Showing posts with label Colour Vie Pigment System. Show all posts

Thursday, October 10, 2024

Joyful Embroidery with Fleur Woods and Free Motion Mavericks

Hi and welcome! 😊 I hope that the change in weather is not too rough on you. I was not enjoying the extreme heat but it would be nice to have temperate weather for a little longer. It looks like we'll be enjoying a couple of warmer days at the end of the week and I'm very grateful that it's not below freezing yet! 🧤 I'm in Canada - what can I say, weather is an important topic of conversation here.

Painting fabric to stitch on 


Being very keen to take the class, I signed up for Fleur Woods' class, Joyful Embroidery the first day enrollment opened. I don't normally watch courses ahead of diving in but I think that I was a little intimidated and watching the videos helped me to see where we are going. Eventually I started doing.😊

Flower drawn on painted fabric - ready to embroider

One of our first tasks was to paint some fabric. I think that half of the fabric is linen while the larger pieces are cotton. I mixed up some blue and yellow with the Colour Vie pigment system. I know that it works well on fabric. I watered it down a bit to get a soft wash.

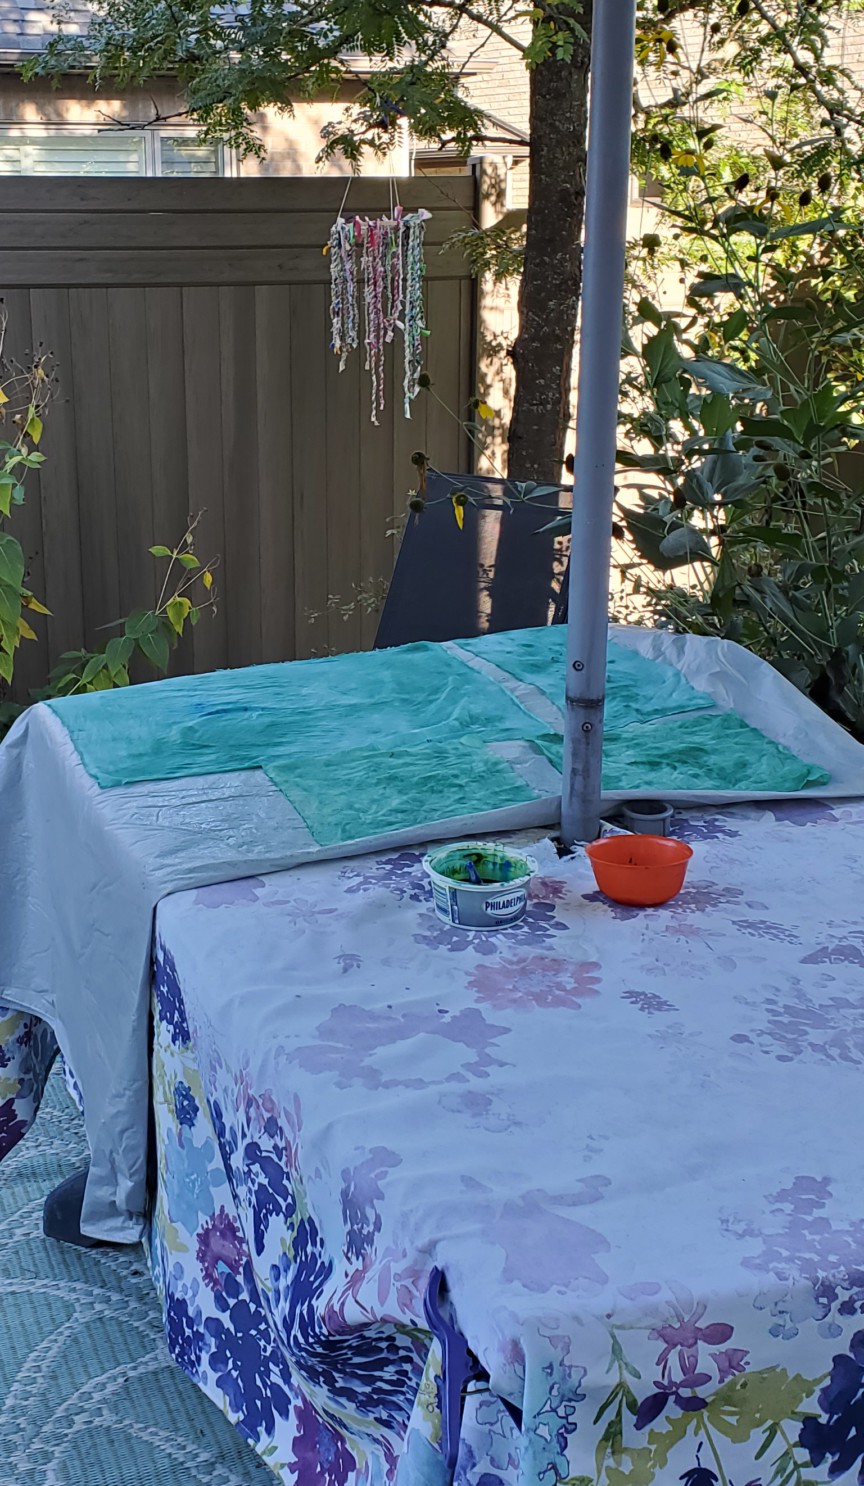
Painted fabric drying outside

Since it was quite cool outside, the fabric stayed out overnight and dried in the morning sun. I took pictures as soon as they were dry but they were very wrinkled. I don't mind some wrinkles but this was too much, so I ironed it and it looks so much better!

The two top pieces on the left are a loose weave linen while the rest is cotton. It's mostly a mottled teal green, with more green than blue. I did have a few splatters of blue on the cotton that I decided to keep - it adds interest and shows the painting process.

Linen squares on the top left with cotton

Practice Stitching


After painting the fabric I decided to start doing the practice stitching. These are all stitches that I've done before and I have so many samplers everywhere that I decided to just stitch up a little area on my eco-printed fabric piece to practice almost all of the stitches. Here it is below. I'll have to use some of these stitches elsewhere on the piece so that it doesn't look out of place.

Practicing most of the stitches on my eco-dyed piece

The only two things that I didn't put on this piece was the Turkey stitch and beading. I added these to a challenge piece that I'm making for the Out of the Box (OOTB) Fall Fling show. More about that below.

Sketching flowers


As you saw at the beginning of the post, we had a section on drawing. I'm not very good at it but with practice I am getting better. Since most of my garden is past its prime, I checked out my photos from this summer. I took these two photos at the beginning of September. I just love that the birds are eating the seeds of the flowers instead of just going to the bird feeder!

I used the image of the flower, without the bird

Using the image of the flower at the bottom

Here are my two sketches, transferred onto fabric using a light box

I just want to mention that I'll be using my special journal to take notes and keep my sketches.

Joyful Embroidery Journal

OOTB Challenge


This spring I helped to organise a brown bag challenge for Out of the Box (OOTB) fibre artists group. Everyone who wanted to participate put a few things in a brown bag for someone else to use in their challenge piece. I had a little bit of plaid fabric, plain white fabric, two kinds of ribbon, a snowflake button, a green flower button and pieces of green felt and red leather. I used a little bit of most of it in the piece, as well as some scraps that I picked up at my quilt guild. 

My OOTB brown bag challenge piece

I used the Turkish stitch as well as beading (one bead!) from my Joyful Embroidery sampler exercise. You can see the small tuff of Turkey stitch at the top middle of the piece. The bead is on top of the felt and leather circle at the bottom. I pulled apart one of my daughter's large bracelet. 

Close up of the challenge piece "2B Merry!"

You'll notice that I used a bit of home-made twine in the piece and to hang it up. I really love making twine 😍. I'll be adding the flower button and the other ribbon on the back, as part of the label, which will be written up on the white fabric.

"2B Merry" reveals its secret!

Out of the Box (OOTB) Fall Fling


My piece will be part of the Challenge exhibit at Fall Fling in a couple of weeks.

What I learned
  • I am really enjoying the Joyful Embroidery course will Fleur Woods. Watching most of the course ahead of time has helped me figure out what I want to do and has lowered my anxiety.
  • I stitched up the practice stitches on my eco-printed cloth as well as in a couple of blocks in my Almost Daily Stitching project of 2024. That was a great way to practice without having to start a new sampler.
  • In the course, instead of doing the Turkey Stitch which is a very time consuming stitch, we will be learning to do Punch Needle. I just received my Oxford needle punch from Robin, my local distributor. I took her rug hooking course a few years ago. I'll put the details in the Related links section below.
  • I enjoyed watering down my Colour Vie pigments and painting the fabric with it. It's going to make a great base for the embroidery. Since I had lots of paint left, I painted a few sheets of water colour paper so that I can use it to sketch on, before embroidering. You can see the paper in the first image of this post, above the fabric and sketch.
  • I've also been stitching on eco-printed paper (more in another post) so I could also use those painted papers to embroider on. That would be very cool!😎
  • I had a lot of fun working on the "2B Merry" OOTB challenge piece. The background fabric is a swatch of upholstery fabric that I got from a fellow artist. What a great way to use it! I also stitched around one of the grommets. It's great to be able to keep it to hang the piece. 
  • I didn't have to stitch around the second grommet since it's hidden by the fabric of the twine.
  • I haven't really done anything to enter into the Fall Fling show yet. I'm not sure that I'll have time to make anything before then but I will be attending both days since I'll be sitting at the membership table. 
Related links
Linking parties
I'll be linking up to many fun linking parties. You might want to check some of the out, before you link up below! Monday Musings, Design Wall Monday, Sew & Tell, Midweek Makers, Put your foot down, Needle & Thread ThursdayOff The Wall FridayBeauties Pageant, TGIFF, Patchwork & Quilts15 Minutes to Stitch 2024, Oh Scrap!,

Free Motion Mavericks


Welcome to week 502 of Free Motion Mavericks! It was a very productive week! Thanks so much for linking up😊. Check out these amazing projects from last week that included FMQ, ruler work or walking foot quilting. 

Last week Preeti of Sew Preeti Quilts had two quilt patterns published! Both of them used the Peppermint Sprinkles collection of Island Batik fabrics. The first quilt, "Good Tidings" is in Annie's Christmas Pattern book while the second, "Austin", is in Make Modern #60. Check out Preeti's post for links to the patterns.

Preeti's "Good Tiding", now in 
Annie's Christmas Pattern book 

Preeti's  "Austin" is in Make Modern #60

Donnalee has started making more table toppers for her guild's sale in 15 months!  Check out her first three.

More table toppers by Donnalee

Melva of Melva Loves Scraps quilted up a lovely vintage table cloth, ready to use for tea. 

Melva's lovely quilted vintage table cloth, ready for tea!

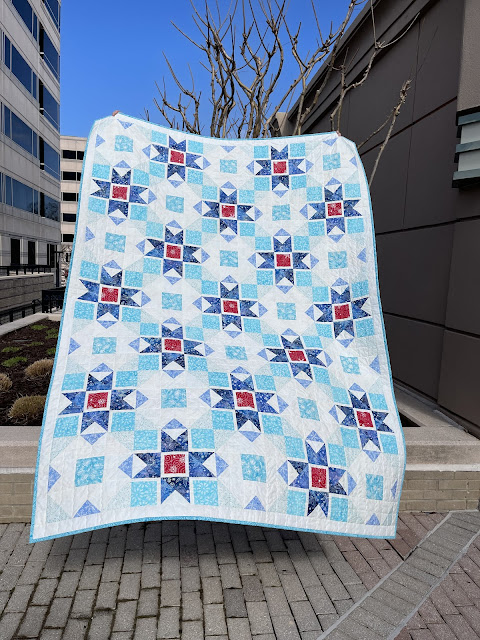
Kathleen of Kathleen's McMusing created a lovely quilt, "Accidental Stars" for the Flower Pot Blog Hop. I really love the quilt's secondary pattern.

Kathleen's "Accidental Stars" quilt

Margo of MY Quilts and Crafts finished her baby quilt as well as a fabric basket. Both are lovely!

Margo's finished baby quilt

The perfect gift basket by Margo

Thanks so much for linking up and visiting! It's now your turn 😊

You are invited to the Inlinkz link party!

Click here to enter

Thursday, May 04, 2023

Gelli Printing and Stitching on Free Motion Mavericks

Welcome to week 429 of Free Motion Mavericks. This week I got lost in a monoprinting and embroidery project. It's all about learning and having fun here - and that's what I did! 😊 Thanks for dropping by.

Monoprinting on a Gelli Plate


Gelli prints stitched so far

After watching artist Sue Hotchkis' workshop on TextileArtist.org, I was inspired to do some monoprinting, but this time on my Gelli plate. I've had it for a while but hadn't had the courage to use it yet. After doing some monoprinting, I was ready to give it a try! 

The fabric doesn't have to be plain white. I cut up a large piece of hand-dyed pink and yellow fabric into 5" or 6" squares. The fabric is probably a blend of cotton-polyester because the dye colours came out quite light. It was perfect for over-printing. 

Pieces of fabric being over-printed on the Gelli plate

You can see from the image above that I placed the fabric onto the paint covered Gelli plate in various ways. Sometimes it was the whole piece of fabric and sometimes only smaller sections. My Gelli plate is 5" x 7", so there was usually extra paint that had to be covered. 

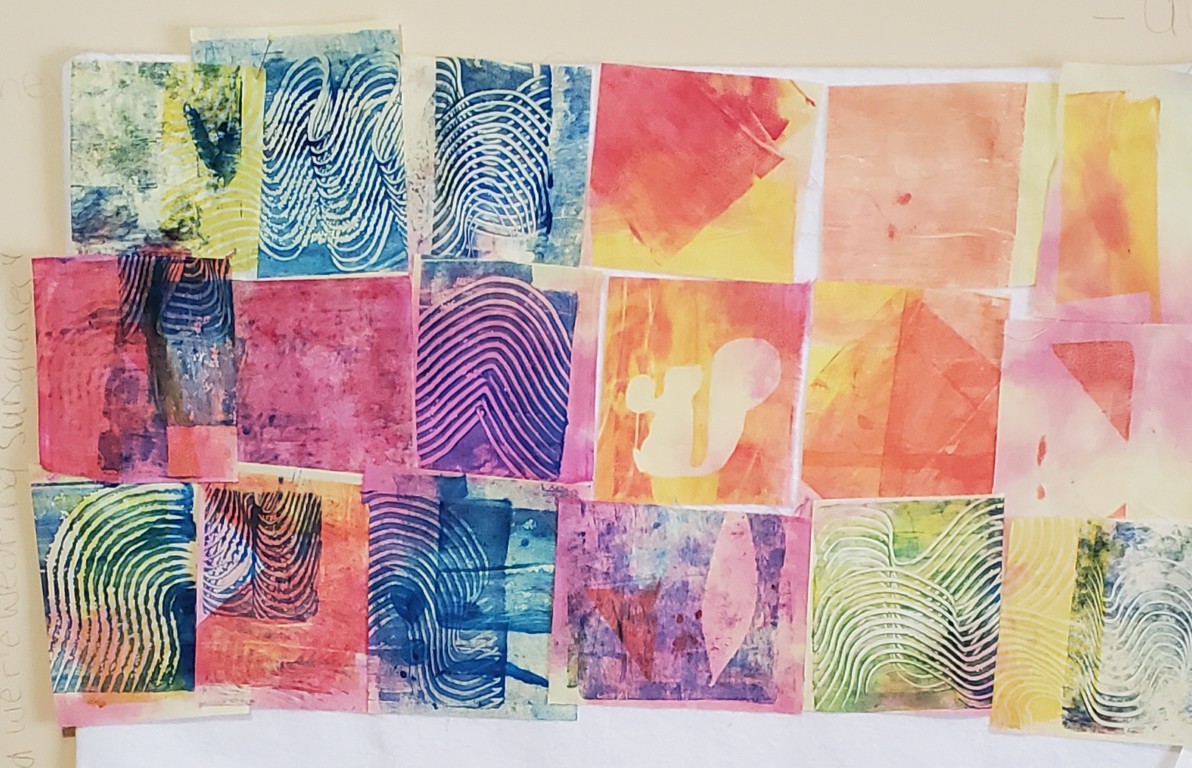
Here are the results. I started by adding yellow and red/pink to the plate. eventually I started adding blue to the mix. Since the paint dried quickly, I often added several layers of paint to a piece of fabric. I really love the results - from simple to complex.

The results of monoprinting on the Gelli plate

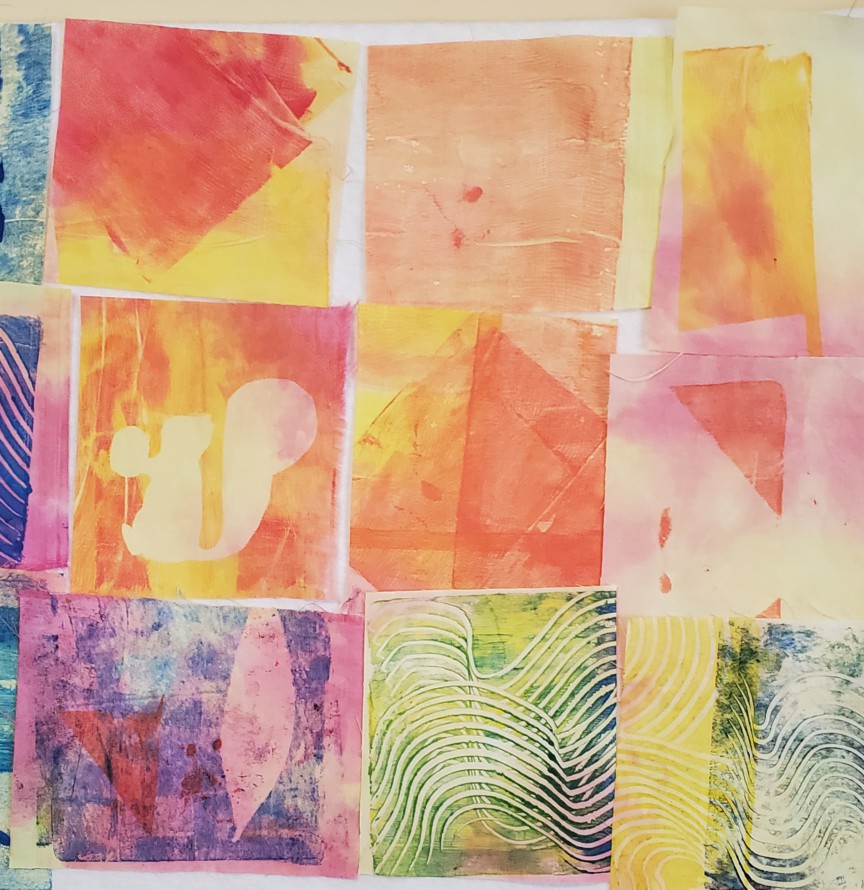
You can see the one mask that I created - the squirrel. I had copied this squirrel to FMQ on my Wild Hexies baby quilt but it got lost in the mess of my desk. I placed a piece of printing paper under the tracing paper and went over the squirrel with a pencil. I could see the lines on the paper, so then I went over them with a pencil. I cut the template and voilà!  

Close-up of the printed fabric

The rest of the printed fabric

I also cleaned up my brayer on a sketchbook page. Here are the two pages that I created. They will eventually look great incorporate into a handmade journal. 

Sketchbook page 
Second sketchbook page 

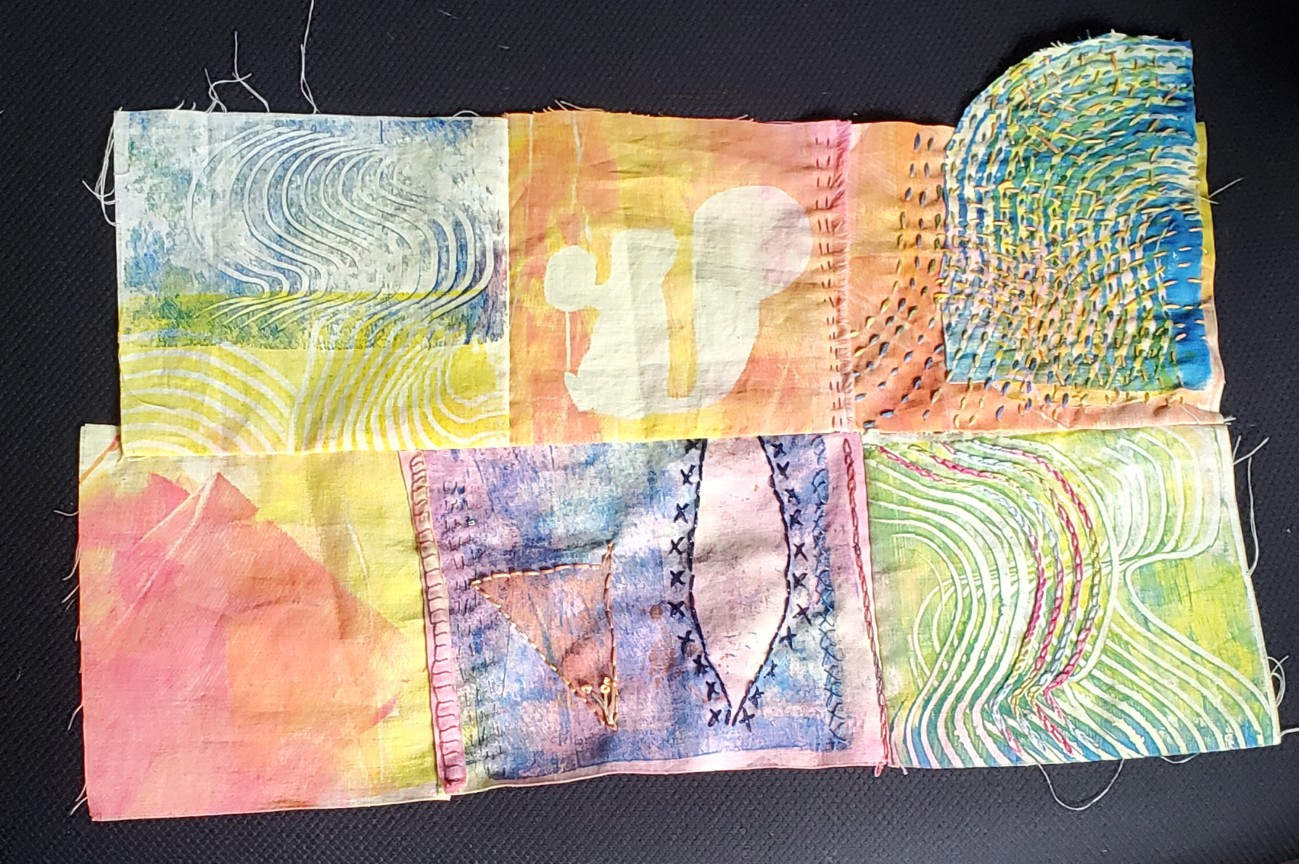
Adding stitching 


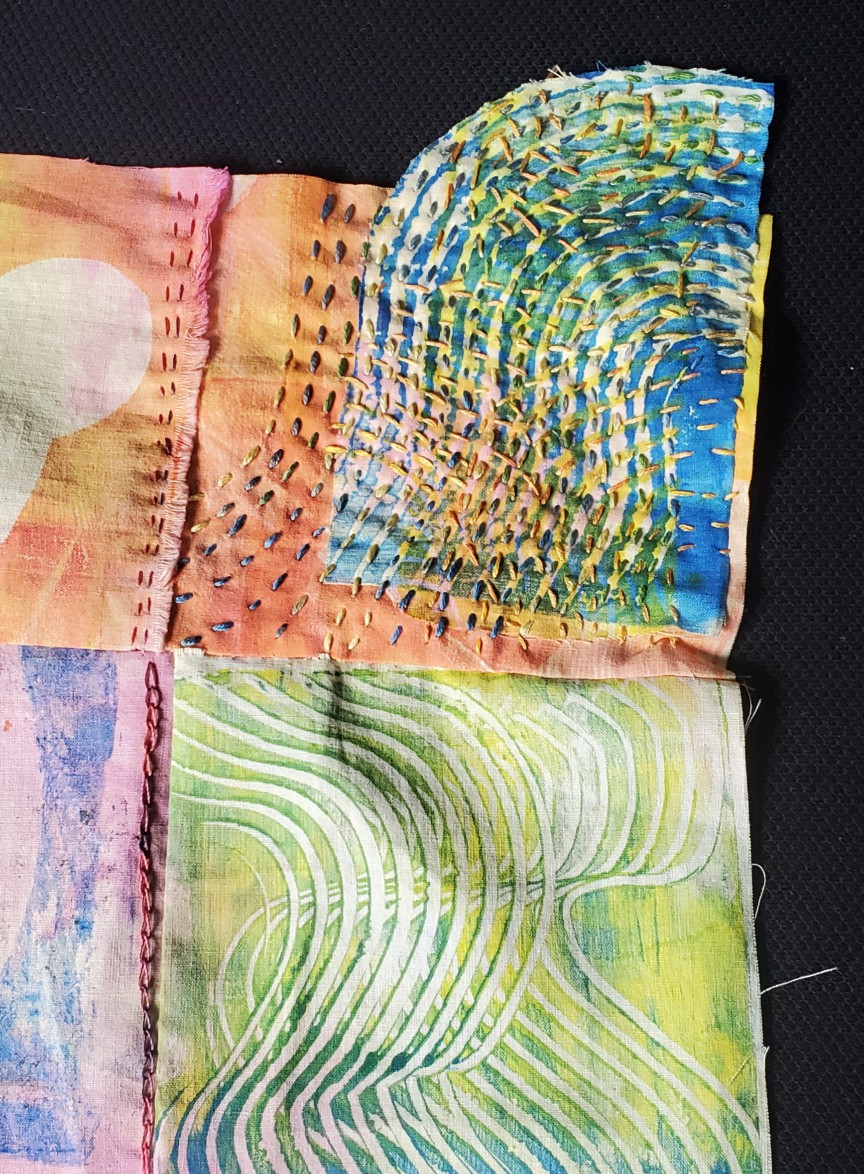
I hand stitched six pieces together to create the beginning of an art piece. I then cut up an interesting piece of another square and stitched it on top. Our teacher, Sue Hotchkis, demonstrated how to finish a piece that has parts sticking out. I really want to try that technique. I'll let you know all about it when I get there 😊

Starting to stitch the piece, including a part that sticks out.

I started by stitching that extra swirling piece. I stitched it one way but was intrigued by the additional yellow swirls going through it. I decided to stitch those also. I'm not sure if I like all of the additional yellow swirls. I may remove a few - we'll see. 

Stitching in the swirls

Is there too much there? Maybe...😕- we'll see

I was glad to start stitching the other pieces. The second stitched piece was created by putting a dried leaf (another mask) over the paint. The leaf had curled up a bit but flattened out when I placed the fabric over it. I love the result.

I added running stitches with metallic thread on the left. I'm using a lot of variegated embroidery floss while the cross stitches and the leaf outline are done using Mouliné étoile embroidery thread by DMC in a dark blue. 

Stitching around the leaf

I love variegated thread and found the perfect one for the chain stitch on this piece. 

Adding a chain stitch with lovely variegated thread

May's One Monthly Goal


I didn't reach my April OMG but I'm going to try again. I really want to finish my Wild Hexies baby quilt. My May OMG is to finish free motion quilting (FMQ) it. I have a few more critters to add and the border. I also need to fix up the trucks where my quilting went off. 

Wild Hexies baby quilt - May's OMG

What I learned
  • I'm so happy that I can do gelli printing on my desk in the studio. I just cover my cutting mat with a sheet of heavy plastic and everything fits on it. Of course I'm extra careful with the Colour Vie paint that I used, but it does wash off easily.
  • It took me a couple of hours to do all of these prints. I'm really looking forward to playing with it again.
  • I tried to print paper from an old book but that didn't work out. I suspect that I didn't have enough paint on the Gelli plate. I will be trying that out again. 
  • When I did monoprinting for the fist time I used ink onto paper, so I will try that also on the gelli plate.
  • I've been cleaning up my studio - it's a big job because I really needed to re-organise things. I'm about half done and it's so much better. I'll write a post about it eventually. I have learned lots!

Related links

Linking parties


Free Motion Mavericks


We had three FMQ projects last week. Congrats!

DonnaLee quilted her large (40" by 48") Wonky Log Cabin quilt on her domestic sewing machine. She used a serpentine stitch. Way to go! It looks great.

Wonky Log Cabin quilt quilted by DonnaLee

Frédérique helped her friend make a "Grey As Well" quilt. When her friend had trouble quilting it, Frédérique offered to do it for her. I love how she quilted the inside of the larger squares - it really adds texture to the quilt. Bravo Frédérique ! 

Grey as Well quilted by Frédérique

Did you see Gail's finished Melodic Mystery designed by Meadow Mist? What a beauty. Gail used a combination of FMQ and rulers to finish this beauty. It really looks great! 

Quilting Gail's finished Melodic Mystery 

It's your turn now 😎

You are invited to the Inlinkz link party!

Click here to enter

Sunday, April 10, 2022

Journal Cover for Quilting Agenda

Hi! This project is a Squirrel as well as a useful way to procrastinate. More about the procrastination later 😊 

Mark Making 

I'm always nervous about working with paint but the few times that I've painted on fabric, the results were interesting and relatively successful for a beginner. I've been using Colour Vie pigment system which was created for Gunnel Hag, a amazing artist who became allergic to the paints she needed to create her surface designed fabrics. She's a Canadian artist who spoke at one of our Out Of The Box Textile Artists' group a few years ago. I've bought a few pieces of her fabric and made my last agenda journal cover with one of those pieces. When I saw that she had a couple of online courses, I tried out the "Make your mark" course.

Finished agenda cover

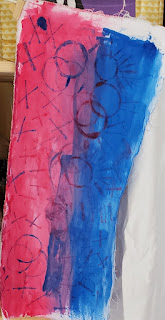
I started by painting the first piece of fabric. I was hoping to get some nice purple where the blue and red meet but that didn't work out so well. Once it had dried a little bit, I added marks on top. 

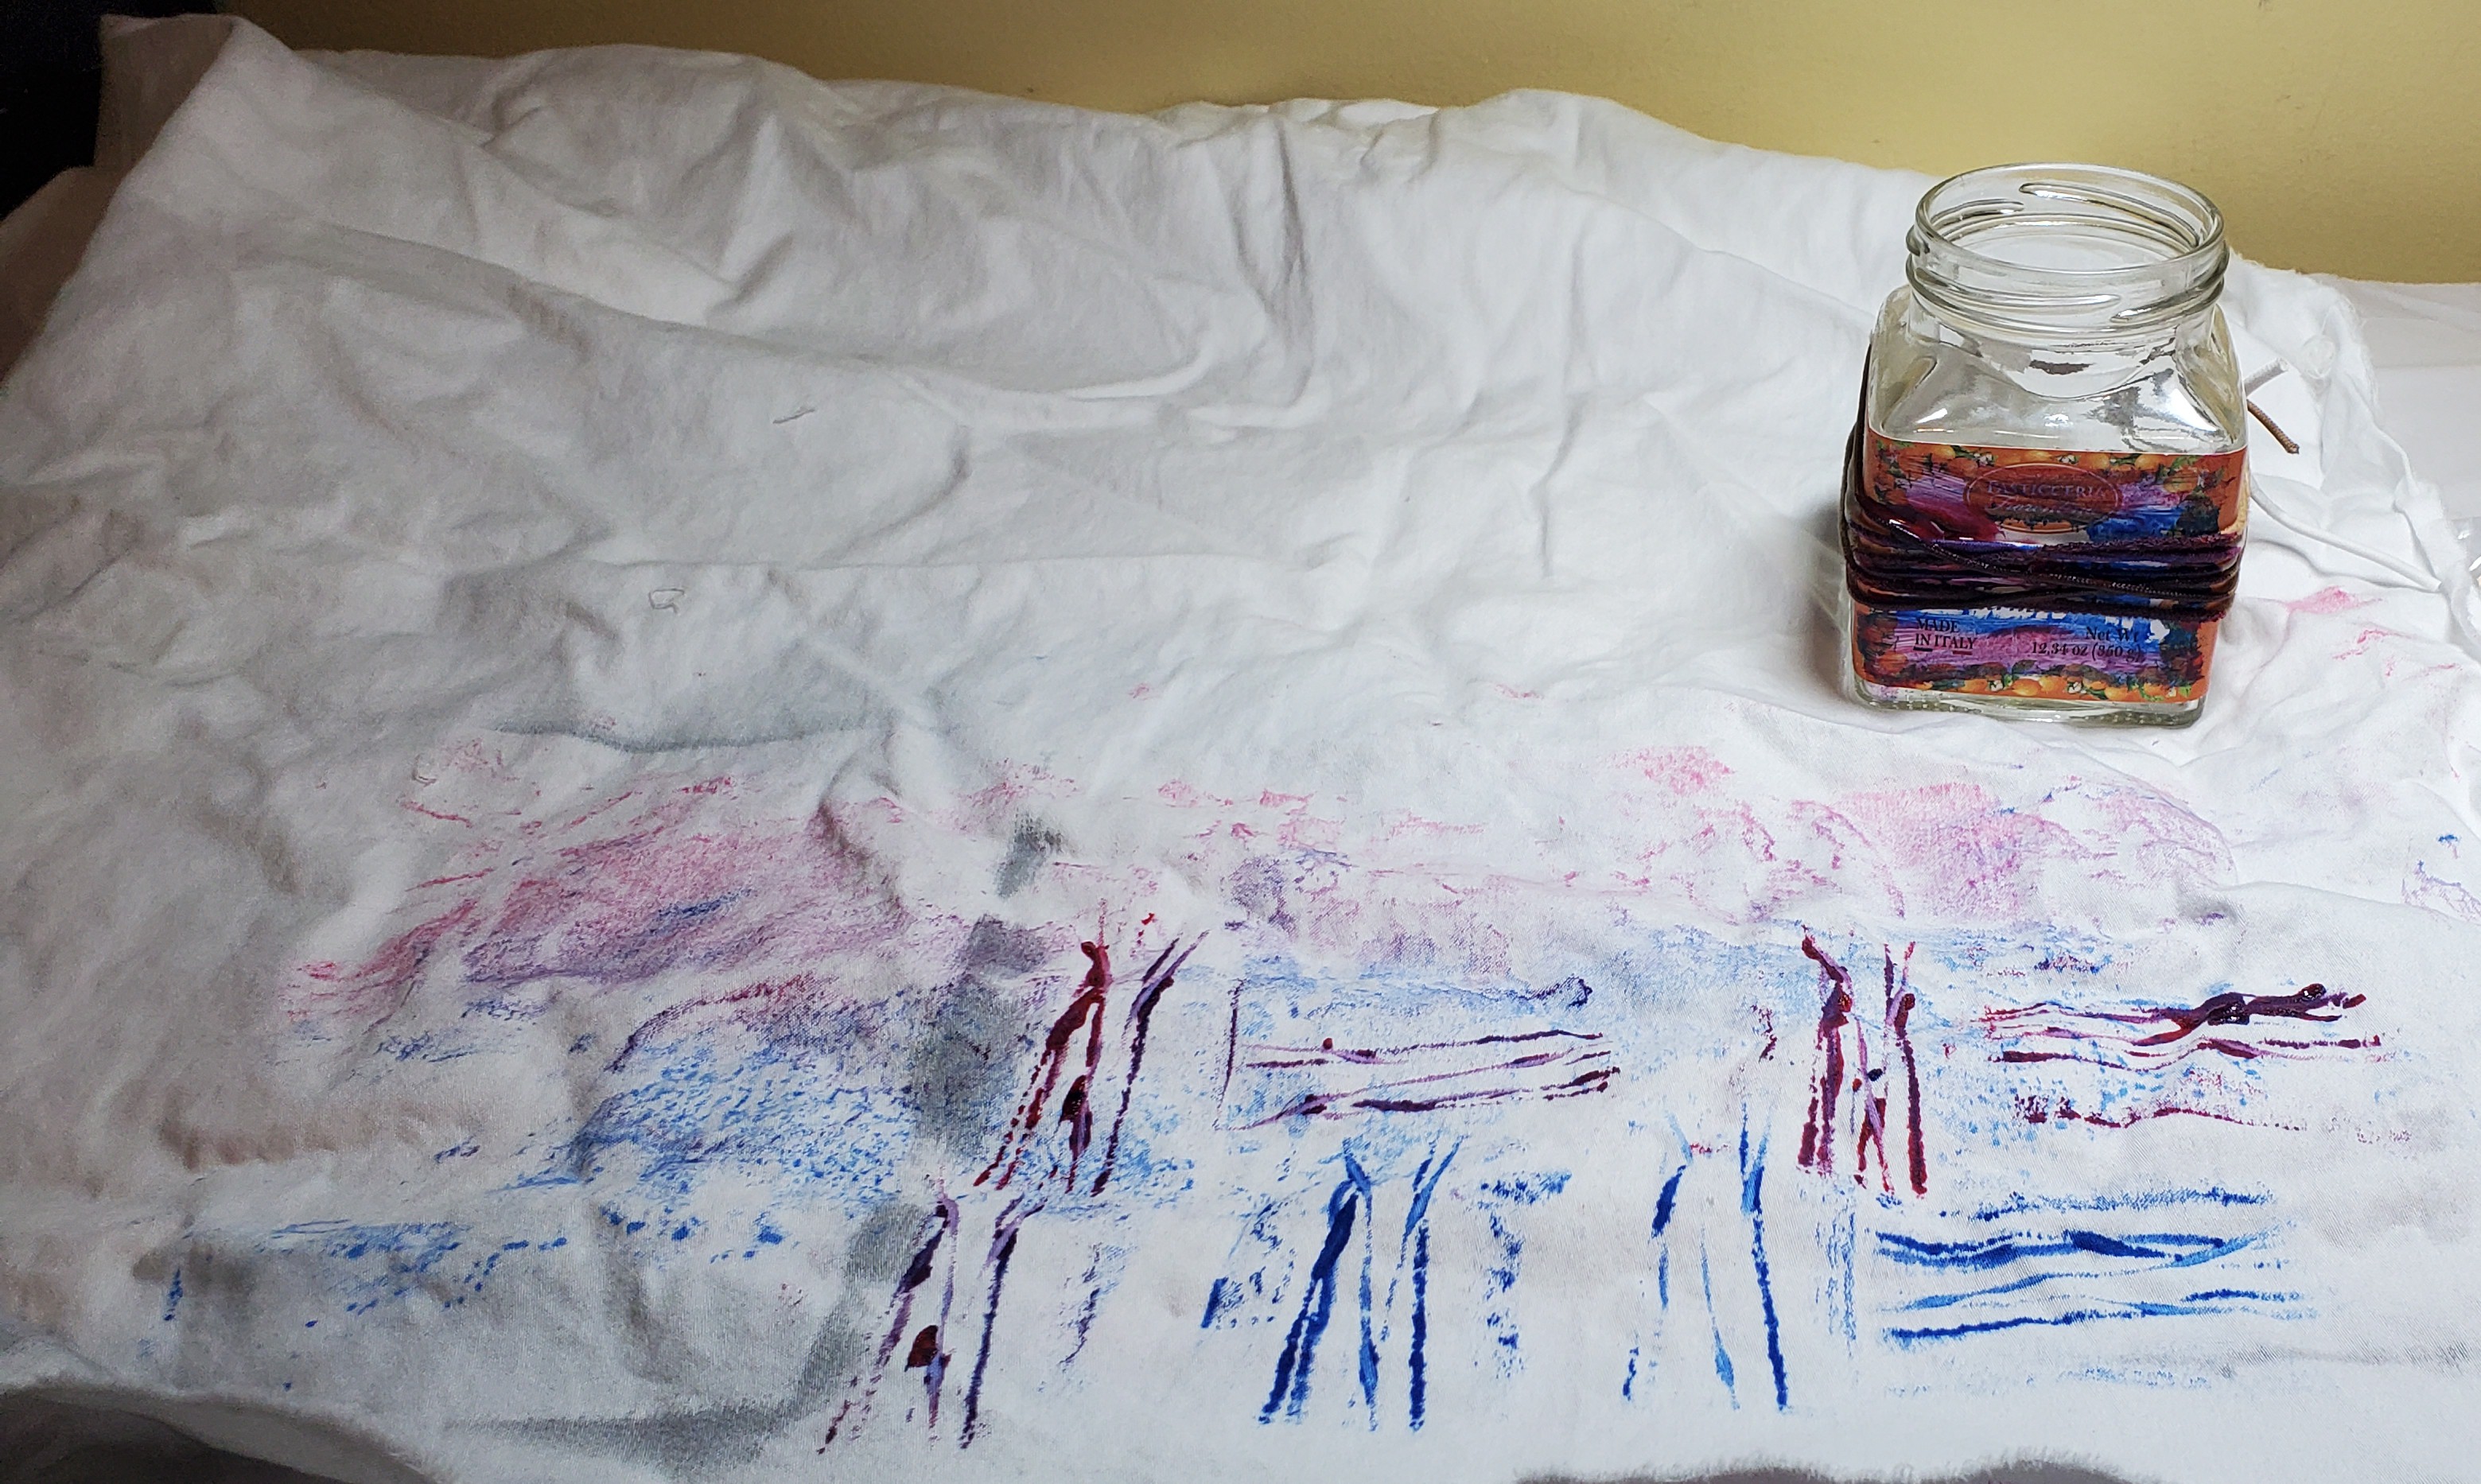
There was a bit of paint on the plastic underneath the fabric, so I imprinted the next piece of fabric with it and then started making various marks. You can see below a square jar that has elastics and cord around it. Those are the marks on the fabric.
Paint and marks
Making marks using the jar wrapped with cord


This was my second piece. I used an assortment of items to make the marks - a fork, a potato masher, the bottom of a plastic container, lids etc. I did figure out a few things that will make my next practice pieces better.

Marks on the fabric

Adding stitches

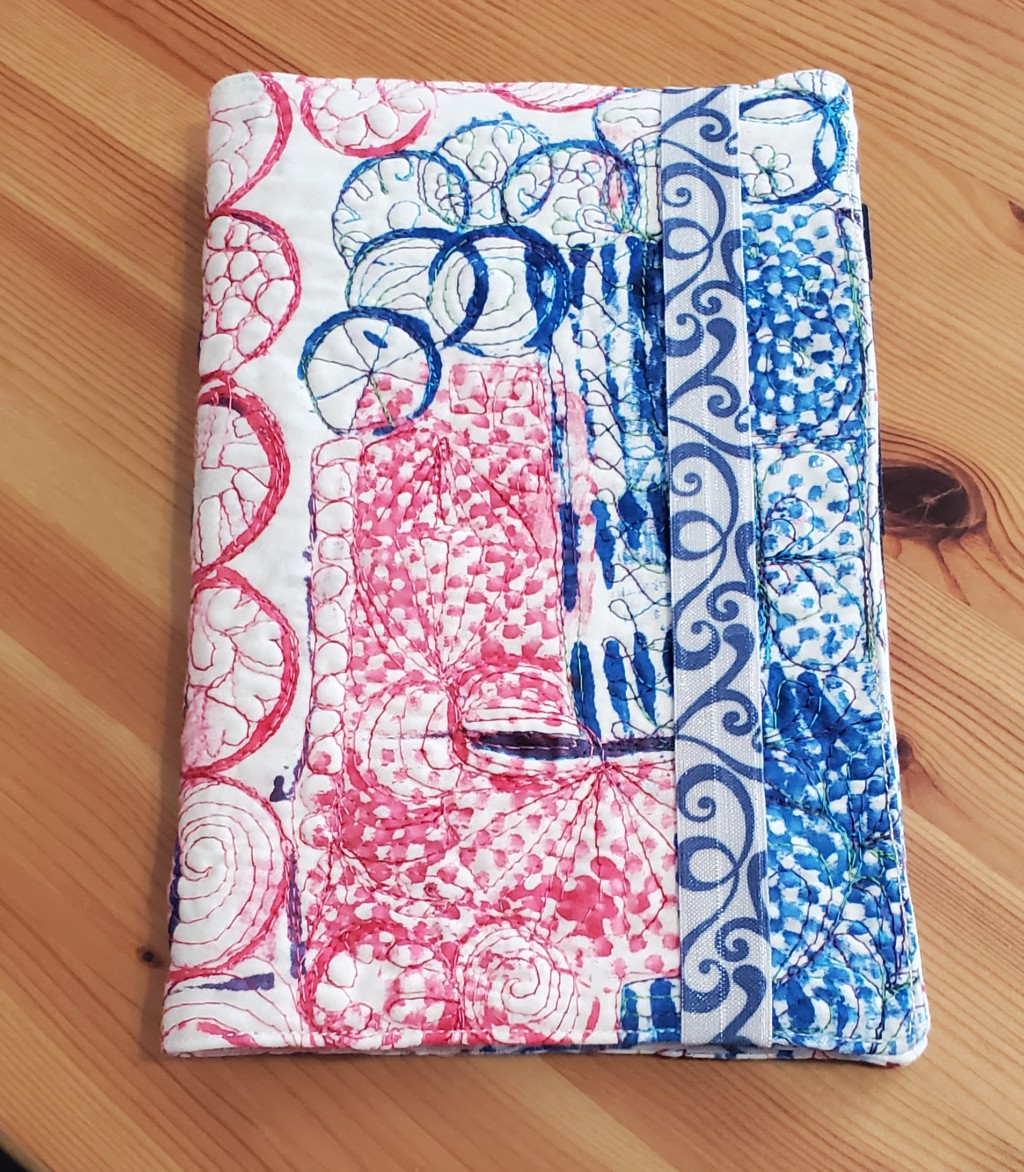
I've been using a perpetual agenda since January 2020 but I was running out of pages. Here it is, made from Gunnel Hag's fabric. 
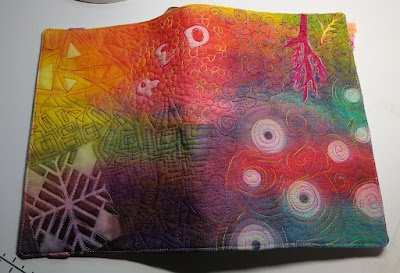
Agenda cover made from Gunnel Hag's fabric

You can understand why I was reluctant to switch agenda's. I could have re-used the cover but I want to keep the agenda the way it is. It seems to be an integral part of it and was used a great deal in the last two years.

I wondered if I should over-paint the piece but decided to see what adding thread would do. Instead of free motion quilting (FMQ) the whole panel, I only quilted what I needed and was able to use the extra pieces for the inside of the cover.

FMQ fabric

I used four different variegated threads to quilt it. I looked through my FMQ journal to find designs to play with. It was great re-visiting the designs - some of which I haven't used in quite a while.

I measured many times and the journal cover came together without any issues. I used Christina Cameli's Free Motion Quilted Gifts on Craftsy. 

Front of the Agenda

The sides of the cover are made with the extra fabric that wasn't FMQ

Back of the cover

You can see the whole agenda cover here.

Front of the agenda with the elastic

I really love it. It went from a simple design on the fabric to something much more complex. That is a very good lesson to learn! 😊

Procrastinating

My first procrastination is in writing this post instead of starting to fill in my new 2022 quilting agenda. I'm almost afraid to see everything that I have going on in the next two months. That is why I made the cover....but it's going to be hectic!

My second procrastination is from working on my next slow stitching project that will be in the ArtPontiac show. I think that it's been over a year since I last worked on it. This is the last photo that I found of it, but there is more done (thank goodness!) More about this piece soon I hope!

Beaded and embroidered piece on biodiversity
 

What I learned

  • As I mentioned, adding the FMQ was essentially over-painting with thread. That means that making simple designs with paint can lead to some lovely, more complex fabrics.
  • When I added the paint to the mark-making items, I should have used a brayer or some other way of adding an even layer of paint on the objects. There's nothing wrong with uneven marks but it might look more professional if it was even. This would be especially good for items like the potato masher.
  • It would be great to make another journal cover, but this time to actually plan where the marks would go. I wish that I could have put the large circles at the front of the cover, although they are interesting on the spine.

Related links

Linking parties
I'll be linking up to many fun parties. Let's see what's going on! Patchwork & Quilts, Slow Sunday Stitching, Off the Wall Friday, Put Your Foot Down, Beauties Pageant, Peacock PartyMonday Making,

Project details


2022 Quilting Agenda cover
5¾" x 8½"
Materials: Fabric marked with Colour Vie, variegated thread
Techniques: mark making, FMQ and sewing




Sunday, November 15, 2020

Creating a stitcher's journal with paper and fabric

I'm back to making hand-stitched projects based on our latest workshop at TextileArtist.org's 2020 Stitch Club. This week's teacher is Ali Ferguson who showed us how to make a stitcher's sketchbook or journal with paper, and then to cover and embellish it with fabrics.

Making the Journal

This is the first workshop that I finished the project only a few days after it had started. I was hooked! I couldn't leave it. 

My new stitching journal

For my paper, I chose some printing paper (one with a gardening motif that I bought years ago, some brightly coloured paper, as well as the normal white stuff). I also found some lovely writing paper that I got as a gift when I was in my teens. It has my name (maiden back then) printed at the top. It was smaller than the other papers but I added them in separately and adjusted the holes. My book is made up of 4 signatures - those are the folded sheets of paper that make up each section. Once the signatures are complete, they are bound into the journal.

For the front cover, I used part of a panel that I created during Gregory T. Wilkins' workshop in July (see Related links below). For the back piece, I used fabric that I painted using a plastic fork and blue Colour Vie paint. The book spine tabs were printed using a print block that I made during a virtual workshop with Christine Chester, as part of the Birmingham Quilt Festival. I just coloured them using Sharpie markers and then sewed on some fun buttons.

Printing block made with
Häagen-Dazs sticks
Making marks with a plastic fork


The fun really started when I embellished the journal.

I started by using only batik fabrics, but then I got even more creative and took out all of those sheer scraps from making my last two sheer projects.

One the inside cover, I covered up the button stitches by gluing on some pieces from a cute scrapbooking sheet. I stitched a diagonal border on the opposite page and stitched the bottom of the page to the next one to create a pouch. I even attached an upside down label 😊.

Inside cover with a pouch for keepsakes

My journal has 58 pages, so I won't show you pictures of each one of them! All of the pages have some stitching on them, but I will show you my favourites.

I made this one this morning. I stitched the fish to the background fabric with a running stitch and then added some French knots. I practiced my "writing" skills based on Joanne Sharpe's The Art of Whimsical Lettering book. I haven't practiced this in a long while but I now have an excuse if I write in this book!

"So long, and thanks for all the fish" Douglas Adams quote
with stitched fish

The fish (above) and the purple batik and organza piece below are on the back of my personalized writing paper. You can see the printing flower paper on the other side.

Using batik and silk organza scraps. They are attached
using embroidery stitches

This is one of my favourite pages. I drew around an oak leaf from my neighbour's yard and then stitched it with this amazing yarn made from Tencel (some type of pulp fibre). The colours are amazing and it's made locally by Trail Head Yarns (see Related links). 


Oak leaf outline with stitching using Tencel yarn.

For one of the signatures, I used a piece of scrapbook paper instead of my personalized writing paper. It's just too cute!
Adding scrapbooking paper in one of the signatures.

My first embellishments were rather simple but as I got going, they became more layered and creative. 

Starting to get the hang of layered embellishments.

As I mentioned, I made the fish this morning as well as this one. I love adding the sheer fabrics. This one has lots of texture which may get flattened a bit when the journal is closed, but that's fine. 😊

Adding more stitching and using sheer fabrics

What I learned
  • In this journal, I want to experiment with stitched layers and then place the pieces in the journal. I would like to use more interesting embroidery stitches but this needs to be done separately and then attached to the journal. 
  • You may have noticed in the image above that the page is getting pretty crumpled. That's what happens when the paper is handled too much. I've figured out that the best way to add the stitching is to put the piece together first and then stitch it on or even better just tack it on with a few stitches.
  • I tried to do the button hole stitch on the paper but just couldn't hold the paper properly. 
  • In the end though, the crumpled paper won't show since I'll be filling this journal up with lots of pretty stitched pieces!
  • BTW, I've actually finished my Marks & Stitches piece - it's even framed! I'll write a post soon...
Related links
Linking parties

I will be linking up to all kinds of fun stitching and quilting link-ups. Let's see what's happening in Blog Land! Colour & Inspiration TuesdayPatchwork & QuiltsOff The Wall Friday, Beauties Pageant, Slow Sunday Stitching, Oh Scrap!Monday Making, Midweek Makers, TGIFF with Storied Quilts, Free Motion Mavericks with Muv, Needle & Thread Thursday, Put Your Foot Down, Finished or Not Finished Friday, Can I Get A Whoop Whoop?

I'm also linking up to Meadow Mist Designs' Favorite Finish Monthly linkup as well as Sandra of mmm quilts' DrEAMi - if this isn't a squirrel, nothing is!