Friday, January 27, 2017

First Block - Applique

Growing up QAL button
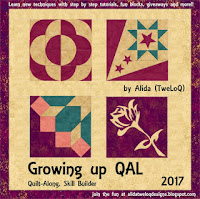
I know that I shouldn't commit to another quilting activity...but since I love learning and participating in Alida's events, I signed up for Growing up QAL, a skill building quilt-along.

Alida is giving us an excellent incentive to actually make the blocks since to keep receiving the instructions for the QAL for free, we have to make and post the blocks within a specific time period (which is generous).

The first block for January is the Rose Appliqué Block.

Crafted Appliqué

Of course, I didn't quite follow the instructions. I copied the pattern onto freezer paper, which I then ironed onto the rose fabric that had been prepared following the Crafted Appliqué technique. It worked perfectly.

As you can see from my image, I used some fabric to test the different sizes for the zigzag stitch. I also wanted to ensure that the thread colour would work out. I used Superior Thread's Bottom Line in the bobbin and their Kimono Silk on top. Wow! That thread combination along with a fine zigzag stitch really worked out well. That's a good thing because it felt like I was sewing for miles!

Rose Appliqué on block 1 with Kimono Silk thread and practice piece


Alida also sent us a special page for attaching our fabric swatches. I'm not sure what fabrics I'll be using for the whole project, but it would be nice if it coordinated well enough to make a quilt.

There is another page that we can use to colour each block. I'm not sure that I want to be that organised :-)


What I learned:

  • Once I put my mind to it, it really didn't take me long to make this block. For the time it took, it's very effective.
  • As I mentioned, this was a perfect project to use the Crafted Appliqué technique.
  • I impressed myself by making the practice piece to check out the stitch. I only do that when messing up would be much more work than doing a practice piece!
  • This first block was done on time and I'm looking forward to the next block (and staying on time)!

Featured Links:


Block 1: Rose Appliqué


Block Details:
Rose Appliqué (Block 1)
15½" x 15½"
Materials: Kona Cotton, Bottom Line and Kimono Silk threads
Techniques: Crafted Appliqué technique, freezer paper, zigzag stitch


Linky Parties: You can see and read about other participants' progress here. I have also linked this post to the following parties. Check them out! Linky Tuesday, Main Crush Monday, Let's Bee Social, Midweek Makers, Can I Get a Whoop Whoop? Needle and Thread Thursday, Off the Wall Friday, Finished or Not Friday, Fabric Frenzy Friday


Tuesday, January 24, 2017

Colour Unboxed Exhibition

Colour Unboxed Exhibition
January 14th was the Vernissage of the Colour Unboxed exhibition at the Mississippi Valley Textile Museum in Almonte, Ontario. The museum has an amazing exhibition space which the fiber art work of members of the Out of the Box group filled up nicely.

I attended the opening but there were a lot of people and my camera battery was dead - so I socialized a little bit, had a quick look around and vowed to come back with my camera at a quieter time.

Details of the Lone Tree 2: Tired or Overachiever?
I went back this Saturday to enjoy the art works at a more leisurely pace. I also wanted to take a photo of my Lone Tree 2: Tired or Overachiever? Although I wasn't originally thrilled with the piece, I got some suggestions from an artist friend and a couple of Out of the Box members and made a few changes.

I learned a valuable lesson about colour value while making this piece. Turns out that even if red and green are complimentary colours, they don't necessarily have much contrast if they have the same value. Who knew? Not me!

Details added to the foreground
Lone Tree 2 - before the changes

I added details to the original piece, especially in the foreground. Here's the before and after.


Lone Tree 2- the final piece


I would also like to show you some pictures of the works of another member of the Out of the Box fibre artist group. Her name is Caroline Forcier Holloway. We both come from Kirkland Lake in Northern Ontario and worked in the same organisation a few years ago. She does some amazing felted work and really went outside of the box, and her comfort zone to make these three pieces for the exhibition.

Arctic Tundra Mosaic depicts the delicate ecosystems of the tundra - the flora forever adapting and competing with permafrost.

Arctic Tundra Mosaic by Caroline Forcier Holloway

Details of Arctic Tundra Mosaic by Caroline Forcier Holloway
Arctic Tundra Mosaic is a mosaic of felted tiles affixed unto metal frame and painted canvas. Natural materials include fur, bone, antler, lichen and moss. Other materials include found objects.

Next is one of Caroline's two installations. They come from her love of audio and video.
The Art of Memory, Part 1 - Ode to Oral History
In the Art of Memory, Part 1 - Ode to Oral History, Caroline explored the boundaries of the natural fibre of wool and the man-made medium of audio tape. She writes that "The narrative of a generation (is) woven into wool using audio tape to guide silent play back and recording equipment." Her second piece is the Art of Memory, Part 2 - Ode to Home Movies. I'm not going to spoil your fun - make sure that you see her work as well as all of the other artists' in the Colour Unboxed exhibition at the Mississippi Valley Textile Museum. It's well worth the trip.

What I learned:
  • Never underestimate the value of "colour value". I really hope never to forget that lesson!
  • I am grateful to have artists around me for encouragement and insight. It's really great to be able to exchange ideas.
  • I love looking at art and quilt exhibitions but I get overwhelmed very quickly. That's why I take so many pictures. After the show, I'm able to look and study the pieces - to see what works, why I like them as well as the details of the pieces for inspiration. I find that I learn so much from the work of others and I'm glad that I can go back to them when I want to.

Features Links: Colour Unboxed exhibition at the Mississippi Valley Textile Museum; details of the making of Lone Tree 2: Tired or Overachiever? (Nov. 6 2016)

Lone Tree 2: Tired or Overachiever?


Project Details:
Lone Tree 2: Tired or Overachiever?
12" x 10"
Materials: fabrics - commercial cotton and batiks, silk thread, embroidery floss, beads, fabric markers
Techniques: Free Motion Quilting, appliqué and hand embroidery


Linky Parties: Check out what others quilters are making! Monday Making, Main Crush Monday, Linky Tuesday, Let's Bee Social, Midweek Makers, Free Motion Mavericks, Off the Wall Friday, Finished or Not Friday, Fabric Frenzy Friday,


Friday, January 20, 2017

Creating a Winter Wonderland

Winter Wonderland Snow Frame
 Last year I made a snow globe as a gift. It was quite small, so it was mostly putting a few little pieces of fabric together and inserting them in the snow globe (see pictures below).

This year I found some slightly larger snow frames (6½" X 4½"). I think that these have much more potential!

I made this one using Christmas scraps, since my holiday fabric stash stayed in the basement this year.

I used a blue background fabric with snowflakes and stars, and covered it with a tulle of gold stars.

For the foreground I used some cute frolicking deer, a couple of tree fabrics and embellished it with some fussy cut bits. My niece was very impressed that I had made it - she thought that it was store bought (when you're 12, that's a good thing).

I've always wanted to make postcard size art quilts so I think that these could be a snowy variation. The piece fit very well inside the frame, although I'm fairly sure I didn't quilt it.
A blizzard in Wonderland!
Snow Globe - penguin
Snow Globe - Santa checking his list

This is the snow globe from last year. It was two-sided and lights up, but wase much more difficult to work with. I'm not at my best working on very small things!


What I learned:
  • I love playing with fabric on smaller projects that have little to no cost (in time or fabric) if I mess up.
  • I bought 2 extra snow frames (on sale) after the holidays. I'm not sure that I'll have time this winter to make them...they may end up in the basement with the 5 snow globes from last year! :-)
Featured links: Joyeux Noel: December 24, 2015 
Linky parties: check out what everyone's up to! Oh Scrap!, Finished or Not Friday, Off the Wall Friday, MOP Monday, Monday Making, Main Crush Monday, Let's Bee Social, Linky TuesdayMidweek Makers, Fabric Frenzy Friday


Thursday, January 12, 2017

Catching up on World Quilting Travel Adventure

with JoJo Hall
I have a lot of catching up for the World Quilting Travel Adventure with JoJo Hall. We are going on a wonderful world tour and making souvenirs from our destinations.
Souvenir from Oregon
Oregon, United States

Our first stop was in Oregon, where JoJo comes from. I made a smaller, more whimsical version of her landscape. Check out her original landscape, it's gorgeous!


Hawaii, United States

The second stop was Hawaii. It's certainly an attractive destination, especially with the -25 C weather we were having in Ottawa! In November I started making the plumeria flower that is on JoJo's headwrap. Of course, since I need to do my own thing, I'm incorporating the plumeria into an art quilt.
The beginning of the plumeria flower

JoJo warned us that the flower would not be impressive until it was painted and sewn. I have to admit that I was terrified of painting it. I'm sure that's why I waited until late December to attempt it - and that's just because my quilting space was such a mess that I didn't want to go near it.

I took the project to the kitchen table with my water colours and brushes (never been used) and played with the paint. I can't say that I had much fun - I was too intimidated, and I also can't say that I liked the results, but I gave myself the benefit of the doubt to wait until I had sewn it before judging it. As my son remarked, this project had better not be washed, or I'll be loosing my water paint!

I'm glad I waited. Turns out it was better than I expected! The paint and the FMQ really add to it. I didn't sew around the whole flower so that it also has a 3-D effect.
Plumeria flower after the water paint and FMQ
The genesis of this art quilt is a silk scarf that I bought in China. The scarf was very fragile and better suited to art than wearing. In my stash, I found peach and yellow fabrics as well as this amazing purple and orange fabric that my daughter brought back from Senegal, Africa. This is truly a multi-cultural project!

Working on this multi-cultural project


To make the background, I just sewed a few pieces of the fabrics together and then cut them up and sewed them back together again. I just love improvising like this.


Embroidered and beaded flower taken from the silk scarf


I cut out one of the flowers from the silk scarf, bunched up the silk around it and embroidered it down. I added many beads (until I'd had enough!) but as my daughter said - it looked like a colourful blob. To make it look like a flower, in colours that would stand out, I embroidered around the different parts of the flower.

You may have noticed the frilly bit on the right in the picture above. I wanted to add more of the silk scarf, to tie it in with the flower. I originally intended for it to drape on the right edge, then my daughter turned the piece around so that the scarf hangs off the bottom. What a difference 90 degrees makes!
Escape - almost done!
I've been hand quilting the orange and the yellow areas and adding beads to some of the colourful African fabric. I'll have to be careful to not over do it - it's so easy to get carried away.

Canada

The third stop on JoJo's World Quilting Travel Adventure is my homeland. I love Canada and I think that JoJo chose well with her souvenir - it's the Northern Lights (aurora borealis) made of hexies. I have to admit that before this project, I had no desire of doing any type of hexies! I have a UFO - an English Paper Piecing project started last summer made with triangles. It's really fun, relaxing and very, very addictive! This hexie project is even more fun because I didn't try to plan the project first. I just went into my scrap bag of batiks and cut out hexies from colours that might fit.That's my kind of project - jump in and adjust as I go!

Making many, many hexies

I won't say much more about this project except that it's a work in progress. If you're interested in doing hexies, JoJo has two really good tutorial for Basting Hexies and Joining Hexies. Please check them out!

Not sure how I'll be putting these together. Stay tuned!
What I've learned:
  • As usual, I'm not doing so well with following dates. That's also how I prefer to travel - without strict agendas and time tables, just an outline of possibilities!
  • JoJo has given me plenty of possibilities. I'm having a blast, and working very hard to not take it (or me) too seriously. This is a perfect opportunity for play,
  • I'm addicted to hexies (only really cool ones, but hexies none the less!) We'll see if this lasts when I try to join them!

If you're interested in seeing what other travelers have made, check out the links on the Travelers' Souvenirs page. I am linking to the following Linky Parties: Oh Scrap!, Free Motion Mavericks, Let's Bee Social, Midweek Makers, Needle and Thread Thursday, Can I get a Whoop Whoop?, Off the Wall Friday, Finished or Not Friday, Fabric Frenzy Friday,