Thursday, March 30, 2023

SAHRR top finished at Free Motion Mavericks

I've finished the quilt for my Stay At Home Round Robin (SAHRR). It's like most of my work - unpredictable, wonky, colourful and happy! 😊 I love it and hope that once it's free motion quilting (FMQ) that someone else will love it too.

Pinwheel block


Here is the finished flimsy. 

Finished quilt top of the SAHRR Challenge

The last block for the challenge was a pinwheel. I've done many pinwheel blocks in my quilting life, most of them not accurately, so I took the time to find instructions on the Internet. These came out very accurate....but also very large! 😮

Half square triangles waiting to be stitched together

It turns out that if you create half-square triangles with two 5" squares, your pinwheel blocks will be huge! Too bad I didn't think of that 😀! It's all good. It's much easier to deal with blocks that are too big, than blocks that are too small, at least when it comes to pinwheels!

Cutting down my pinwheel blocks

I cut down the pinwheel blocks to 6", which is still 2" larger than most of my blocks but it works. I added an extra hour-glass block at the top and a tiny square within a square block at the bottom. 

Pinwheel column

Here is a look at some of my favourite parts of this quilt.

Top rows of the quilt. I love my wonky stars and flying geese

More flying geese and some hour glass blocks

After all of this work, I still love my centre block, although it's no longer in the centre!

Centre block - still sweet!

What I learned
  • Thinking through the size of my pinwheel block would have been the smart thing to do, before I started making it. 
  • On the other hand, this block is much more accurate than many of my other ones. It's very possible that working with larger pieces of fabric helped. I'll have to give that some thought!
  • Looking at my finished top, I realise that some of the fabrics that I thought were quite bright are not bright at all when placed beside really bright fabric. The second pinwheel just blends in, even though it has small bright birds on it. Something else to think about😊
  • I will probably re-do the top hour-glass block in my pinwheel column - it really looks a little too wonky!
  • I also learned to add fabric between blocks to make the rows and columns work.
  • The tiny square within a square block at the bottom of that column was made as an experiment. I'm glad that I was able to include it. I really do seem to like smaller blocks - too bad they are more difficult to sew accurately!
  • I'm really glad that I participated in this challenge. It was a lot of fun and I learned so much! Thanks to Quilting Gail and all of her friends for a great time!

Related links

Linking parties

Free Motion Mavericks


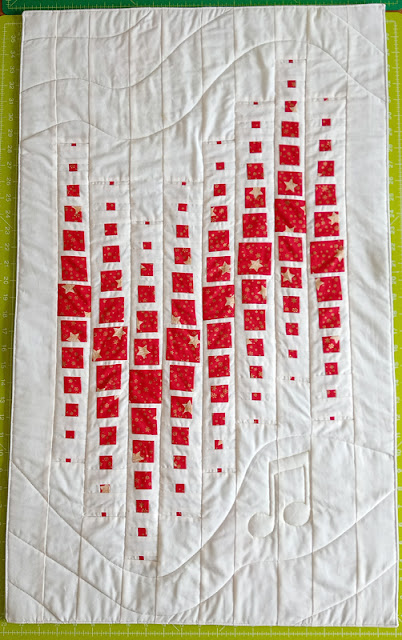
Welcome to week 424 of the Free Motion Mavericks linking party. Here's what we saw last week.

Melva is working on quilting some wonky quilts for a client. Here is one of them, a runner that she FMQ.

A runner FMQ by Melva

Gail of Quilting Gail was finally able to share with us a quilt that appeared in the May/June issue of McCalls Quilting magazine. Congrats Gail! 

See the issue of McCall's Quilting in Gail's post

It's now your turn!😎

You are invited to the Inlinkz link party!

Click here to enter

Thursday, March 23, 2023

Making Journals on Free Motion Mavericks

Welcome! I can't believe that it's already time for Free Motion Mavericks! I doesn't help that I posted a day late last week. This week I'm on time but no FMQ (free motion quilting) to share. 

Upcycled Traveller's Journal 


This week there is an exciting free event going on - Sketchbook Revival 2023. There are loads for really cool teachers presenting various things related to art, sketchbooks, colour and creativity. Before the week began, Ali Manning of Vintage Page Designs and the Handmade Book Club (of which I'm a member!) showed us how to use an old book binding to make a traveller's journal with separate journals that can be added or removed from the cover. It's so cool!

I used an rescued book cover whose book was falling apart. It's not the prettiest book cover (9¼ " x 6") but perfect for learning how to make this journal. I glued a piece of cloth over the spine area. Since the inside of the book cover wasn't pretty, I added a pretty piece of craft paper to the front and back. 

Book cover and first journal

I prepared 4 journal to fit into the cover. Each journal has craft paper as a cover. 

First and second journals

Each journal is stitched and then attached to the book cover using stretch lace elastic. 

Each journal can be removed from the book

Washi Tape Journal


The bonus course from Ali is a fun washi tape journal.

Washi tape journal
This small journal (5¾ " x 4½ ") was super simple and quick to make. It consisted of 2 signatures of 10 photocopy pages each, folded in half to make 20 pages.

Two covers are made using a legal size folder. We covered them with washi tape but they could be decorated in any way. Since the legal size folder is long, you can add pockets on the inside and middle of the journal. My pockets are attached with paper clips until I buy some narrow 2-sided tape to keep them down.

Journal with a pocket on the inside cover

The second cover ends up in the middle of the journal, where additional pockets can be added.

A smaller pocket in the middle of the journal.


A larger pocket, also in the middle of the journal.

This is one of my favourite journals - so easy and simple to make but very versatile. You can use all kinds of paper for the signatures and decorate it any way you want.

A lovely slim journal that can fit anywhere.


Update on my SAHRR baby quilt


Just a quick note to say that I've completed the first step of making the pinwheel blocks by make batches of half-square triangles. 

Next step in the SAHRR baby quilt

What I learned
  • I'm happy to say that making journals is getting easier. 
  • I should have cut my paper for the Upcycled Traveller's Journal by about a ¼ " shorter. This would have made it easier to put the journals in the elastics. Next time 😊!
  • Old washi tape doesn't stick as well as new stuff, so I may have to glue some of it down. 
  • The narrow two-sided tape will be great to keep the pockets down. I love adding pockets to my journals, so it will be a good investment.
  • I'd like to make more washi tape journals but experiment with fabric. Mod Podge would affix the fabric to the cardboard and make it stiffer (and help keep it clean).
  • I also have many nicer book covers that I'd like to use to make more Upcycled Traveller's Journals. 
  • I also want to make larger journals (the size of a duo tang) with lots of pockets to hold my travel souvenirs, notes, etc. The cover is not a problem but getting paper that large can be.
Related links

Linking parties


Free Motion Mavericks


Welcome to week 423 of Free Motion Mavericks. Did you have time to do any FMQ? Either way, we'd love to see what you're working on 😊.

Since we didn't have any FMQ, here's what Donnalee, Melva and Joy are working on!

Donnalee is making a second runner with some lovely Spring colours.

Spring runner by Donnalee

Melva was on her eleventh mini, but I want to show you number ten, Angel on the Shore.

Angel on the Shore, a mini by Melva


Joy linked up her Split Back Star blocks for a QOV quilt. Welcome Joy!

Split Back Star blocks for a QOV quilt by Joy

It's now your turn.

You are invited to the Inlinkz link party!

Click here to enter

Sunday, March 19, 2023

Project Quilting 14-6 - Conquer a fear

I'm so glad that I saw Kim Lapacek's newsletter on Friday, because that gave me a whole day to prepare this fun quilt. I couldn't resist creating something that might help me though my fears....of submitting a quilt to a show! Maybe this will help 😊

Courage 


When it comes to my art, there isn't that much that I'm afraid of. It seems that ideas abound (and if they don't, I just think it through or wait it out), new techniques to try, and now I even have time to play 😊. I know that if I create a mess, that I'll figure out a way to fix it. I'm also not looking for perfection. What does scare me though, is rejection.

Courage

I'm not someone who takes risks. I've applied for jobs that I didn't get, but somehow that didn't phased me much. However, having someone reject my creation is more than I can bear. So I created this piece to help me through this fear.

In the centre of the flower, I wrote down words of the things that I fear - of the feelings that I'm afraid of, such as rejection, unworthy, criticism, submit, mistakes, imperfect, humiliation. I realise that imperfect is in there, but if you want to submit a piece to a show, it usually has to be close to perfect!😕

Fears

To counter those fears, I wrote encouraging words in the petals: believe, courage, process, fun, trust, just do it, practice, create. 

Encouragement

The only process picture that I took is this one. I created a template on tracing paper and then cut out 12 petals. I then trimmed the petal template and cut out the adhesive backing.


Cutting out petals

What I learned
  • Chevy
    If I had thought through the process, I would have added the adhesive to the fabric before I cut it. I really should be remembering this by now.
  • I wanted to make a colourful, encouraging piece about my fears. I wanted it to include hope, not just darkness.
  • The flower top with the petals is out of proportion to the stem and leaves, and that's intentional. It's about the flower and its petals. It reminds me of taking pictures of Chevy where all you can see is her head, while everything is behind her!
  • I'm amazed that the words in the petals fit - I usually run out of space!
  • I had a great time FMQ the background with feathers. I love how the feather stems show up and give the piece mouvement.
Related links

Linking parties

Project details


Courage
Made for Project QUILTING 14.6 – Conquer a fear 
Size: 11" x 14"
Material: Kona cotton and hand-dyed fabrics
Techniques: Machine appliqué and free motion quilting (FMQ)


Saturday, March 18, 2023

Embroidery and Free Motion Mavericks

Hi! I'm back 😊 after an amazing trip to another side of the world! 😊 (Argentina and Antarctica). The travelling was safe, the sights were outstanding, everyone was so lovely and the food was scrumptious 😋. I even got some sun 😎! I'll be writing up a post soon with a little bit of art and lots of photos of nature 🐧

Embroidery on the Ocean


Since we are so tightly squeezed on airplanes, I didn't bother trying to stitch during those long flights. They were good for reading and listening to audio books. Once onboard the Norwegian Star, I took out my embroidery in the evenings and during our days at sea. 

Progress so far on Glimpses of Antarctica

I started the trip with the two bottom pieces but then attached the top two. I'll trim then up eventually.

At first I was just doing some abstract stitching, using the stitches that I know from memory. At some point, I decided to add stitches that represented my trip. Here are some birds and fish.

Birds in a line


Fish swimming in the ocean 

I then got ambitious and drew a little penguin on another piece of the painted cloth. I stitched it up, cut it and then appliquéd it to the piece.


Penguin appliquéd to the piece


After a fellow traveler suggested a whale, I added it into the piece, with a few of his/her friends blowing water. At one point, they estimated that we could see over eighty fin whales from the ship, blowing water and swimming about. I used a few strands of Mouliné étoile embroidery thread from DMC to show the water sprouting up.

Fin whales blowing water

Here is a closer look at both sides of  the embroidery.

Left side of the piece

Right side of the piece

I've decided to make this piece as representative of Antarctica as possible, so I'll be stitching in some of the islands that we visited. That's why it's called Glimpses of Antarctica - like an abstract map with real things in it. See Related links below to the previous post.

What I learned
  • When I was first looking for spots on the ship to embroider, I was looking for comfort and ambiance. It didn't take long to figure out that the most important element was light! It's difficult to thread a needle in dim light!

Great view and light!

  • I didn't have access to the internet a lot, so I relied on my memory of embroidery stitches. I may have made up a few, but it's all good.😊
  • It was nice to have something to stitch. I also worked on a hexie diamond at the beginning of the trip. It's about half stitched together.

    Hexie diamond

Related links

Linking parties
I'll be linking up to many fun linking parties this week. Why not check them out? Put your foot down, Finished (or Not) Friday, Can I Get A Whoop Whoop?, Peacock Party, Off The Wall Friday, Patchwork & Quilts, Design Wall Monday, Sew & Tell

Free Motion Mavericks


Welcome to week 422 of Free Motion Mavericks. Thanks to everyone who linked up while I was gone. 

Donnalee shared with us a wall quilt that she FMQ with a serpentine pattern. Isn't is lovely for someone who says that she doesn't FMQ?

Wall quilt by Donnalee

We have two quilts by Gail, of Quilting Gail. The first involved some ruler quilting while Gail FMQ the Baby Stars.


Made for the Sweet on you blog hop by Quilting Gail

Baby Stars by Quilting Gail for the Island Batik catalogue

Frédérique, of Quilting Patchwork Appliqué FMQ her lovely quilt for the Dust Off A Quilt Book blog hop. She added trapunto to the musical note based on the book she dusted off! Here is her Modern Bargello, Huahine.  

Modern Bargello, Huahine by Frédérique

It's now your turn 😊

You are invited to the Inlinkz link party!

Click here to enter