Friday, December 20, 2013

Another Cute Mug Rug

I'm glad to say that the production of mug rugs has slowed to a crawl, but unfortunately, I still have a few more to make. Through a Quilting group on Linked In, I found this wonderful pattern for my last few mug rugs by Elizabeth Wyatt (www.ebethwyatt.com).

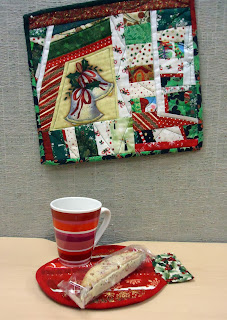
Mug rug and wall hanging in my office
Here's the link to the Stripy Christmas Ornament Hot Pad. As the name suggests, the original pattern is for a hot pad, but I adapted it for a mug rug by only using batting and skipping the insulated lining. This project uses a quilt-as-you-go technique so that really, the most difficult part is putting on the binding. I also had to adjust the top part of the ornament since I didn't include a hanging loop. Check out her tutorial on the link above. It's really great.

As well as planning, following instructions is not my forte (except at work, of course!) - so I ended up cutting the batting and backing fabric first and then sewing directly onto the batting as instructed. One advantage to doing this was that I was able to use shorter strips for the edges of the ornament. The disadvantage  was that the backing ended up a little smaller than the batting - so I suggest that you cut the backing a little bigger than the batting and then trim before putting on the binding.

Red Christmas Ornament Mug Rug
Christmas Ornament Mug Rug


This is a great little project that could probably be adapted to other shapes. In one of my previous mug rugs, I had put together a triangle that looked like a Christmas tree. This would be a great shape to use this technique with.
Stripped Christmas Tree


What I learned:
  • If possible, use bias tape or cut out your own. I didn't and the mug rug doesn't really lie flat. Not a huge deal since it is only a mug rug and you are supposed to put something on it which will make it lie flat!
  • If you cut the batting and backing first, you may want to cut the backing a little larger so that it doesn't get too small. You can always trim it before adding the binding.
Update - I made 2 more Christmas Ornament Mug Rugs, in green this time. I was able to find bias tape and it did help somewhat with the flatness. I did make one of them larger but then I forgot to trim it! Here are the results:

Hope you get some quality quilting time during the holidays.
Andrée

Wednesday, December 11, 2013

Christmas Mug Rug Production

It's almost that time again! This year, since I didn't have to create the guild newsletter and post it etc., I've had so much extra time to actually quilt. What a treat! I decided to make a little something for my friends and colleagues for the holiday season. Since mug rugs are all the rage this year, I thought I would give those a try.

I am very happy to say that I have a nice little stash of Christmas fabrics collected over the years. Just enough fabrics to have a decent variety. This year, at Quilty Pleasures, I bought two little bundles of 2 1/2 inch charm packs of Moda Christmas fabrics. With those squares mixed in with some of my own fabrics, I made quite a few small 9 patch blocks with borders. They made really nice mug rugs.
Mug rug using Moda squares
These are all little Moda squares

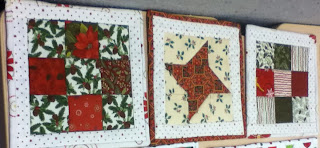
Three 9 patch mug rugs
The block in the middle mug rug was made years ago!
I also had quite a few blocks that I had made years ago, so they got incorporated into the mug rug production.

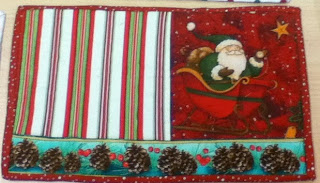
Three fabric mug rugs
After researching on the internet, I found that many mug rugs were made of three panels of fabric. Here are a few of those models.  I found it difficult to put all of these printed fabrics together, but I think most came out ok.

Appliquéd tree
Appliquéd tree
The tree on the mug rug above was made of strips of fabric and appliquéd. That was a lot of fun.

These were also great little projects to practice my free motion quilting. Some came out better than others, but that's what practicing is all about!

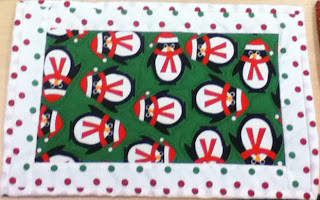
Lovely penguin fabric
I made this mug rug to highlight the penguin fabric. Aren't they cute!

I bought a couple of e-patterns for mug rugs. The mug and gingerbread man was one of them. My version doesn't really do it justice. The one with the different border looks better though.

mug rug
Mug and Gingerbread Man 
Glitzy mug rugs
Same mug rug with a different border
 I also created a few glitzy mug rugs. The two below will be in the mail today for Denmark, one for my brother and sister-in-law and the other for her mother. I hope they get there on time!

Bandit in the stash
Bandit nesting in my Christmas stash!

I spent many evenings making these. One night, Bandit decided to keep me company. He moved around some of the fabrics in the box and made himself at home.

What I learned:

  • Having a dozen or so small projects on the go is more than I can handle. At one point, I felt very scattered. I think that it's best if I make a few and finish them before moving on.
  • Sometimes it's important to review things that you think you know! I was having a very hard time at the beginning with the binding. I thought I wasn't stopping early enough at each corner (that 1/4 inch) but it turns out, after reviewing directions for making those corners that I wasn't folding the fabric properly. After that, my corners were much more respectable.
  • I found it hard to choose the different fabrics that would go together on a mug rug. After I made the Mug and Gingerbread Man above, I realised that having a different fabric for the binding can be a very good thing to emphasize the project.