Wednesday, October 25, 2017

Learning QAL - October Sum Up

Welcome to Learning QAL's October Sum Up.
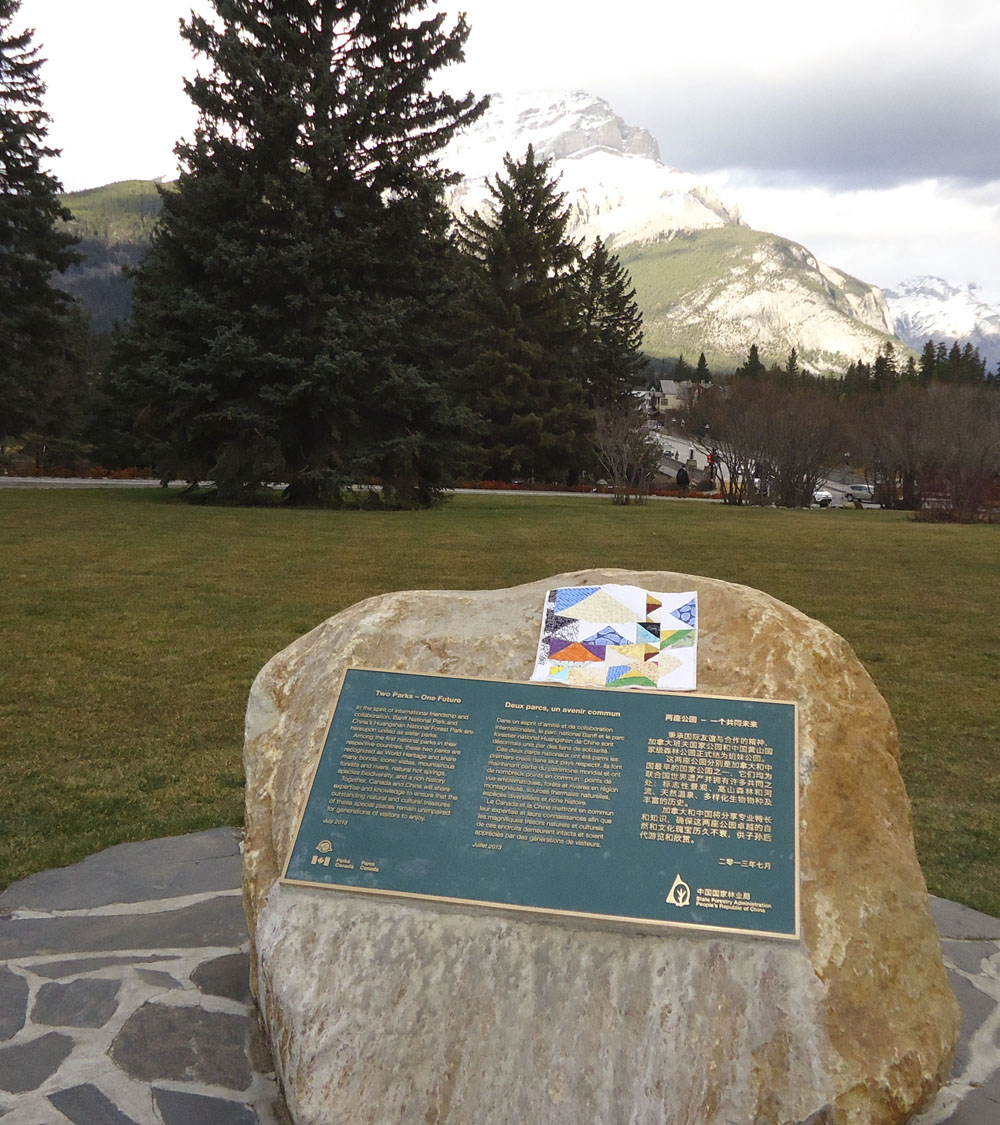
One of the views from Banff
Life is good here! I'm writing this post from the beautiful town of Banff, within the Banff National Park in Alberta.

As you can imagine, last weekend was a frenzy of activity at my sewing machine, getting my samples ready for this post and getting ready to leaving for Banff. 

Quilt blocks lounging in the grass in Banff!
Quilt Tops

First things first - to test the batting, I had to create some quilt tops. I wanted this to be as painless as possible - so I chose to make some scrappy improvisational pieces. These are, for me, the easiest things to piece since matching points and such is not my strength. 

I looked through "Quilt Improv" by Lucie Summers for some ideas on new improv blocks to make. 

It was really fun putting together a half-square triangle block. Since I had many half-square triangles left over from other projects, this was the perfect way to use them. I must admit that it's my favourite of the blocks. I also tried a variation of her X block.

I already had a log cabin block that I just added strips to, as well as a block that Lucie calls pieced squares. These are the improv blocks that I usually make.

X Block with
silk-poly batting
Here they are, sandwiched and pinned, before quilting.

Half-square Triangle block with
cotton-wool batting


Pieced Squares block with
bamboo-cotton batting

Log Cabin block with
cotton batting


Batting

Here are the four different batting I used.
  • Tender Touch bamboo-cotton (50%-50%) with scrim
  • Warm 100 Cotton  with 100% cotton scrim
  • Hobbs Tuscany Collection cotton-wool (80%-20%) batting with resin bonded
  • Hobbs Tuscany Collection silk and fine polyester (90%-10%) with resin bonded
Taking these different batting out of their bag, I was surprised by the stiffness and stickiness of both Hobbs products, although in the end, this didn't affect the quilting.

Something else that I noticed when I made my quilt sandwiches, is that the silk batting didn't stick to the fabric at all, even after being ironed. Again, I don't think that this affected the quilting, but it was unusual.

The bamboo batting was the softest and most supple while the all-cotton also felt great and was a little thicker than the bamboo-cotton.

Quilt blocks lounging in the gazebo
The Quilting Process

For consistency, I used the same backing fabric for all of the pieces, a Kona solid in pink. I put a new Superior Topstitch 90\14 needle into the machine. I also used Superior Threads, King Tut thread (40) for both the bobbin and the top. The bobbin was a grey thread while the top was a light variegated. I ended up running out of both of these on my last block! 

I started by quilting-in-the-ditch each block. The cotton and bamboo-cotton batting were great. The cotton-wool batting adds loft (puffiness) and did feel a little thicker. It was also great to quilt. I was surprised with the silk batting. It is the thinnest, was a little stiff and it almost felt as if there was no batting.

Free Motion Quilting (FMQ)

After doing some in-the-ditch quilting, I then went back to complete the FMQ of each block. I started with the cotton-wool batting. Wow! It was really great to quilt and I definitely saw the added loft while quilting. I did have to be more careful about puckers, just because of the added loft. 

FMQ on the cotton-wool batting (block size 16" x 16"½)
After quilting the cotton-wool batting, the silk batting felt really thin. I did have to adjust the tension on my machine since it was so different from the cotton-wool. It did quilt well.

FMQ on the silk batting  (block size 14" x 14"½)
I didn't really see or feel much difference when quilting the cotton and bamboo-cotton pieces. They were both great - but this is what I'm used to quilting. 

FMQ on the cotton batting  (block size 16" x 16")

FMQ on the bamboo-cotton batting  (block size 15" x 15"½)
I didn't get to finish the FMQ on the bamboo-cotton piece. I ran out of both bobbin and top threads. It is about 80% quilted.
Back of the X block
(silk batting)
Back of the Half-Square Triangle block
(cotton-wool batting)

Back of the Log Cabin block
(cotton batting)
Back of the Pieced Squares block
(bamboo-cotton batting)
The experiment is not over...

Overall, I was really impressed with the cotton-wool, bamboo-cotton and cotton batting. I was a little disappointed with the silk batting, just because it was a little stiffer and so thin. But the experiment is not over!

I still have to finish quilting the bamboo-cotton piece (after I buy more thread), and then bind each of them so they can be washed. That could make a difference in the end result.

I will also do some more experimenting with these batting - so if you're interested, follow my learning adventure next month. I'll be posting the details of Batting - Part 2 in my goal setting for the November Learning QAL on November 1st. I also hope that you'll be learning along with me!

Quilt block enjoying the view
What I learned
  • I was working hard to not be biased in regards to the silk batting because I was sooo looking forward to using it. It was difficult to not be disappointed.
  • In defense to the silk batting, it is known to be very lightweight but warm. I will reserve judgement (on all of them) once they have been washed.
  • In reality, the experiment can only be over once a whole quilt has been made and used to really get a feel for their properties as quilts. This experiment may last a long time :-)
  • I was impressed by the cotton-wool batting. Only 20% wool made a big difference in the loft. I'm also glad that there is only a little bit of wool since I do react to wool - even the softest makes me itchy. I had no problem working with this batting.
If you've had success, or not, with a particular batting, feel free to share with readers and me in the comments section!

Related Links
Linking Parties: I will be linking up to these great parties. Please check them out! Let's Bee SocialLinky TuesdayMidweek Makers, Design Wall Monday, Main Crush Monday, Quilter's Monday, Can I Get A Whoop Whoop?, Oh Scrap! Finished or Not Friday, MOP Monday, Free Motion Mavericks, Off the Wall Friday,

Great news! My half-square triangle block was featured on Free Motion Mavericks. Check it out!
Update: I linked to Sarah Goer's fun linky, Show Me Something Improv.

Monday, October 16, 2017

Splash of Color QAL and a deadline

I've been resisting....but it didn't last. Myra of Busy Hands Quilts is hosting a Splash of Color QAL. The quilt has to be black and white with a splash of colour. As you can guess, I'm joining!

Why would I do that when I have tons of other stuff to do? Well, it turns out that I took a workshop last year with the Common Threads Quilt Guild called Shattered Angles. The technique was based on the book "Splash of Color - A Rainbow of Bright Black-and-White Quilts" by Jackie Kunkel. I just happened to choose Black and White with a jelly roll of solid colours for my quilt.

The quilt is only partially done - so this is the perfect opportunity to keep working on it. I'm not sure if I'll finally finish it during this QAL, but getting anything more done on it would be a bonus!

Here is the fabric that I'm using. If they look familiar, it's because I used some of these for Anna's Black & White wall hanging. Oops, I may have to pick up a few more fat quarters of black and white fabric!

Fabric selection for Shattered Angles
My To-Do List this week

Since I am going away for a week at the end of the month, I have to complete, or at least start my Learning Quilt-A-Long for October. Ideally, I would finish it by the weekend and then write my October Learning Sum Up Link-up post before I leave. Nothing like being ambitious at the beginning of the week :-)

You may recall that my learning challenge this month is to quilt with different batting to see what the difference is.

I now have 4 batting to try. I'll be adding the specifics of each batting on the October Learning Sum Up Link-up.
  • Hobbs Tuscany silk batting
  • Hobbs Tuscany cotton wool blend batting
  • Warm & Natural cotton batting
  • Bamboo batting
Silk batting
Cotton-wool batting


Batting is great, but I also need something to quilt! I've been working on some improvisational piecing with scraps. The goal is to make two blocks with each batting. So far, I'm thinking of one block of the improvisational piecing and the other using solid fabric so that I can to see how the quilting will show up as well as do a little bit of hand quilting, to compare each batting.

This will give me a chance to practice my free motion quilting (FMQ) as well as test out the batting. Hopefully I'll figure out what to do with the test pieces, since I like having something to show for the effort, even if they are rug mugs, placemats or mini wall hangings for the office.

What I learned
  • I can't resist a QAL if it means that I'll be able to work on an existing project. And to be honest, I love having a reason to write a blog post and link it!
  • The hardest part of the batting experiment is figuring out what to quilt. I do reserve the right to change my mind and quilt something totally different :-)
Related Links

Sunday, October 15, 2017

Labels, Image Transfers and Slow Stitching

Last week in my Art with Fabric Blog Hop - Fall 2017 post, I mentioned that I would write about the use of a photo transfer medium to put the image of the statuette on fabric. So here it is, with a few other things thrown in!

Image Transfers
Mod Podge
Photo Transfer Medium

I've wanted to place images on fabric for a long time but the one attempt by my son to do this didn't end well for either the image or the printer! I'm not bad with technology and will eventually have to buy a new printer - and then I'll do the research required to get the proper printer and transfer paper. However, I'm just not there yet.

So when I heard about a photo transfer medium, I got pretty excited! I did a little bit of research, mostly to see where I might buy this type of product in Canada. Turns out that Micheal's sells a product made by Mod Podge.

I originally wanted to use the photo transfer medium to make a label for my art quilt, Reason & Passion, created for the Art with Fabric Blog Hop - Spring 2017. The idea was to place the image of the original quilt by Joyce Wieland on the label as a tribute to her and her work.

Photo Transfer Medium applied to two images
For this particular image, since it had writing on it, I had to "flip" the image before printing it. Turns out that you can do this in Paint (click the Rotate button and choose flip).

Final two images of the original
Reason Over Passion Quilt by Joyce Wieland
Once I had figured out how to use the photo transfer medium (see "What I learned" below), I was ready to try the product on the image of my GaĂŻa statuette. I chose to use the black and white image since the original statuette is made of a grayish clay. 

Gently rubbing off the dried photo transfer medium
Final photo transfer image of GaĂŻa on Kona fabric
It came out great, except for a white spot (see "What I learned"). I would probably have redone the image except that I was able to use a pencil to cover and shade the finished image. If you can draw, I think that it would be easy to draw over and/ or add colour to the image using colouring pencils.

GaĂŻa image on the finished piece
Attaching the image was simple. I very carefully cut around the fabric, placed her on the quilt and using the silver silk thread that I was using to quilt the piece, sewed around the image. I then FMQ around a few features to better attach it and to give it depth.

The finished image on the fabric is a little rubbery, sort of like the way t-shirts were years ago. Depending on the look you want and the use of the piece (you wouldn't want to use this for items that you would wash a lot), the Mod Podge photo transfer medium works fine.

Quilt Labels

If I have time, I like to be inventive with my quilt labels. At the very least, I try to use fabric from the quilt. For Anna's Black & White wall hanging, I actually cut away a piece just for the label, while I was doing the improvisational piecing. I'm really happy that I was able to find it when it came time to sew on the label! (I think that I've learned a valuable lesson from the still missing Growing Up QAL blocks!)
Improvisational piecing

Label made from the
improvisational piecing of the quilt


For the Neutral lap quilt, I wanted to make a smaller version of the original block used in the quilt.

Label based on block
Original block


Growing Up QAL

I have finished block 10 of the Growing Up QAL. I enjoyed making this one, probably because it used one of my favourite techniques, foundation paper piecing. I just love the accuracy of the technique. With minimal effort, I can make pretty accurate blocks - gotta love it!
Block 10 of the Growing Up QAL

Slow Stitching 

With company around and just being tired after finishing the Art with Fabric QAL, I've been spending my evenings embroidering or doing English Paper Piecing (EPP). I do this while being read to since I've downloaded a whole bunch of audio books from our local library.

I started another embroidery piece with the same type of pattern as my previous (unfinished) piece. I've brought it to work a few times to stitch a little during lunch time. This one is also mostly practicing the stem stitch.
Embroidering FMQ motifs
Here is my EPP to date - seven large flowers completed, with 3 or 4 in the works.

Seven large hexie flowers so far
What I learned
  • When you buy photo transfer medium, check out the product's instructions for how to use it! Each product is different. It took me many tries to get it right, and it was only after checking out the instructions for using the brand I had bought that I got it right!
  • It's important to very gently rub off the dried photo transfer medium. The "Reason Over Passion" image on the left is a little less crisp because I rubbed a little to hard. It's best to remove the medium in several stages than to get it all off at once.
  • Turns out it's VERY IMPORTANT to keep your fingers off of the photo transfer medium once it's on the image. The white spot that you seen on the GaĂŻa statuette (where her heart would be!) is from my finger when I was placing her onto the fabric! I added extra medium but it didn't really help.
  • My stem stitch is getting better, but still needs work in tight curves. That's mostly my lack of patience since you need to use very small stitches in tight curves 

Related Links
Linking Parties: I will be linking to a number of great linking parties. Check out what others are doing! Growing up QAL - linky month 10, Slow Sunday Stitching, Oh Scrap!, Can I Get a Whoop Whoop? Finished or Not Friday, MOP Monday, Monday Making, Main Crush Monday, Design Wall Monday, Off the Wall Fridays


Thursday, October 12, 2017

Art with Fabric Blog Hop - My Happy Yellow Cow by Patty

Hi, I'm Patty. It's the first time I'm participate in an Art Blog Hop. I'd like to thank Alida for all her work and also to Andrée, my hostess for encouraging and guiding me throughout this new experience.

"My Happy Yellow Cow" by Patty
My quilt is inspired by "The Yellow Cow", one of the most famous works of Franz Marc (1880-1916). He was an  extraordinary German artist, which I admire since ever. He was one of the main painters of the expressionism, co-founded with Kandinsky, of The Blue Rider magazine and movement that grouped expressionist artists from 1911 to 1914. 

Franz Marc is known mostly because of the animals he used to paint in bold bright colors. Even if he evolved in style, until reaching the cubism and the abstractionism, he never abandoned neither the animals nor the wonderful colors. 

Although I've read the analysis of "The Yellow Cow", which by the way is rather sad, I must say that in my humble opinion, I disagree. I've  always seen her happy, having a good time, a wonderful moment of relaxation and pleasure. That's why in my quilt I'm showing her swimming freely and peacefully enjoying the fresh water on a hot summer day. A small peek look at Mother Earth.

My process:

Template of a larger simplified image of the cow
I first drew a larger simplified image of the cow, then I cut it in a fabric to use it as foundation and I began to work on it by gluing flowers.
Foundation used for the cow
The background is made of strips also sewn to a foundation. Finally I put it all together adding some more elements...and that's it!
Cow on a background of strips

"My Happy Yellow Cow"!!!! 48' x 56'
"My Happy Yellow Cow"


Hope you enjoy it!
I'm really proud of being among so many talented artists.
Thank you to you all!
Patty


Here is the schedule for the Art with Fabric Blog Hop. 
Check out the amazing art work!

Monday, October 9th, 2017
Tuesday, October 10th, 2017 
Wednesday, October 11th, 2017 
Thursday, October 12th, 2017 
Friday, October 13th, 2017 
I've also linked Patty's post to Off the Wall Friday

Wednesday, October 11, 2017

Art with Fabric Blog Hop - GaĂŻa, Mother Earth

It's that time again - the semi-annual Art with Fabric Blog Hop - Fall 2017!


I've been participating in Alida's blog hop for two years now. This will be my fourth entry. It's a great event - I get to make an art quilt from a piece of art that I love, and see all of the participants' creations. Thanks Alida for organising this again!
GaĂŻa, Mother Earth

This fall event's theme is Mother Nature, sometimes known as GaĂŻa, the goddess of the earth.

My entry is based on a reproduction statuette of a beautiful Pre-Columbian female figure from Colombia, South America. Technically, the figure probably did not represent GaĂŻa, but she is, to me, a symbol of Mother Earth.


Reproduction statuette from the Tamaco culture 
When I found her fifteen years ago, I was told that there were very few of these statuettes around since they were extremely difficult to ship to Canada. Since coming to our home, she has always been in my living room surrounded by books and plants.

Provenance
The archaeological area
in Colombia and Ecuador
I've done some research on this lovely lady. This reproduction comes from Colombia, South America, near the Rio Mira (Mira River). The original statuette is from the Tumaco culture, dates from 1000 to 1600 AD and is held in a private collection.

I found two resources, that I have listed in the Related Links below, about the statuette. The first one is about the Tumaco culture while the other one, on the Tolita culture, is from the same region but possibly older. Check them out for a fascinating read.

The area in Colombia where she comes from is near the Ecuador border. Here is a map of the area from the Museo Chileno de Arte Precolombino.

The background
Since the theme is Mother Nature, I wanted to make the background of this art piece based on the area where this statuette comes from.

Tumaco is both a port city and municipality located on the southwestern corner of Colombia, near the border with Ecuador, on the coast of the Pacific Ocean. It has a hot, tropical climate.

It's far from a realistic representation but it includes some interesting animals and plants of the area, and of Colombia in general. The wax palm tree, Colombia's national tree, is found near this area, in the Cocora valley. I've included a poison arrow frog, an orchid, a bird (the Stripe billed aracari), and a morpho butterfly. The landscape includes a river, the valley with the wax palms as well as mountains in the distance.
Panoramic of Cocora valley with wax palms

The making of the art quilt
I started with the background of the valley and the mountains. These are all hand-dyed fabrics - my own and some from my stash. I also wanted to add a water feature. It took me a while to work in the river on the bottom left. You can see one of my earlier attempts in the image below.


My favourite part was making the wax palms. They are so tall and elegant!

After the thread painting and before the quilting
I made the aracari and butterfly on some interfacing and solid off-white fabric, while using some fun yellow fabric to make the frog. All were made separately with lots of thread sketching and then appliquéd to the piece.

I quilted the piece with Superior Kimono silk thread in both the bobbin and the top.

Quilted and almost finished
As I was working on the background, I started with just a cut-out of the statuette's image to make sure that she would belong. When the background was almost finished, I used a photo transfer medium to get the image of my statuette onto fabric. I'll be explaining this technique in a later post.

To outline the mountains, I couched some dark green yarn made of banana fibre.

Finishing
I embellished the statuette, as if they were offerings made to GaĂŻa, with coral buttons representing baskets and an orchid.
Baskets and an orchid as offering to GaĂŻa
Wax Palms and stripe billed aracari

River with a Morpho butterfly and a poisonous arrow frog 
The art quilt is finished with a pieced binding that matches the quilt.
GaĂŻa, Mother Earth
What I learned
  • I hadn't researched the origins of the statue until I decided to make this art quilt. I am really happy to know a little more about her culture and her country of origin. Colombia has an amazingly rich and diverse ecology.
  • I had a really hard time incorporating the river into the piece. When I finally stopped trying to be realistic, it all fell into place.
  • It was fun making the various animals and plants that I appliquĂ©d to the piece. 
  • I had no idea how I was going to finish the piece. This is really something that I should think about before making the quilt - it would make it so much easier at the end. I do like how the pieced binding worked out. I considered quilting over it and making it a more integral part of the quilt, but frankly I was tired and this would have required a lot of work. I just wasn't up to it.

Related Links

Project details


GaĂŻa, Mother Earth
19¾" x 17¾"
Materials: hand-dyed and commercial cotton fabric, coral buttons, banana fibre yarn
Techniques: appliquĂ©, photo transfer medium, couching, thread painting, FMQ, 


Linking Parties: this post is a part of the Art with Fabric Blog Hop - Fall 2017. Take the time to visit the other participants. I'm sure that it will be worth while!  I will also be linking to some fine link-ups. Main Crush MondayDesign Wall Monday, Linky Tuesday, Let's Bee Social, Midweek Makers, Free Motion Mavericks,  Off the Wall Friday, Needle & Thread Thursday, Can I Get a Whoop Whoop? 

Here is the schedule and links to the Art with Fabric Blog Hop, I will be adding direct links to the  posts as they are posted. I will also be hosting guess blogger Patty, on Friday. Be sure to come back and check out her work!

Monday, October 9th, 2017
Tuesday, October 10th, 2017 
Wednesday, October 11th, 2017 
Thursday, October 12th, 2017 

Friday, October 13th, 2017