Wednesday, January 30, 2019

Free Motion Mavericks and funky square flowers

Welcome to my second week of hosting the Free Motion Mavericks link-up. Muv, who is located across the pond, and I are taking turns organising the party!😊

Free Motion Mavericks (Week 214)

On my last post of Free Motion Mavericks, I shared my attempts at creating our logo with my own free motion quilting (FMQ) writing. A few readers were surprised to find out that it was possible to write using FMQ, so I thought that I would share some writing from my piece, A White History of Art. It's much easier to write in FMQ when the thread blends with the fabric!
Writing with FMQ: WHITE, austere and Elite

Funky Square Flower

For this week's post, I decided to learn to FMQ the Square Flower in Lori Kennedy's Free-Motion Machine Quilting 1-2-3.

Start by drawing the design - in this case, the Square Flower

As always, the first thing I did was to practice drawing it. This was one of the pretty pages - the rest of my practicing was on scraps of paper!

I often practicing FMQ the design on a fabric sandwich that I've made for this purpose. However, this time I practiced directly on a wheelchair quilt that I made years ago for my grandmother. Since I made it before I learned to FMQ, there is a lot of negative space to practice in 😊.
Chevy can't resist a quilt on the floor

It was difficult practicing on the light fabric since I could barely see the white thread. It did come out on the darker fabrics.

Funky Square Flowers

More Square Flowers designed by Lori Kennedy
The flowers showed up surprisingly well on the back of the quilt

Flowers on the back of the quilt
I quilted the Square Flowers on each half of the sets of two strips. You can see that I'll be able to keep practicing on this quilt for a while.

A row of Square Flowers
What I learned
  • I really like the funky look of these square flowers. They are so much fun, and can be made with the centre in the middle of the space, or at one side for a lopsided flower.
  • Having something sandwiched and ready to practice FMQ makes my practice much less of a bother.
Related links
Linking parties
I'll be linking up to these great linky parties. Let's go see what the fuss is about! Tuesday Colour Linky Party, Midweek Makers, Silly Mama Quilts WIPsNeedle & Thread Thursday, Finished or Not Friday, Friday Foto Fun, Can I Get A Whoop Whoop?,

A big thank you to Anja for linking up her Freefall Finish when I sent her a plea by email. A party with no guests is just too sad! Check out her lovely quilt!
We don't want a sad party here, so please link up....your project doesn't even have to include free motion quilting!

Inlinkz Link Party

Monday, January 28, 2019

Slow stitching - embroidery and a red mini art quilt

There is a lot of slow stitching happening these days - in my home and around quilting blogland. It's so exciting to see everyone re-discovering slow stitching with embroidery, English Paper Piecing, hand quilting and even hand piecing.

More embroidery

I've been following TAST - Take A Stitch Tuesday with Sharon of Pintangle. Here are the stitches to date: Chain stitch, Fly stitch, Buttonhole stitch, and Stem stitch.

Green Buttonhole and green & yellow Chain stitches
In my excitement, I started with the Stem stitch. However, last week I added the Chain stitch to my piece, as well as the Buttonhole stitch. It was so much fun working on this fabric - it's like it was made to practice these embroidery stitches!
Working Fly stitches in the wider areas
I want to go through Sharon's stitch dictionary to try out these stitches in the many options she illustrates.
Lots of Chain and Stem stitches happening
Red Mini Art Quilt

My red mini art quilt, aka “Peek-a-boo Red”, is now completed.

This one is totally hand-stitched with embroidery and beading. Peeking out from behind the curtain, you can see the batik hexies. I wanted to incorporate some traditional quilting in this piece – and although English paper piecing is new to me, it’s actually an old quilting tradition.
“Peek-a-boo Red”

I love the curtain that’s made of banana fibres. I just happened to have the perfect colours. It just goes to prove that when you find cool supplies, if you can afford it….pick them up! You never know when you’ll be needing them.
Can you see the hexies peeking though?
The background is a red grunge and the embroidery floss that I used is the one that matched the paint chip that went with bright red. I practiced my fly stitch and of course used more stem stitch for the top. Finally I beaded the red banana fibre with red seed beads.

Here are my three mini art quilts so far.

Three Mini Art Quilts so far
What I learned

  • My son helped me with the colour. I had some white fibre in the curtain but he said that it was taking away from the red – so off they came!
  • It’s interesting that the white was too much but the green and blue-grey were fine. I guess it was a matter of value.
  • I didn't finish the green mini art quilt for the deadline. Luckily I wasn't the only one. We now have a couple more weeks to get these done - so stay tuned for my green mini art quilt!

Related links

Take a Stitch Tuesday

Linking parties
This post will be linking up to some cool linky parties. Let's see what's happening in quilting blogland 😊 Slow Sunday Stitching, Oh Scrap!, Monday Making, Main Crush Monday, Design Wall Monday, Moving It Forward, What I Made Monday, Linky TuesdayTuesday Colour Linky PartyMidweek MakersSilly Mama Quilts WIPs, Needle & Thread Thursday, Wondering Camera, Off The Wall Friday, TGIFF

Project details

Peek-a-boo Red mini art quilt
5" x 7"
Materials: cotton, batik, embroidery floss, banana fibres, seed beads, Kimono silk thread
Techniques: English Paper Piecing, embroidery, hand sewing, beading

Wednesday, January 16, 2019

Free Motion Mavericks Link-up

Welcome to...
Free Motion Mavericks (Week 212)

As some of you may know, Muv of Lizzie Lenard Vintage Sewing has been hosting Free Motion Mavericks for a while (two hundred and eleven times in fact!). A few months ago she asked me to co-host the weekly link-up. I was thrilled and said YES! So Muv and I will be taking turns hosting this trans-Atlantic event. We're still working out the details, but I'm sure we'll figure it out 😊. So let the fun begin!

For my free motion quilting (FMQ) this week, I thought I would show you the evolution of our new buttons.

Andrée"s Button
Muv's Button
What I originally wanted was to free motion quilt the words "Free Motion Mavericks" on fabric to use as the logo. As you can see, it didn't work out that way!

I played with different fonts and printed up a few to use as examples. Many were very difficult to free motion quilt continuously.

I then chose a fabric that I thought would make an interesting but subtle background. Below you can see  my attempts at achieving contrast.
Not enough contrast
Too much contrast if your letters aren't perfect!


FMQ in contrasting thread


Finally I chose a Kona solid fabric, wrote the words using a Frixion Pen and then free motion quilted the words in dark blue. I free motioned some feather meanders around the writing. I learned these from Angela Walter's FMQ Challenge last year.


Ready for the photo shoot

I then staged the photo and used PowerPoint to add more text.


Here was the final image. Not bad but the name of the link-up just isn't prominent enough.


Finally I just added writing over the FMQ backgrounds (one of Muv's and one of mine) and Voila!
Much more effective. Oh well, I did learn a lot 😊


What I learned
  • I already knew it but it was confirmed once again. Writing using free motion quilting is not easy, especially when you want the writing to show. 
  • A little pattern on a fabric can make a huge difference in the legibility of the writing.
  • The writing on a button needs to be very visible and I'm not sure that my FMQ skills are quite up to it at this time. Thank goodness for PowerPoint 😊
Related links
Linking parties

I'll be linking this post to many fun link-ups in the hope of getting the word out about the Free Motion Mavericks Link-up. Don't be shy, spread the word! Tuesday Colour Linky PartyLinky Tuesday, Let's Bee Social, Midweek MakersSilly Mama Quilts WIPs, Needle & Thread ThursdayFinished or Not Friday,  Friday Foto FunCan I Get A Whoop Whoop?

In last week's Free Motion Maverick Link-up (Week 211), Karina linked up with her Christmas Wreath Panel. Go check it out - it's lovely!


Monday, January 14, 2019

Mini Art Quilts and Slow Stitching

Mini Art Quilts
✔Two minis done, and two more to go!

Blooming Yellow

The yellow mini art quilt is finished.

My original intention was to wrap the mini over the canvas. I had a difficult time because the seams in the background made the corners bulky. When I trimmed on of  the seams to reduce the bulk in the corners, I ended up ripping it. It was a pretty frustrating mess!
Blooming Yellow Mini Art Quilt
I ended up finishing the art quilt like a pillow case. I then added a background using one of the fabrics on the mini quilt and then wrapped it around the canvas. I used my scary but efficient staple gun to attach the background to the canvas. Then I very carefully stitched the mini quilt to the background fabric.

Blue Moon

This time I used a larger selection of blue fabric to make the background of the quilt. Using improv piecing, I sewed strips of fabric together, then cut them up, added more fabric and sewed everything back together again. The fabrics were mostly different values of blue, but there were some bits of other colours included.
Playing to create a mini.
I have to admit that I had absolutely no idea what I was going to do with the background. I took out some bits of yarn and started playing. I found a silvery blue piece that I liked and coiled it. On my table, I had a bag of batik pieces that I used to make hexies. I found a few pieces that had leaves and flowers and cut these out and Voila!

For the center of the coil, I used a blue foil paper from a chocolate I had just finished. 😊 On top of it, I added a crystal that I wore for years as a pendant until the string broke. Since the crystal has a hole through it, I was able to stitch it in and re-purpose it.

You can see the blue glittering through the crystal
This time, I didn't bother trying to attach the art quilt directly to the canvas. I finished it using the pillowcase method and found a piece of light blue flannel to cover the canvas. Again, I just stitched the mini to the background.
Blue Moon Mini Art Quilt

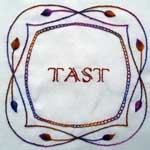
Slow Stitching with Take A Stitch Tuesday (TAST)

I found another project to follow. It's a Stitch Along on Facebook for embroidery. Every week Sharon of Pintangle highlights an embroidery stitch from her stitch dictionary. It's very low key with a Facebook group. It's been around since 2007 and still going strong.

Frankly I just wanted an excuse to keep doing embroidery. Since I have an embroidery course from Craftsy, I can use multiple sources to figure out the stitches.

Week 1 featured the Chain Stitch and Week 2 was the Fly Stitch.

As I'm writing this, I just realised that I did the Stem Stitch for week 1 instead of the Chain Stitch - so I'll have to add the Chain Stitch to my sample. 
First two weeks of the Take A Stitch Tuesday (TAST)
Isn't the fabric amazing? I think it's a Kaffe Fassett fabric. I've been wanting to stitch on printed fabric for a while, ever since I bought a Wild Boho book for my daughter. I spent a great evening last week just playing with these stitches.

Stitching on beautiful printed fabric

What I learned
  • I learned that stretching fabric over canvas is pretty tough on the fabric. It's also important to avoid having seams where the fabric needs to be folded around the corners.
  • I was using the canvas to ensure that my mini art quilt was the correct size. All I had was to make the mini roughly the same size as the canvas. It turns out that that wasn't very easy to do! It's really a good thing that the canvas was there.
  • For the blue mini art quilt I decided right from the start to attach the quilt to the canvas in the same way as the first. It was even wonkier than the first but it looks good against the canvas frame.
  • I've included a reference from Quilting Arts that includes different methods of binding art quilts. Of course I didn't look at it until it was time to write this post! I might help me for the next two.😊
  • It's a good thing that I trust my intuition because I would never have figured out what to do with the blue mini art quilt since I didn't really want to do an abstract piece. I must remember this for the next two....which I've started and still have no idea what I'm going to do!!!
  • When attaching the silvery blue yarn to the background, I just sewed through it since the thread showed too much when I tried to couch it
  • I just used a glue stick to attach the blue foil and the batik fabric to the background. I then FMQ the whole thing down.
  • I'm pretty happy with the amount of contrast in the blue piece. It still reads blue, and hopefully it will be the right blue! I figure that if it's surrounded by other pieces with the correct blue in them that they will each play off each other.
  • I've been wanted to stitch on printed fabric for a long time. I love it!!!
Related Links
Linking parties
I'll be linking this post to many interesting linking parties. Let's go see what's happening out there! Main Crush Monday, Monday Making, Design Wall Monday, What I Made Monday, Oh Scrap!, Tuesday Colour Linky Party, Linky TuesdayLet's Bee Social, Silly Mama Quilts WIPsNeedle & Thread Thursday, Off the Wall Friday, Finished or Not Friday, Friday Foto Fun, Can I Get A Whoop Whoop? Slow Stitch Sunday,
I'm also linking up to To-Do Tuesday because I have two more of these to do before next week - Yikes!

Project details


Blooming Yellow Mini Art Quilt
5" x 7"
Material: cotton quilting fabric, embroidery floss, pearl cotton, batting, silk thread, staples.
Technique: improvisational piecing, embroidery, free motion quilting, hand-stitching.


Blue Moon Mini Art Quilt
6" x 6"
Material: metallic yarn, batik, foil, crystal, canvas, cotton quilting fabric, flannel, silk thread, staples.
Technique: improvisational piecing, free motion quilting, hand-stitching,

Saturday, January 05, 2019

A few mini art quilts to make

Welcome to my first post of 2019!

One Monthly Goal (OMG) for January

I'm not sure what happened at the last Out of the Box Fibre Artists Group meeting in November...I know I wasn't drunk because I was driving (lol)...but somehow I got over-excited and ambitious and put my name down for another two mini art quilts. That's above the other two that I signed up for in September - that makes four! They may be mini, but that doesn't mean that they're easy or quick to make.

So that's what I need to do by January 21st! They will be done (that's an affirmation that I will repeat many times between now and then... in between actually making them) 😊

Making Mini Art Quilts

The rules:
  • They need to be 5" x 7", 6" x 6", 6" x 8" or 6" x 12".
  • They must be seen overall as a specific colour (see colour swatches below).
  • There must be fiber involved.
  • They must be handed in January 21, 2019.
The rules are pretty open (except for size and colour) and frankly, that's not making things any easier!

Light yellow and bright green
Soft blue and bright red


Two of the canvases to cover!

I bought 2 canvases, before I signed up for 2 more, so I have one that's 5" x 7" and the other 6" x 6".

We don't have to use canvases but I've wanted to try attaching art quilts to canvases for a while. I'm hoping to try different techniques with them.


This is my first mini, in light yellow. Since I had just finished the Symphony in Stem Stitch, I still had embroidery and free motion quilting (FMQ) on my mind.
Light Yellow mini so far
I pieced a number of fabrics that seemed to match the embroidery floss and paint swatch. I also used the designated embroidery floss as well as colours that were close. I added the butterfly in some contrasting colours to add a focal point and some interest. I used the embroidery and FMQ to give it some mouvement.
The back of the yellow piece
Once the fabric seemed to be large enough and I had finished the embroidery, I cut a piece of batting and did some FMQ. It's at this point that I decided to have the fabric and FMQ extend over the sides. Since the background fabric wasn't quite large enough to cover the sides, I just added a few pieces. That's one of  the advantages of improv piecing. 😊

Ready to attach?
I haven't decided yet if I'll add some beading to this piece. I thought that I would start the next mini and see where that leads me.

I have no idea what I'm going to do with the next three minis, but I'm really hoping to let the fabric and colour inspire me. Wish me luck!

What I learned
  • Using canvases is a great learning experience and will ensure that my mini art quilts are the correct size...and that's a very good thing. 😊
  • Working with specific colours is NOT easy for me. I have a really hard time figuring out if the colours match the paint swatches. It does help that they gave us the matching DMC embroidery floss number. With the floss, I can place it over the fabric and see if it matches.
  • It's going to be difficult ensuring that these pieces are not too boring, which is a definite possibility if I need the piece to read as a specific colour. Adding some contrast is necessary but how much can you play with the colours before it starts "not reading" as the colour?
  • I'm hoping to expand my fabric and colour choice for each piece, to see how much I can push the "reading as a specific colour" rule. Hopefully it will get easier by the fourth one!
  • The batting for this first piece was cut just a little larger than the front of the canvas (5" x 7"). It did shrink with the FMQ, and would have been fine being larger and hanging over the sides. I'll work on that on the next pieces.

Related links

Linking parties
I'll be linking this post to Elm Street Quilts' One Monthly Goal (OMG) link-up as well as other fun linking parties. Join the party and see what others are doing! Off the Wall Friday, TGIFFFriday Foto FunMain Crush MondayOh Scrap!, Monday Making, Design Wall Monday, Moving it Forward, What I Made Monday, Slow Sunday Stitching, Free Motion Mavericks