Sunday, January 30, 2022

New technique and new project

Did I say that I would try to stop starting new projects? I'm sure that it's in writing somewhere but, oh well, I am having too much fun learning new techniques and playing with fabric! 😊

Fantastic Fusion Workshop

Through my local quilt guild, I registered for a couple of workshops. This first one peaked my interest - it's an improv quilting using fusible web. I've done both of these before but I liked the look of the teacher's sample and hoped that I would learn something....and I have!

We were encouraged by our teacher, Lisa Walton from Australia, to buy Wonder-Under Transfer Web (or something like it) because it can be ironed on many, many times, and we definitely needed that for this technique.

These were the first two blocks that I made during the first class. 

Block 1 - still one of my favourites

Block 2

I used an assortment of batiks that had different values, colours and patterns. These are important, otherwise the fabrics all sort of merge together. Since I knew that I wouldn't be making a large quilt, I only added fusing on the back of about 12" blocks of each fabric, knowing that I could fuse more if needed.

Fabric pull of batiks

I was enjoying the class but when Lisa got to cutting curves, I was thrilled. This is exactly what I wanted - line are fine but curves add flow. I add curves whenever I can, especially if there're no sewing involved! 😊

Block 3

Block 4

Block 5

These first 5 blocks are roughly 6" square. I tried to keep them simple, but that's very hard for me - I'm a "more is best" kind of gal!

These next 3 blocks have slightly different shapes.

Block 6 - Do you see a moon there?

I simplified these next 2 blocks because I figured that I would add more if need be. Also, by the time I made these Saturday evening, I couldn't tell which side of the fabric the fusible web was one (it's difficult for the light fabric but obvious for the darker ones!)

Block 7 Just flowing

Block 8 - not really finished since this is the one that I will probably
 have to change to make it fit with the others.


Possible layouts

I found this to be the most difficult part. I did take lots of pictures of layouts but each block could, in theory be laid out in 4 possible ways since there is no right-side up here!

My thought process:

  • The first thing that I noticed was the very dark purple in three of the blocks. I think that they need to be balanced somehow.

First layout - balance the dark purples?
  • I think that this balanced the dark purple blocks.
Second layout - balance the odd shaped blocks
  • I think that most of the blocks are interchangeable except for the 3 that are different sizes. 
Third layout - more balancing?
  • I believe that this may be the best balanced layout....but I'm still learning and I can't wait to get feedback from Lisa.
  • The bottom right block may need to be redone, or at the very least cut up. I like the outside striped border but the rest could be redone - maybe into two, either attaching the left side to the block next to it (not bad but not great) and then fixing up borders for the other part.
Fourth layout....maybe?

You'll just have to come back to see the finished project...by the end of February!

February's One Monthly Goal 

Finishing this quilt is my OMG for the month of February. I'm excited about this piece and don't want it to get lost in my WIP pile 😊 Thanks Patty for the great motivational  party!

What I learned

  • Tips for working with Fusible Web:
    • I pressed the pieces of fusible-backed fabric onto a piece of Pellon Wonder-Under Transfer Web backing. This lets you pull the fabric off of the backing and keep adding more fabric. You can also use parchment paper.
    • When I wasn't sure on what side the fusible web was attached, I pressed the fabric piece between 2 pieces of the backing. The fusible web is on the side that is attached to the backing (rather than on your iron). I did a lot of that too until I thought of this.
The side with the fusible web 
sticks to the backing paper.

Pressing the fabric between two sheets of 
fusible web backing


  • Lisa is a great teacher - laid back, organised and very knowledgeable. 
  • She also teaches this course online. During her class, she showed us an introductory video that featured her quilts in this technique, as well as quilts by other students. It's always great for inspiration to see what can be done.
  • She is a very generous teacher, and after our 3 hour class, she sent us a link to the first half of her online, on-demand class. It's really excellent and was a great reminder of what we had learned. As you can see, I highly recommend her classes!
  • During our next 3-hour class, we will learn tips for putting the whole quilt together (without stitching!) and then quilting and finishing it. I think that I've done most of my blocks but I want to see what Lisa advises before I cut and make adjustments to finish it. 
  • I figured out that I need one of those circle templates - it was difficult using objects to make the circles on these!
Related links
Linking parties
I will be linking up to the February OMG party as soon as it opens. I am also linking up to Kathleen McMusing's Tips and Tutorials on the 22nd, as well as many other fun linking parties. Monday Making, Design Wall Monday, Midweek Makers, Put your foot down, Needle & Thread Thursday, Off The Wall Friday, Free Motion Mavericks (it's Muv's turn - check it out!), Finished or Not Finished Friday, Patchwork & Quilts, Oh Scrap!, 15 minutes to Stitch 2022


Thursday, January 27, 2022

FMQ Lake Louise on Free Motion Mavericks

Welcome to week 366 of Free Motion Mavericks. If you're looking for the Polar Bear Blog Hop, click here

I'm still working on free motion quilting (FMQ) the tan stripe with Canadian nature scenes from coast to coast. Our stop today is Lake Louise in Alberta. It's an incredibly beautiful lake surrounded by mountains, and is also part of Banff National Park. 

FMQ Lake Louise

It's rather difficult to take pictures of the quilting so far since it's all tan on tan. Below you can see the lake, mountains and trees. There's even an attempt at adding Château Lake Louise in the foreground.

Adding Lake Louise as we head east into Alberta

I've been going through some of my postcards and found a few that will be useful to help me add nature scenes of Canada on the tan stripe. 

Postcard of Lake Louise

I though that it might be interesting to see the stitching from the back - it stands out a lot more, for better or for worst. Here is the FMQ done so far.

Lake Louise, mountains and forests from the back of the quilt

Heading west, the mountains, forests, river and a bear - from the back

The west coast - the ocean and a whale as seen from the back


What I learned
  • Seeing too much details in the FMQ also includes the less than perfect sections.
  • We are supposed to embrace our imperfections...right? I'm doing that by sharing them 😊
  • I quilted this section too quickly but really, in the grand scheme of things, no one will notice.
  • I'll be researching the Prairies next - from the ranches to the fields, with a few National Parks added for interest.
  • About my thread issues. I'm still FMQ with the spool of Omni thread - it's really going well. I did go on a road trip with my daughter to pick up Glide thread at 3 Dogs Quilting. I brought my fabric and Pauline helped me match them. I'll be using the thread when I finish this tan stripe, or when I run out of Omni thread...whichever comes first!
Related links

Linking parties
I'll be linking up to many fun linking parties. Let's see what's going on out there. Put Your Foot DownOff the Wall FridayFinished or Not Finished FridayPatchwork & QuiltsMonday Making,


Free Motion Mavericks

Thanks to everyone who linked up last time. It was great to see the many projects. I do hope that you saw Nancy's table runner, made with blocks that she and her friends made. Nancy of Grace and Peace Quilting free motion quilted matchstick, stitch-in-the-ditch, and micro-meander. If you've considered doing micro-meandering, check her post for her tip! 

This is one block of Nancy's runner. Check out the entire runner here!

It's now your turn to link up!

You are invited to the Inlinkz link party!

Click here to enter

Wednesday, January 26, 2022

A true polar bear story

Hi! Welcome to my post of the Polar Bear Plunge Blog Hop. Many thanks to CalicoJoan of MooseStash Quilting for organising this wonderful event. When I saw the theme, I had to participate....not sure why but I was really drawn to it...and then I found this. So, let me tell you a true story 😊 

An unexpected visitor


Castaway of the North (1930's)

This was in May, in the 1930's. The Collin family lived in a village across from the islands of the Mingan Archipelago National Park Preserve (off the North Shore of Québec). 

Map of Eastern Canada with the North Shore of Québec.
The red dot is roughly the Mingan Archipelago National Park Reserve.

Mrs. Collin was the village's telegraph operator. That night, she received a telegraph. After reading it, she goes up to wake her husband. While she tells her husband that the lighthouse keeper, Mr. Vigneau, has spotted a polar bear, their teenage son John wakes his brother Gerard. Intrigued, the boys decide that they will be the first to see this polar bear.

Travelling by ice flow

Although very unusual, there are sometimes sightings of animals that have drifted down on ice flows from the North. 

While Mr. Collin and Mr. Vigneau are assembling a group of men, the boys take their own boat and head to the island illuminated by the lighthouse.  Ashore, they see the polar bear's footprints deep in the snow. These end at the edge of the water. The bear is gone, having swum to the next island. 

The boys head back to their boat and make their way there. After landing on the island, they hear heavy breathing. As they look, they can see the air coming from the large polar bear's muzzle. At that moment, the bear's eyes stare directly at them. After a moment, the bear turns away and dives back into the water.

Polar bear sighting

To read a more detailed version of this story, "The Castaway of the North - A true story", see Related links below.

The making of the art quilt

I don't have many pictures of the making of this art quilt. I did start by tracing images of polar bears on tracing paper...and then time passed. I had no idea what I was going to do with these images, but as it got closer to the date, I knew that it would have to be relatively simple.

At work, on the Parks Canada intranet, I looked up polar bear. I thought that I would find all kinds of scientific facts....but ended up reading "The Castaway of the North - A true story". I knew that it would make a simple but interesting story. 

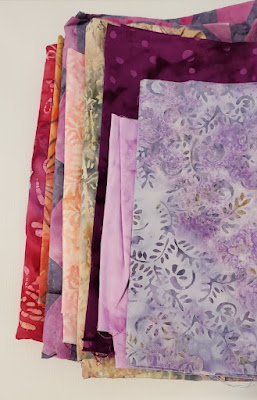
I found all the fabric in a bag of scraps of hand-dyed fabric given to me by a friend. The background blue and the light gray were perfect. I knew that I wanted a boat on the edge of the island and a lighthouse. 

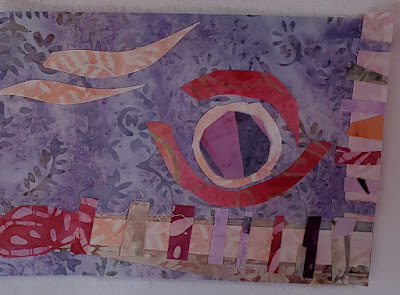
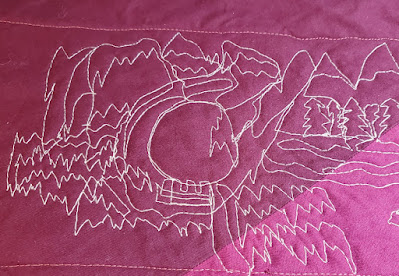
The polar bear and the lighthouse
As you may know, I've been taking some really great workshops with TextileArtists.org. Many of them include working with paper, so I thought that I would give this a try. The map is actually a piece of brown wrapping paper. I traced the map from the internet and then transferred it to the brown paper by roughly cutting out the tracing and marking the outline on the brown paper. I then coloured it using wax crayons...that was fun 😊 and I mostly coloured within the lines! Once the map was coloured I scrunched it up to make it more pliable. I covered it with clear silk organza and stitched it down. It was really great to work with. To finish it off, I found some perfect yard to couch down around it.

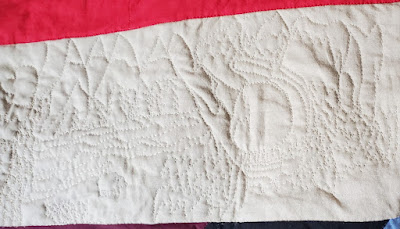
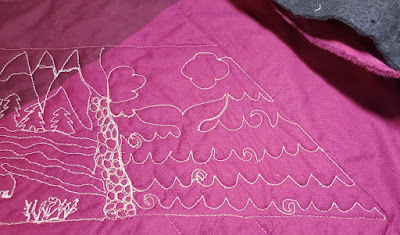
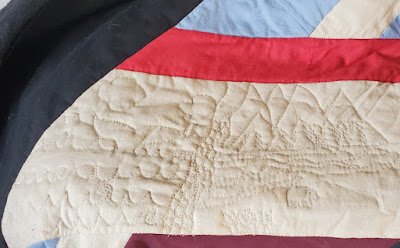
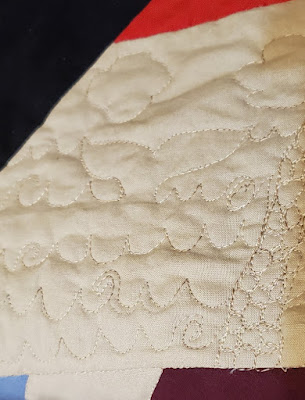
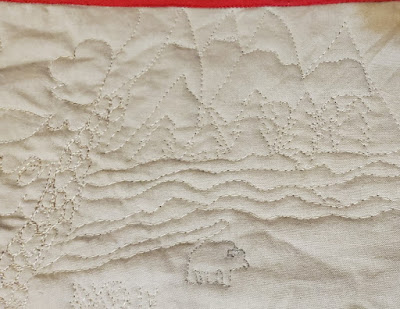
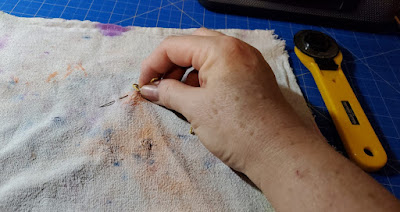
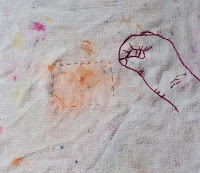
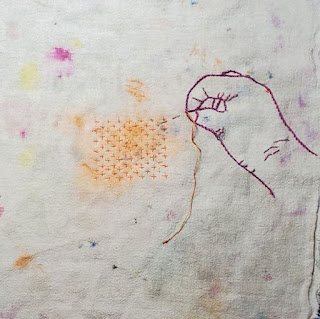
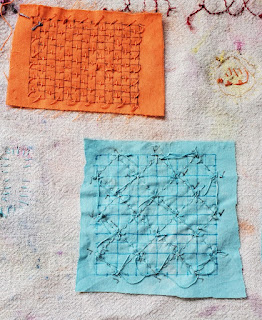
I cut out the gray foreground and added the boat. For the polar bear, I started by FMQ over the tracing paper. The picture was good, but on top of the gray fabric it barely showed up. So I added a layer of sheer white fabric and some batting over the first free motion quilted bear and then re-did the FMQ from the back, following the first outline. I then cut around the fabric and batting. It came out really well. I used black thread to embroider the eyes, nose, and ears.

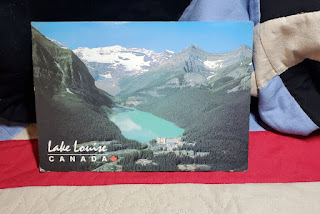
The image of the lighthouse comes from a postcard of Eastern Canada. I just free motion quilted it on, once I had backed the entire piece with batting and backing. 

Creating the foreground with the boat and bear


It was then time to add the facing. Instead of buying specialty clips, I use paper clips. Everyone always has tons of those!

Adding facing to the piece

What I learned

  • The story was posted on the Parks Canada intranet site. I didn't want to break any rules but then I found the story posted on the Mingan Archipelago National Park Reserve's Facebook page. The link is in Related links if you want more interesting details. 
  • The story captured my imagination. It incredible that a polar bear should travel so far south on an ice flow, and I can just imagine those teenagers thinking that it would be so cool to see it.
  • I wanted to experiment with something different on this piece - so the paper map and the image from the postcard seemed right. Since I've been collecting postcards forever, it will be great to incorporate them in art pieces and let parts of them live on.
  • I am giving this to a colleague who is retiring shortly from Parks Canada. I know that she will appreciate it as she goes on to the next part of her life. 
Related links
Linking parties
I will be linking this post up to many fun linking parties. Why not check some of them out? Monday Making, Midweek Makers, Oh Scrap!, Put Your Foot Down, Off the Wall Friday, Beauties Pageant, Patchwork & Quilts, Slow Sunday Stitching, Peacock Party

Participants:


Project details


Castaway of the North
10½" x 9"
Materials: hand-dyed fabric, silk organza, brown wrapping paper, postcard, commercial fabric
Techniques: drawing, colouring, free motion quilting (FMQ), embroidery


Thursday, January 13, 2022

Back to Version 2.0 on Free Motion Mavericks

Welcome to week 364 of Free Motion Mavericks! The new year has begun and the biggest goal that I have to accomplish this year is Version 2.0 of my son's quilt. No more excuses....there will hopefully be progress posted at least once per fortnight when it's my turn to host!

FMQ Canada's beauty starting with the west coast

Stitching Canada's natural beauty

If you remember, my mother hand-quilted the original quilt with themes based on what my son liked. The large tan angled strip at the top was originally quilted with tree motifs for his life in Northern Ontario. I've decided to quilt it based on the nature found within Canada's provinces, going from west to east. 

I've divided the tan strip in roughly 5 sections based on Canada's geographic areas (West Coast, Prairies, Ontario, Quebec and the Maritime provinces) I will try to add the North somewhere in there too!

I started with the ocean. Many years ago we went to Vancouver and Victoria and saw some whales. Can you spot a whale in there? 

Coastal waters and a whale

After that comes the mountains of course! There are rocks and pebbles to separate the water from the land, then, mountains, trees, a river, plants and a bear! 

I'm not sure what to quilt at the bottom since I don't want this to be too densely quilted (I know...too late!) I think maybe just another tuff of plants like the first one.

The West Coast with mountains, forests, a river and a bear.

Here is the map of the quilt and its original quilted designs. I'm now doing the tan stripe that says "trees". The stripe is about 65" long by 6" wide.

What I learned

  • I've enjoyed researching ideas for quilting this section. There are so many fun, iconic images for each region.
  • I may somehow insert the North within the prairies since a good chunk of the North is over the prairies.
  • I even googled how to capitalise the geographic areas. Hopefully I got it right! (Should I capitalise Google when it's a verb? 😊 I decided not to!)
  • I better make some of the other quilting simpler, otherwise it will take me years to quilt this!
  • I looked at my related links and the original PowerPoint that I created and realised that I already have a whole bunch of ideas for the quilting...so I'm going back to that planning to see how it can help me!
  • I love my cotton thread but it did not want to FMQ on this quilt. The tension was not good, even after trying a couple of kinds of different brands. So I'm using some Omni thread that I bought as part of a trial pack from Superior Threads (when the exchange was good here...sigh). It's working very well. However, tan is the only colour I have, so I'm going to pick up some Glide thread since it comes so highly recommended by many of you (thanks!). I'm going to take Friday morning off for a little road trip to pick up thread....life really has gotten dull, hasn't it? Oh well, I will enjoy my drive (cold and sunny forecast!) and probably stop in at a drive-through Tim Horton for breakfast. When life gets basic, you have to appreciate the little things!😎
Related links

Linking parties

I'll be linking up to many fun linking parties. Let's see what's going on in Internet Quilt land! Put your foot down, Finished or Not Finished Friday, Peacock Party, 15 Minutes to Stitch 2022, Design Wall Monday, Monday Making


Free Motion Mavericks

It was a very quiet week last time but I did want to thank Gail of Quilting Gail for linking up the announcement for her PHD in 2022. If you participate, you may end up linking up lots of past UFOs as you FMQ them! It's not too late to participate...you have a couple of days left!

Get those UFOs done! with Quilting Gail

It's now your turn.

You are invited to the Inlinkz link party!

Click here to enter

Sunday, January 09, 2022

Wishes for 2022

After the holidays, it was good to start 2022 calmly and quietly. I did a little bit of free motion quilting (FMQ) which I will show you at the end of this post. Today I want to share with you a very fun project - another squirrel!

Stitching on a clean-up cloth

The first workshop of the year at TextileArtists.org was presented by Vanessa Marr. It's called Domestic Story Cloths. Vanessa stitches stories of women and domestic work on dusters. I was intrigued by the workshop and took a couple of days to think about the possibilities. 

please let me play - a work in progress

I knew that I didn't want to stitch on a duster since I really, really dislike housework. Finally in the laundry room where I also do my dyeing, I found a cloth that was perfect. It was a rag that had been used to clean but it was so much more! It had splashes of dye and also needed mending. It was perfect! 😊

I started by taking a picture of my hand holding a needle. I put the image on my laptop screen and then drew it out on tracing paper. Finally I used my light box to transfer the image onto the cloth. 

Picture of my hand stitching used in the piece

I used a wonderful shade of fuchsia perle cotton to embroider the hand with a stem stitch. At this point I wasn't sure what else would be on there except for some boro and sashiko. I learned two kinds of sashiko - the hitomezashi and the moyouzashi and used one of each on this piece.

Ready to add the sashiko

Using a hitomezashi stitch - Offset crosses


Here is the second sashiko, which actually is a moyouzashi stitch. It's a diamond variation. The blue blends into the fabric but it's very pretty. You can see the back of the piece from which I stitched.

The back where you see the stitching grids

This is a moyouzashi stitch -
diamond variation


Adding lovely colour
Of course I had to add a few other fun stitches and techniques on here 😊. 

The first thing I did was add a pretty piece of hand-dyed linen and stitched on it.

In the image below, I cut out two circles and embroidered the inside one. To show that a rag can be precious too, I added a circle of gold thread that I had purchased for Hannah Newton's goldwork workshop. 


Adding gold thread


Adding words to tell the story

It took me a while to figure out what I wanted to say on the cloth...and then it hit me.... a plea to just let me play, which is really what I've been wanting to do since I was a kid. As you know, there is a count down....it's now at less than 10 months!😎

I practiced writing the words a few times and then very carefully used a frixion pen to write it on the cloth. I used my favourite hand-dyed thread to stitch it.

Adding the words

To emphasize the word, I drew the letters, cut out the templates, added Heat and Bond to the back of the fabric, cut them out and then ironed the letters on. I've only gotten the "L" stitched so far.


Stitching the word - not quite finished.

I'm really looking forward to finishing this piece. Since I'm still doing the #100dayschallenge on Instagram, I figure that I can get it finished by the end of the month.

Update on Glimpses of Joy

Since my machine is back, I did a little bit of FMQ on my Glimpses of Joy piece. I love the extra FMQ that I did. As you can see, I'll be adding the word JOY (not sure with what fabric yet). I also finally know what to do with the rest of the piece. Again, because of my posting on #100daychallenge on Instagram, I hope to have this one done within the next few weeks.

Glimpses of Joy - almost there!

What I learned

  • As you may have figured out in my post, my wishes for 2022 are calm, joy and play!
  • It was different stitching right onto the fabric of the rag. It's sort of flimsy yet it bounces back. 
  • I was looking for the link to the post on the goldwork workshop that I did with Hannah Newton but it seems that I never wrote it, so I'll try to add that soon.
  • I'm sure that I'll be adding more stitches on the "please let me play" piece, so I'll post it when it's done. I'm thinking of attaching it to a canvas frame - we'll see how that goes.
  • I'm really liking the Glimpses of Joy piece. Funny how I like it, then don't (usually because I don't know what to add to it) and then I like it again once I have a vision. It's a good thing that there is no deadline for any of these.
  • I'm still posting on Instagram - if you're curious you can see the images on the left side of my blog.

Related links

Linking parties

I'll be linking up to many fun linking parties. Let's see what's going on out there in quilting land 😊 I'm linking up with Muv on Free Motion Mavericks. There are still a couple of days left to link up your posts! Patchwork & Appliqué, Slow Sunday Stitching, Oh Scrap! Design Wall Monday, Monday Making, Midweek MakerPut your foot down, Off the Wall FridayPeacock Party, Oh Scrap!