Showing posts with label eco printing. Show all posts

Thursday, September 25, 2025

Embroidering Mercury Retrograde

Hi and welcome 😊 I finished the Mindful Stitching project that I mentioned in a mid-July post. At that time, I had completed the tree and its roots. The background is an eco-printed linen fabric from a while back. When I shared this project, it was pretty traditional - now it's more metaphysical.

Mercury Retrograde - Strong Roots Required!


I love the picture below - the light behind the piece makes it so dramatic! 

Mercury Retrograde - Strong Roots Required is finished

The photo below, taken on the cement deck, shows some of the details better. The very top of the piece is a pocket made of white and sparkling tulle and contains a variety of thread. It was meant to be ethereal.

The next section in orange-brown is embroidered using chain stitch. The yellow section coming out of the door includes many different yellow thread in running stitch layered with tulle. The rays of light end at the heart located near the top of the tree. 

Mercury Retrograde - Strong Roots required!

As I mentioned in my original post, "I used a double and single chain stitch for the tree, and the feather stitch for the roots. I chose these stitches after watching Mirjam Gielen's branching video on Patreon. She's a great teacher and uses stitches in a very creative and organic manner." 

The beginning of my Mindful Stitching piece

Sketch of the branching of the tree and roots

What I learned
  • I found it difficult to keep going after finishing the tree and the roots.
  • Part of it was that I loved it and didn't want to "mess" it up!
  • I knew that I needed a door with light streaming through...but what else?
  • After using tulle in the stitching of the light, I thought that it could be used at the top of the piece to give it an ethereal quality. 
  • I don't often use my sketchbooks but drawing the branching of the roots and the tree really helped me get a feel to embroider it.
  • It's been a real joy to embroider on my eco-printed fabric. I have quite a large piece that I'll be able to cut up and stitch on.
Related links
Linking parties
I'll be linking up to many fun linking parties. Why not check some out after linking below? Monday Musings, Sew & Tell, Put your foot down, Beauties Pageant, 15 Minutes to Stitch 2025, Off The Wall FridayPatchwork & Quilts,  Slow Sunday Stitching

Great news! Mercury Retrograde - Strong Roots Required was featured by Denise at Put your foot down

Free Motion Mavericks

Welcome to week 550 of Free Motion Mavericks! I hope that you'll be linking up below. I'm on vacation so I'm sorry that I can't feature any of your projects this week. If I can, I will be visiting but it depends a lot on whether or not my data works as promised!πŸ˜‰

Please party without me 😍. I'll be back soon! πŸ˜€


You are invited to the Inlinkz link party!

Click here to enter

Thursday, July 17, 2025

Hexies and a Mindful Stitching Project

Hi and welcome 😊 Thanks for joining me today! I've noticed that for some reason, I now have many new followers. I'm glad that you're joining me on my stitching journey. Sometimes it's very busy here, but mostly I try to keep it slow and steady. This week, it's been mostly slow stitching as I estivate. 😁 I'm hoping that the expected cool nights will perk up my sluggish energy.

More Hexies


I've been enjoying making more hexie flowers using the English Paper Piecing (EPP) technique. It's very relaxing - there's no rushing it! I also love finding the right fabric to go into each hexie flower.

Hexies posing in front of one of my colourful art pieces

Since I usually make hexies from my scraps, it's sometimes difficult to find enough fabric that match to make these larger hexie flowers. 

Bright colourful large hexie flower

I made this one with three pieces of purple scrap fabric that I got recently. They are so much fun!

Purple scrappy hexie

I got a lot of scrappy dot fabric from a friend and I've been using quite a bit of it to make these hexies.

Very red hexie with dots!


Mindful Stitching on Eco-printed Fabric

I just started a small embroidery piece. It's stitched on a piece of eco-printed linen. The eco-printing didn't take that well, but it makes a lovely background to the embroidery. The embroidery is about being grounded in times of turbulence. 

Grounded embroidery piece in progress

I used a double and single chain stitch for the tree and the feather stitch for the roots. I used these stitches after watching Mirjam Gielen's branching video on Patreon. She's a great teacher and uses stiches in very creative ways. 

Tree embroidered using double and single chain stitch

I'm still working on the roots. It took me a while to figure out how to make these since the feather stitch goes up instead of down. I finally figured out to start at the bottom of the piece and make my way up, while intersecting other branches. It worked 😊

The roots, deep in the earth

Sketch with the branching of the tree and roots

What I learned
  • There were no backyard animal antics this week. I did have my coffee outside a couple of mornings but it's been so hot that the animals have all finished their foraging by the time I get up!
  • I made these cute hexies. It's nice to have something to do that is relatively mindless and is quick and easy. 
  • Now that the studio is tidy, I want to take out the new fabrics I bought recently to make more hexies. Since they are mindless, I get bored very easily - so I need different fabric to play with!
  • I love the small embroidery piece that I'm working on. It was great to sketch something quickly and then stitch it. I got a lot done in a few hours.
  • I joined in the Community Stitching with the TextileArtist.org Stitch Club today. I got a lot further stitching the roots.
  • Soon I'll have to figure out what goes at the top. I have a few ideas....πŸ˜‰
  • I'm listening to the audiobook of Women's Work, The First 20,000 years by Elizabeth Wayland Barber. I read it about 20 years ago and heard a podcast about the impact that the book had. 
Related links
Linking parties
I'll be linking up to many fun linking parties. You might want to check some of these out! Sew & Tell, Put your foot down, Off The Wall Friday, Finished (Or Not) Friday, Patchwork & Quilts, 15 Minutes to Stitch 2025, Oh Scrap!, Slow Sunday Stitching

Free Motion Mavericks


Welcome to week 540 of Free Motion Mavericks! It was another productive week! Thanks for linking up. Here are the projects from last week that included FMQ, ruler work or walking foot quilting.

Kat of Scrapbox Quilts learned to FMQ watching and following Angela Walters. Angela sells this printed fabric so that you can follow along with her FMQ. The FMQ on this quilt is absolutely gorgeous. You really need to check out Kat's post to see that delicious quilting 😍

Most of the quilt, FMQ by Kat

Details of the FMQ by Kat

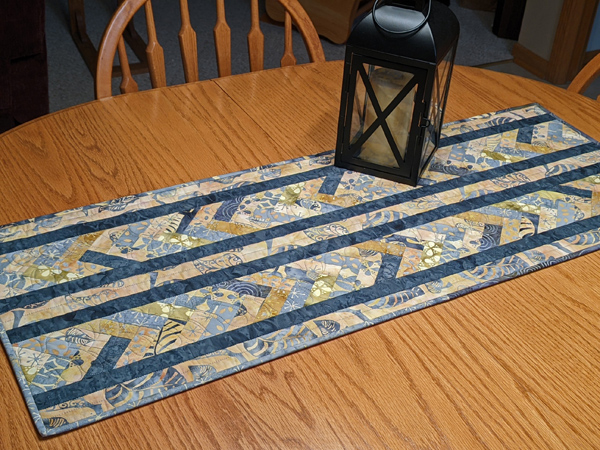
Vicki of Vicki's Crafts and Quilting has been busy making and quilting a table runner and some banners. 

Lovely gray and yellow batik runner by Vicki

Sunflower banner or wall hanging by Vicki

Hallowe'en Banner by Vicki

Melva of Melva Loves Scraps finished her Crown Royal quilt. She made a two-colour flange binding for it. . Check out her post for details.

Crown Royal Quilt with flange binding by Melva

It's now your turn!

You are invited to the Inlinkz link party!

Click here to enter

Thursday, October 10, 2024

Joyful Embroidery with Fleur Woods and Free Motion Mavericks

Hi and welcome! 😊 I hope that the change in weather is not too rough on you. I was not enjoying the extreme heat but it would be nice to have temperate weather for a little longer. It looks like we'll be enjoying a couple of warmer days at the end of the week and I'm very grateful that it's not below freezing yet! 🧀 I'm in Canada - what can I say, weather is an important topic of conversation here.

Painting fabric to stitch on 


Being very keen to take the class, I signed up for Fleur Woods' class, Joyful Embroidery the first day enrollment opened. I don't normally watch courses ahead of diving in but I think that I was a little intimidated and watching the videos helped me to see where we are going. Eventually I started doing.😊

Flower drawn on painted fabric - ready to embroider

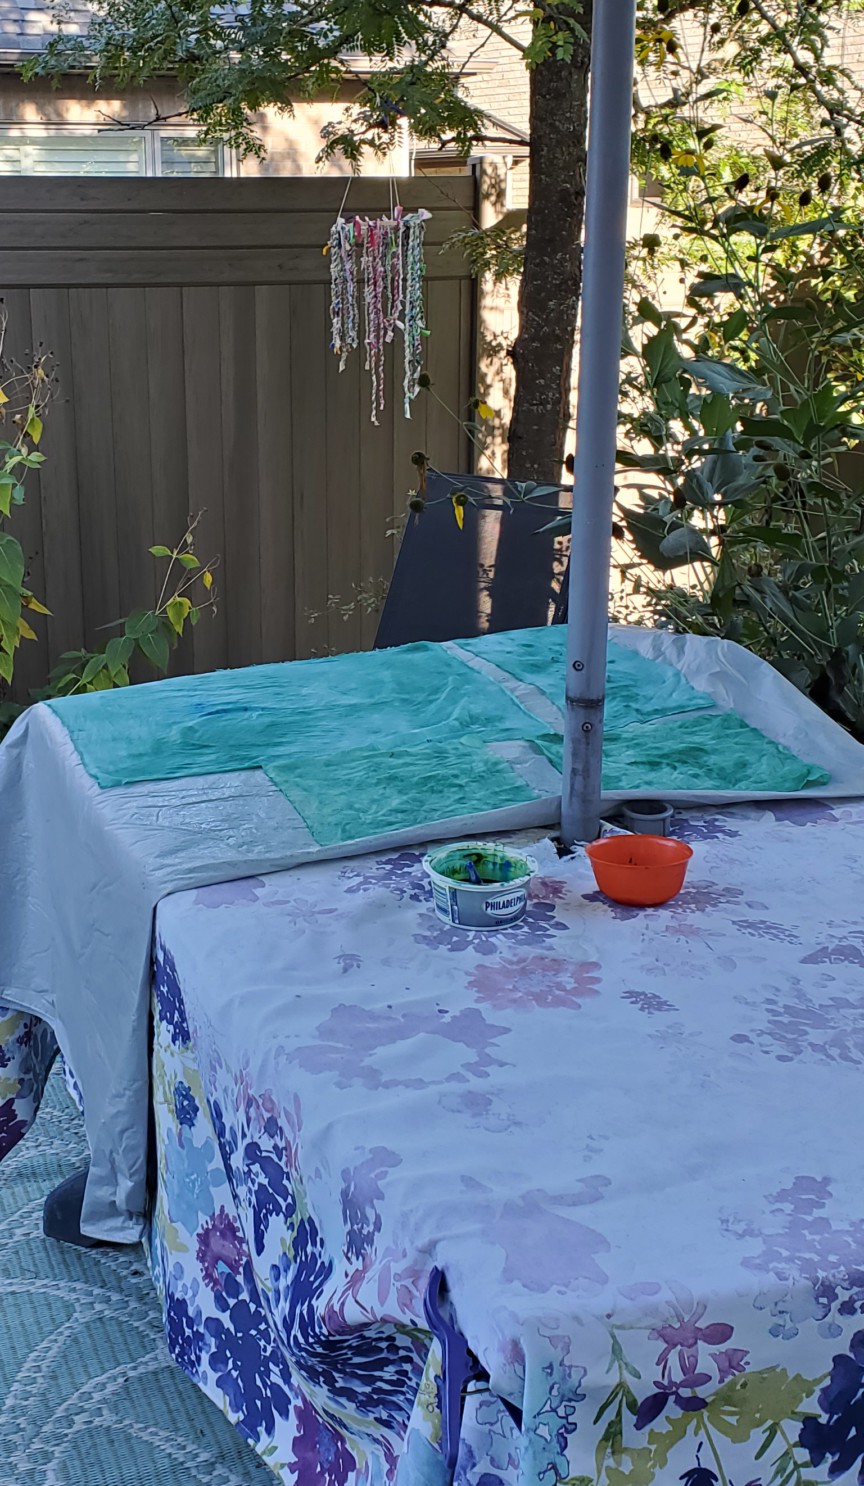
One of our first tasks was to paint some fabric. I think that half of the fabric is linen while the larger pieces are cotton. I mixed up some blue and yellow with the Colour Vie pigment system. I know that it works well on fabric. I watered it down a bit to get a soft wash.

Painted fabric drying outside

Since it was quite cool outside, the fabric stayed out overnight and dried in the morning sun. I took pictures as soon as they were dry but they were very wrinkled. I don't mind some wrinkles but this was too much, so I ironed it and it looks so much better!

The two top pieces on the left are a loose weave linen while the rest is cotton. It's mostly a mottled teal green, with more green than blue. I did have a few splatters of blue on the cotton that I decided to keep - it adds interest and shows the painting process.

Linen squares on the top left with cotton

Practice Stitching


After painting the fabric I decided to start doing the practice stitching. These are all stitches that I've done before and I have so many samplers everywhere that I decided to just stitch up a little area on my eco-printed fabric piece to practice almost all of the stitches. Here it is below. I'll have to use some of these stitches elsewhere on the piece so that it doesn't look out of place.

Practicing most of the stitches on my eco-dyed piece

The only two things that I didn't put on this piece was the Turkey stitch and beading. I added these to a challenge piece that I'm making for the Out of the Box (OOTB) Fall Fling show. More about that below.

Sketching flowers


As you saw at the beginning of the post, we had a section on drawing. I'm not very good at it but with practice I am getting better. Since most of my garden is past its prime, I checked out my photos from this summer. I took these two photos at the beginning of September. I just love that the birds are eating the seeds of the flowers instead of just going to the bird feeder!

I used the image of the flower, without the bird

Using the image of the flower at the bottom

Here are my two sketches, transferred onto fabric using a light box

I just want to mention that I'll be using my special journal to take notes and keep my sketches.

Joyful Embroidery Journal

OOTB Challenge


This spring I helped to organise a brown bag challenge for Out of the Box (OOTB) fibre artists group. Everyone who wanted to participate put a few things in a brown bag for someone else to use in their challenge piece. I had a little bit of plaid fabric, plain white fabric, two kinds of ribbon, a snowflake button, a green flower button and pieces of green felt and red leather. I used a little bit of most of it in the piece, as well as some scraps that I picked up at my quilt guild. 

My OOTB brown bag challenge piece

I used the Turkish stitch as well as beading (one bead!) from my Joyful Embroidery sampler exercise. You can see the small tuff of Turkey stitch at the top middle of the piece. The bead is on top of the felt and leather circle at the bottom. I pulled apart one of my daughter's large bracelet. 

Close up of the challenge piece "2B Merry!"

You'll notice that I used a bit of home-made twine in the piece and to hang it up. I really love making twine 😍. I'll be adding the flower button and the other ribbon on the back, as part of the label, which will be written up on the white fabric.

"2B Merry" reveals its secret!

Out of the Box (OOTB) Fall Fling


My piece will be part of the Challenge exhibit at Fall Fling in a couple of weeks.

What I learned
  • I am really enjoying the Joyful Embroidery course will Fleur Woods. Watching most of the course ahead of time has helped me figure out what I want to do and has lowered my anxiety.
  • I stitched up the practice stitches on my eco-printed cloth as well as in a couple of blocks in my Almost Daily Stitching project of 2024. That was a great way to practice without having to start a new sampler.
  • In the course, instead of doing the Turkey Stitch which is a very time consuming stitch, we will be learning to do Punch Needle. I just received my Oxford needle punch from Robin, my local distributor. I took her rug hooking course a few years ago. I'll put the details in the Related links section below.
  • I enjoyed watering down my Colour Vie pigments and painting the fabric with it. It's going to make a great base for the embroidery. Since I had lots of paint left, I painted a few sheets of water colour paper so that I can use it to sketch on, before embroidering. You can see the paper in the first image of this post, above the fabric and sketch.
  • I've also been stitching on eco-printed paper (more in another post) so I could also use those painted papers to embroider on. That would be very cool!😎
  • I had a lot of fun working on the "2B Merry" OOTB challenge piece. The background fabric is a swatch of upholstery fabric that I got from a fellow artist. What a great way to use it! I also stitched around one of the grommets. It's great to be able to keep it to hang the piece. 
  • I didn't have to stitch around the second grommet since it's hidden by the fabric of the twine.
  • I haven't really done anything to enter into the Fall Fling show yet. I'm not sure that I'll have time to make anything before then but I will be attending both days since I'll be sitting at the membership table. 
Related links
Linking parties
I'll be linking up to many fun linking parties. You might want to check some of the out, before you link up below! Monday Musings, Design Wall Monday, Sew & Tell, Midweek Makers, Put your foot down, Needle & Thread ThursdayOff The Wall FridayBeauties Pageant, TGIFF, Patchwork & Quilts15 Minutes to Stitch 2024, Oh Scrap!,

Free Motion Mavericks


Welcome to week 502 of Free Motion Mavericks! It was a very productive week! Thanks so much for linking up😊. Check out these amazing projects from last week that included FMQ, ruler work or walking foot quilting. 

Last week Preeti of Sew Preeti Quilts had two quilt patterns published! Both of them used the Peppermint Sprinkles collection of Island Batik fabrics. The first quilt, "Good Tidings" is in Annie's Christmas Pattern book while the second, "Austin", is in Make Modern #60. Check out Preeti's post for links to the patterns.

Preeti's "Good Tiding", now in 
Annie's Christmas Pattern book 

Preeti's  "Austin" is in Make Modern #60

Donnalee has started making more table toppers for her guild's sale in 15 months!  Check out her first three.

More table toppers by Donnalee

Melva of Melva Loves Scraps quilted up a lovely vintage table cloth, ready to use for tea. 

Melva's lovely quilted vintage table cloth, ready for tea!

Kathleen of Kathleen's McMusing created a lovely quilt, "Accidental Stars" for the Flower Pot Blog Hop. I really love the quilt's secondary pattern.

Kathleen's "Accidental Stars" quilt

Margo of MY Quilts and Crafts finished her baby quilt as well as a fabric basket. Both are lovely!

Margo's finished baby quilt

The perfect gift basket by Margo

Thanks so much for linking up and visiting! It's now your turn 😊

You are invited to the Inlinkz link party!

Click here to enter

Thursday, August 15, 2024

Eco Printing on paper and Free Motion Mavericks

Hi and welcome. I hope that you've had a fun sewing, stitching, making week - whatever you love to do! The Ottawa weather is still hot but the evenings cools down, so all is good here 😊 I went on a road trip to Vankleek Hill with my BF to visit the Impermanence - Γ‰phΓ©mΓ¨re Outdoor Fibre Art Exhibit. I'm happy to say that everything still looks really great. Severe storms hit at the end of July but the art suffered only minor issues that were resolved.

Eco Printing on Paper


My first attempt at eco printing on paper. Not wonderful but promising! 

First attempt - love those poplar leaves😍

A couple of weeks ago, I visited Connie, the artist who made that wonderful leaf print that I used to make "Essence of Leaves"  (see Related links below). During our visit, I showed her how to make a journal with some of her amazing eco printed paper. We had a great time and I will be going back soon to show her how to make another type of journal. 

We talked about eco printing on paper, which I have never done. So a few days after, I bought some aluminum sulfate at the bulk store, found an article on the Internet (see Related links below) and dipped my watercolour paper in the water/aluminum sulfate overnight. 

Watercolour paper soaking in water with aluminum sulfate

When Connie and I were talking, she mentioned that with the humidity and heat that we were having, she had heard that you could put your paper in an insulated bag in the sun, instead of steaming the paper bundle. I gave it a try, but it was late in the day and the weather was actually cooling down by then. So, it might be a good idea but I ended up steaming the paper on the stove.

Bundle of paper in the sun, on the top of my swing
It didn't work

Since my bundle was ready, I put an upside down glass casserole at the bottom of my pot, added water, placed the bundle of paper on it and weighted everything down with more glassware. 

Bundle in the casserole, weighted down, ready to steam

It was then steamed for two hours.

Steaming the bundle of papers

I really didn't plan the plants that I used. I just put a bunch of leaves, flowers, and ferns from my backyard on the paper and then stacked up the pages. I used cardboard under and on top of the paper bundle. It wasn't perfect, but it was done and now I've learned a lot - so hopefully it'll be easy to do better the next time!😊

Plants used


The plants used make different imprints depending on what they are but also how they are placed - on the side of the ridges or not. For example, the two pages below are the mirror image of each other because the plants were placed between them. You can see on the image on the left that the long leaves (Phlox I think) show up more than on the image on the right. That's because the leaves have ridges on one side and I think that that is what shows up more.

The rounder leaves (poplar) are clearer and more colourful on the right because the ridges of the leaves were placed facing the right page. It's the same for the fern leaf. The green blob on the left stuck to the paper - not sure what it was!

This paper was placed on top of the leaves
The paper was placed below of leaves 


Here are another page. In the middle of the left page are some rose leaves that transferred a lovely yellow. There is a flower between them, but I'm not sure what. There is also a different fern on the top. 

More images of fern, leaves and a flower

This image contains two flowers, a Cutleaf Coneflower (large one on the left) and a Black-Eyed Susan. Above and below the flowers are two section of leaves from the honey locust tree. There came out better in the image on the left. The colour is most intense at the end of the clipped branch.

The flower prints came out well on this side
Two flowers and leaves


Once I took the pot off the stove, I removed the papers to cool them off and then within an hour unbundled everything. I read that taking the plant material off before they dry is easier than when you wait.

I love the colours that came through. There isn't any great compositions here but cutting out various leaves to insert into a journal could be lovely. I'm not sure what else I can do with the papers but it was easier to do than eco printing fabric.

I think that one of the reasons that the colours are so vibrant is that I didn't rinse the pages - I just let them dry. The fabric that I eco printed a few years ago looked its best before washing. Unfortunately a lot of the colour washed out. 

What I learned
  • Equipment
    • The glass casserole dish at the bottom of the pot was probably not ideal. Something with holes where the steam can rise through would be better but I didn't have anything that fit.
    • Larger pieces of heavier cardboards would be the best way to sandwich the bundle. The flimsy cardboard didn't stand up well.
    • I used large binder clips to keep everything together. I think that was fine ✔
  • Paper
    • The water colour paper worked well but since I used flat pieces of paper, each piece got imprinted with whatever was on the other side.
    • Connie folded her paper in two, putting her material on one side of the paper while the other side of the fold got the imprint. This means that each piece of paper has a clean backing.
  • Plants
    • I picked many leaves, flowers and fern from my back yard. 
    • The ones that worked best were the poplar leaves.
    • The phlox flowers didn't work but the leaves sort of did.
    • The clips from the honey locust tree came out ok but the colour was very intense at the edge of the clipping.
    • The two flowers, Cutleaf Coneflower and Black-Eyed Susan came out well. It might be a good idea to flatten the middle so that it doesn't poke through the paper.
    • The rose leaves were a very pretty yellow.
  • There are many lists of plants on the internet that eco print well. I'll have to read up on it the next time to see if there is anything that works particularly well.
Related links
Linking parties
I'll be linking up to many fun parties. You may want to check some of them out! Monday Musings, Design Wall Monday, Sew & Tell, Put your foot downOff The Wall Friday, Finished (Or Not) Friday, Patchwork & Quilts

Free Motion Mavericks


Welcome to week 494 of Free Motion Mavericks! Another productive week - thank you so much for linking up. Here are the projects from last week that included FMQ, ruler work or walking foot quilting. 

Kat from Scrapbox Quilts quilted up four Dresden Toppers that were made by a friend. Here is the front of one of them, and the back of another. If you want to see all of the FMQ, hope over to her post!

Look at the FMQ loveliness by Kat!

The FMQ back of one of the Dresden Toppers by Kat

Donnalee's eldest daughter came to visit for a couple of weeks. They finished up two quilts by sewing on the bindings and then made two Christmas runners.

Two lovely Christmas runners made by Donnalee and her daughter

Gail of Quilting Gail made two Thanksgiving mini quilts for the Island Batik Marvelous Mini Challenge. These were designed by Tessa, age 13! Aren't they great?

Two Thanksgiving mini quilts sewn by Gail, designed by Tessa

Deb the Scrappy Quilter finished FMQ her third crazy log cabin quilt. They are all fun and different. You can check out her other two finished quilts.

Deb's third third crazy log cabin quilt

Preeti of Sew Preeti made two minis for the Island Batik Marvelous Mini Challenge. The first one is Goddess Lakshmi's Feet while the second one is Kalpataru (Tree of Life). And what do you think Preeti did with those minis? She turned them into two lovely See-Through Zippered Bags!

Preeti's Kalpataru (Tree of Life) mini

Preeti's Goddess Lakshmi's Feet 

Preeti's lovely See-Through Zippered Bag

It's now your turn!

You are invited to the Inlinkz link party!

Click here to enter