Thursday, October 26, 2023

Fall Fling Market on Free Motion Mavericks

Welcome to week 453 of Free Motion Mavericks. I have been busy getting ready for the Out of the Box (OOTB) Fibre Artists' Fall Fling Marketplace. This will be the first one held in the Fall. 

Fall Fling 2023


Fall Fling 2023 - a marketplace

The organisers had a major challenge when they found out a few weeks ago that the location that they thought they had rented, was not available. A new, even better venue was found but the posters and advertising with the old location are out there! We've all been doing our best to spread the word through social media. 

Since this is a marketplace, all of our art work must be for sale. I don't usually make items to sell for the market section of our shows, but this time I thought that I would make a few and see how I do. As I've mentioned in another post, I love all of the things that I've made, so having to bring them back home would not be a terrible thing 😊. However anything that sells can go towards buying new supplies and that would be nice!

FMQ journals and covers


In case you didn't see these last week, here are a few pictures. If you want more details, all of the links can be found in the Related links section below.

2 pink journal covers

Blue and green journal covers with very thick journals within

Hand-made books


I've also decided to put the three little library books in the marketplace. 

Embroidered stitches used for the spine of these lovely little books

Included is the journal with the hour-glass binding made of paper fabric. I haven't written a post about this specific book, but I did include it in the post about my refillable notepad cases, when I talked about paper fabric.

Journal with the hour-glass binding made of paper fabric

Front of the journal made of paper fabric

I have one refillable notepad case in the marketplace.

Refillable notepad case

The inside of the case

Small art pieces


I have three small art pieces for sale. This first one is Squirrel! I realised as I was writing this post that I never did share the finish on my blog. There are, however, pictures on Instagram.

Squirrel! made from gelli printed fabric

My Ephemera 1 piece will be in the show. 

Ephemera 1

Finally, I finished a meditation piece that I started at an Out of the Box (OOTB) playdate that I ran in July. It was very successful and I decided to see if I could stitch the finished piece on a spray painted canvas. I really love the effect. I'll be trying out more of these in the future.

Fly, fly away meditation stitched piece mounted on an 8" x 8" canvas

Since I haven't bought any business cards yet, I created these home-made price cards for the items. Between the snowflake hole and the label, I have affixed the price codes for the sale. Most of these are attached with small safely pins. 

Home-made price cards 

What I learned
  • It always takes so much more time than I expect to get everything ready for a show or sale and this time was no exception.
  • I had fun making the little price cards. I still haven't bought business cards yet.
  • I'm really looking forward to doing some shopping of my own at the marketplace.
  • If you're in the Ottawa area, I'll be at Fall Fling all day Friday. I hope to see you there!
    • Results: It was a lot of fun seeing everyone's art and pieces and of course seeing my peeps! I sold the blue and the green covered journals and the chain stitch little library book. Yeah!!! If you are a reader or you found my blog because you bought the journals, Thanks and Welcome here!
Related links
Linking parties
I'll be linking up to many fun linking parties. Why not check them out after linking up below? Put your foot down, Needle & Thread Thursday, Sew & Tell, Design Wall Monday, Midweek Makers, Off The Wall Friday, Beauties Pageant, Patchwork & Quilts, Oh Scrap!, Slow Sunday Stitching.

Free Motion Mavericks


Last week we had six FMQ link ups. Yeah!!! Thanks everyone for linking up. 😊

Denise at the Quiltery created this beautiful North Carolina Star for the Falling for Accuquilt Challenge. You can check out a close-up of her FMQ here.

Denise's beautiful North Carolina Star 

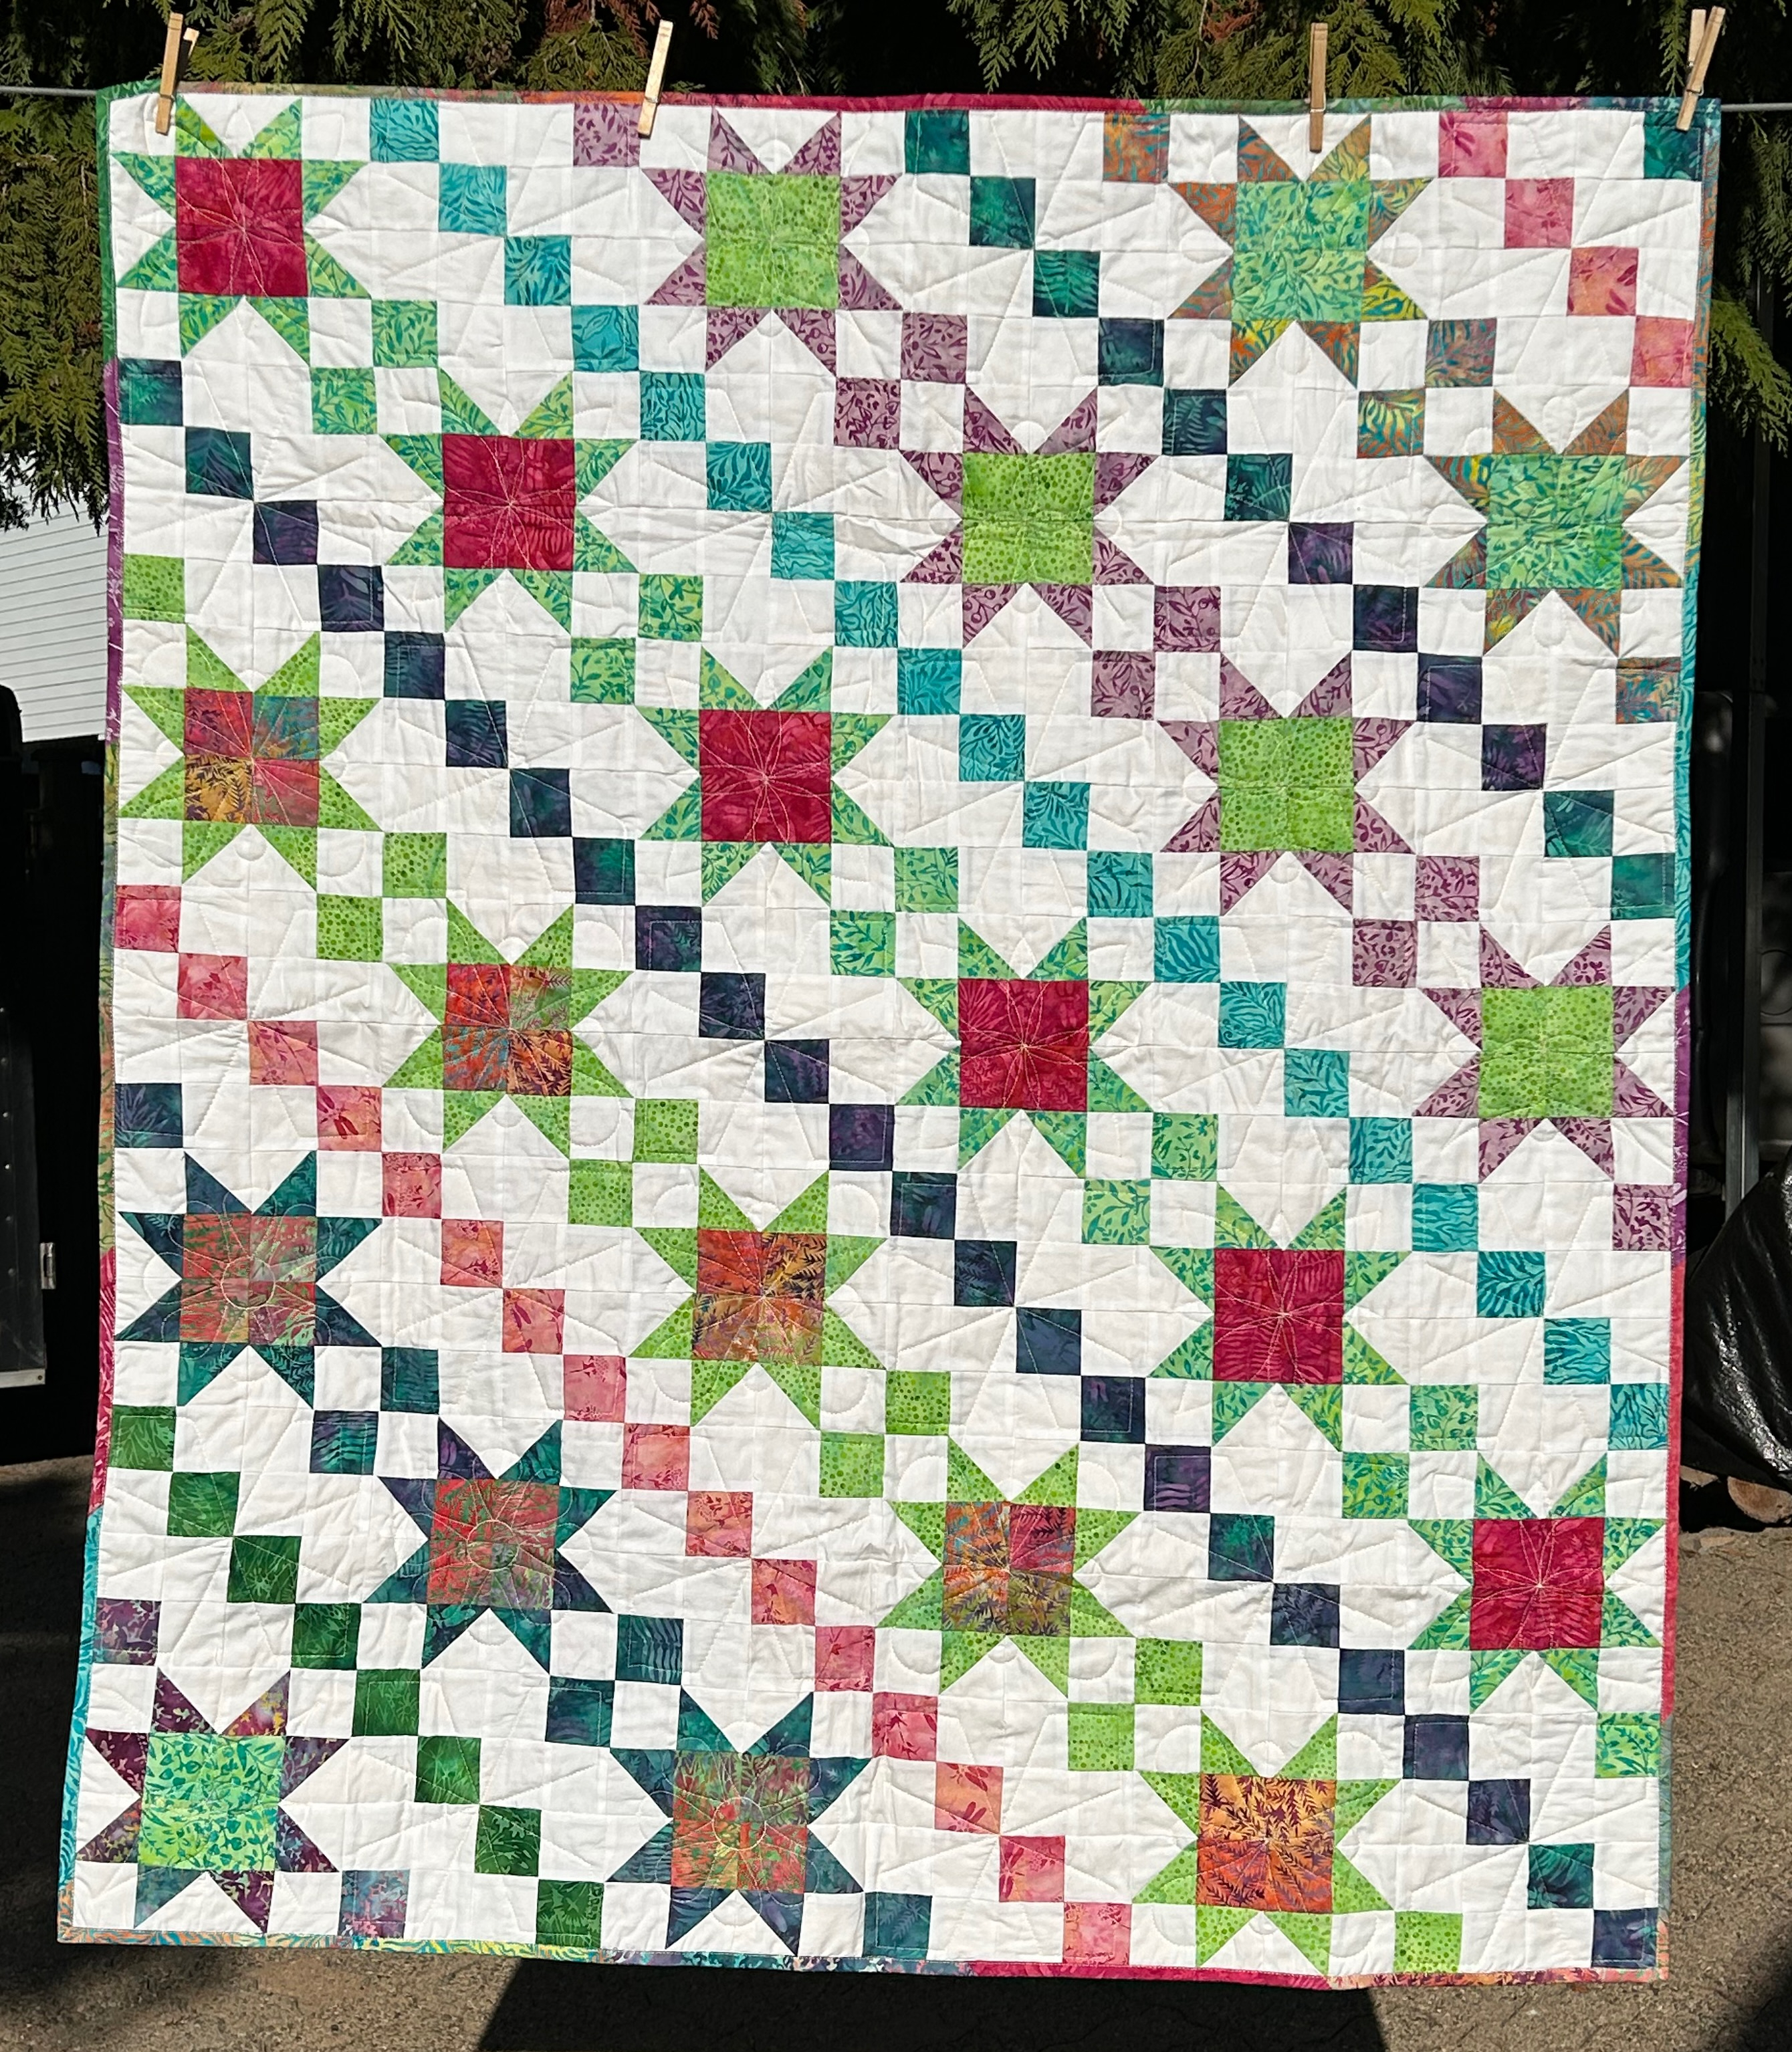
Margo of MY Quilts and Crafts designed and quilted this lovely modern baby quilt. It's a real beauty. You can find out more about it on her post.

Margo's modern baby quilt

Sandra of mmm quilts has been working on this quilt for many years. It celebrates 150 Canadian Women. Make sure that you read her post and see close-ups of some of the blocks!

150 Canadian Women quilt - 7 years in the making!

Gail had another beautiful finish! She quilted "Splendor" using 3 Silly Moon's rulers. 

"Splendor" finished by Gail

Anja finished FMQ "Blue Skies". This is the first quilt that she has loaded on her new longarm. That is a lovely finish with wavy lines and stippling. It's always difficult to quilt on a new machine. Best of luck!

Anja's "Blue Skies"

Diann of Little Penguin Quilts finished a lovely beach landscape quilt. It was her first landscape quilt, and hopefully not her last. What a great finish and a souvenir of one of her favourite places....I wish I was there too! 😊

Diann's lovely beach landscape quilt

It's now your turn!


You are invited to the Inlinkz link party!

Click here to enter

Thursday, October 19, 2023

FMQ Journal Covers at Free Motion Mavericks

Welcome to week 452 of Free Motion Mavericks. I have finally done some Free Motion Quilting (FMQ), but not on my niece's quilt yet. These were fun squirrels that I pursued for the upcoming Fall Fling marketplace with Out Of The Box (OOTB) Fibre Artists.

Making Journal Covers


The Fall Fling is like our Spring Fibre Fling except that everything on exhibit is for sale. I've been slowly getting ready for this event and am finally ready. Here are my first two finished journal covers.

Blue and Green Journal Covers

The fabric for these first two covers is made by Gunnel Hag, a Canadian textile artist. Every once in a while, I go to her Etsy shop and treat myself to a couple of pieces of fabric. They are always colourful and fun. 

I also bought very thick journals to go in the journal covers. They are as close to a hand-made look as it gets and have lovely scalloped page edges. I also love the fabric that I used for the lining. If they don't sell, I will be very happy to keep them, although I have so many journals already 😁

The inside of the blue journal with one of my favourite fabrics

The inside fabric of this journal is a green ombre with purple, pink and blue dots. I used the dark green part for the lining.

The fun ombre fabric lining with purple, pink and blue dots.

Here are photos that show the FMQ on the journal covers.

The blue fabric was very difficult to FMQ and I should have listened to my intuition when it told me that I shouldn't follow the lines of the diamonds. It's a good thing that I started on one end so that when it didn't work out, I moved over and quilted in a spiral. It also helped that I used dark blue thread, so it doesn't show up much.

FMQ the diamond patterns in a spiral shape

Front of the journal cover

Back of the journal cover

I did, more or less, follow the shapes in this crazy ribbon shaped fabric. I started with a turquoise/brown variegated thread that looked quite good. About halfway through, I stitched around the brighter yellow/green with a bright lime green thread. I then finished up with the original variegated thread. 

The FMQ on the green journal cover

The front FMQ of the journal cover

FMQ the pink journal covers


For the next two journal covers, I chose one of my own hand-dyed pink fabric. 

Two pink journal covers

For the first journal cover, I FMQ it with just the top fabric and batting. I've done this before without an issue, but this time, there was a huge drag. I even checked to make sure that I had lowered the feed dogs. Yup, they were down, so for the second cover, I added a backing fabric. That really helped.

FMQ pink fabric with a meandering flower

FMQ with the batting at the back

For something different on the second journal, I did some vertical FMQ. In the image, you can see my practice page. I went through my FMQ journal to find some designs that would be easy to do vertically.

Vertical FMQ designs with practice sheet

Here are my two FMQ journal covers.

First pink journal cover with Meandering Flowers

Second pink journal cover with vertical designs

When I did my second pink journal cover, I remembered to stitch my label before I put the whole thing together. I was so proud of myself, until I realised that I had sewn it inside the journal cover! It's a good thing that I was able to fold and sew it back out. 😓Aren't the lining fabrics gorgeous?

I was able to stitch the label again so that it peaks out!

Poster for Fall Fling 2023 Marketplace

I have a total of 11 pieces for sale in Fall Fling. Most of them you've seen before, but I will show more of them on Instagram. I'll check to see if I've blogged about each of them. If not, I'll include them soon in a post.

What I learned
  • Making a quilted journal cover is always a little tricky because most journals are not the same size. It's not complicated, but since I am accuracy challenged, I really have to be extra careful.
  • My first journal cover, the blue one, was a little tight because of the thickness of the journal. I thought that I had added extra space for that, but not quite enough. It looks fine, but the green one fits the journal much better.
  • For the pink fabric, I knew that the fabric would be tight, but it did work out. At least this journal is thin, so no extra fabric needed for that!
  • For the FMQ, as I mentioned earlier, I knew that I shouldn't try following the diamonds, but I just couldn't help it. After a few inches, I knew that I needed a plan B - so a spiral it was. It's always a great go-to when you want movement in your design. I balanced the wonky diamonds by adding a few on the other side of the fabric. I was lucky that I had more than enough fabric, so only an inch or so shows up on the journal cover.
  • I'm also lucky that I used a navy thread that blended in well.
  • I feel like I should explain my bizarre thread choice for the green journal cover. I ended up using a turquoise/brown variegated thread because the top of the fabric has some subtle turquoise where the green and blue paint has blended. After making the first journal cover with the blending thread, I wanted a little bit of pop. Adding the bright lime green thread in areas was a good idea.
  • I was so proud of myself for finally remembering to add my label before I sewed the journal cover together. I could have pulled it out, but since the label is quite long, I was able to fold it and stitch it down so that it shows.
  • I love my choices of lining fabric. I believe that it adds a lot to the look of the journal cover.
  • I was also surprised that FMQ without a backing cause so much drag. Adding a piece of fabric as a backing for the second pink journal cover did the trick!
Related links
Linking parties

Free Motion Mavericks


Last week Donnalee's oldest daughter came for a visit and some quilting lessons and practice. How wonderful that mother and daughter have the same passion! Here are a couple of her finished projects.

Table topper and runner by Donnalee's daughter

Gail has been busy pattern testing this lovely quilt for her friend. If you go to the original post, there is a link to the pattern.

Starry Path made by Gail

It's now your turn!

You are invited to the Inlinkz link party!

Click here to enter

Thursday, October 12, 2023

A Journal and More Notepad Cases

Welcome to week 451 of Free Motion Mavericks. There hasn't been any FMQ here but I have been busy making journals, refillable notepad cases and cards. 

Fabric journal with long and link stitches

My brother and sister-in-law are here from Denmark and I made them some birthday gifts. For my brother's 60th birthday party, I made him a plaid fabric journal. Here it is!

Fabric journal with long and link stitches

I'm so happy when I can add fabric to a journal.😊

At my local quilt shop, I found this perfect plaid fat quarter for the journal covers. The cover fabric is cut and a layer of Heat & Bond iron-on adhesive is added to the back. From there, I ironed-on a sheet of thin paper, in this case grid paper, to the other side of the adhesive. This allows me to glue the fabric to the book board without the glue going through the fabric. 

Fabric cover with iron-on adhesive and grid paper

Once the cover was made, I then stitched the cover to the first signature pages. Then each signature (package of pages) is stitched to the next, until it's time to stitch everything to the back cover. It's a long enough process and it's important to keep the tension even. The stitches include: 
  • beginning with a row of kettle stitches that keeps everything together, 
  • then a row of link stitches, 
  • the long stitches,
  • a row of link stitches,
  • one more row of long stitches,
  • and finally the last row of kettle stitches. 

Rows of kettle stitches, link stitches and long stitches

This is the inside of the journal. I added a little sticky to indicate the front of the journal.

The inside of the journal

More Refillable Notepad Cases


Since my niece's and sister-in-law's birthdays are also coming up, I decided to make them each a notepad case. I also made one for my brother since that's probably more useful than a journal 😁 Here is the production line. I cut out all of the paper and paper fabric needed for the three cases. I kept all of the measurements and notes in my own journal at the right. This time, I also learned from my past experience and added my labels by sewing machine before putting everything together!
 
Paper and paper fabric ready for the making of the cases


Refillable notepad case with pen

The inside
This is my niece's notepad case. It only had one refillable notepad but came with a pen. I added a pen holder to the case. Isn't it sweet?


This case is for my sister-in-law. It included two pads. Since the theme of the paper is cocktails, I found a fun bubbly paper for the inside. 

Another refillable notepad case

A bubbly inside!


The third notepad case is for my brother. I used different paper for the front and back. I also used these papers for the insides of the case.

Third notepad case

Front of the case


A different paper for the back 


What I learned
  • I always love adding fabric to a journal. In this case, I didn't pre-wash my fat quarter, but I will wash the left over fabric so that everything that I quilt with is pre-washed.
  • It was interesting working with so many different stitches on the journal. Ali Manning's instructions were excellent so that it wasn't as difficult as it could have been.
  • The next time though, I will watch the tension of my long stitches more carefully.
  • Using a production line style for making the refillable notepad cases worked out very well.
  • I'm glad that I remembered to stitch my labels by machine, before gluing them onto the case. They are attached to the sleeve, so are not visible unless you take the notepad out of its case.
  • For these cases, I solved my gluing problems by using a heavier card stock on the inside. No wrinkles there. However Frédérique had an excellent idea to sketch over the paper or to glue flowers or other designs to hide the wrinkles. Thanks!
  • You may be wondering what's happened to the quilting of the t-shirt quilt. My nephew, who is going to Denmark for Christmas, has agreed to bring it with him. Otherwise I only had one week to quilt it - which was not going to happen! I'm re-defining my October OMG to have the quilt sandwiched by the end of the month.
Related links
Linking parties

Free Motion Mavericks


Gail of Quilting Gail, made a beautiful Caroline Star using the Accuquilt die and the Island Batik “Autumn Wings” collection. It was for the Falling for Accuquilt Blog Hop. What a complex but lovely quilt! Gail quilted in-the-ditch. The quilt really didn't need anything more.

A wonderful Autumn quilt by Quilting Gail

 It's now your turn!

You are invited to the Inlinkz link party!

Click here to enter

Monday, October 09, 2023

Refillable Notepads Cases

I've been enjoying playing with paper and these have become some of the squirrels that I've been chasing in the last few months. Here are three notepad cases that I've completed so far. BTW, Happy Canadian Thanksgiving!🦃

Refillable Notepad Case


This project is great to make as a gift. I often pick up cute notepads on sale because I've always writing up lists. Of course, I'm notorious for forgetting or loosing those lists, but that's besides the point! 😁

These are the three refillable notepad cases that I've made so far. I've cut up the pieces required to make two more. I've learned a lot about making these and each one is better than the last!

First refillable notepad case

Second refillable notepad case

Third refillable notepad case

I'll tell you a bit about the process but without too many details. This project is available on YouTube, see Related links. 
  • The case is made to hold a notepad and it's refillable, as long as the notepads are roughly the same size.
  • The case consists of a top, a back, a hinge that attaches the top to the back, as well as a sleeve in which to slide the notepad. 
  • The top and back are made of book board or very heavy cardboard. These are covered with a paper or light cardboard on the outside (cover paper), and a lighter paper on the inside (end sheet).
  • Book board is very sturdy and will not warp when covered with glue.
  • A hinge, made of book cloth, paper fabric or Kraft-Teck, is attached between the top and bottom book boards. Everything is glued together with PVA glue. Quilting clips are very handy to keep these together while the glue dries. 
Top hinge piece is attached between
the two pieces of book board

Another smaller hinge liner, made of the same material, is then glued to cover the hinge. You can see this in the image below.

Here is the inside of my first finished notepad case. 

Inside of notepad case

Without the notepad in the case, you can see the sleeve that is used to slide the notepad into the case. The sleeve is glued between the book board and the end sheet.

The sleeve to insert the notepad

For this first case, I used the same cover paper for both the front and the back of the notepad case. 

Back of the case 

For my second case, the front and back covers are different.
Back of second case 


Front of second refillable notepad case


This is the notepad that I use in my studio. I picked up a couple of these notepads in Stratford ON this summer. 

To do, or not to do....notepad

Here is the last one that I've done so far. I'm very happy with it since I've learned so much and this one reflects that.

Best case yet, after applying all that I've learned

Open refillable notepad case


Making Paper Fabric


The hinge and sleeve are made with paper fabric. This is done by adding thin paper from a book or sheet music, etc. and/or tissue paper and napkins to a background fabric. You essentially add glue or Mod Podge between all of the layers. Here are two paper fabric pieces that I have made. You can also add a thin layer or dabs of paint once the paper is dry.

My two attempts have been rather a colourful mess of all of these papers. You can, of course, limit yourself to just a few papers. I love using napkins and tissue paper. The pages of a book or music sheets adds depth to the paper. I'm going to try making some that are less busy (wish me luck!)😊

First time making paper fabric

Latest batch of paper fabric - much thinner and easier to use for the hinge

This is the hourglass journal that I made with a paper fabric cover. This fabric paper is heavier because I used Kona solid fabric for the background and then added several layers of papers and glue. It's perfect for a limp book cover but too thick for the hinge of the refillable notepad case. I know this for a fact because that's what I used for my first notepad case. The second and third notepad cases were much easier to do with thinner paper fabric.

Paper fabric limp book binding


What I learned
  • This is a fairly simple project to make but I found that it took me a couple of tries to get it to look really good.
  • The hardest part, for me, is to glue the paper on without wrinkles. My third case was my best in that regard. As long as you get one of the end sheets glued without wrinkles, you can always make that one the back of the top cover. The other end sheet is covered by the notepad, so it's not as critical.
  • An artist friend has suggested another method for gluing down paper to cardboard/book board by applying a mat medium to both paper and book board, letting it dry and then ironing them together. I will try this out and let you know how it works!
  • The hinge can be fiddly but Ali Manning, of Vintage Page Designs explains it very well in her video. 
  • For my first notepad case, I used some home-made paper fabric but it was very thick, and difficult to bend and glue. I made a second batch of thinner paper fabric which was much better to use.
  • If you're interested in making your own refillable notepad cases, check out Ali Manning's YouTube video below.
  • I was a member of the Handmade book club with Ali at Vintage Paper Designs for a year. Ali's videos and instructions are top notch - I can't recommend them enough. A few times a year they hold 5-day challenges which are not expensive and well worth it. Of course once you've done one, you may get hooked. Usually after the challenges, they open up their membership. 
  • Since my retirement, I have to choose where to spend my money. Since I now have a great foundation in making hand-made books and journals, I'll be staying with the Stitch Club with TextileArtist.org.
  • I'm sure that I'll be making more books since I've downloaded a lot of video instructions and I don't want to loose those skills. Stay tuned!
Related links

Linking parties
I'll be linking up to many fun linking parties. Why not check some of them out? Slow Sunday Stitching, Beauties Pageant, Off The Wall Friday, Patchwork & Quilts, Put your foot down, Sew & Tell Monday, Design Wall Monday