Showing posts with label fabric paint. Show all posts

Thursday, April 09, 2026

A very slow-stitching project and I Quilted This!

Hi and welcome! I've been busy getting ready for the Out-of-the-box Fibre Artist's show, Fibre Fling 2026. I've done more quilting than art recently so I'm now working hard to finish three art pieces to put into the show. See, UFOs (UnFinished Objects) can come in handy!😊

Nature's Textures


In September of 2024, I took a course with Fleur Woods entitled Joyful Embroidery, offered through Fibre Arts Take Two. I learned many techniques and during 2024 worked on two different pieces which I shared with you in the blog. One of the advantages of the Take Two courses is that once you're enrolled, you have access to the course but you also can join the teacher every time the course if offered to a new group. I was happy to resume the course this winter when Fleur Woods' course was offered again. Another perk of the course is that you can submit to participate in the course's online exhibitions. I wasn't ready to submit anything after the 2024 course but that's what I'm now working on.

It's still a work in progress but I can see the end, even if I'm not sure what to add 😁

A few empty spaces to fill

The last time I shared this class's progress, on January 1, 2025, I was working on two separate pieces. 

Punch needle and embroidery project

Embroidery on the hand-painted fabric 

When I read the theme for this year's online exhibition, Nature's Textures, I decided to make the embroidery and punch needle piece smaller and add some of my original embroidery. It's been so much fun thinking up things to include and to try to make the piece cohesive.

A few details

Details of the left side of the piece
At the top I attached one of my black-eyed susan flowers. I also padded it with batting to give it some depth.

Underneath it, I covered the area with hand-dyed fabric and added three woven picot stitches in dark green perle cotton to look like fern leaves.

Underneath that is a little pond with pink lilies in the water. The pond is the backside of a punch needle, surrounded by punch needle on the right side (which is 3D).

On the original version, I had attached a spool of thread. Since the theme is Nature's Texture, I changed it into a log with moss.

I also cut leaves from a fabric and backed it with an iron-on adhesive fabric so that the leaves are stiffer and don't need to be totally tacked down.

Details of the bottom left side of the piece
Beneath the leaves is a piece of pink batik that I embroidered to look like flowers.

Next to it is a green coil as well as a piece of green fabric with a few yellow-green woven picot leaves.

Beneath that is a gathered piece of green fabric standing upright. It has frayed edges. The monk cloth beneath is finished with yellow-green back stitch. 

The sections in the middle were made in 2024 - you can read more about them in previous posts listed in the Related links section. 

I want to mention that the textured blue and green fabric surrounded by beads is a technique that I learned from Mirjam Gielen through Patreon. It's a fabric manipulation technique called "cuir froissé" or "creased leather".  Details are in my November 20, 2024 post.

Details from the other side
On the edge of the top of this photo I added a brown coiled fabric and a nut on top. 

Beneath the punch needle dark brown leaf shape, I added a flower - it's a specific rug hooking technique called Proddy that originates from the Yorkshire Dales. It used fabric strips to create wonderful high-relief texture. I added a couple of backed fabric leaves next to it. 

At the bottom, there is a purple thread woven flower surrounded by yellow perle cotton. The purple weaving was done with hand-dyed silk thread that I bought from Karen Turner. The final bright yellow perle cotton border is made with detached blanket stitch, as taught by Mirjam Gielen.

The right edge has an embroidered clover. I used an amazing book that I've had for over 40 years, Wild Flowers of the North by botanist Ruby Gibbins Bryan and artist Muriel Newton-White. It's one of my most cherished books. The images are all hand-drawn in black and white and each plant/flower has lots of information about it. I'm a big fan of clover, so this is a red clover plant. I used Karen Turner's hand-dyed silk for the flower and even stitched the tiny leaflets in tiny woven picot stitches. 

Red clover plant in progress

Wild Flowers of the North


I'm really happy with my piece, "Views Both Far and Near" so far and I've learned so much making it.


Next Steps
  • As you can see from the images, I don't have much left to cover the background monk's cloth. However, I want it to be thought out and deliberate - not just adding things to finish it.
  • Considering that I've spent the last day doing sketch book art, I would say that I'm really not sure what comes next. That's OK - now I'll do a little bit of "research" to get ideas on how I should finish this.
  • I'm sure that I'll be adding in more details such as more stitches on the clover to make it slightly puffier. 
  • In the photo below, you can see what the piece looks like now. I machine stitched a strip of fabric to the right side, and then had to hand-stitch the other side down since there was so much texture in the way.
  • Once all four strips are attached, I'll stay-stitch the monk's cloth and then cut it away from underneath the green strips.
  • It will then be time to attach the whole thing to the 12" x 10" canvas. I may put batting between the canvas and monk cloth.
Views Both Far and Near - so far

What I learned
  • The hardest part about making this piece was to reconcile that I was making both landscape and close-up views of natural elements. I would usually do only one or the other, but since it's an abstract piece, who says that I can't do both? It took me a while to give myself permission to do so.
  • Based on the point above, I've decided to name this piece, "Views Both Far and Near". 
  • As you can see, I used and learned many wonderful techniques to make this piece. That's what keeps me happy and stitching!
  • With our Take Two courses, we have a bonus course on how to photograph our art using cell phones. I've watched part of it but will have to finish it and then use what I've learned to photograph my piece.
  • I'll share with you any tips that I learn 😊
Related links
Linking parties
I'll be linking up to many fun linking parties. You may want to check some out before you link up below 😍 Monday Musings, Put your foot down, Sew & TellOff The Wall Friday, Finished (Or Not) Friday, Patchwork & Quilts15 Minutes to Stitch 2026, Slow Sunday Stitching


I Quilted This!


Welcome to the I Quilted This! linking party that celebrates quilting on a domestic machine or custom quilting on a long-arm. Feel free to link up and share any recent project, even if you're not quilting it! Here are the posts that included FMQ, ruler work and walking foot quilting last week. Thanks for linking up 😊 and feel free to grab the button.

We have a quiet week in the quilting world - but that's OK - most people were probably busy with family and such.

Kat from Scrapbox Quilts made a green scrappy placemat for the monthly color challenge at Freemotion By The  River. What a lovely green placemat.

Kat's blocks in her scrappy green placemat.

The back of Kat's green scrappy placemat


It's now your turn 😍

You are invited to the Inlinkz link party!

Click here to enter

Monday, July 24, 2023

A handmade album covered with Glimpses of Antarctica

I still haven't written my posts about our Antarctica trip, but I'm one step closer - I finished my stitched piece "Glimpses of Antarctica" and used it as the cover for an album to hold a few photos, postcards, etc.  

Glimpses of Antarctica


In February, I wrote a post about a few of my ongoing hand-stitching projects. The first was a mark-making and stitching project with Gwen Hadley through TextileArtist.org (see Related links below). I made marks on two pieces of white cotton - the first was heavily marked while the second was not.

I cut up the pieces and put them back together again with lots of stitching. Sometimes it was fun, other times a little tedious and even frustrating, but I must admit that I love the finished piece.

Finished Antarctica piece mounted
at the front of a handmade album

Here are a few process pictures.

Heavily marked cloth

Lightly marked cloth   

Both pieces cut up to be re-sewn together

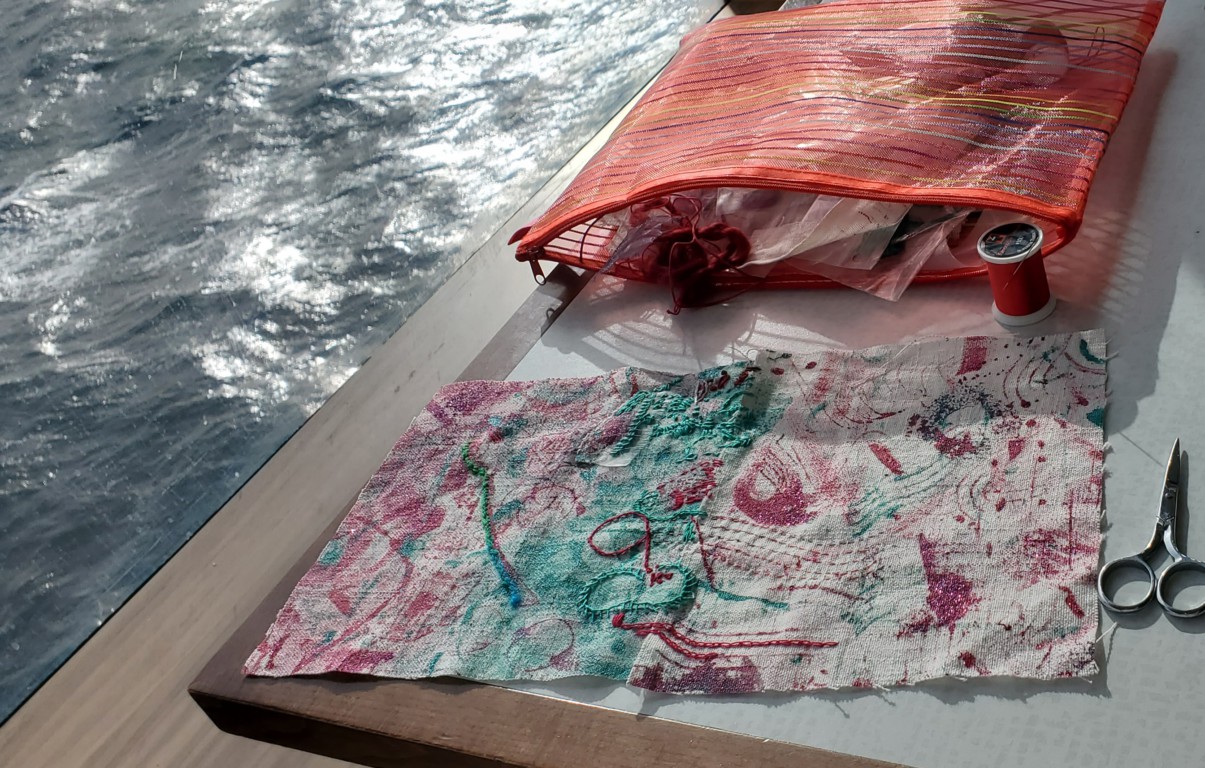
Stitching on the ship


While I was on vacation, I stitched quite a bit and started adding shapes and images from Antarctica. There is a penguin, whales, birds, fish, and whales blowing water (see Related links). I quickly learned that good lighting was more important than ambiance when stitching on the ship. I also had a few interesting conversations with my fellow passengers. 

A glimpse of the water

Finding a well lit bar 😊

Finishing it at home


The frustrating part came at the end of May. I didn't know if it was finished and I also wasn't in love with it. A friend gave me the perfect ribbon to add to the bottom of the piece. I added an embroidered a scene from the rocks and glaciers of the South Shetland Islands. 

Almost finished

At the very top, a scene of glaciers and rock formations
from the South Shetland Islands

The stitched scene above is a compilation of a few photos, but this is the general image.

Glaciers and rock formations in the South Shetland Islands

Making the album


In the archives of the Handmade book club, I found the perfect book - the hard cover stab bound album. The pages of the album are not folded in half, so it's easier to make a larger book. Instead, the pages are folder about an inch at the top, so that the album won't bulge after you add things to the pages.

You can see the additional fabric sewn around the piece

The album cover is made of book board covered by a book cloth. I added strips of batik fabric around the Glimpses of Antarctica piece to make it large enough to cover the board and to go over the edges by about 1". I then covered the fabric with fusible web and then ironed a very large piece of copy paper to it. This is then glued onto the book board. I did the same thing for the back, except that it was a lovely piece of batik with penguins on it.

Additional fabric is sewn around the penguins to fit the book board

There is less fabric around the back cover. The end sheet
is craft paper with vintage postcards.

Wider fabric behind the front cover with a craft paper end sheet

Photo shoot and next steps


I went into the garden yesterday and took some lovely pictures.

A very sturdy album

Album among the flowers and chicken!

The back, from a better perspective

  • This is what I've done do far: 
    • I went through my souvenirs and have organised them by days and regions travelled.
    • All of my photos have been transferred from my phone to my computer.
  • This is what's next:
    • Pick a very few pictures from each day or region to print and add to the album.
    • Write my posts!
I had Poppy keeping me company in the back yard today 😊

Poppy basking in the sun

What I learned
  • I managed to put the front cover on backwards so that the album opens up from the wrong side. I could say that it reflects the other hemisphere....but who are we kidding - I'm just accuracy challenged.
  • I have no idea why the penguins are not facing the correct way on the back cover. I only noticed after it had been glued to the board. Again...see point above!
  • I mentioned that I didn't really like Glimpses of Antarctica. It was like I was seeing the trees and not the forest. Once I placed it on the cover of the album, I knew that it was good! It really does look like a map. I had lost sight of that.
  • I know that it's going to take a while to get my trip posts done, but I do hope that it's sooner rather than later. 

Related links

Linking parties

Project details

Handmade album covered with Glimpses of Antarctica (hard cover stab bound album)
Size: 13¾ x 11"
Album: book board, craft paper end sheets, thick craft paper signatures (pages)
Glimpses of Antarctica: fabric paint on cotton, embroidery, appliqué, embroidery floss, Mouliné étoile embroidery thread, perle cotton, silk thread, organza, yarn, ribbon


Saturday, March 18, 2023

Embroidery and Free Motion Mavericks

Hi! I'm back 😊 after an amazing trip to another side of the world! 😊 (Argentina and Antarctica). The travelling was safe, the sights were outstanding, everyone was so lovely and the food was scrumptious 😋. I even got some sun 😎! I'll be writing up a post soon with a little bit of art and lots of photos of nature 🐧

Embroidery on the Ocean


Since we are so tightly squeezed on airplanes, I didn't bother trying to stitch during those long flights. They were good for reading and listening to audio books. Once onboard the Norwegian Star, I took out my embroidery in the evenings and during our days at sea. 

Progress so far on Glimpses of Antarctica

I started the trip with the two bottom pieces but then attached the top two. I'll trim then up eventually.

At first I was just doing some abstract stitching, using the stitches that I know from memory. At some point, I decided to add stitches that represented my trip. Here are some birds and fish.

Birds in a line


Fish swimming in the ocean 

I then got ambitious and drew a little penguin on another piece of the painted cloth. I stitched it up, cut it and then appliquéd it to the piece.


Penguin appliquéd to the piece


After a fellow traveler suggested a whale, I added it into the piece, with a few of his/her friends blowing water. At one point, they estimated that we could see over eighty fin whales from the ship, blowing water and swimming about. I used a few strands of Mouliné étoile embroidery thread from DMC to show the water sprouting up.

Fin whales blowing water

Here is a closer look at both sides of  the embroidery.

Left side of the piece

Right side of the piece

I've decided to make this piece as representative of Antarctica as possible, so I'll be stitching in some of the islands that we visited. That's why it's called Glimpses of Antarctica - like an abstract map with real things in it. See Related links below to the previous post.

What I learned
  • When I was first looking for spots on the ship to embroider, I was looking for comfort and ambiance. It didn't take long to figure out that the most important element was light! It's difficult to thread a needle in dim light!

Great view and light!

  • I didn't have access to the internet a lot, so I relied on my memory of embroidery stitches. I may have made up a few, but it's all good.😊
  • It was nice to have something to stitch. I also worked on a hexie diamond at the beginning of the trip. It's about half stitched together.

    Hexie diamond

Related links

Linking parties
I'll be linking up to many fun linking parties this week. Why not check them out? Put your foot down, Finished (or Not) Friday, Can I Get A Whoop Whoop?, Peacock Party, Off The Wall Friday, Patchwork & Quilts, Design Wall Monday, Sew & Tell

Free Motion Mavericks


Welcome to week 422 of Free Motion Mavericks. Thanks to everyone who linked up while I was gone. 

Donnalee shared with us a wall quilt that she FMQ with a serpentine pattern. Isn't is lovely for someone who says that she doesn't FMQ?

Wall quilt by Donnalee

We have two quilts by Gail, of Quilting Gail. The first involved some ruler quilting while Gail FMQ the Baby Stars.


Made for the Sweet on you blog hop by Quilting Gail

Baby Stars by Quilting Gail for the Island Batik catalogue

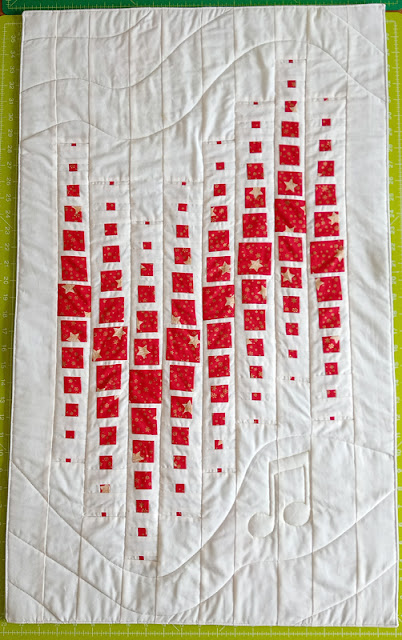
Frédérique, of Quilting Patchwork Appliqué FMQ her lovely quilt for the Dust Off A Quilt Book blog hop. She added trapunto to the musical note based on the book she dusted off! Here is her Modern Bargello, Huahine.  

Modern Bargello, Huahine by Frédérique

It's now your turn 😊

You are invited to the Inlinkz link party!

Click here to enter

Tuesday, February 14, 2023

So many projects on the go!

Welcome! Have you ever felt like your quilting life is out of control? Since finishing Version 2.0 I have been working on more and more projects. Some are classes, others are my usual TextileArtist.org workshops and then there are those squirrel projects from who knows where. 😃

2023 Stitch Camp


This year's Stitch Camp at TextileArtist.org was a revised version of the Gwen Hadley workshop from June 2021. Since I hadn't done the original workshop, I thought that I would give this version a go. TextileArtist.org does an amazing job with their workshop and Gwen Hadley is very popular. I just hadn't participated because I had tons of other projects on the go and it involved paint. I am getting more comfortable mark making with paint but it's not my favourite thing to do. I do like how it came out.

First cloth is heavily marked

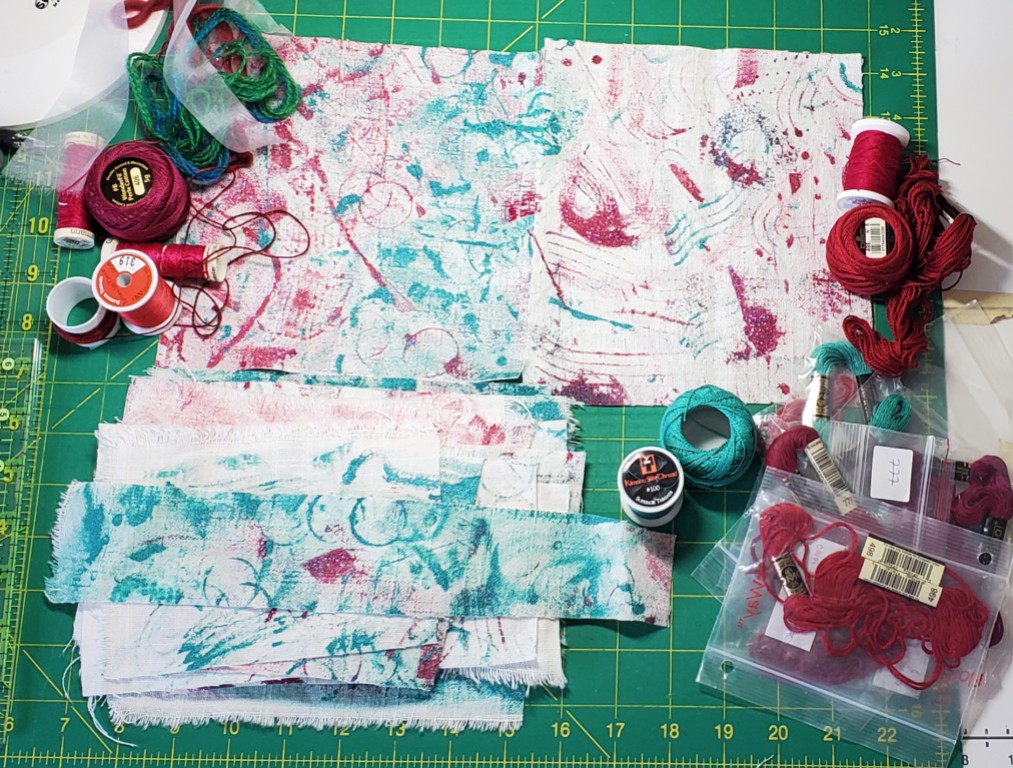
The first cloth is heavily marked, half in one colour and the other half in the second colour. We added little bits of the "other" colour in each half. I used many tools for mark making, including the bottom of a plastic insert from an assorted box of crackers.  

Second cloth has more background showing

We used the same colours for the second cloth but applied the paint marks sparingly. I used many of the same tools but added a plastic fork as well as the end of a swimming noodle. For both pieces I used Pebeo Setacolor  - a shimmer opaque turquoise and a glitter tourmaline (purple/fuchsia). I figured that they would play nice together 😊

The next step is to cut these two cloths up and join then back together with stitches, appliqué, etc. The suggested project is to stitch together a long narrow band such as a snippet roll. For this project, I would rather make an art piece that I can attach to a canvas frame. 

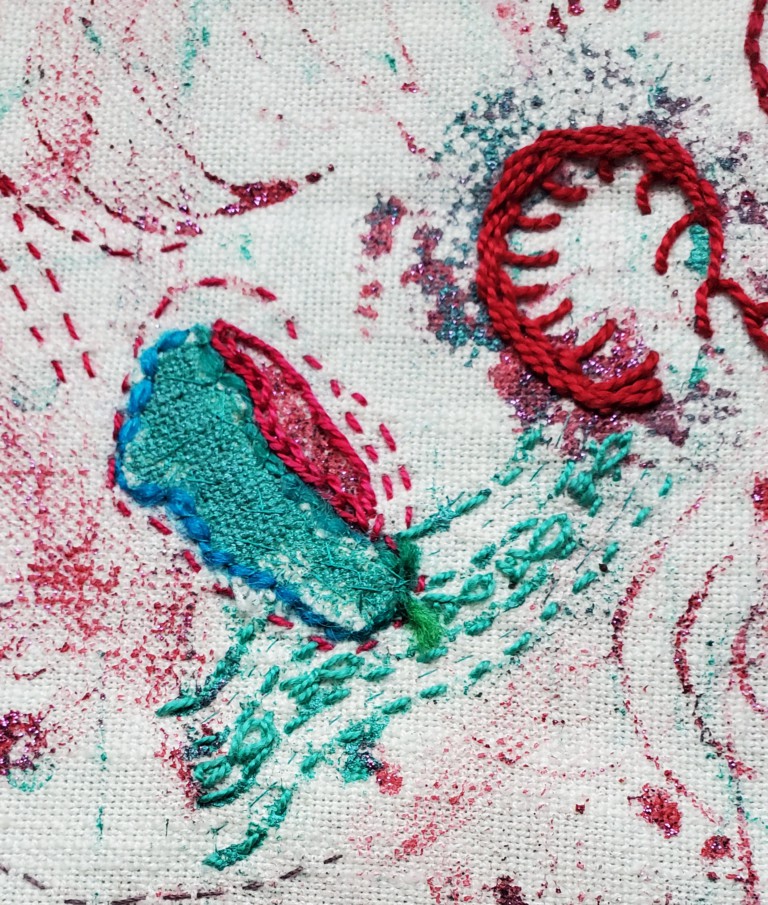
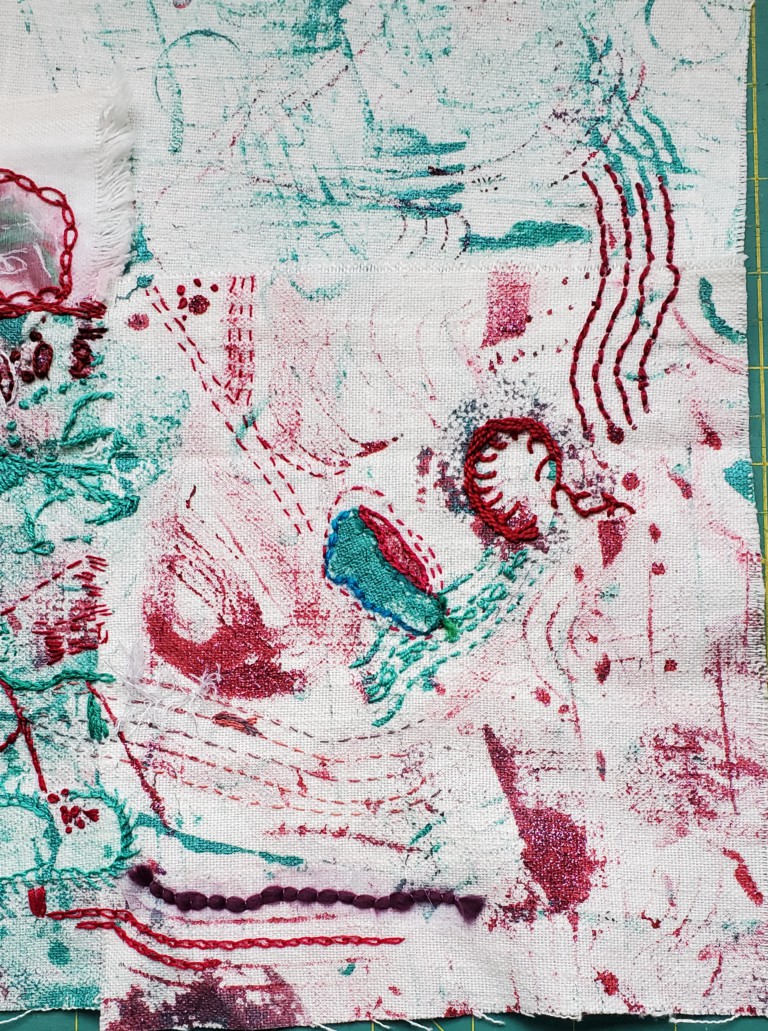
Starting to put some stitches in to blend the pieces

I've put everything together (i.e. fabric, yarn, thread, etc.) to work on the project. This is the best way that I've found to keep ongoing projects. Every once in a while, if I find something that could be used for the project, I just add it to the bag.

My project so far.


Rocks, Pebbles & Stones, Oh My!


The Rocks, Pebbles & Stones, Oh My! workshop was taught by Ana Buzzalino, through the Craft Napa 2023 Uncorked at home (virtual). When I saw the images for the course, with those rocks attached to her art quilt, I was hooked.

Ana is a great teacher and her work is wonderful. We learned 3 techniques for making and attaching rocks to our work. The first is to use the background fabric to make the rock, sort of like trapunto. For me this was the easiest technique to use.  

My project so far

I found an amazing piece of painted fabric in my stash. In the picture above I've covered the top sections with different blue fabric since I want it to be more of a water and beach scene. 

Here are some of the photos of my trapunto-like process of making rocks and pebbles. For this technique, it was easiest to work with the padding and background fabric within an embroidery hoop, underneath the top fabric.

Adding the batting over the back

Stitching the first rock

Keeping the fabric as tight as possible and having as little gathering fabric as possible was difficult. To hide these pleats, I'll be adding beads after the rocks are finished. This covers up the pleats, looks like sand and gives a wonderful effect.

Pinning the fabric to stitch a second pebble

Three rocks or pebbles imbedded within the piece

We learned two other methods of making rocks or pebbles. The first is to create a flat stone using a cardboard  template while the other used more batting and stiff interfacing. These can then be attached by appliqué to the piece. Again the most difficult part is getting rid of pleats because rocks don't generally have them 😁

A collection of stones on a partly FMQ background


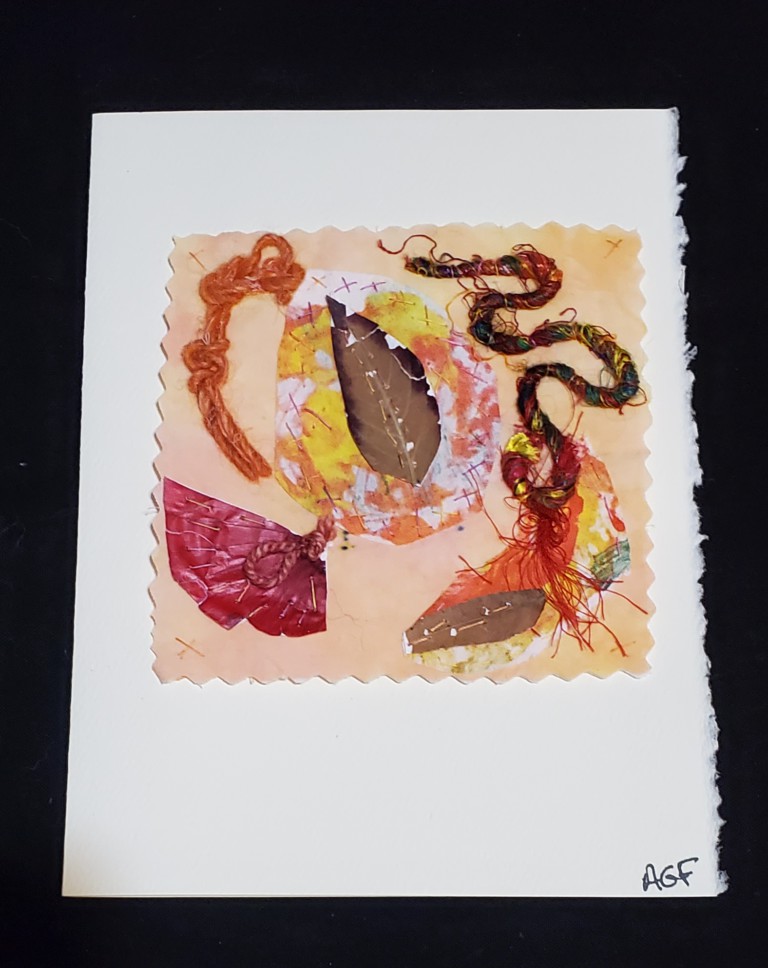
Card featuring a Meditation block


A couple of weeks ago I needed to send a card. Since I have lots of blank cards and envelopes in my stash, I though that it might be the time to see what I could make.

Hand-made card using a Meditation block

I attached my favourite meditation block with natural elements to make the card. I stitched the corners of the block into the paper to attach it. I really like how it turned out. This is a great way to use meditation blocks.

Card with natural elements


What I learned

Stitch Camp
  • I enjoyed the mark-making process in Gwen Hadley's workshop. 
  • There was also no pressure to make it look great since it would be cut up.
  • When cutting the fabric, I was nervous because the fabric's weave is quite open. I think that the paint kept it from fraying too much. Besides, I'm sure that I'll be adding some frayed bits for effect!😊
  • A week was not enough for me to get this workshop done but then I always take it further, and of course having all of these projects on the go isn't helping. 
  • I've arranged all of the materials in a lovely bag that I can grab at any time. This one is coming with me on holidays. I just need to ensure that I have some good contrasting thread and material so that things don't all blend into a puddle!
Rocks, Pebbles and Stones
  • The first thing that I learned is that I need to read course descriptions better before signing up! When I saw the images of Ana Buzzalino's art pieces, I had no idea that the stones were made of fabric - they are that good! So, I though that I was going to learn to attach stones to art quilts, not make the stones! 😁
  • I'm not sorry that I took the course. I did learn new techniques and the teacher was terrific, but it's going to require a lot of practice before my stones look like the real thing.
  • I'm not sure what I want to do as a finished piece. I will be adding shells and driftwood with embroidery, like I did in the Embroidered Seascape workshop (see link below). That would be very cool, but I'm not quite ready to tackle that yet. One day inspiration will crash into my consciousness!
Card featuring Meditation blocks
  • I'll be making more of these and playing with that concept!
  • I'm not sure how the card survived the postal service - I hope that the recipient didn't end up with a bunch of crumbled bits at the bottom of the envelope. I'll have to work on that if they are going to be mailed!

Related links
Linking parties


Project details


Card with Meditation block - Natural Elements
Meditation block made based on Claire de Waard's workshop
Card size: 5" x 6⅞"
Material: Meditation block made with fabric, sari yarn, painted fabric, thread, yarn and leaves and onion skins glued to paper; card is ivory with deckle on acid free paper
Techniques: embroidery and stitching