Showing posts with label Instagram. Show all posts

Wednesday, August 09, 2023

An Exhibition and Hexie Love on Free Motion Mavericks

Welcome to week 443 of the Free Motion Mavericks linking party. I'm still not spending much time in my studio, but it's because I have a companion who would rather spend time outside or in the living room than in my studio 🐶. It's also #100hexies100days2023, so I've been having tons of fun going back to my hexies. 😊

Dog Days of Summer Into Fall


The Out of the Box Fibre Artists group has an exhibition up in one of our local libraries. The Alta Vista branch has a lot of wall space. I'm really looking forward to seeing the exhibit. I'm also thrilled that one of my pieces made the poster!

Out of the box Fibre Arts Exhibit

These are my two pieces. Clover at Dusk was made after a walk with Chevy. It was magical - in the field of clover were several fire flies twinkling around. The background was a fence and vines that were starting to turn red. It's a tiny piece, only 7½" x 8½". 

Clover at Dusk 

My second piece is Swirling Leaves. You've seen this one a few times because I created a similar one for an auction. I'm going to make a third one this fall as a wedding gift for my daughter's friend.

The original Swirling Leaves

If you're in the area, I hope that you have a chance to see the exhibit. Just check the library's hours.

Dog Days of Summer Into Fall exhibit

Hexie Love!


It's been a while since I played with hexies. As I reviewed my posts, I saw that I made a fun hexie project for Quilting Project this year (see Related links below) and then only posted about my Scrappy Hexie Blanket last November. This was the last time that I added anything to it. 

I love the #100hexiesin100days2023 challenge on Instagram and have participated in many of them.

Here are my hexies for week 1. The theme was "This is ME". I included a mono-printed hexie with mostly floral fabrics. That purple flowers hexie is from the curtains of my favourite purple bathroom many moons ago. My son and his fiancé are on holidays in the East Coast of Canada - that blue-green reminds me of the sea 😊and of them.

Week one hexies - "This is ME"

There hexies are from week 2 - Summer Vibes. I'm getting more creative now. This time it includes summer critters as well as blueberries and books. They are all surrounded by a very happy sun 😎.

Summer Vibes displayed with rocks gathered on summer trips

Summer Vibes and my stash of ready-to-go hexies

As I was at it, I created a double flower hexie to add to my Scrappy Hexie Blanket. It started of as this lovely yellow hexie flower with a brown centre.

Playing with hexies outside in the back yard

It then made it to this double flower - poor Poppy acted as a not impressed prop for my picture 😁

Poppy and the double flower

You may have noticed that I messed up the order of the outside hexies. Oh well, I doubt that it will show surrounded by all of the other hexies!

Attached double flower

Here is the week 2 flower added to the rest.

Week 2 flower now part of the gang!

Finally, here is my very crooked Scrappy Hexie Blanket. The double hexie flowers at the top are actually the bottom of the blanket. I have one side finished and will keep extending the other side and making it a little wider. I am then going to figure out how to make it more even, probably by adding some whitish hexies as a kind of border...we'll see. 

Scrappy Hexie Blanket so far 

This is what the Scrappy Hexie Blanket started as during the #100hexies100days2018

The beginnings of Scrappy Hexie Blanket in 2018

My Companion


When it wasn't raining, I spent a lot of time in the backyard garden with Poppy.  I love these photos. If the garden looks like a jungle, it's because it is 😊 The lawn (mostly plants) desperately needs a cut!

Poppy - waiting to see wildlife

Poppy reluctantly posing


Poppy in the sun. She doesn't care
if the lawn is cut!

What I learned
  • I'm really looking forward to seeing the exhibition. I saw the pieces when I dropped off mine, but couldn't stay because I had a stomach flu and didn't want to share it!
  • It was really nice to spend time playing with my hexies. It had been almost a year.
  • I'm going to have to raid my fabric stash to get a little more creative as the challenge goes on.
  • I've also been spending time stitching on my watercolour pieces. I'm trying to get a little more creative. Hopefully I'll have something interesting to share soon.
Related links
Linking parties

Free Motion Mavericks

We didn't have any free motion quilting going on last week but Melva finished another mini, Margo Yang is working on a baby quilt, and Gail made a cool bag for her phone, to use while she walks the dog. 

Melva's black and white mini 


Margo's design for a baby quilt


Gail's cell phone bag

Please note: there won't be a Free Motion Mavericks post next week, so I'll leave the party running a while longer. Feel free to link up anything you're working on and as often as you want. See you later 😊

It's now your turn!

You are invited to the Inlinkz link party!

Click here to enter

Tuesday, June 07, 2022

June's OMG and Summer Book Club QAL

A quick post to announce that I'm going to be playing with fun fabrics as part of Kate Basti's The Summer Book Club QAL. 

Making more book blocks

I'm thrilled to have found out about The Summer Book Club QAL on Instagram. It uses one of my favourite foundation paper piecing blocks - the Tall Tales Quilt Block. Kate Basti has designed the block and it can be purchased on her Etsy shop (links in Related links below). The pattern is only $1, and she's donating all of her sales of the pattern to the Ronald McDonald House Charities until the end of 2022.

The Summer Book Club QAL on Instagram
with Kate Basti (@katebasti)

I made a few of these blocks as minis in 2019 (feels like so long ago!). I've always wanted to make a quilt of them, since they look amazing on Instagram (#so this is my chance. The block sews up easily and is great for featuring beautiful fabric.

The QAL runs for 8 weeks. 
  • Week 1: Decide Your Project & Pull Your Fabric
  • Week 2–7: Make Tall Tales Blocks
  • Week 8: Assemble Your Project

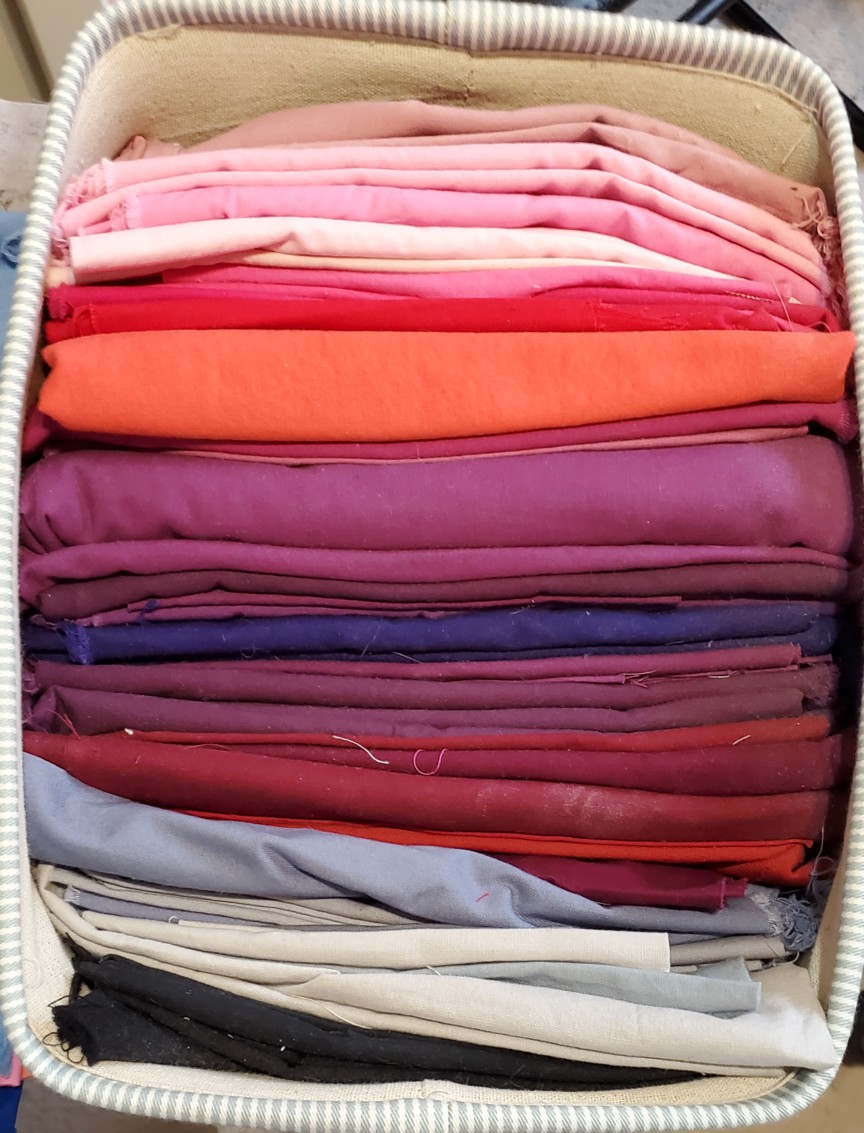
Week 1: post (an) image(s) of our fabric on Instagram. Here is my fabric pull. As you can see I have lots of choices. I'll be choosing as I go along. I'll be using a variety of solid colours for the book borders.

Critters fabrics - some of my absolute favourites

Misc. fabrics, from cute to books to everything else

Travel fabrics

You may have noticed the small frame that I made to view the fabrics since I will be fussy-cutting them.

Solids for the block borders

More solids

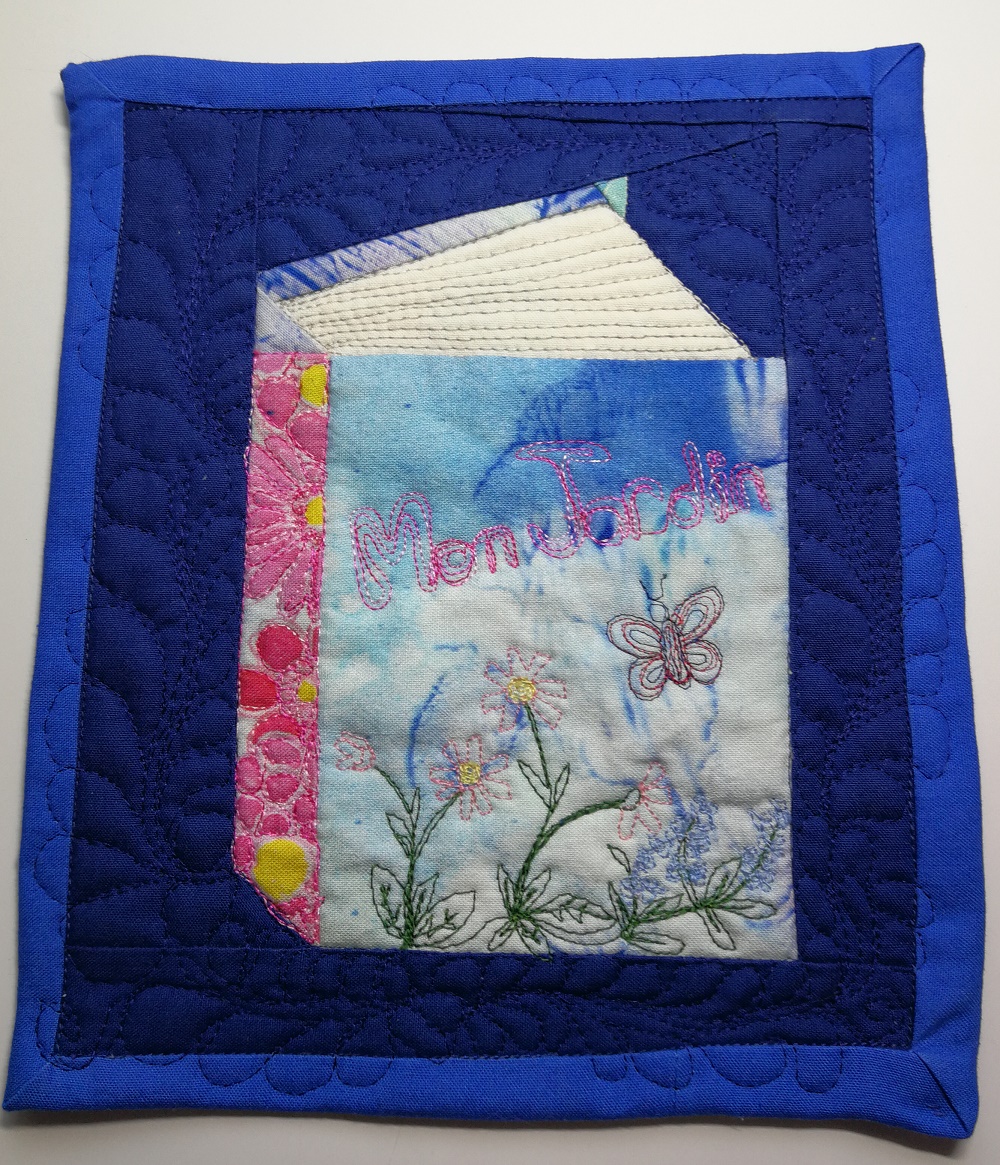
Here are the blocks that I've made. I love that I can add so much to these book covers. Some have appliqué while another is mostly free motion quilted (FMQ).

Paddington book mini for my daughter of course!
for the Nifty Novelties Blog Hop

"The Earth is not flat" book for my son
during the Summer Book Club QAL of 2019

And a few mini book blocks for my colleagues!

Mon jardin with FMQ

A Fantastical Book Block with appliqué

Bambi book, also made during
the Summer Book Club QAL of 2019


June's One Monthly Goal (OMG)

My goal this month is to make 10 blocks for the Summer Book Club QAL. I'll report back here at the end of the month (or before if I need to showoff share 😊)


What I learned
  • I love this versatile block and hope to be inspired to make a whole quilt of it.
  • I'm hoping to use a few techniques, but since it will be a quilt, I won't be adding embellishment (I think!)
  • Ten blocks may be ambitious but I really want to give myself the opportunity to play!
Related links
Linking parties

I'll be linking up to many fun parties including June's OMG, and posting on Instagram. Remember that even if you don't use Instagram, you can check the sides of my blog to see my latest Instagram posts. 
Monday Making, Oh Scrap!, Patchwork & Quilts, Off the Wall Friday, Peacock Party, Put your foot down, Design Wall Monday, Midweek Makers
Muv is hosting Free Motion Mavericks - make sure to check her post out and then come back here on Thursday!

Monday, December 06, 2021

Traveller's Blanket Update

I've been doing a lot of slow stitching, mostly on my Traveller's Blanket and then posting on Instagram. There have been lots and lots of hours pleasantly spent stitching and now quilting it.

Quilting the Traveller's Blanket

The last update on my Traveller's Blanket was October 11, 2021. I was showing you my daily stitching on the #100dayschallenge on Instagram. At the time I was up to day 37/100. On Day 39, I started quilting the background of the right top corner of the piece. This picture was taken about a week ago.

Slowly quilting around each piece 

Here is a close-up that was taken a few days after.

Stitched top-right corner

I'm doing all of the quilting with sewing or quilting thread. Most of them are King Tut Superior variegated thread. I love the look of it although you can mostly see the changes in colour when you're up-close.

It turns out that I have lots of this type of thread 😊


At one point I got bored of making straight-ish lines, so I quilted a swirl. Because the centre was puffing up, I added a few French Knots. 

A quilted swirl and French Knots

Right now I'm working beneath the hexie, which is at the right bottom corner of the piece. 

Stitching the bottom right corner

Here is the difference between looking at the thread colour from the front of the hand-dyed fabric, vs the back of the quilt on white fabric. The pictures above and below were today's (Day 64/100) Instagram post.

This is the back of the blanket, with the
variegated thread against the white background

What I learned
  • I'm really enjoying the quilting part and I usually listen to an audiobook at the same time. Last week I listened to many of them. It was very Zen.
  • Of course I did get bored and did some stitching in a swirl. It went well but since there is so much going on in the piece, I don't think that I should do that too often. 😊
  • It's also difficult to post just plain stitching on Instagram so I try to include the shapes around it. They are quite popular - it must be all that yummy colour :-)
Related links
Linking parties
I'll be linking up to many fun linking parties (now that my WIFI is up again!) Check them out and see what's happening out there in quilt land😊 Patchwork & Quilts, Monday Making, Design Wall MondaysPut Your Foot DownNeedle and Thread ThursdayOff the Wall FridayCan I Get A Whoop Whoop?,  Peacock Party, Slow Sunday Stitching


Saturday, September 25, 2021

Eco Printing - Take 2

In February of this year, I did some eco printing based on Caroline Nixon's workshop for TextileArtists.com. If you don't remember the post, it's because it was never written. Last weekend I decided that I would take a second stab at it since I love the results of eco printing. Here is what I learned 😊

Eco Printing & learning

My first attempt, as you may have figured out, was not wonderful. That was due to a few things - like not reading the instructions carefully enough and by the fact that Ottawa in February doesn't have any green stuff outside to use! I had bought a couple of bundles of flowers and got a few great prints from the rose leaves but not much else.

Great eco print on the pocket of a linen skirt

However, I know that we can over dye, so why not over print? Those blank spaces on my fabric were certainly big enough to add more prints. 

I resolved to try again when I found a bouquet of eucalyptus at my local grocery store. They are really great for eco printing, so it was time.

All of the leaves outside are very green, with a few reds and oranges, so there is an abundance of material to work with. 

I re-read all of the instructions, watched all of the videos and was ready. On Saturday morning, with an apron over my PJs, I gathered what was available in my back yard and then set off to the school yard down the street to gather more interesting leaves.  

While I was picking leaves, the fabric was being scoured (washing the fabric with delicate soap in the washing machine). It was then time to let the linen soak in the soda ash mixture and then a quick dip in the ferrus sulphate mix (iron water). 

Here are a few pictures of the process.
Fresh leaves added to the previously
printed fabric
An assortment of leaves on my drop cloth


Once the leaves are placed on the damp fabric, I added a barrier (plastic wrap the first time and parchment paper the second time) and then rolled up the fabric onto dowels. When I used parchment paper as a barrier, I protected the rolled bundle with plastic wrap and then tied it using cotton bias strips.  

Into the pot they go

I used an old, huge cooking pot and placed the rolls onto a metal platform (made to cook chicken with beer - that I never used). Once all of the bundles were ready, I added water to the pot and then the fabric bundles were steamed for 90 minutes.


Wrapped and ready to steam


This batch had 7 bundles


Steaming the bundles


Seven bundles cooling off,
waiting to be opened


Once the bundles have cooled off, it's time to see the magic. The colours on the fabric are just wonderful when they come out. You then hang them up for 24 hours to cure and dry. Unfortunately, they don't look as vivid after they are washed.

You can see the difference below.

This is the same bundle that I added
leaves to in the top image.


The final result,
after being washed


My favourite piece is on new linen fabric that I purchased the day before. I used a technique that Caroline suggested for making larger pieces. 

The leaves are placed on one half of the fabric, and then the fabric is folded over. You're supposed to place the leaves as close to the fold as possible, so that you don't get an empty line. As you can see, the leaves weren't quite up to the fold but it's still a beautiful piece. 

You end up with an image of both sides of the leaves. It's not a mirror image since most of the leaves will print better on one side, usually the one with the ridges on them (the back side). When you use this technique, you want to place the leaves both front and back so that some strong images appear on both halves of the fabric.
My favourite eco-dyed piece

Adding leaves on one side of the fabric


Here are a couple more pieces below. This first one has some great prints but also shows what happens when the fabric is wrinkled while it's bundled up. 

The second piece was over printed. The original images were quite blurred but the over printing brought some lovely results. It looks like I'll have to do some mending at the same time as I stitch this one. What fun 😊

A wrinkle in the eco printed leaf

Over printed piece what will need some
lovely mending.


What I learned
  • After my first try, I was really disappointed with the results after the final washing of the fabric. I knew what to expect this time, and I believe that my eco printing came out better, but I will have to look into it to see if there is something that I can do to keep those beautiful colours and images.
  • In my first try, I didn't soak the linen in ash water. I missed that step and it probably made a difference.
  • I also read up on what plants make the best eco prints. I learned the hard way that you get nothing from tulip leaves! 
  • Here are some really great leaves to work with: geranium (the perennial kind), eucalyptus, locus leaves, rose leaves, ginkgo and walnut. I'm sure that there are more - I will have to check out more websites. I may have caught the bug...and I also need to do something with these!
  • I found a blog about how to dry leaves for eco printing (she's from Canada also :-)) so I think that I will join the animals out there and start saving up for winter....not nuts, just leaves! 
  • When an eco printed piece doesn't look that great, there is nothing stopping me from cutting out and using the good prints.
  • I also created a PowerPoint of the pictures that I took with the leaves, before and after washing. I'm hoping that this will help me for the next time.

  • Below you will find the finished piece, Mixing it up! from the fist 25 days of my #100dayschallenge. I didn't want to write up a new post just for the final image.

Related links
Linking parties


* If you're looking for Free Motion Mavericks, we are taking the week of Sept 23 off. The next link up will be with Muv on September 30. See you then!

Project details

Mixing it up!

First piece made during days 1 to 25/100 for 
@100dayschallenge on Instagram

Size: 12½" x 14½"

Materials: cotton scraps

Techniques: Improv piecing, free motion quilting, embroidery