Showing posts with label buttons. Show all posts

Sunday, June 06, 2021

Snippet Exchange

Exchanging Snippets
In mid-February I exchanged the background of my snippet with Dorothy, another member of the Out of the Box (OOTB) Fibre textile group. We had until May 17th to finish embellishing our partner's snippet background and exchange them for the final reveal during our monthly virtual meeting.

Snippet background

A snippet is a small piece of something. You've probably heard of a snippet of music or video. If you Google "snippet roll" you will find that they are generally narrow lengths of embellished fabric that are often rolled around a piece of wood, such as a dowel or tube.

Dorothy's background
My background

Dorothy's background was made of purple fabric that she had hand-dyed, as well as a square of dyed cheesecloth. She has a lovely gradient of purples there. My background consisted of two strips of rather wild coloured fabrics that ranged from light blue to deep purple and fuchsia. I bought this fabric years ago when Ricky Tims came to Ottawa for a presentation.

Embellishing a snippet


The snippet that I was to embellish hung on my design wall for at least a month. When I finally started putting things to embellish it aside, it slowly came together. I filled a small basket with threads, yarn, buttons, hand-dyed scraps, lace etc. 

Fabric

The first piece of fabric that I stitched on was the long pinkish sliver on the left. I used Kimono silk thread to attach and sew when I didn't want the stitching to stand out. Otherwise I used my hand-dyed perle cotton as well as other embroidery thread.

First pieces of fabric
Adding various elements


Top of the snippet
One evening I stamped a couple of my hand-dyed fabrics. The swirl next to that first piece was stamped and then I just added random cross-stitches. On a piece of purple and blue fabric, I stamped on some birds. I added them at various places to add a little bit on cohesiveness. I embroidered around that first bird but since the result wasn't worth the effort, it was the first and last bird to be embroidered.

Here are the details of the completed snippet in three images. 

You can see that I added a lot of different fabrics. The colours that matched the background were easy to find while the contrasting pieces were more difficult. That's why I added that first pinkish piece - to remind myself to use contrast.

While colour is important, I also wanted to use contrasting textures in the fabric scraps. Here is a piece of voile from an old skirt that is attached to the first pink fabric and the printed swirl. 

Layering fabrics is a great way to add contrast and interest. At the bottom of this image is a layer of silk organza, a scrap of a dyed t-shirt and finally some dyed cotton velour.


Middle of the snippet
In the middle section, you can see a couple of other stamped birds that I didn't bother to outline with embroidery. Near the middle, Dorothy had used a purple cheese cloth so I added a piece of white silk organza to add some depth. 

I couldn't resist adding a small scrap of fabric with violets - it was just so perfect.

The fabric that starts in the middle and goes all of the way down the right side is the back of a skirt where tulle had been attached to the dark purple slip underneath. What you see is the sergered stitches. I thought that it might add interest to a piece at some point. 

Yarns and thread

Since I wanted to use many yarns in the piece, I started by couching some fuzzy dark purple yarn to create the top flower. 


Bottom of the snippet
I wanted to cover the stitching on the background piece, so I alternated between couching yarn and embroidery stitches.  

I also couched a piece of cheesecloth and added beads for interest. Many are small pieces of amethyst from my mother's broken necklace.

At the very bottom, you can see a white piece that is sort of lacy. It's a piece of FMQ on soluble fabric that I made a couple of years ago. I backed it with purple semi-transparent fabric.  

Buttons

I added a couple of fun purple buttons with white dots on them for a little bit of whimsy. There is also a beautiful hand-carved flower button near the bottom.

My Snippet

Here is the lovely snippet that I received from Dorothy.

My snippet made
by Dorothy
Dorothy used embroidery, appliqué, and beading. She added a few pieces of cheese cloth, some fun buttons (stars, an inch worm, bees, sewing machine, etc.) as well as ribbon that looks like a measuring tape. 

She made the swirls from foil that lines the inside of many food containers (I'm going to have to try that!) as well as two hand-made flowers.

I attached the snippet to those ice cream sticks that I roll up my hand-dyed thread on. It now hangs in my studio.

My new snippet roll.


My June OMG
June's One Monthly Goal (OMG)

I will be sandwiching my son's Version 2.0 quilt by the end of the month. Hopefully I will have gotten further along but at this point I'm being prudent by just putting the sandwich as the goal.

What I learned
  • The blank background was very intimidating but when I started to gather possible materials, it became less daunting.
  • I found it difficult at first to work on such a narrow background. 
  • When I found my groove, it was a real delight of slow stitching to put this together. 
  • I found it hard to part with the piece but I got such a vibrant, joyful piece back. 
  • Our snippets are so different. I can really see the influence of the workshops that I've taken from TextileArtist.org Stitch Club.
Related links
Linking parties
I'll be linking up to many fun linking parties, including Free Motion Mavericks which is being hosted by Muv. I will also be linking up to Patty's June's One Monthly Goal as well as other fun linking parties. Let's see what's going on out there! Oh Scrap!, Slow Sunday Stitching, Patchwork & Quilts, Peacock Party, Beauties Pageant, Off the Wall Friday, Monday Making, 15 Minutes to Stitch 2021


Sunday, January 10, 2021

Project Quilting 2021 - Grey and Yellow

I hope that 2021 has been good to you so far. I've been working away at this year's first challenge of Project Quilting: Illuminating (yellow) + Ultimate Gray. These are the Pantone colours of the year for 2021. I guess just having grey as the colour of the year could have been dull, so these are lovely colours together.

Project Quilting Challenge 12-1


I decided to keep it simple. As you may have read in my last post, my word of the year is calm. I took the opportunity to make myself of reminder of my word and intention.

Keep calm & stitch

It was a very straight forward piece. Find yellow and grey scraps and start sewing pieces together. I just had to go into my stash for a little more grey. I decided to keep it simple and created a log cabin improv block with the grey in the centre and yellow on the outside.

I put the block together in one evening but it took most of my free time this week to stitch it. There is no doubt that slow stitching is just that....slow! It did remind me to stay calm. 

Stitching in progress

After stitching most of the inside grey section, it was time to square off the piece. Lesson learned: if I don't do this before the piece is finished, I'm bound to stitch where the binding goes and cut off some of the stitches. At this point I prepared the scrappy binding and attached it. Then I finished stitching, knowing that I would now stay inside the lines!


Adding more stitching once the binding is on

Here are views of some of the details.


The grey was stitched mostly with running stitches

For Christmas, my son got me the paper copy of Sharon Boggon's Creative Stitches for Contemporary Embroidery. I used Sharon's book for inspiration. I didn't want to get too fancy with stitching but I used some of her ideas for the stitching layouts. 


Adding beads
and couching
Adding beads and 
trying out stitches


What I learned
  • Yesterday I got a little panicky about finishing the piece on time. So I took a deep breath and decided that it was no big deal if it wasn't finished by the deadline - I could just post it after the party. Problem solved, back to calmness. 😊
  • I absolutely love Sharon Boggon's new book. Sharon is the lady who hosts TAST or Take a Stitch Tuesday on her blog, Pintangle. If  you like embroidery, check her out (see Related links below).
  • Now that I have this new project out of my system, it's time to work on my son's quilt!
Related links

Linking parties

I will be linking this post to Project Quilting 12.1. Make sure that you check out what wonders others have created! 
I'll be linking up to many other fun linking parties. Let's see what's going on in quilting/stitching blog land! Sarah Goer has a new linking party - Show me something that's a challenge, that I've linked up to.
Oh Scrap!, Slow Sunday Stitching, Patchwork & Quilts, Colour & Inspiration Tuesday, Design Wall Monday, Monday Making, To-Do Tuesday, Needle & Thread Thursday


Project details

Keep calm & stitch
15" x 11"
Materials: grey and yellow scrap quilting cottons, beads, buttons, embroidery floss, perle cotton
Techniques: improv piecing, embroidery stitching, beading

Saturday, April 06, 2019

Moose Cubicle Mini Quilt

It's a cubicle mini - a little late because I didn't finish on time for the March One Monthly Goal (OMG) but not too late since my son is still working in his cubicle 😊

Moose Cubicle Mini

I've made a few foundation paper pieced minis using Made by Marney's patterns. This is the latest.

A Moose for you
Since I added a border to the mini, I actually remembered to used the Extended-border binding technique. It really worked out well. I stitched in the ditch around the border and then free motion quilted (FMQ) the mini, up to the border. I then flipped the border towards the mini and cut the batting and backing about one inch from the sewn edge of the border.

Cutting the batting and backing
I had ironed the binding so that I knew where to trim the batting and backing. At the bottom of the image below, you can see that the batting reaches to the border (if it's laid flat). Once the batting and backing were trimmed, I flipped the mini over and hand-stitched the border to the back, as if it was a binding. For more details see the link to the tutorial in the Related links below.
The border will cover the back, as if it was a binding.
Here is the mini from the back. The backing and batting have been cut and it's now time to fold the borders over them.
Getting ready to sew down the border
A moose for you
What I learned
  • I used a different fabric for the bottom of the mini since I wanted it to look like vegetation. Next time, I think that I'll just add an extra piece between the sky and the bottom so that the vegetation doesn't go all the way up to the antlers.
  • After trimming the batting and backing, I realised that the moose's antlers were not very visible, so I added some FMQ.
  • Preparing the extended-border was much easier this time than the last.
  • I used a quilting marking pencil that turned out to not be erasable! I got rid of it, but not before making a mark that won't go away!
  • I could have made it on time for the March OMG (barely) except that I didn't have two small matching buttons in all of my button stash!
  • As much as I love linking up to OMG, I'm going to give myself a break this month - I really need to just go with the flow for a while :-)
Related links
Linking parties
I am linking up with Muv at Free Motion Mavericks as well as many of the fun link-up parties in the neighbourhood. Let's go see what's on! Can I Get a Whoop Whoop?, TGIFF, Finished or Not Friday, Friday Foto Fun, Brag About Your Beauties, Oh Scrap!, Monday MakingDesign Wall MondayMoving It ForwardWhat I Made Monday, Tuesday Color Linky Party, and Meadow Mist's April Favorite Finish Monthly Linkup.


Project details


A Moose for you
8¾ " x 9"
Materials: cotton and buttons
Techniques: Foundation paper pieced, free motion quilting, extended-border binding technique


Monday, February 18, 2019

Green Garden Gate mini art quilt

My final mini art quilt is finished! The first three were enjoyable to make, and not too difficult, but this one was tough. I had decided to try one last time before giving up - and then I made it.

Green Garden Gate

I had the perfect background, which was probably part of my problem, but didn't know what to do with it. I started by embroidering some of the designs. Chain stitches for the swirls and French knots over them.

Now what? When in doubt, add a twig or two!

After running some errands, I cut a couple of twigs from one of our trees in the yard. I decided that this last attempt would incorporate some weaving. I attached the branches to the fabric using green embroidery floss and placed the floss across the two twigs to make a warp.

Weaving with many types of yarns
I took out some of my lovely yarn and started weaving. I then couched some more yarn to the twigs themselves and then beaded them. I still had no clue what I was doing.
Woven and beaded garden gate
Next I used a piece of the background fabric that I had folded, accordion style. I attached the two ends of that around a little piece of branch that was sticking out, trimmed it and then used this lovely green and blue voile fabric inside it to make a flower.

The voile was attached to the outside of the flower and beads were added both inside the flower, around the edges where both fabrics met, and on top of the inside fabric.
Using the branch as a support for the flower
I tucked a lighter voile fabric behind the woven gate and sewed on a lotus flower shell(?) button to add a little bit of interest. Finally I added the gorgeous turtle button on the bottom. At that point, I called it finished!

It's too bad that I didn't get to take a photo of all four minis together. Here are the other three.
Mellow Yellow, Blue Moon and Peek-a-boo Red
What I learned

  • I'm not sure how I feel about this piece. It gave me such trouble that I don't know if it's ingenious or plain bizarre. 
  • There were definitely many lessons learned.
  • First and foremost, don't attach the background to the canvas until you finish embroidering, sewing, beading, etc. It just made everything very difficult.
  • The reason I did that is because the twigs needed to be held down to weave. In hind sight, I could have taped them to a flat surface and then added them to the background!
  • I don't know what to make of the flower. It probably could have used more contrast but I wasn't sure that I wanted it to show too much.
  • If you suspect that this mini was late - you're correct. We got an extension, thank goodness!
  • I feel like I had to try to hard to make this one. I think that I was focusing on the green fabric too much and just didn't know what to do with it.
  • I also think that four minis using mostly one colour was a huge stretch for me - I would much rather be told what technique or material to use than to be bound by a specific colour.
  • Making four of anything is probably a few too many 😊 for me.
Related links
Linking parties
This post will be linked to some cool linky parties. Why not check them out? Monday Making, Design Wall Monday, Moving it Forward, What I Made Monday, Linky Tuesday, Tuesday Colour Linky Party, Let's Bee Social, Midweek Makers, Needle & Thread Thursday, Off the Wall Friday, TGIFF,

Project details

Green Garden Gate
5" x 7"
Materials: twigs, cotton, buttons, toile, embroidery thread, yarns, beads
Techniques: weaving, embroidery, beading


Reminder: The Dust Off a Quilt Book Blog Hop is on this week. My turn is Thursday, so please come back to see my Mola post! Until then, here is the link to the blog hop.


Wednesday, October 11, 2017

Art with Fabric Blog Hop - Gaïa, Mother Earth

It's that time again - the semi-annual Art with Fabric Blog Hop - Fall 2017!


I've been participating in Alida's blog hop for two years now. This will be my fourth entry. It's a great event - I get to make an art quilt from a piece of art that I love, and see all of the participants' creations. Thanks Alida for organising this again!
Gaïa, Mother Earth

This fall event's theme is Mother Nature, sometimes known as Gaïa, the goddess of the earth.

My entry is based on a reproduction statuette of a beautiful Pre-Columbian female figure from Colombia, South America. Technically, the figure probably did not represent Gaïa, but she is, to me, a symbol of Mother Earth.


Reproduction statuette from the Tamaco culture 
When I found her fifteen years ago, I was told that there were very few of these statuettes around since they were extremely difficult to ship to Canada. Since coming to our home, she has always been in my living room surrounded by books and plants.

Provenance
The archaeological area
in Colombia and Ecuador
I've done some research on this lovely lady. This reproduction comes from Colombia, South America, near the Rio Mira (Mira River). The original statuette is from the Tumaco culture, dates from 1000 to 1600 AD and is held in a private collection.

I found two resources, that I have listed in the Related Links below, about the statuette. The first one is about the Tumaco culture while the other one, on the Tolita culture, is from the same region but possibly older. Check them out for a fascinating read.

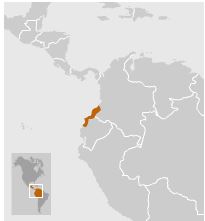
The area in Colombia where she comes from is near the Ecuador border. Here is a map of the area from the Museo Chileno de Arte Precolombino.

The background
Since the theme is Mother Nature, I wanted to make the background of this art piece based on the area where this statuette comes from.

Tumaco is both a port city and municipality located on the southwestern corner of Colombia, near the border with Ecuador, on the coast of the Pacific Ocean. It has a hot, tropical climate.

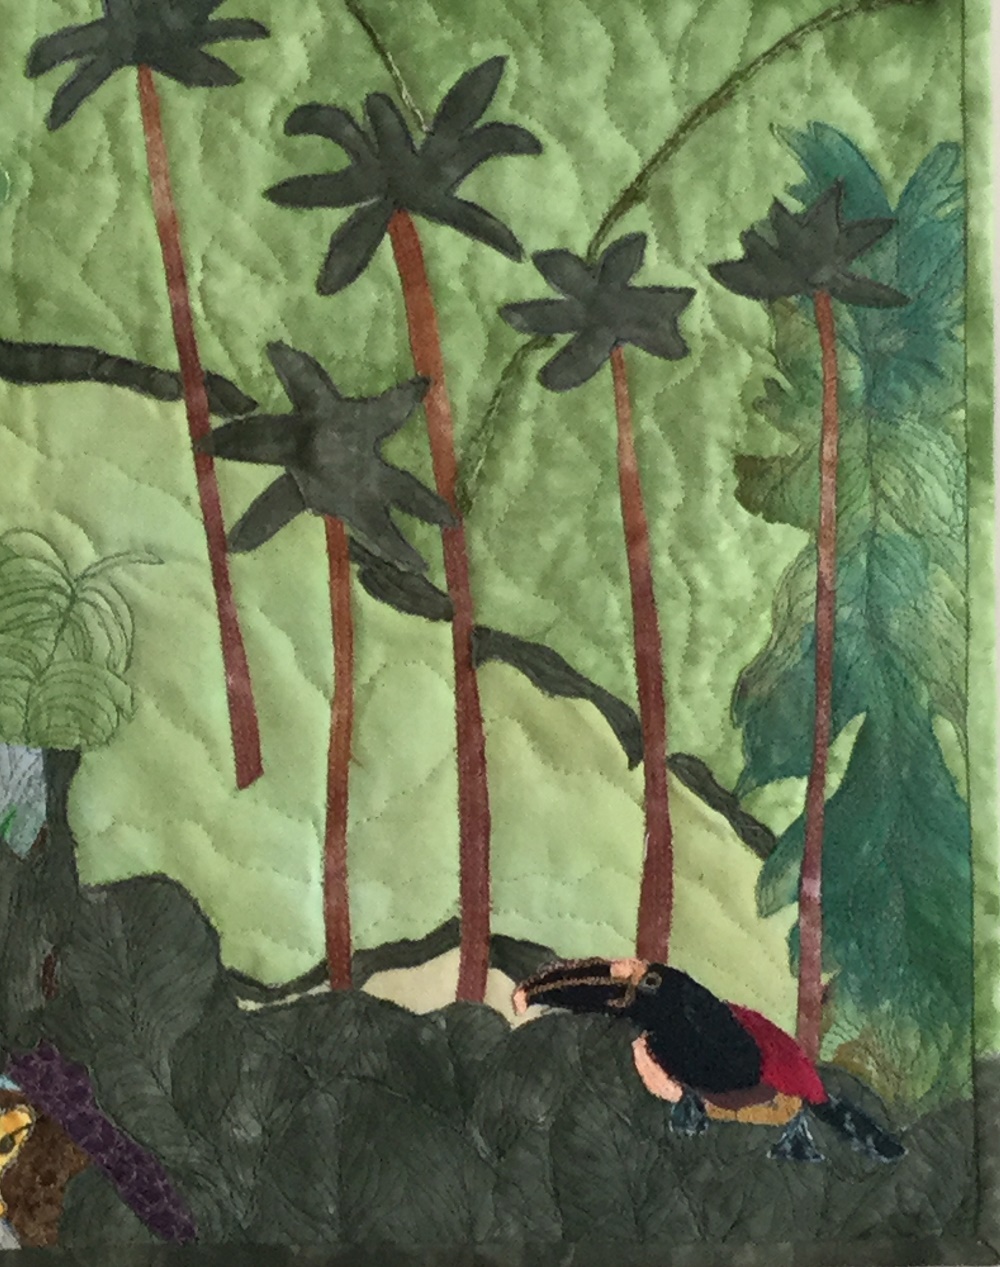
It's far from a realistic representation but it includes some interesting animals and plants of the area, and of Colombia in general. The wax palm tree, Colombia's national tree, is found near this area, in the Cocora valley. I've included a poison arrow frog, an orchid, a bird (the Stripe billed aracari), and a morpho butterfly. The landscape includes a river, the valley with the wax palms as well as mountains in the distance.
Panoramic of Cocora valley with wax palms

The making of the art quilt
I started with the background of the valley and the mountains. These are all hand-dyed fabrics - my own and some from my stash. I also wanted to add a water feature. It took me a while to work in the river on the bottom left. You can see one of my earlier attempts in the image below.


My favourite part was making the wax palms. They are so tall and elegant!

After the thread painting and before the quilting
I made the aracari and butterfly on some interfacing and solid off-white fabric, while using some fun yellow fabric to make the frog. All were made separately with lots of thread sketching and then appliquéd to the piece.

I quilted the piece with Superior Kimono silk thread in both the bobbin and the top.

Quilted and almost finished
As I was working on the background, I started with just a cut-out of the statuette's image to make sure that she would belong. When the background was almost finished, I used a photo transfer medium to get the image of my statuette onto fabric. I'll be explaining this technique in a later post.

To outline the mountains, I couched some dark green yarn made of banana fibre.

Finishing
I embellished the statuette, as if they were offerings made to Gaïa, with coral buttons representing baskets and an orchid.
Baskets and an orchid as offering to Gaïa
Wax Palms and stripe billed aracari

River with a Morpho butterfly and a poisonous arrow frog 
The art quilt is finished with a pieced binding that matches the quilt.
Gaïa, Mother Earth
What I learned
  • I hadn't researched the origins of the statue until I decided to make this art quilt. I am really happy to know a little more about her culture and her country of origin. Colombia has an amazingly rich and diverse ecology.
  • I had a really hard time incorporating the river into the piece. When I finally stopped trying to be realistic, it all fell into place.
  • It was fun making the various animals and plants that I appliquéd to the piece. 
  • I had no idea how I was going to finish the piece. This is really something that I should think about before making the quilt - it would make it so much easier at the end. I do like how the pieced binding worked out. I considered quilting over it and making it a more integral part of the quilt, but frankly I was tired and this would have required a lot of work. I just wasn't up to it.

Related Links

Project details


Gaïa, Mother Earth
19¾" x 17¾"
Materials: hand-dyed and commercial cotton fabric, coral buttons, banana fibre yarn
Techniques: appliqué, photo transfer medium, couching, thread painting, FMQ, 


Linking Parties: this post is a part of the Art with Fabric Blog Hop - Fall 2017. Take the time to visit the other participants. I'm sure that it will be worth while!  I will also be linking to some fine link-ups. Main Crush MondayDesign Wall Monday, Linky Tuesday, Let's Bee Social, Midweek Makers, Free Motion Mavericks,  Off the Wall Friday, Needle & Thread Thursday, Can I Get a Whoop Whoop? 

Here is the schedule and links to the Art with Fabric Blog Hop, I will be adding direct links to the  posts as they are posted. I will also be hosting guess blogger Patty, on Friday. Be sure to come back and check out her work!

Monday, October 9th, 2017
Tuesday, October 10th, 2017 
Wednesday, October 11th, 2017 
Thursday, October 12th, 2017 

Friday, October 13th, 2017 


Monday, October 17, 2016

Whimsical Landscape - Oregon Mountain

Wold Quilting Travel Adventure
with JoJo Hall
I'm on a World Quilting Travel Adventure with  JoJo Hall. The fun started in September. We will be visiting a different place every month and then making a souvenir from that destination based on  JoJo's design.

Our first destination was Oregon, where  JoJo lives. She posted a whole bunch of interesting facts about Oregon. Then, if we registered for a passport, we received a pattern of Mount Hood with the lake in front of it. It's a really beauty.


Here's a picture of  JoJo's quilt.

Jojo Hall's quilt of Oregon.
 JoJo's original pattern was very large, so I made it my usual landscape art quilt size, about 8" x 12". This size was much more manageable since I was in the middle of working on my Art with Fabric blog hop quilt.

I really wanted to have fun with this project, so I started digging into my scrap bag for something to play with. I found the black fabric with yellow polka dots and knew that it would give the project a whimsical feel.
Picking fun fabrics from my scrap bag
I didn't love the fabrics, but I knew that I wanted to do some serious embellishing, which meant that a lot of the fabric wouldn't really show that much.
Sparkling tulle over the mountain top

I wanted to add something to make the snow cap stand out a little. I added sparkling tulle over the white fabric and then back stitched with white embroidery floss to attach it. The easiest way to do this is to use a larger piece of tulle, stitch it in place and then cut the excess. 


Next I added embellishment to the fields at the bottom of the mountain (no lake in my landscape). I really like adding embellishment, and since I was going for whimsical, I went all out. I embroidered using all types of chunky wool. When the wool was too heavy to embroider, I just couched it.

Adding embellishment
Adding embellishment 
I also covered some of the flower fabric that I really didn't like with tulle to mute it. Do you recognize the row of daisies? I've had that in my sewing supplies since I was probably 12 years old! My girlfriend had some when she was younger too!

I finished by adding a few beads and buttons to the project. I even found a small airplane to add in the sky!

Whimsical Landscape - Souvenir of Oregon
I had a great time making this souvenir from Oregon. I didn't follow JoJo's pattern very much. One day when I have the time and energy, I'd like to make one more like her's. It really is beautiful.

What I learned:

  • I was so keen to get this blog up that I forgot about What I learned! That's the first time - I think it was also a result of being tired and (gasp!) too much quilting :-)
  • I really need to get more of these types of playful quilts done. It seems that when they are small and done for fun, then I not only have fun, but I learn and am not afraid of making mistakes because ultimately it doesn't matter. That is very liberating!
Join JoJo Hall on a World Quilting Travel Adventure. The destination for October is Hawaii, Our souvenir is very nice - check it out. Hopefully I'll be making something fairly soon. JoJo also featured my quilt on her post! How cool is that???!

I'll be linking this post to some linky parties. Check out what others are up to! Oh Scrap! MOP Monday, Monday Making, Main Crush Monday, Fabric Tuesday, Linky Tuesday, Let's Bee Social, Midweek Makers, Needle and Thread Thursday, and Off the Wall Friday