Showing posts with label bed quilt. Show all posts

Thursday, April 30, 2026

Island Batik Fabric and I Quilted This!

Hi and welcome 😊. The weather here is all over the place but this morning the poplar in my back yard had leaf buds. There was no greenery yesterday and now there are tiny leaves peaking out! Between the explosion of bulbs and the birds hard at work constructing their nests in the neighbourhood, it must be Spring! 😍

A Future Quilt Make-over


I was one of the lucky winners of a bundle of Island Batik fabric for the 2026 SAHRR. That was the best gift ever since after over 10 years of sleeping under it, I have a king-sized quilt to repair/make-over.

Island Batik bundle of fat quarters

With 169 blocks to quilt, I never did finish FMQ it. This caused some of the problems but unfortunately a few fabrics just disintegrated around the FMQ. I've been buying batik fabrics ever since I started quilting. Back then, I didn't know that not all batik fabrics are of the same quality.

Batik king-size quilt - after 10 years, in need of serious repairs


I started FMQ the quilt in 2016. All of the 8" blocks had been stitched-in-the-ditch. When we first slept under it, only 23 blocks had been quilted. By 2019 I had 54 blocks FMQ and in 2020 I had 120 blocks done, that's about 2/3 done.

In my 2020 post I had repaired a few of the blocks but since then it's gotten worse and I just did what I do best - I ignored it by putting another smaller quilt over the worst of it! I really didn't know if I should fix the quilt or just throw it out but when I won these fabrics, I knew that it would eventually get fixed.

A couple of weeks ago we bought a new bed cover. Since it wad deeply discounted, it's quality and lovely to sleep under. This means that I can now work on the original quilt without having to take it off  the bed and then put it back on to sleep 😁

Block I fixed the last time  - there are many more!

Next week I'll be washing the batiks as well as the king-size quilt. After that, I'll figure out how many blocks need to be repaired or replaced. I'm hoping to fix a few blocks at a time but this will be a big job over several months. 

May's One Monthly Goal (OMG)

For April's OMG I managed to iron the flimsy. Next will be the backing and then the sandwich. My objective remains the same - to start quilting it, at least in-the-ditch. I'll be linking up to May's OMG when it opens 😊

May's OMG

What I learned
  • I now know that batiks, like other fabrics, are not all the same quality. I now should have enough batiks to fix the whole quilt.
  • Since I'm not sure which batiks were the cheaper made ones in my stash, I've only been using batiks for art or wall hangings that won't be washed.
  • I was gifted some gorgeous batiks from Alaska that I'll be adding to the quilt - thanks LiseπŸ˜€
  • Thank you so much to everyone who was involved in the SAHRR 2026 and a particular thank you to Kathleen who mailed the box to Canada - wow, no wonder no one wants to ship to Canada from the US anymore....so a very special thanks!😍
Related links
Linking parties
I'll be linking up this post to many fun linking parties, including the May OMG. Monday Musings, Sew & TellPut your foot downOff The Wall FridayPatchwork & Quilts,


I Quilted This!


Welcome to the I Quilted This! linking party that celebrates quilting on a domestic machine or custom quilting on a long-arm. Feel free to link up and share any recent project, even if you're not quilting it! 

Here are the posts that included FMQ, ruler work and walking foot quilting last week. Thanks for linking up 😊 and consider grabbing the button (contact me if you need the coding). 

Gretchen quilted this colourful Fabric Vortex quilt for her grandson. She quilted it with a spiral design. Gretchen made the quilt reversable using orphan blocks. Her grandson was thrilled! If you're interested in learning more about making a fabric vortex quilt, Gretchen has included all kinds of links in her post. I'm looking forward to going down that rabbit hole once this late post is finally published!

Gretchen's Fabric Vortex quilt, quilted in a spiral design

The back of Gretchen's Fabric Vortex quilt - made of orphan blocks

Kat from Scrapbox Quilts worked on her second quilt in the 6 quilts in 6 weeks challenge. She was able to find a UFO started last year that was a Villa Rosa design - Honey Bouquet. Kat quilted her scrappy quilt on her domestic.

Kat's second quilt for the 6 quilts in 6 weeks challenge

Anne-Marie of Stories from the Sewing Room found out that one of the quilts that she custom quilted in 2024 was on "display at the AQS shows in Daytona Beach and Hartford this spring and will also be on display in Paducah." What amazing news! You'll want to check out the FMQ on her original post.

Custom quilted by Anne-Marie in 2024
It's now your turn 😍

You are invited to the Inlinkz link party!

Click here to enter

Thursday, December 21, 2023

T-shirt Quilt Finish on Free Motion Mavericks

Welcome to week 461 of Free Motion Mavericks. I delivered the quilt to my nephew last night at 10:30 so that he could pack it up to bring to Denmark. He lives down the street so it wasn't a long journey. He and his roommate are tall men, so they helped me take a few quick pictures of the quilt. Thanks guys!😊

A Finished T-shirt Quilt


It's done and since I drove my nephew to the airport... I know that it's way to Copenhagen ✈ 

A finished queen size t-shirt quilt

I'm not going to go through all of the blocks, mostly because since I don't have the quilt with me, I can't really see from the pictures what I quilted on them! 😎 Here are just a few highlights. 

I had quilted stars in the sashing of this t-shirt but wasn't sure what or with what thread to quilt the t-shirt. In the image below this one, you can see the threads that I used. I FMQ with the neon orange while I originally used the variegated thread to zig-zag stitch the "14" panel from the back of the shirt to the front. 

Free Motion Quilting (FMQ) the bright orange t-shirt

Threads used to stitch the t-shirt

On the next two Ottawa Lions t-shirts, I FMQ the sashing with some dot-to-dot diamonds and other designs within the squares and rectangles. It was good to do something different.

Using dot-to-dot FMQ in the sashing

More dot-to-dot FMQ


The last t-shirt quilted was the New York one. For part of the sashing, I FMQ some lightning bolt designs. I then quilted the contour of the buildings, signs and statue. I used a pink thread to fill in the sky.

FMQ the New York t-shirt 

FMQ the Border


I wasn't sure what to FMQ in the two side borders. I knew that it had to fill in the space quickly without being too fiddly. I found the design in Angela Walter's second book, Shape by Shape Collection 2. She calls it the Serpentine Clusters. It has three serpentine lines and then a row of feathers. 

Angela Walter's Serpentine Clusters design in the two borders

Squaring the Quilt


I am accuracy challenged at the best of times. With a t-shirt quilt, you just make it up as you go along since most blocks are different sizes. It's difficult to square things when you can't really measure from anything. All I could do was make each side straight-ish and then see if the quilt could be folded in half properly.

Straightening the border sides

The quilt didn't past the folding or wonky test. Since these are just the borders, I knew that I could adjust them as required.

Folding the quilt lengthwise

Trimming the edges


I put together strips of the Kona Solids that I had used for sashing in the quilt. I was lucky that the sashing also used 2½" strips. I was able to use many of them for the binding and didn't have to do too much cutting. 

Cutting strips after squaring the quilt
Strips of binding ready to be sewn together

I then used Quilting Jet Girl's Tips for Making / Planning a Scrappy Binding. It was very useful (see Related links below). I needed the binding colour used around the quilt to be a different colour from the fabric it was going to be attached to. Otherwise, the binding tends to recede and looks like there is no binding. 

I put the quilt on our king size bed and placed each strip down where I wanted. Then I very carefully stitched them in the correct order and side. It was then time to attach the binding strip to the back of the quilt.

Attaching the binding strip to the back of the quilt

Finally I turned the binding over and stitched it using one of my fancy stitches. It was the first time that I did this, and I really like the result. My wavy stitching pattern isn't straight but it doesn't show as much as a straight stitching line that is wonky! 😁

Stitching down the binding with a fancy stitch

Here's a couple more pictures of the finished quilt. I hope that my niece will take some so that I can post them.

Part of the finished quilt

The best pictures I could get of the finished quilt


What I learned
  • FMQ a quilt that did not have batting was different. There is no doubt that the quilt would have been too heavy for my niece with batting.
  • The FMQ went well. I only had issues with tension a couple of times. I'm not sure what happened but when I re-threaded the machine, everything was fine.
  • All of the thread used for FMQ was polyester. The bobbin thread was Superior Thread's Bottom Line (60wt). I used two more colours of Bottom Line. There was also 4 colours of Madeira polyneon, 6 colours of Glide polyester thread and then the neon Orange polyester thread from Coats (I think). They also needed the same tension, so that was great.
  • As I mentioned, I used Quilting Jet Girl's Tips for Making / Planning a Scrappy Binding. I know that the colour of the binding needs to be a different colour from the fabric that it's attached to, otherwise the binding tends to recede and it ends up looking like there is no binding. 
  • I knew that I wouldn't have time to hand-stitch the binding so I found a video, "How To Bind a Quilt on a Sewing Machine with Jenny Doan of Missouri Star". It taught me what I needed to know and except for one corner, the stitching went really well.
  • I decided to use the wavy stitch from my machine since I knew that a straight stitch line would not be straight. I also wanted something a little bit wide to attach the binding well.  
  • Now that my niece's t-shirt quilt is done, I can focus on Christmas πŸŽ„πŸŽ… and other projects.
  • I'm also looking forward in participating in the usual end-of-year blogging posts. See you then!
Related links
Linking parties
I'll be linking up to many fun linking parties. Why not link below before checking these out? This quilt was my December OMG. I'll link up when the party opens! Put your foot down (at the Quiltery), Midweek Makers, Design Wall Monday, Sew & Tell, Patchwork & Quilts, Beauties Pageant, TGIFF with Anja
I'm linking this post up to Tips and Tutorials on the 22nd


I hope that you have a wonderful Christmas and Holiday Season! 

Christmas Tree Window Hanging

Free Motion Mavericks


What wonderful quilts we had last week. I haven't visited everyone yet, but I will! 😊

Denise of the Quiltery (Love of Geese) made this really lovely Christmas hanging for both the Virtual Cookie Exchange and the Island Batik Ambassador Celebration Challenge.

Christmas tree and gift wall hanging  by Denise 

Donnalee finished her first fabric collage piece based on mushrooms that she saw on a trip to New Zealand. What a great finish!

Mushroom fabric collage piece by Donnalee

Melva of Melva Loves Scraps, finished her customer's t-shirt quilt and it's been delivered. It really looks great with the sashing and border fabrics.

Melva's finished customer's t-shirt quilt


Quilting Gail participated in the monthly Classic Car Colour Challenge hosted by Jen @ Patterns by Jen. What a great quilt! I especially like the border piecing. Gail did “Wild” or “Graffiti” quilting in the centre. The outside was quilted using Silly Moon’s Rocket ruler.

Gail's Classic Car Colour Challenge finish


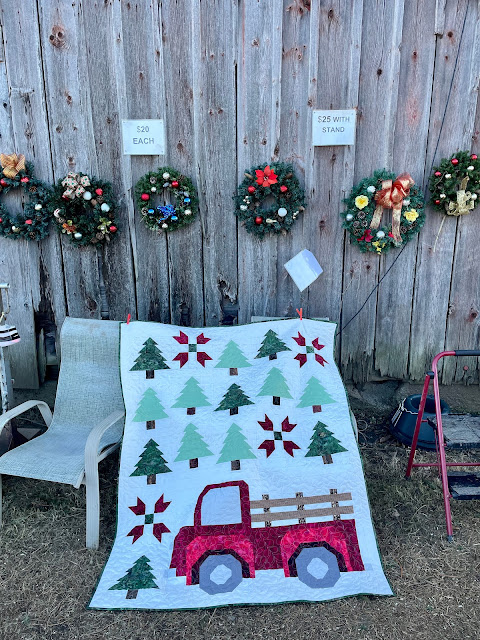
Sandra of mmm quilts made a Christmas tree farm quilt for her daughter. What a wonderful finish! My feathers sure don't look like that! πŸ˜€

Sandra's Christmas tree farm quilt 

Thanks so much for participating! It's now your turn.

You are invited to the Inlinkz link party!

Click here to enter

Wednesday, December 13, 2023

Back to FMQ the T-shirt Quilt on Free Motion Mavericks

Welcome to week 460 of Free Motion Mavericks. I have been able to do free motion quilting (FMQ) this week. It felt good to be back home and at my Jag (my sewing machine) 😁 

FMQ the T-shirts


I started quilting the outlines of the hearts on this lovely t-shirt. Once I finished the hearts, I added the row of ruffle to the top of the block. Isn't it cute? 😍 I'll come back and do the sashing when I have blue thread in the machine. 

Lovely heart t-shirt with a ruffle

I then FMQ some of the t-shirts whose sashing I had previously quilted. In this case, I just wanted to keep it simple. They are mostly wavy lines.

The three high school t-shirts ✔

I just FMQ around the people and outlined the letters. After adding the photo to this post, I decided that it needed a little more quilting.

Outlining the group and name

Adding more swirls in white


I then started another t-shirt block. On this one I fudged improvised the sashing a lot because the t-shirt had to be cut at odd angles. I FMQ linked squares and rectangles and then went around the letters. I didn't want to stitch over the image too much because it's rubbery, but I went around the hat and it seems ok. I love the sentiment of this t-shirt...I guess my niece and I have that in common 😊

Linked squares and rectangles in the sashing

Here are a couple more blocks. I had fun with the Bridge t-shirt. I FMQ clouds in the sky, then water below, with fish and a sailboat. It's not obvious but it will be a fun discovery 😊 I'll be FMQ the border when that navy blue thread comes out!

Bridge t-shirt with FMQ landscape elements 

For this t-shirt block, I used some dot-to-dot type FMQ for the sashing. The sides have rather rough diamonds, the bottom is covered with echoed paisley and the top is another variation from the dot-to-dot design. On the t-shirt itself, I quilted a row of meandering flowers at the bottom and then some swirls. I also outlined the girl. Isn't she precious? She reminds me of my niece when she was young!

Dot-to-dot variations in the sashing

For this next t-shirt, I had a dilemma. I FMQ the Anna Canada t-shirt following the very faint lines that are in the t-shirt fabric, and I outlined the numbers. However, you can probably see the extra t-shirt fabric on one side. It's more than a little pucker and it will be vulnerable to ripping so I went back and sewed it down by giving it a slight tuck. It took quite a few lines of stitches but it's better than a huge pucker. 

Puckers stitched down
A dilemma that
needed to be fixed


The emoji t-shirt was FMQ with a kind of flowing algae design with white thread. It's much better than what I usually do, which is to circle around each element. 

I went back to the music t-shirt and added more looped filling within the t-shirt. As I cropped the image, I realise that I'd be going back once more to put a few lines between the locations at the back of the t-shirt. That has flatten it out well.
Additional lines of FMQ to flatten the t-shirt

The back of the t-shirt 


Here is the t-shirt that I was working on when I ran out of bobbin thread and called it a day. I have to eventually publish this post! For this pink t-shirt, I'm FMQ some allover large echoed flowers. It's a lot of fun but is time consuming.  

FMQ allover large echoed flowers

What I learned
  • The FMQ goes quickly when I know what design I'm going to use. It always slows down when I have to think of something new to use.
  • I spent a few hours looking for and drawing out some fun designs. This time, I went back to Leah Day's 365 Free Motion Quilting Designs. I drew then out and added them to my FMQ journal to keep track of.
  • It turns out that even if there is no batting, I still need to quilt all over or there will be loose fabric that can get caught, as I showed you. 
  • Considering how accuracy challenged I am, I'm pleasantly surprised that there haven't been more problems.
  • I did manage to cut the backing too much at the top of the high school t-shirts. I left the top sashing unquilted for now, so that I can add a couple of inches of backing. πŸ˜’
  • Of the 25 t-shirt blocks, I have 7 more blocks to complete, 1 t-shirt only to FMQ (not the sashing) and I've almost finished the pink all-over block.
  • All of this, including the binding needs to be finished by next Wednesday. It will be done ✔
Related links
Linking parties

Free Motion Mavericks


There were no link ups last week. I don't think there were issues with InLinkz. If there are, please let me know in the comments. Thanks.


You are invited to the Inlinkz link party!

Click here to enter

Thursday, November 09, 2023

FMQ the T-shirt Quilt on Free Motion Mavericks

Welcome to week 455 of Free Motion Mavericks. November has brought us snow in Ottawa. It probably won't stay but it is pretty. I guess that it's time to put away the patio furniture! I hope that you're enjoying whatever fall is bringing you.😊 

FMQ the first three blocks


Here is a quick look at the blocks. Nothing fancy but fun to quilt!

The first block with snowflakes on the t-shirt

Second block quilted with the Ablaze design

Third block quilted with meandering loops, notes and musical symbols

I'll start at the beginning, after having made the flimsy. I had been procrastinating because the next part was sandwiching the quilt...and you know how I love that (heavy irony here, if you don't know me!) To get motivated, I did a search about FMQ (free motion quilting) a t-shirt quilt. This is what I found out: 
  • Since none of the t-shirts have heavy plastic logos, I would be able to stitch inside the t-shirts.
  • T-shirt quilts can be quilted as densely or as lightly as you want - it depends on preference and the batting.
  • T-shirt quilts tend to be very heavy and hot because of the weight of the t-shirts, batting and backing. I can attest to that - my nephew's quilt weighed a ton (but he's a big strapping man)!
  • The t-shirt quilt doesn't have to include batting. That was a mmm... moment. Since my niece is rather tall and slim with a small frame, did she really want a quilt that would be, for her, like a weighted blanket?
  • So I asked her. Did she want a hot and heavy quilt, or a light and cooler one? 
  • Cool and light it is! Yeah!!!! 
This meant that I didn't have to add batting to the quilt. Since the quilt was on the banister at the top of the stairs, I put the backing face down on the banister and then added the quilt. Sometimes I am brilliant 😎 It helped that I had lots of time to think about it while procrastinating.πŸ˜πŸ˜‚

This weekend I sandwiched the quilt over our dining room table. Without the batting, it was the quickest quilt sandwich that I've ever made. Yeah!

Stitch-in-the-ditch


Choosing thread to quilt this queen size quilt is important. From experience, I know that my machine prefers light, synthetic thread over cotton or even polyester. I do have a few cones of Superior Threads' Bottom Line, so that's where I started.

Since my stash of Bottom Line cones is rather small, I looked for other thread that could work. I found 5 colours of Glide thread and 4 colours of Madeira thread. I guess that there's no need to go shopping!😌

Glide, Madeira and Superior Threads' Bottom line cones

I used the tan coloured Bottom Line thread to stitch-in-the-ditch. From the back, it's perfect...but not so great when I miss the ditch in the front! No worries, it won't show once everything is quilted. 😊

Texture at the back, but very little extra colour

Block one


I chose the lovely skiing t-shirt as my first one to FMQ because it was sort of in the middle of the quilt and I have a lovely blue cone of Bottom Line. Since I kept the tan coloured thread in the bottom, this was a great way to see if my tension was good enough to use different colours on the top and bobbin...and it was!

The skiing t-shirt with the light blue sashing

Since my favourite FMQ design is the meandering flower, I stitched this on the side sashing. At the top and bottom, I used another favourite, what I call the "l" and "j" design. Designs that use our writing motor muscles are often the easiest to do since we learned to write a long time ago! 😊

Inside the t-shirt, I added meandering snow flakes and a few lines for the skiing. I used the light blue thread - it almost looks white against the red background. What a fun first block!

A colourful snowy first block!

Block two


After the first block, I did a lot of research using my own FMQ books to find some appropriate designs. The Ablaze design is from Christina Cameli's Step-by-step Free-Motion Quilting. I was looking for something that would connotate speed - so why not a line of fire? I used the little extra row at the top right of the block to FMQ the Ablaze design for the first time.

First image of the Ablaze design

If you click on the first image to make it larger, you might notice what I did when I was cropping the images. I had forgotten to FMQ most of the space between the two crests. Oops!

Finishing up the Ablaze design

The first quilted block of crests


Block three


I decided to quilt the front and back of the Lukas Graham t-shirt next. From the Terrific T-shirt Quilts book, I had found a meandering loops and notes FMQ design. I added a few other musical symbols and quilted all of these in the navy sashing of both t-shirt pieces. In the inside of the t-shirts, I used a white thread to outline the name and then go around the t-shirt and the frames. For the front of the t-shirt I also stitched around the girl's t-shirt.  

The front of the t-shirt with stitching inside the t-shirt and sashing

The 2 parts of the Lucas Graham t-shirt and
the first crest block

What I learned
  • It's different doing FMQ without the batting in the quilt. It's not bad, just different. 
  • I could have done some easier quilting but what's the fun in that? It is good to know however that I can do minimal quilting in the t-shirts if I have to.
  • I didn't do much FMQ for the back of the Lucas Graham t-shirt. I don't really like how it lies. The next time that I'm using white thread, I'll add a few lines of stitching between the locations to help it lie flat.
  • My tension was perfect when the bobbin and top thread were both Bottom line. It was a little more finicky when the top thread was a dark Madeira. I haven't used the dark Glide thread but I'm sure that it won't be any fussier. 😊
  • I'm still having trouble when I FMQ from right to left for more than a few inches. It just seems to be something that my machine doesn't like! At least I was able to turn the quilt around and stitch from bottom to top instead. I just have to remember this.
  • Sometimes my studio is very hot, especially on a sunny afternoon - so I now wear my shorts to quilt. That really helps and I get to keep wearing shorts!
Related links
Linking parties
I'll be linking up to many fun linking parties. Why not check them out after linking up below? Monday Design Wall, Sew & Tell, Midweek Makers, Put your foot down, Finished (or Not) FridayCan I Get a Whoop Whoop?, Peacock Party, Patchwork & Quilts, Oh Scrap!, 15 Minutes to Stitch 2023

Free Motion Mavericks

Last week The Joyful Quilter linked up with her ABC (Table) SCRAPS Challenge for November. Look at those light neutral colours and curves! She also managed to include the "Q" and "T" in the mini. Can you spot them? It took me a while.😁

The Joyful Quilter's light neutral mini

It's now your turn.

You are invited to the Inlinkz link party!

Click here to enter