Showing posts with label fancy machine stitches. Show all posts

Wednesday, January 24, 2024

A Shuttered Window and Open Works Tutorial on Free Motion Mavericks

Hi and welcome to Week 566 of Free Motion Mavericks! I taught part of a playday on Monday for some members of the Out of the Box Fibre Artists group (OOTB). Since I'd like to share this with you, I created a tutorial. Hope you enjoy it.

Shuttered Window


We start by making the shuttered windows. The open work, which are the threads on top, is optional and is done once the shuttered window is finished. 😊

Shuttered window

Shuttered window with open work


These are the triangles that I made for my Exit Strategy piece.

For this tutorial, 
  • I made a few samples, so please don't mind the different coloured fabrics.
  • There is both a hand stitched and machine stitched component. 
         
1. You will need two pieces of fabric. The larger one is at the top and the slightly smaller one is at the bottom.

2. Mark the shape that you want on your top fabric. The shape needs to be smaller than your bottom fabric. 
  • You can use any shape that you like, but one side needs to be straight. That's the side that you will be using for your shuttered window. A triangle, rectangle, or square works well. They can also have wonky sides.
On the top fabric, mark your shape.
    • If you're not sure if the shape is larger than your bottom fabric, place your top fabric over your bottom fabric and hold these up in front of a window or a light. You'll want to ensure that your bottom fabric is at least a half inch (½") larger than your shape, on all sides.
Use a light or window to check that your bottom  
fabric is larger than your shape

3. Except for the side that will be shuttered, cut the other sides of your shape along the line.

Cut the sides of your shape, except for the straight shuttered side.

4. Place the bottom fabric underneath the top fabric, both facing up.

The bottom fabric peaks out of the open shape

The sides of the your shape can be wonky 😊

  • Decide on the orientation of your bottom fabric if applicable.
You can change the orientation of your bottom fabric
as long as it still a ½" larger on all sides than the shape.

5. Stitch around the three sides of the fabric. Fold the window shutter section to keep it out of the way of your stitching.

Stitch all sides except the window side.

You can stitch however you like, as long as the sides are stable.

You can use one of your sewing machine's 
fancy stitch to sew around the three sides.

6. Fold your window shutter any way that you like and then secure it using stitches, beads, buttons, etc. 
  • You can be as fancy with your folds as you like! 
1. Close your window shutter

2. Fold the shutter in half diagonally 


3. Fold the other side diagonally

4. Bring the point up and pin


4a. Fold the point to face downward

Point is facing down. Secure it.


You can fold the shutter accordion style and secure it with beads.

An accordion fold secured with stitching

Open Work


To add the threads across your window, you can do this by hand or by machine. 
  • Ensure that you secure the thread on the edge, each time that it crosses the window. 
  • Watch the tension on the thread so that it isn't too tight (and pulls) or too slack (and sags).
If you do this by machine, 
  • Take a few stitches on the side to anchor or secure the thread. 
  • Lift the foot and go across to the other side where you want your thread to land. 
  • Anchor the thread by taking a few stitches on the side.
  • Repeat until you are happy with your threads.
The open work can be done by machine.

If done by machine, once you are finished, you can clip
the bobbin threads at the back of the piece
since they have been secured at the side.

The finished block that was stitched by machine. You can now 
secure the window if you didn't do it before.

Class piece finished with open work

Demo finished with open work.
Threads were doubled.

Members' work


Here are images of the work done by the members during the playday. There are some very interesting variations!


What I learned
  • It was so much fun teaching my part of the playday. I was the second presenter and it was the perfect position since my section was the easiest, so a bit of a break between the two more involved sections of smocking and creating tucks. 
  • All the participants had a good time and did some interesting things. It's always nice to see the creativity in the class.
  • When I presented, I mentioned that at least one side of the shape had to be straight for the window shutter. That got me thinking that my other sides didn't have to be straight. That's when I made my wonky sides 😊
  • I enjoyed using my sewing machine to make the fancy stitches on the side of my demo for you. It has so much potential.
  • Did you recognize the fabric? These are scraps from my niece's t-shirt quilt.
Related links
Linking parties

Free Motion Mavericks


We had three lovely FMQ finishes last week. 

Melva made a runner and bowl cozies for a client. The mountains on the runner are prairie points and the "C" is for Colorado! 😎

Melva's lovely Colorado runner and bowl cozies.

Frédérique of Patchwork & Appliqué made this gorgeous reversible Patio quilt for her husband. It took a few years to accumulate the right fabrics, but what a finish! Her backing consists of blocks made during the "30 days of improv" challenge last year. She made a stencil of a lovely continuous line flower pattern. It looks amazing! 

Frédérique's reversible Patio quilt is finished!

Sandra of mmm quilts finished this cute pixelated heart quilt for her daughter's cat. How wonderful! I'm sure that Harper will enjoy cuddling up on it. Sandra quilted it with lovely double loops. You can see Harper's name quilted in the bottom left side of the quilt.😊

pixelated heart quilt for Harper by Sandra of mmm quilts.

It's now your turn!

You are invited to the Inlinkz link party!

Click here to enter

Thursday, December 28, 2023

Table Scraps Challenge on Free Motion Mavericks

Welcome to week 462 of Free Motion Mavericks - our last linking party for 2023. This week, if you don't have anything new to link up, why not link up a favourite post or quilt? It doesn't have to be free motion quilted, just a excuse to join in the fun 🍷🍾🎄🥳

A colourful scrappy mug rug


December's colour for the challenge is rainbow and the letters are S, H, and E.

Do you remember the teal scrappy improv runner that I made for my brother's birthday? Well I had pieced a mug rug with the same fabric but never got it finished....so here it is. To add something special to it, I used some of my Jag's fancy stitches. I added them to my sampler page and quilted up the mug rug with different stitches and variegated thread.

Colourful scrappy mug rug

You can really see the stitches clearly from the back. That was a lot of fun 😊

Back of the mug rug - what fun stitches!

There's not much to say about the construction except that I stitched it and then removed the batting from the edges. That left me with some backing fabric that I then trimmed and sewed down to make the binding.

Stitched mug rug

I had originally decided to cut the binding to one inch, but that was too wide. I ended up cutting it to ¾" and then folding it twice and stitching it down. 

Batting removed to make the binding

You can see the different stitches that I used (click the image for a closer view). My binding is really not great but it will stay together!

Rug mug stitched with fancy machine stitches

This is the stitch sampler page that I added to while I played with the stitches. I made several pages like this at one time, but got bored! At least I'm adding to it when I play with stitches....and when I'm really feeling smart, I'll even sample the stitch before I use it 😃. The two complete rows on the left were made before I stitched the binding on my niece's t-shirt quilt last week.

Stitch samples

For the holiday season, I bought some Twining's Gingerbread Tea. It's black tea with ginger and cinnamon. I'm not a huge tea drinker, but it's really good with maple syrup! 😋

Mug rug, tea and chocolate. Yeah! 

I wrote a post yesterday about the Best of 2023. I took the opportunity to go through the year's projects to see what I accomplished. For the 2023 ABC Table Scraps Challenge, I have one WIP (work in progress - Swirling Leaves 3) and there is a mug rug that was for February but was finished in October and never blogged about. Unfortunately the December mug rug is missing, but I'm not redoing this photo.  

This year's 2023 ABC Table Scraps Challenge

What I learned
  • Using the fancy stitches wasn't difficult, unless you have to stop and start over. Depending on the stitch used, that can be pretty tricky.
  • Trust me when I say that you do not want to have to pick these stitches out!!!!
  • I used one of the stitches for the t-shirt quilt. The first corner was difficult because the machine got stuck, but the others went well. I though that it would be the same here, but I didn't realise that working on a much narrower binding wasn't the same. The corners were harder to fold on this smaller quilt and binding.
  • I'm happy with my mug rug and I'm sure that my brother will like it. It was a Scrappy, Happy Endeavor
Related links
Linking parties
I'll be linking up to many linking parties. Why not check them out, after you link up below? I'll be linking up to the Joyful Quilter's December 2023 ABC Table Scraps Challenge when it opens, as well as Midweek Makers, Sew & Tell, Put your foot downBeauties Pageant, TGIFF, Patchwork & QuiltsFinished (or Not) Friday,

Project details

Colourful scrappy mug rug
Made for the December 2023 ABC Table Scraps Challenge
Size: 7" x 8"
Material: commercial cotton scraps, variegated thread
Technique: improv piecing, quilted using fancy machine stitches


Free Motion Mavericks


Gail reminded us that the 2024 Stay At Home Round Robbin is happening again soon. Here is one of the quilts that she has made during the challenge. Check out her post if you're interested in participating this year!

One of Gail's previous SAHRR quilt


Thank you Melva for linking up to the party. Here is Melva's mini, Star of Wonder

Melva's mini, Star of Wonder


It's now your turn!


You are invited to the Inlinkz link party!

Click here to enter

Thursday, December 21, 2023

T-shirt Quilt Finish on Free Motion Mavericks

Welcome to week 461 of Free Motion Mavericks. I delivered the quilt to my nephew last night at 10:30 so that he could pack it up to bring to Denmark. He lives down the street so it wasn't a long journey. He and his roommate are tall men, so they helped me take a few quick pictures of the quilt. Thanks guys!😊

A Finished T-shirt Quilt


It's done and since I drove my nephew to the airport... I know that it's way to Copenhagen ✈ 

A finished queen size t-shirt quilt

I'm not going to go through all of the blocks, mostly because since I don't have the quilt with me, I can't really see from the pictures what I quilted on them! 😎 Here are just a few highlights. 

I had quilted stars in the sashing of this t-shirt but wasn't sure what or with what thread to quilt the t-shirt. In the image below this one, you can see the threads that I used. I FMQ with the neon orange while I originally used the variegated thread to zig-zag stitch the "14" panel from the back of the shirt to the front. 

Free Motion Quilting (FMQ) the bright orange t-shirt

Threads used to stitch the t-shirt

On the next two Ottawa Lions t-shirts, I FMQ the sashing with some dot-to-dot diamonds and other designs within the squares and rectangles. It was good to do something different.

Using dot-to-dot FMQ in the sashing

More dot-to-dot FMQ


The last t-shirt quilted was the New York one. For part of the sashing, I FMQ some lightning bolt designs. I then quilted the contour of the buildings, signs and statue. I used a pink thread to fill in the sky.

FMQ the New York t-shirt 

FMQ the Border


I wasn't sure what to FMQ in the two side borders. I knew that it had to fill in the space quickly without being too fiddly. I found the design in Angela Walter's second book, Shape by Shape Collection 2. She calls it the Serpentine Clusters. It has three serpentine lines and then a row of feathers. 

Angela Walter's Serpentine Clusters design in the two borders

Squaring the Quilt


I am accuracy challenged at the best of times. With a t-shirt quilt, you just make it up as you go along since most blocks are different sizes. It's difficult to square things when you can't really measure from anything. All I could do was make each side straight-ish and then see if the quilt could be folded in half properly.

Straightening the border sides

The quilt didn't past the folding or wonky test. Since these are just the borders, I knew that I could adjust them as required.

Folding the quilt lengthwise

Trimming the edges


I put together strips of the Kona Solids that I had used for sashing in the quilt. I was lucky that the sashing also used 2½" strips. I was able to use many of them for the binding and didn't have to do too much cutting. 

Cutting strips after squaring the quilt
Strips of binding ready to be sewn together

I then used Quilting Jet Girl's Tips for Making / Planning a Scrappy Binding. It was very useful (see Related links below). I needed the binding colour used around the quilt to be a different colour from the fabric it was going to be attached to. Otherwise, the binding tends to recede and looks like there is no binding. 

I put the quilt on our king size bed and placed each strip down where I wanted. Then I very carefully stitched them in the correct order and side. It was then time to attach the binding strip to the back of the quilt.

Attaching the binding strip to the back of the quilt

Finally I turned the binding over and stitched it using one of my fancy stitches. It was the first time that I did this, and I really like the result. My wavy stitching pattern isn't straight but it doesn't show as much as a straight stitching line that is wonky! 😁

Stitching down the binding with a fancy stitch

Here's a couple more pictures of the finished quilt. I hope that my niece will take some so that I can post them.

Part of the finished quilt

The best pictures I could get of the finished quilt


What I learned
  • FMQ a quilt that did not have batting was different. There is no doubt that the quilt would have been too heavy for my niece with batting.
  • The FMQ went well. I only had issues with tension a couple of times. I'm not sure what happened but when I re-threaded the machine, everything was fine.
  • All of the thread used for FMQ was polyester. The bobbin thread was Superior Thread's Bottom Line (60wt). I used two more colours of Bottom Line. There was also 4 colours of Madeira polyneon, 6 colours of Glide polyester thread and then the neon Orange polyester thread from Coats (I think). They also needed the same tension, so that was great.
  • As I mentioned, I used Quilting Jet Girl's Tips for Making / Planning a Scrappy Binding. I know that the colour of the binding needs to be a different colour from the fabric that it's attached to, otherwise the binding tends to recede and it ends up looking like there is no binding. 
  • I knew that I wouldn't have time to hand-stitch the binding so I found a video, "How To Bind a Quilt on a Sewing Machine with Jenny Doan of Missouri Star". It taught me what I needed to know and except for one corner, the stitching went really well.
  • I decided to use the wavy stitch from my machine since I knew that a straight stitch line would not be straight. I also wanted something a little bit wide to attach the binding well.  
  • Now that my niece's t-shirt quilt is done, I can focus on Christmas 🎄🎅 and other projects.
  • I'm also looking forward in participating in the usual end-of-year blogging posts. See you then!
Related links
Linking parties
I'll be linking up to many fun linking parties. Why not link below before checking these out? This quilt was my December OMG. I'll link up when the party opens! Put your foot down (at the Quiltery), Midweek Makers, Design Wall Monday, Sew & Tell, Patchwork & Quilts, Beauties Pageant, TGIFF with Anja
I'm linking this post up to Tips and Tutorials on the 22nd


I hope that you have a wonderful Christmas and Holiday Season! 

Christmas Tree Window Hanging

Free Motion Mavericks


What wonderful quilts we had last week. I haven't visited everyone yet, but I will! 😊

Denise of the Quiltery (Love of Geese) made this really lovely Christmas hanging for both the Virtual Cookie Exchange and the Island Batik Ambassador Celebration Challenge.

Christmas tree and gift wall hanging  by Denise 

Donnalee finished her first fabric collage piece based on mushrooms that she saw on a trip to New Zealand. What a great finish!

Mushroom fabric collage piece by Donnalee

Melva of Melva Loves Scraps, finished her customer's t-shirt quilt and it's been delivered. It really looks great with the sashing and border fabrics.

Melva's finished customer's t-shirt quilt


Quilting Gail participated in the monthly Classic Car Colour Challenge hosted by Jen @ Patterns by Jen. What a great quilt! I especially like the border piecing. Gail did “Wild” or “Graffiti” quilting in the centre. The outside was quilted using Silly Moon’s Rocket ruler.

Gail's Classic Car Colour Challenge finish


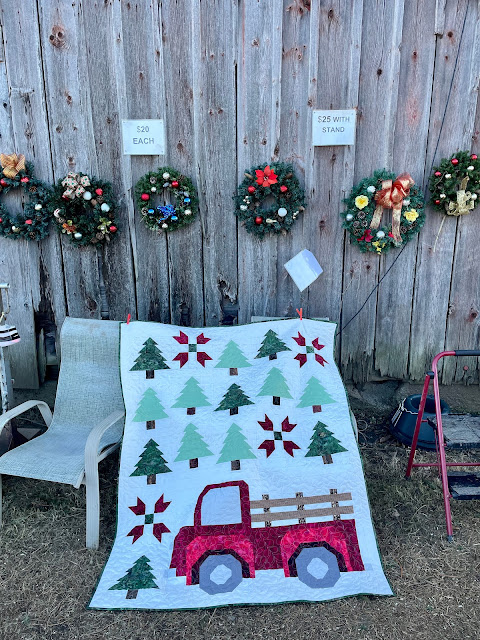
Sandra of mmm quilts made a Christmas tree farm quilt for her daughter. What a wonderful finish! My feathers sure don't look like that! 😀

Sandra's Christmas tree farm quilt 

Thanks so much for participating! It's now your turn.

You are invited to the Inlinkz link party!

Click here to enter