Thursday, January 26, 2023

Going somewhere is Finished on Free Motion Mavericks

Welcome to week 417 of Free Motion Mavericks! I hope that you've had a chance to play since I last posted. When I began this piece, I had no idea that it would end up being free motion quilted (FMQ). I think that the FMQ added a lot to it. I'll let you judge this for yourself.

"Going somewhere..."


This piece began, as many of them do, with a workshop on TextileArtists.org. I haven't had time to do as many workshops as I would like, but this one grabbed my attention. It took me a while to start, but once I did, I couldn't leave it! 😊

Going somewhere... original orientation

Going somewhere... is upside down better?

It all started with a fat quarter of Kona "School Bus" and some lovely hand-dyed orange-pink fabrics by Elaine Quehl. I also took out my stash of translucent fabric scraps. The workshop, Stitching in the Round, was created by April Sproule. She provided a template of a spiral, but of course, I had to make my own! 😁 

Following April Sproule's Further Development video, I created my own template of two connected spirals. To work, the spirals needed obvious negative and positive spaces. I coloured in the negative space and added a couple of extra starting and finishing points to create some interest and clear paths to follow. 

Creating my own spiral template

I transferred the template to my fabric and started playing. I asked April how she decided where to put the extra fabrics onto her background. She mentioned focal point and colour, but since I was just starting, I wasn't sure what I was doing, so I just added different sheer fabrics in 5 areas, mostly below and to the side, but with one stripe in the middle. Connecting some of that background fabric with the spiral creates unity, so that's what I did on the left side. I had lots of empty space under the smaller spiral, so just create an interesting block underneath it. 

Starting to put it together.


That interesting block is one of my favourites and I stitched it early on.

An interesting block

At the beginning, I spent most of my time on the left side spiral and background. There was a lot of hand stitching! 

Very slowly stitching things up

I used some beautiful scraps of hand-dyed fabrics as well as sheer fabrics. I also varied my thread, although I tried to use each element a few times in the piece so that it would add consistency. This is what my final stitched piece looked like. I knew that I would have to do something with it - either add a lot of hand stitching around everything, or do some FMQ.

Finished attaching the appliqué

Free Motion Quilting (FMQ)


As  you can guess, FMQ won out! 😊It was soooo much fun 😁

FMQ finished - so how do I finish the actual piece?

You may have noticed in some of the pictures that at the top right corner and the bottom left corner, there were small chunks of fabric missing. My original intention was to trim the fabric, but of course I waited too long and wanted to keep the whole area. I covered these holes with matching fabric and all is good!

I didn't have any more Kona "School bus" fabric for the binding so I came up with (it turned out) a great idea! I used strips of one of the sheer fabrics (it's curtain fabric) to add interest at the top of the piece. Why not ruffles at the top? I based this down and then machine stitched it so that it would stay upright. I worked in sections to make sure that I liked it before continuing.

Making ruffles for the top

Adding ruffles was a lot of work and probably would have been too much all around the piece, so I used 1½" strips and attached these like regular binding. I am really happy with the result.😊 I thought that I was finished, but this morning I decided that it needed just a little more stitching. I added a chain stitch in a #12 perle cotton over the machine stitching of the ruffles. I also coiled up the bottom of that hanging sari yarn. 

Going somewhere.... when I thought that it was finished

Here are some of the details.

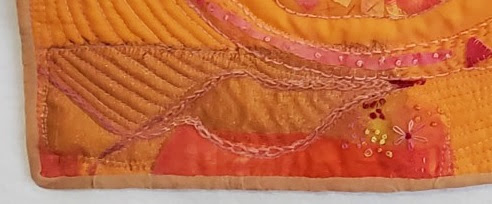
Embroidery and FMQ over very shiny sheer
with silk and hand-dyed cotton

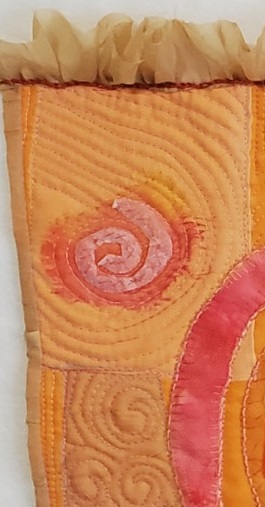
Fancy tissue paper swirl
over silk


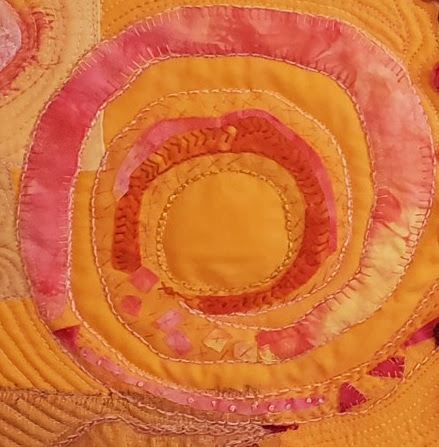
Spiral with embroidered hand-dyed
fabric pieces and snippets


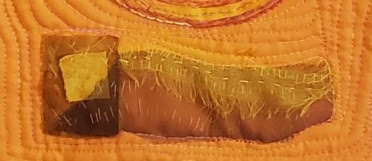
Sari yarn coil, appliquéd triangles and circles
 with embroidery

Interesting block of sheer fabric (overlapped to makes it darker),
silk and hand-dyed cotton square with simple embroidery


What I learned
  • There was a lot of learning in the last couple of weeks as I worked on this piece.
  • The bottom, shiny sheer fabric had a very loose weave so I was glad to FMQ around and into it to add stability. My overcast appliqué stitch was shredding away.
  • I worked with some beautiful printed tissue paper that came in a lovely box of chocolates. I added the spiral on the left and used it in some of the triangles. It stitched up really well. I do want to experiment more with stitching on paper.
  • The circles of fabric on the smaller spiral were stitched down with blanket stitch circles. They came out very well.
  • It's not always easy to figure out when to stitch fabric down before you embroider it, or just to let the embroidery stitch it down. There was only one piece, near the centre of the small spiral that I could have stitched down before I edged it with chain stitches. The chain stitch didn't catch everything, but once it was embroidered, it was easy to stitch a few sections down with thread. This didn't show, so I'm not sure that stitching it down before the embroidery was necessary. 
  • I loved using sheer fabric for the binding. I will do this again!
  • April suggested that we use silk organza (not washed) as a stabilizer behind the piece. I usually use a very lightweight cotton but since I had some silk organza I tried it. It was really lovely to stitch on and did give it a nice stability to the piece. I'm not sure that it's better than my lightweight cotton but it's a great option.
  • I curled up the other end of the sari yarn because without it, it looked too much like sperm (not the effect that I was going for) 😲
  • In the end I'm happy with the sheer fabric that I added to the background. It's hard when you don't really have a plan, but I thought that the focal point would be the spirals.
  • Did I change the focal point when I added the coiled sari yarn, or the darker interesting block? I may have, but I hope that since everything is connected, either physically or though colour and fabric, that it's ok. 
  • I did want lots of movement, which I think I was successful in doing.
  • When I showed my daughter the finished piece, she suggested that I turn it around. I like it but it does change the focus. Do you have a preference? Let me know😊
Related links
Linking parties

Project details


Going somewhere....
Made based on a workshop with April Sproule
17¼" x 12½"
Materials: Kona cotton, sheer fabrics, sari yarn, hand-dyed fabrics, tissue paper, perle cotton and embroidery floss
Techniques: embroidery, FMQ, ruffles 
April Sproule


Free Motion Mavericks


Gail from Quilting Gail finished her lovely "Quilt More Worry Less" hanging. If you didn't see it, you may want to check it out! She has also picked a centre block for her SAHRR quilt (Stitch at home round robin). You can see it here.  

"Quilt More Worry Less" hanging by Quilting Gail

It's now your turn 😊

You are invited to the Inlinkz link party!

Click here to enter

Wednesday, January 18, 2023

Version 2.0 quilt finished on Free Motion Mavericks

 Hi! I'm thrilled to share this finish with you - it's been a very long time coming 😁.

Version 2.0 quilt

It seems counter intuitive to take a picture of a warm bed quilt on a snow bank but we use what we have! Here it is.

Version 2.0 quilt done ✔

Here's a more traditional photo on the bed that it was made for.

Version 2.0 on the bed

Here is another photo - my daughter has learned how to crop out backgrounds. You don't need to see my messy bedroom! You can even see some of the FMQ here 😊

Version 2.0 with the background cropped

We tried the traditional photo of the quilt over the banister. It's a little too wide!

Top half of the quilt over the banister

Queen size quilt over the banister 

Finally, this is one of my first pictures. It seems that the fence in the snow is not long enough!

Photo of Version 2.0 on the fence, in the snow 😊

What I learned

  • I created a page for Version 2.0 with images of all of the stages of the making and FMQ with links to the original posts. I spent so much time on it that it deserves it's own page.
  • It feels so weird to not have this project as a constant to-do in my life. It was a lot of fun to FMQ, until near the end. Then it was all about finishing it.
  • Since the quilt had so many areas, it was great to be quilting it in stages with different designs. That's a lot more fun than all over quilting, although a lot of work figuring out what to quilt next. 
  • This was my January One Monthly Goal (OMG), so I'm thrilled to finally have it done for one of those deadlines!

Related links

Linking parties

Free Motion Mavericks


Welcome to week 416 of Free Motion Mavericks. We celebrate all things quilting with an emphasis on free motion quilting (FMQ). 

I have lots to show you from our last party. Pam of Applique Paintbox had a few finishes to share with us from 2022. Here are some of them.

Garden of the Honeybees

A black background on a flower panel - how stunning!

A project that languished until a problem was resolved.
Check it out!


Quilting Gail went to a retreat. Here is some of the FMQ that she did on her "Quilt More Worry Less" quilt!

"Quilt More Worry Less" quilt by Quilting Gail

I'm not sure if Melva, of Melva Loves Scraps, quilted all these quilted hearts by machine as well as by hand, but I did want to share these with you. If you haven't heard about "I found a quilted heart", check out Melva's post. I'm really hoping to make a few to bring on my trip next month!

I Found A Quilted Heart - made by Melva

Thanks to everyone who linked up! Here's your chance once again 😊

You are invited to the Inlinkz link party!

Click here to enter

Thursday, January 12, 2023

Finishing up Version 2.0 on Free Motion Mavericks

Welcome to week 415 of Free Motion Mavericks. I hope that you are doing well and that getting back into your routine after the holiday season hasn't been too painful. I am thrilled to say that I finished the free motion quilting (FMQ) of Version 2.0. 😊
Travel Adventure


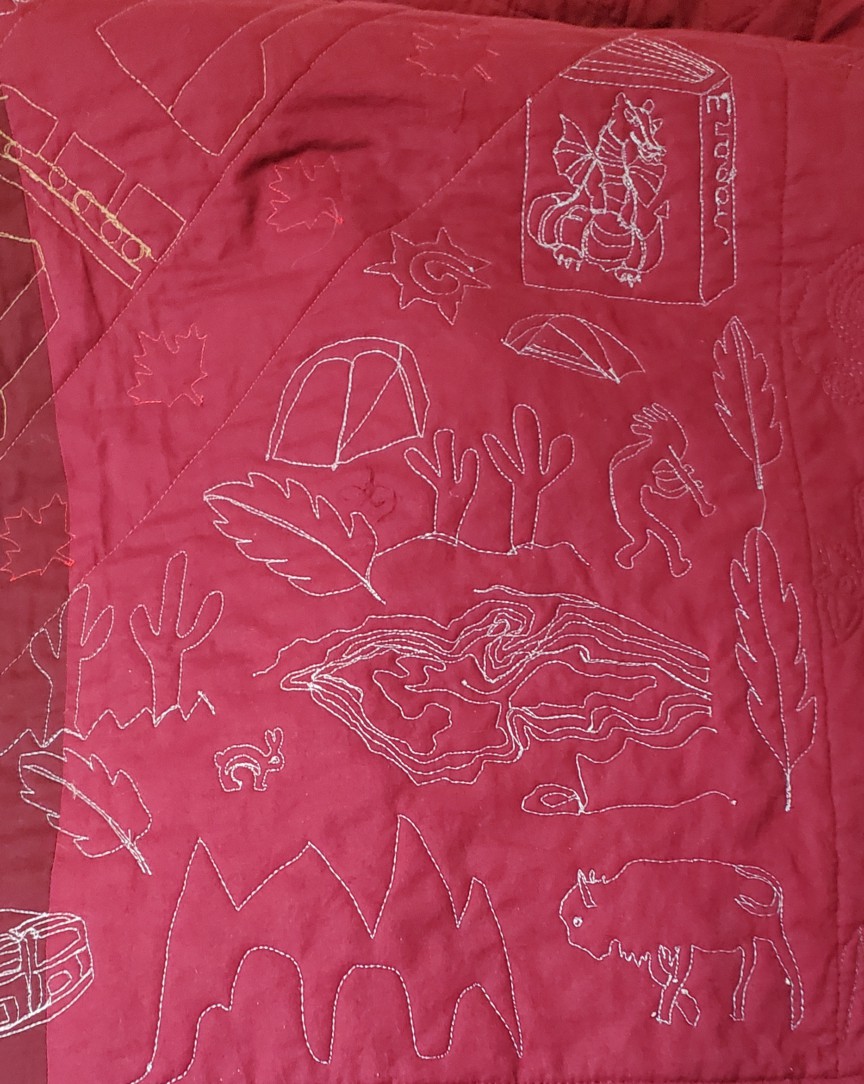
Before FMQ the borders with feathers, I had added the main images to the Travel Adventure section. I did a little bit of research and found some great things to add to that section. Do you know about Kokopelli, the Hopi fertility god, prankster and story teller? His image has been painted and carved on rocks in the American South-West for over 3000 years. You can read more about him in Related links below.

Depicting our South-West adventures, seen
from the back of the quilt


More of the Travel Adventure


Tapering Feather Heart


I had a small space that needed filling underneath the Sun section. It was perfect for a medium sized tapering feather heart.

I may have FMQ what seemed like miles of feathers in the borders, but this smaller heart required a lot more practice to get it looking good within that smaller space. I used Lee Cleland's "Feathers that Fly" book to guide me. I drew the feather heart about 4 times before I was ready to FMQ it. 

FMQ a tapering feather heart

I then wrote out my son and his girlfriend's name in the centre. For my first attempt I used a chalk pencil but I couldn't see it well enough to quilt. Finally a bright blue Frixion pen did the trick.

Stéphane & Sarah in the heart


Eastern Canada Scenes


By this afternoon, all that was left was to finish FMQ the tan stripe that contains Scenes of Canada. I had completed the West and North, but now needed to add the East.

I had about 26" of stripe to quilt and thought that I could include scenes of Ontario, Québec and the Maritime provinces but I seemed to have miscalculated! I started finding images and FMQ from the end of the Eastern section. I started by drawing a glacier and a whale. This was fun because I had started the Western section with a whale in the ocean.

A glacier and a whale

Then came a lighthouse since each Eastern province has a number of historic lighthouses. 

Lighthouse

I had to include some wildlife, and Newfoundland is famous for its puffins. 

A puffin on a rock

I found an amazing photo of houses on the cliffs on Newfoundland, so that was my next design.

Houses on the cliffs of Newfoundland

After finishing the houses, I looked at the stripe and realised that I only had about 8 inches to depict Ontario and Québec (2 of the largest provinces!). I choose the most iconic images possible 😊. As far as nature goes, Ontario is full of lakes, Canada geese, moose and my favourite white pine. 

Capturing the essence of Ontario and Québec nature

Next Steps


I've started hand-stitching the binding. It's a queen size quilt but I should be done tomorrow. It then gets washed and hopefully I'll take some great pictures before I give my son his quilt on Sunday. I'll be showing off the quilt in all of it's glory next week on Free Motion Mavericks. 

What I learned
  • It was so good to see the end of all this FMQ coming!
  • My FMQ was not at its best in the Canadian section and unfortunately I took a lot more space with the images than I had for the Western Section.
  • This section is the only one that has some puckering in it. It's not surprising considering how dense (and uneven) the stitching is.
  • I'm really happy with my Tapering feather.
  • The Travel Adventures section was quickly finished once I found Kokopelli's name and images. Google is pretty darn amazing!
  • The tips that I shared last week on binding (i.e. position and pressing) really helped. 
Related links
Linking parties

I'll be linking up to many fun linking parties. Why not check them out after you link up below 😊Design Wall Monday, Put your foot down, Finished or (Not) Friday, Off The Wall Friday, Can I Get A Whoop Whoop?, Peacock Party, Patchwork & Quilts, 

Free Motion Mavericks

Thanks so much for linking up! It's starting to look like a party here 😎

Frédérique of Quilting Patchwork Appliqué made a two sided cushion before Christmas. One side is a paper pieced Sapphire while the other side is a lovely bow. She FMQ around the bow to give it more definition. It looks great!

Bow side of the cushion by Frédérique

Sapphire side of the cushion by Frédérique

Sally of Painted Thread finished her Sea Glass quilt. I love those fabrics! It was a challenge to quilt, but her swirl and waves look great. I'm glad that you persevered! 

Sea glass quilt by Sally of Painted Thread

Sandra of mmm quilts had two finishes last week. Her Santa Power quilt is so cute. It's quilted very simply because that's exactly what it needs. You'll want to read her post to find out how it got that name 😁


I didn't realise that Project Quilting had started its new season last week until I read Sandra's post. The make up bag is stitched using one of Christina Cameli's textured quilting. It's very effective. You can check out her post and even buy it on Etsy if it's still there 😊

Sandra's make up bag with Christina Cameli's textured quilting

Now it's your turn!

You are invited to the Inlinkz link party!

Click here to enter

Sunday, January 08, 2023

Project Quilting 14.1 and Slow Sunday stitching

Hi, Project Quilting, season 14 has started again. The first theme is "The First One". I just had time to make a quick piece. I'm also working on a new slow stitching project.

The First One for Project Quilting

The theme brought me to think of "one" which can be alone but also unique. That's where my thinking stopped! 

I found a beautiful, unique piece of hand-marbled fabric that was gifted to me. 

The First One - Unique and Beautiful 😍

To use the fabric as the binding, I cut the backing and batting about one inch smaller than the front. I then double folded the edge of the front fabric. I machine stitched it from the back. 

This is what it looked like with the first fold.

Fabric folded once for the binding.


Folded binding to the back.

Stitching in the Round


This first TextileArtist.org Stitch Club workshop of 2023 is by April Sproule. After watching her Further Development video, I created my own spiral to stitch and appliqué. 

Stitching in the Round project - so far

There will be a lot of stitching, both around the spiral lines and within the spiral. On my template, I shaded in the positive space, where there will be appliqué and stitching. The negative space will be mostly left unstitched.

Spiral Template

This is how I envisioned placing some of the appliqué. After attaching the larger pieces, the rest of the positive space will be mostly smaller snippets of fabric with stitching.

Playing with possible layouts

I still have many enjoyable, mindful stitching hours left on this piece. 😊 Here are some close up pictures as of last night (or morning).

Attaching the fabrics in the background

I haven't finished attaching this beautiful sari yarn

Most of the stitching is on this side

What I learned

  • I forgot that the linking party ends at noon CT. That gave me just an hour to write the post!
  • I used the walking foot to quilt this since I was having problems with my tension with my FMQ foot. I'm happy to say that this has all be resolved!
  • I couldn't help myself, I started another slow stitching project from last week's TextileArtist.org Stitch Club. 
  • Our workshop teacher, April Sproule, suggested that we use silk organza under our background. I didn't think that I had any that hadn't been pre-washed, but I found some. She's correct when she says that sewing through it is like going through butter!
  • It took me a while to figure out what to add to the background. I'm really hoping that it will work. I can always add more or even remove, if I really have to!
  • I am happy to say that I am playing, learning and stitching with mindfulness and contentment. So far so good!
  • You may have noticed my new blog background. What a job that was since Blogger is always changing how things are done. It's not what I planned to do, but it was the best that I could do at the time. Hopefully I'll figure out how to make some of the changes that I want!
  • BTW, Version 2.0 is coming along nicely 😊. I was able to fix the tension so the Travel Adventure is finished. I only have the second third of the Canadian section left. The final post will be on the upcoming Free Motion Mavericks.

Related links

Linking parties

I'll be linking up to many fun linking parties, including Project Quilting 14.1. Let's go see what everyone else has made! I'm also linking up to Slow Sunday Stitching - finally I have a post that is done one time for this great linking party also! Put your foot down, Can I Get A Whoop Whoop?, Off the Wall Friday, Beauties Pageant, Peacock Party, Patchwork & Quilts, Oh Scrap!, 
Great news! The First One was featured on Put your foot down. Thanks Denise!

Project details


The Fist One - Unique and Beautiful
Made for Project Quilting 14.1
Material: hand-marbled fabric
Technique: Quilted with walking foot; self-binding.


Thursday, January 05, 2023

An Agenda Cover and Update on Free Motion Mavericks

Welcome to week 414 of Free Motion Mavericks. Are you busier than you expected after the holidays? I was anticipating a quiet week in the studio but it's been busy for all kinds of reasons. I hope that you got some quality playing time this week 😊

FMQ an Agenda Cover


It's a new year and since I'm not at my computer every day, I can't live without some kind of agenda. Over the years I've made a few agenda and journal covers and it's finally getting easier. 😎

2023 Free Motion Quilted Agenda Cover

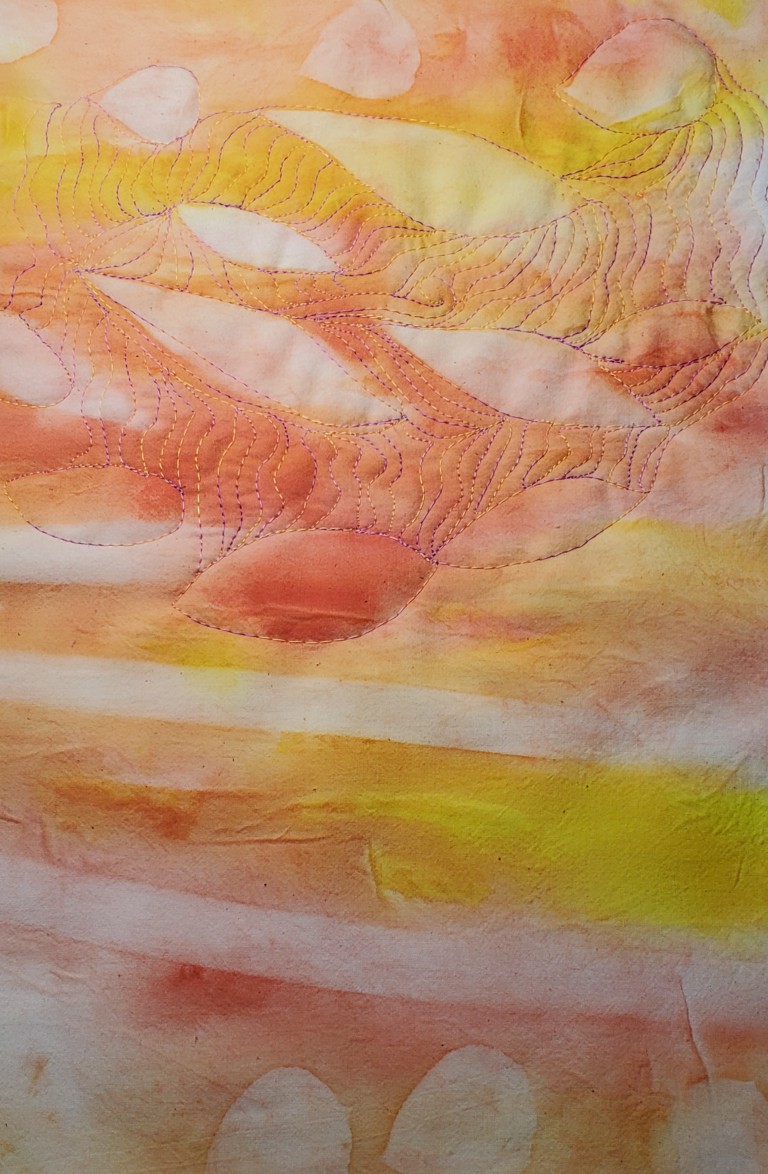
For this year's agenda cover, I wanted to use fabric that I had created, so I started by looking at this summer's sun printed fabric. I really love this piece and it's large enough! Here is how this fabric came to be. 

Day lily leaves, a fern and leaves of all sizes
on a yellow/orange background

Some lovely sun prints


FMQ on the sun printed fabric

I used Christina Cameli's Free Motion Quilted Gifts course on Craftsy again. It was a real pleasure to make, especially since I have extensive notes and experience!

I wasn't sure how to fill in the leaf outlines on the FMQ fabric, so I left them empty and added this year's intention using a Prismacolor pen. It was a lot more effective than if I had tried to free motion quilt the words. You can double-click on the image to see a larger version, but here is my intention for 2023: learn by playing, with mindfulness and contentment. 

Adding my 2023 intention on the front cover

The back of the cover

The agenda with matching fabric for the inside panels

Version 2.0 Update

Need to finish the
Travel Adventure
I had run out of fabric for the binding, so I had to wait until the shop opened to get more of the Kona burgundy. I could have ordered it but I wasn't 100% sure that it was burgundy, so I preferred to take a scrap of the fabric with me. The fabric was purchased this week, washed, pressed and cut! I cut 8 rows of 3" binding and it fit just perfectly 😊(I love it when my math works!)

I watched a bit of a course on Craftsy about bindings and it was very complicated and much more fiddly than I like. I did learn a couple of tips that I'll include below. 

I still have three small sections to finish FMQ. I started last night but my machine was not cooperating - so it's getting a time-out until I do some practice FMQ to get my tension back to normal!

January's One Monthly Goal (OMG)

Totally finishing Version 2.0 is my January OMG. I'm hoping to finish by the end of the weekend....so we'll see!


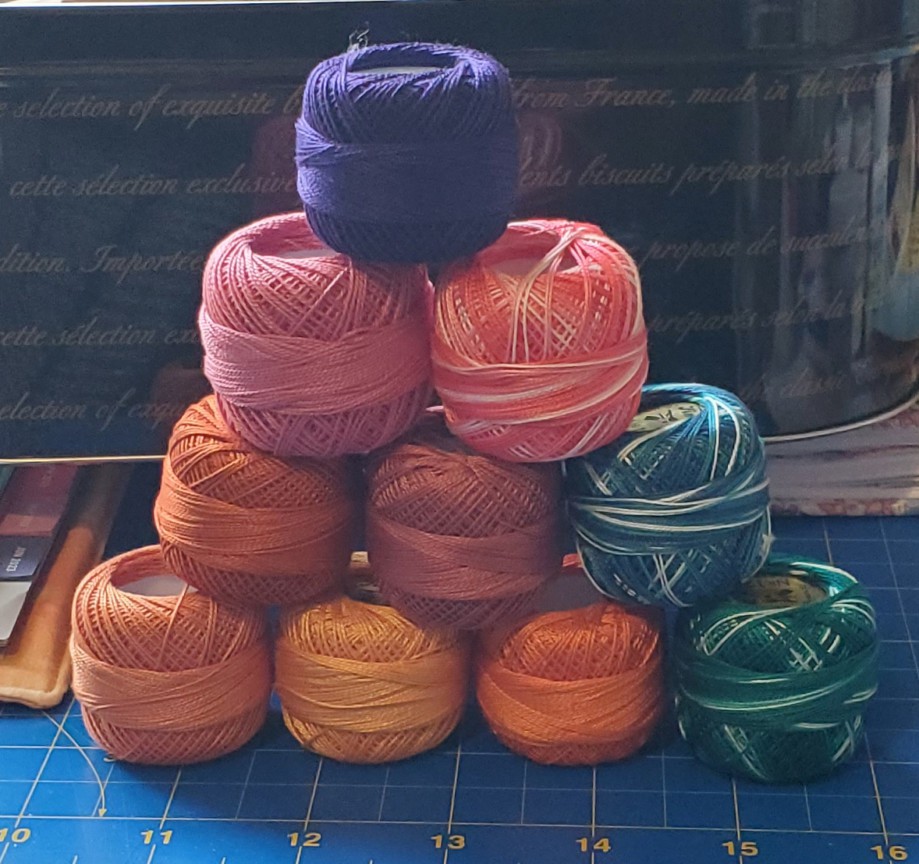
I didn't get any fun fabric but my daughter and I splurged on some lovely #12 perle cotton. I played with it a little before putting them away 😊

#12 perle cotton


What I learned

  • I took the time to read my post about the last time I made an agenda cover (in April - see related links below). I also found my notes so this really helped the process along.
  • Place binding straight
    and follow the quilt
    As I did the last time I made an agenda cover, I used some of the left over sun printed fabric to make the inside panels. For the middle panel, any fabric can be used. This is a great way to use up fabric that you don't really like, or fabric that you have tons of and doesn't seem to disappear, ever!
  • For the binding, I learned that you should also press your binding once you have sewn it on to the quilt. Since I don't have extra width, this should help me make it wide enough. 
  • I also got a couple of tips about doing the mitered corners for the binding. I didn't realise that if you fold the binding straight out before attaching it, that it will turn out great (see picture since it's hard to describe.) 
  • When you press the attached binding, put the tip of your iron in the mitered corner to sharpen the miter.

Related links


Linking parties
I'll be linking up to many fun parties. Why not check them out? January's One Monthly Goal (OMG),  Sew & Tell, Design Wall Monday, Put your foot down, Midweek Makers, Needle & Thread Thursday

Project details


2023 Quilting Agenda cover
6¾" x 8¾"
Materials: sun printed fabric, variegated thread
Techniques: Sun printed fabric covered with Pebeo Setacolor light fabric paint, FMQ and sewing


Free Motion Mavericks

Thanks for linking up! We saw many lovely quilts made of 2022. What a productive bunch we are 😁.
Two projects we haven't seen are Frédérique's casserole carrier or sac à tarte and Donnalee's two Christmas runners.

I hope to make a casserole carrier as part of the 2023 Table Scraps Challenge this year. Frédérique used her guide bar to quilt it. That made for lovely straight lines! It's a very useful item to make for yourself or as a gift. 

Frédérique's casserole carrier or sac à tarte


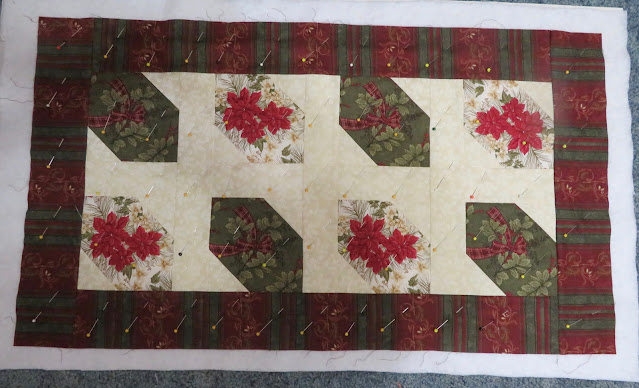
Donnalee's two runners came about because she didn't have enough fabric to make the four blocks required to make a wall hanging. I think that her table runners are a huge success and will make great Christmas gifts next year!

One of Donnalee's Christmas runner


It's now your turn to link up 😊

You are invited to the Inlinkz link party!

Click here to enter