Showing posts with label freezer paper. Show all posts

Thursday, October 06, 2022

Birds on Free Motion Mavericks

Welcome to week 402 of Free Motion Mavericks. I managed to find time to get a little bit of FMQ done yesterday. Today we are celebrating birds - the cute ones, not the Hitchcock ones😊

A flock of birds

I added some birds to Stéphane's Version 2.0 quilt. I found a few pictures on the web of simple bird outlines that I copied. I then drew templates of Canada Geese from a picture.

A flock of birds

I started by drawing out the area that needed to be filled on a sheet of long paper. I then placed my freezer paper templates over the area to see if it would work. It was a great idea, but of course, I didn't follow my plan!😊

Planning the placement of the birds

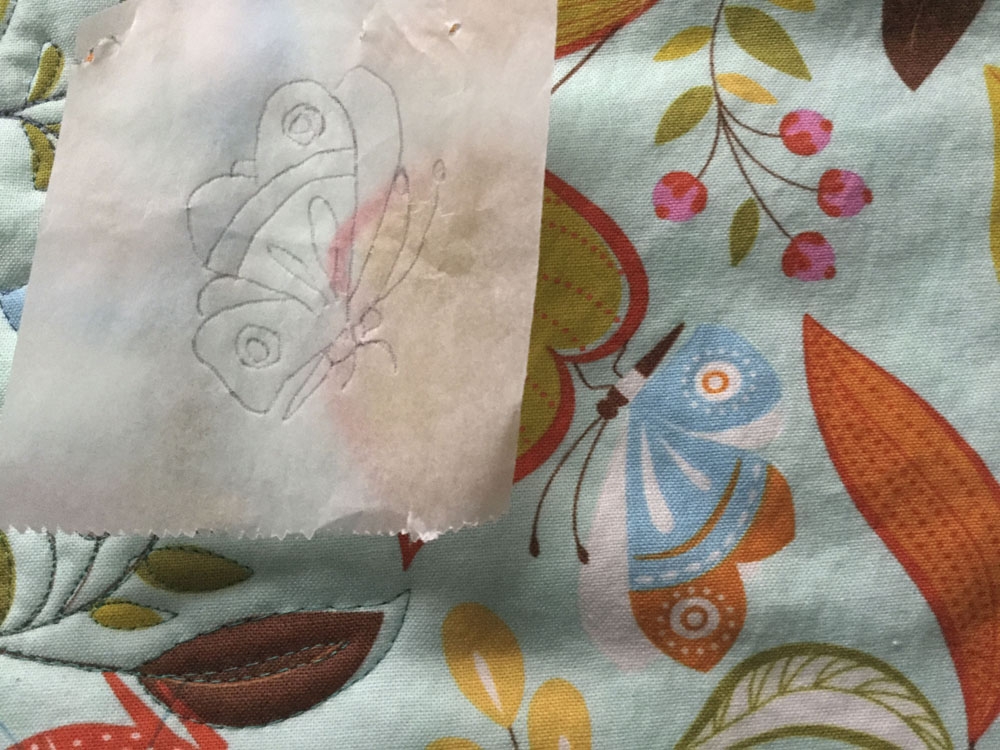
I copied the birds onto freezer paper thinking that I would iron-on the template and stitch on the very outside of them. It was ok, but when I stitched on the freezer paper, it was really hard to remove without affecting the stitches. So scratch off that idea!

Stitching the woodpecker from the freezer paper template

FMQ woodpecker

I then used my chalk pencil to draw around the template. That worked much better. After making the first bird that way, I just decided to do it again, and again!

Flock of cute birds

For that other space, I wanted to add the Canada Goose. Again I used the freezer paper as a template and drew around it.

Canada Goose

The last bird that I did stood on a branch. I drew around the bird template and then drew the branch.

Bird on a branch

Bird as seen from the back of the quilt

You can see here the goose and the bird.

Canada Goose and bird on a branch

October's One Monthly Goal

My OMG for October is to stitch another 2 areas of the Version 2.0 quilt. It helped last month to have a goal, so I'm going to do it again :-)

What I learned

  • Freezer paper is fine for a template, if you can just FMQ around it. Don't use it if you have to stitch through it!
  • I was pleasantly surprised that my chalk pencil worked on the light blue fabric.
  • It was nice FMQ these birds since they were mostly near the edges of the quilt.

Related links

Linking parties

I'll be linking up to many parties, including the October One Monthly Goal. Let's see what's out there...but remember to link up here below too! Needle & Thread Thursday, Put your foot down, Midweek Makers, Monday Making, Design Wall Monday, Finished or Not Finished Friday, Peacock Party, TGIFFOff The Wall FridayPatchwork & Quilts


Free Motion Mavericks

Welcome! Did you get any free motion quilting done this week? If you did, make sure to link up. If you didn't, you can share your quilting project anyway 😊.

Last week, we saw Sue Daurio's custom quilting on the San Marco quilt. What a beauty! Make sure to check it out! Since we didn't get any link ups and Muv is not able to host this week, I'm doing a take 2! Please link up 😎

Sue Daurio's custom quilting on the San Marco quilt

You are invited to the Inlinkz link party!

Click here to enter

Tuesday, November 30, 2021

Mallard Duck Mini Finish with Free Motion Mavericks

Even without my favourite sewing machine, I was able to sew and quilt with the walking foot, my son's Mallard Duck mini. When I showed it to him, he said that he would find a spot for this one and the other two that I've made for him.

Finishing the Mallard Duck

As you saw in my Making a Mallard Duck Mini post, the foundation paper piecing went well. I always manage to make at least one piece that doesn't have enough selvage but I'm really good at problem solving 😊  I would have loved to go crazy with the free motion quilting (FMQ) but this little guy got off easy.

Finished Mallard Duck mini 

In a previous life I was a planner, but you wouldn't know it based on most of my quilting. I had planned to use my extended-border binding technique where I extend the backing fabric to make the binding, but I wasn't thrilled with the backing fabric as a binding. I ended up trimming the piece but if I had through it through, I would have added at least a half inch to the outside so that my binding would be wide enough to look like a frame. 

Carefully measuring the binding for a ½" frame

So, more problem solving to be done. I cut the binding fabric 2" wide but didn't double it. Instead I very carefully measured the front of the binding so that it would be a ½" wide all around the piece. I should be measuring my binding all the time since I tend to have some wider areas. Accuracy and consistency are not my strengths but that doesn't mean that I can't try!😊

Looking for that perfect button

When it came time to choose the perfect button, I went to my giant jar of buttons. I thought that it was a good idea to have all of my buttons in one jar (and it looks good too!) but having to find one tiny button in that jar might not be the most efficient way of storing them...

Writing the label on fabric backed
with freezer paper

The back of the mini


In case you don't know this trick, the next time you need to write up a label, iron a piece of freezer paper to the back of the fabric. It will stabilize the fabric so that it's easy to write on.

What I learned
  • I'm really happy with my finished Mallard Duck mini. I spent a lot of time getting the binding to be the same width so that it looks like a frame.
  • Sometimes I make fancy labels but I kept this one simple. Using the freezer paper really helps me write on the fabric.
  • I'm not sure what I'm going to do with my button jar. It's not like I need buttons very often, so it may not be worth changing it...again!
  • I would have loved to FMQ this little guy - I even found a great picture to follow to make it realistic. Oh well, maybe the next one.
Related links
Linking parties

Project details


Mallard Duck Mini, pattern by Made By Marney
8¾" X 8¼"
Materials: commercial and batik cotton, button
Techniques: foundation paper piecing and quilting with a walking foot 


Free Motion Mavericks

Welcome to week 358 of the Free Motion Mavericks' linking party. Last time, Donnalee linked up her red birds on an improv background. She FMQ her background with a serpentine design. It looks very effective. If you didn't see her post, check it out here. She also discovered that using safety pins is a good way to keep her quilt sandwich together. What do you use to keep things together (if you're not using a long-arm)?

DonnaleeQ: Red Birds Improv

Now it's your turn.

You are invited to the Inlinkz link party!

Click here to enter

Wednesday, September 23, 2020

Swirling Leaves for Hello Fall Blog Hop

Welcome to my stop at the Hello Fall Blog Hop. When I saw Carla's button for a fall blog hop, I couldn't resist. I'm thrilled to be part of this fun event - Thanks Carla 😊

Making Swirling Leaves

Swirling Leaves

I have to admit that I had some pretty grandiose ideas for this blog hop....and then it was two weeks before the event and I got realistic! This wall hanging is a simpler version of my original plans. I'm really happy with the way it came out - and it didn't take months to make!

All along, my idea was to make a wall hanging with falling maple leaves. About a month ago, while walking with Chevy, I found a small bunch of maple leaves that had fallen off a tree. That was the first part!

I then made freezer paper templates from most of them, ironed them onto some gorgeous hand-dyed fabrics and Voila! I had a whole bunch of leaves to work with. Only the orange leaves are made from my own hand-dyes.

Freezer paper template
Once the leaves were cut, I rummaged into my neutral scraps and made up the background. These are from the last three neutral quilts that I've made in the last few years.

Choosing neutral fabrics for the background
I had a great time doing some improv piecing, my favourite kind of piecing. Since I wanted this quilt to be as simple as possible to make, I even took the time to square up the pieces so that it would be relatively easy to finish. It worked!
Choosing borders
With the background finished, I auditioned some fabrics for borders. Since these are relatively muted colours, I went into my civil war reproduction fabrics and found two perfect pieces.

On the weekend I added the borders and appliquéd the leaves. I found a perfect piece of batting and backing. 
A sandwich ready to FMQ
Then came my favourite part - free motion quilting (FMQ). I started by quilting-in-the-ditch around the two borders. I then chose different thread colours to quilt around each leaf and stitch in the veins, following my freezer paper template since my leaves had all dried up by then. Because the quilt is pretty muted, I took the opportunity to use some lovely variegated thread for the leaves.
Details of the FMQ

I FMQ the background with swirls and extended them into the first border. For the final border, I quilted some leaves.

Swirling Leaves with the Burning bush


What I learned

  • I'm glad that I reduced my plans based on the limited time I had. Maybe one day I can make that original one, but like I said, it would have taken months!
  • I love improv piecing. I kept it simple this time, using square and rectangular pieces of fabric that fit together easily. 
  • My big lesson learned was taking the time to square up blocks as I was putting the improv pieces together. It really made a difference in the end.
  • I like how the FMQ in the neutral background sort of makes it recede. I was afraid that some of the fabrics would overpower the piece.
  • I even stitched down the binding by machine from the front. There was only one spot that I had to hand stitch down at the back. That was a huge time saver.
  • Of course I lost that saved time when I stitched the sleeve to the wrong end of the quilt (sigh). 

Links to Carla's Creatin' in the Sticks

Links to Wednesday's participants
Linking parties

I'll be linking up to many fun linking parties around the virtual world of quilting. Lets see what's going on! Muv is hosting the Free Motion Mavericks linking party this week - visit and link up! Monday Making, Design Wall Monday, What I Made Monday, Colour & Inspiration Tuesday, Midweek Makers, Long Arm Learning, Put Your Foot Down, Needle & Thread Thursday, Off The Wall Friday, Finished or Not Finished Friday, Can I Get A Whoop Whoop?, Friday Foto Fun, Beauty Pageant, Peacock Party, Oh Scrap!, Quilting & Patchwork

A reminder to join us on October 1st for the trans-Atlantic party! Find out more about this special linking party.


Wednesday, June 05, 2019

Butterflies in the FMQ garden and pond

Welcome to Free Motion Mavericks link-up (Week 232) - If you're looking for Throw Back Thursday, click here!

Free Motion Mavericks Link-up

I think that I'm finished! What do you think? Is there anything else that I should add to this free motion quilted (FMQ) practice piece?

FMQ garden and pond
I think that it has done quite well, considering its very humble beginnings as a gray FMQ piece three months ago!
Original FMQ piece
Here are a few details. I used the Kimono Silk Thread that I've been working with on my Gaïa's Garden.
A few butterflies
 I was thinking that I could add more colour to the butterflies and especially the dragon fly.
A butterfly and a dragonfly
I'm going to keep it short and sweet - so please link up and let me know what you think I should do. Is it finished or does it need a few minor touches?

What I learned
  • I copied the butterflies from a colouring book onto freezer paper. I then cut the freezer paper and drew around the shape onto the fabric with a Frixion pen. This is certainly better than trying to draw from a picture since I can never get both sides the same. If you're wondering, that's what happened to the dragonfly. 😊
  • 🎈BTW, this is my 🎈 300th post over 7 years. Wow, time flies...🎈
Related links
Linking parties
I'll be linking up to several fun linking parties. Let's spread the word about Free Motion Mavericks! Monday MakingMoving It ForwardWhat I Made MondayTuesday Colour Linky PartyMidweek Makers, Let's Bee Social, Needle & Thread Thursday, Wondering Camera, Off the Wall Friday, Finished or Not Friday, Friday Foto Fun, Can I Get A Whoop Whoop?,

Free Motion Mavericks
Thanks to everyone who linked up two weeks ago. It's great to see quilts at all stages of production - from a few basic but important lines, to finished quilt tops, and fancy quilting! This week I really enjoyed Sandra's wonderful Harry Potter fabric pillow for her daughter. It's a really lovely project, so if you haven't seen it yet, here's the link.

You are invited to the Inlinkz link party!
Click here to enter

Sunday, November 25, 2018

A loon, a bear and a binding tutorial

Finished loon

Finished loon quilt mini
The loon mini is quilted in-the-ditch.
I found some fabulous foundation paper pieced patterns for making woodland animals blocks. Here's how it started.

My October DrEAMi! (something that catches your fancy and you just have to Drop Everything And Make It!) was a foundation paper pieced block that I gave my brother for his birthday instead of a card. Since he loves the outdoors, I made him a loon.

This is the first of several minis that I'll be making using Made by Marney's patterns. The finishing of the loon mini and the making of the bear mini are my November DrEAMi!

A bear mini

My next mini was a bear - well actually two bears because I'm making a second one for my husband. The first one I made has a pretty obvious mistake so I'm keeping it for myself and using it in the binding tutorial below.

Extended-border binding technique

These minis are perfect for trying out new techniques. I tried this binding technique on the loon block and then took pictures of the process using the first bear mini for this short tutorial.

Challenge: I didn't want to add a binding to this block. I've tried binding the quilt from the back but didn't really like the results since my corners are not always very good. So I essentially made a wider border and used it to bind the quilt. Here is the tutorial.

Measurement: Decide how wide you want your border, then add ¼" for your seam allowance and add 1" for the binding.
In this case, the border fabric was made from 2¼" strips. (¼" seam allowance + 1" border + 1" binding.) * You can adjust how wide you want your border as well as how much fabric you want to use for your binding.

Attach the border
Attach the border fabric to the top and bottom of the block.
Adding the top and bottom border
 Attached the side borders to the block.
Adding the side borders
Sandwich the quilt with the batting and backing fabric and quilt the piece except for the border.

Quilting in-the-ditch with the "Shorty" ruler
Cut the batting and backing
Once the quilting is finished, flip over the border fabric away from the edge. Then, one side at a time, trim the excess batting and backing. 
(In this case, I cut the batting and backing 1" from the edge of the border.)

Trimming the batting and backing

Trimming the batting and backing from all sides

The front border extends past the backing once each side has been trimmed.
The front border extends past the backing
Finish Quilting 
If you want to quilt your border, this is the time to do it!

Press the border
Fold the extended part of the border in half and press
Pressing the extended fabric in half
Flip the pressed extended border over the back of the quilt. (I use small metal paper clips to keep my border in place.) Stitch the extended border to the back.

Using paper clips to keep the border in place while stitching
This is what the back of the pieces looks like with the border used as the binding.

The back of the bear min when the border is used as binding


The back of the loon mini 


Label
I made a label using some great retro duck fabric and used neutral fabric to write on. As I learned previously, I ironed freezer paper to the back to ensure that the fabric wouldn't shifting around when I wrote on it.
Making a label for the quilt
Using freezer paper to stabilise the fabric to create a label
Happy Thanksgiving to all those who are celebrating today!

What I learned
  • Minis are great to try different techniques. There isn't the investment of time, material and effort that you might have with a larger or more complex quilt.
  • One of the tricky things about foundation paper piecing is that the finished product is the reverse of the pattern. Since I didn't print up the pattern in colour, I mixed up one of the pieces. You can see that the bear block looks like it has a broken leg with a cast instead of the shadow of the leg. I haven't finished quilting the second bear, but it doesn't have a broken leg! 
  • Making the bear pattern a second time was much easier since I knew what to do - and not do! I rarely make something twice but it is a good learning experience. The second time it usually is easier and faster and probably better. I think that I sometimes miss out on the learning aspect of that type of repetition. Since I was so intent on getting the second bear mini right, I wasn't bored 😊
  • I used Angela Walter's "Shorty" ruler to quilt in-the-ditch. This is the second time I use it and I'm very impressed.
  • I've never come across this method of binding a quilt, but if it's out there somewhere under another name, please let me know.
  • I hope you were able to follow the tutorial (it's my first one). If you have any questions or suggestions, please leave me a message in the comment section, or email me at quiltingandlearning (at) gmail.com
Related links
Linking Parties
I'll be linking this post to Sandra's DrEAMi! party as well as other linkies. Check them out and see what others are doing! Free Motion Mavericks, TGIFF!, Slow Sunday Stitching, Oh Scrap!, Monday Making, Main Crush Monday, Design Wall Monday, Moving It Forward, What I Made Monday, Linky Tuesday, Tuesday Colour Linky Party, Let's Bee Social, Midweek Makers, Needle & Thread ThursdayWondering Camera, Finished or Not Friday, Friday Foto Fun, Can I Get A Whoop Whoop?, TGIFF,

Project Details


Loon Mini, pattern by Made By Marney
8½" X 8¾"
Materials: commercial and hand-dyed cotton, embroidery floss
Techniques: foundation paper piecing and free motion quilting, embroidery


Sunday, November 26, 2017

Wholecloth Quilt 2 and Goal Sum Up

In the November Learning QAL, I very optimistically said that I would try out the 4 types of batting on wholecloth quilts.

So far, I made the beginnings of a wholecloth quilt with the silk batting. The quilting is mostly done, although I do want to try quilting some kind of grid pattern in the border. The project won't be finished for a while because I will be painting within the FMQ. (See the Wholecloth link in Related Links below for more details.)


First Wholecloth quilt - the back
First Wholecloth quilt - the front


This will be the front of the quilt
I started the second wholecloth quilt Thursday night. Since it's essentially just following the pattern of the fabric, it's not that difficult. The hard part is making the decision of which thread to use where!

I am using # 100 Kimono silk thread on this wholecloth quilt as well. So far I've used teal and blue on the plants and a maroon on the bird. The colours don't show that much, but once I've quilted the outline, I hope to add more colour from the front (instead of the back). That would be much easier :-)

You may be able to see two upside down birds that I've x-ed out, on the fabric. I don't care about the direction of the plants but didn't want the upside down birds. I x-ed them out in the hopes that I won't quilt them by mistake. The marks will come out when I iron the piece.

The pattern that I am following, which will be the back


I used the cotton-wool batting for this project because I would love to have the extra loft. In my last batting experiment, I found that once the quilts were washed, there was little difference in the loft of each. Since I don't expect to wash this one, I'm hoping that the cotton-wool batting will give me the best result.

Here's a closeup of the FMQ. You can see the bird in red and some of the plants.
Closeup of the FMQ so far
This is roughly the same section as the top, but in reverse. It's so weird looking at all of this colour and not seeing it on the quilted side :-) I'm really hoping that I'll be able to add more colour once I've outlined the pattern. Then I'll be able to follow the FMQ and see exactly what I'm doing.

Closeup of the pattern that I'm quilting. Isn't it amazing?
The fabric also includes 2 butterflies. I could leave them upside down but I'd rather not. I think I've figured out how to reverse the image so that I can quilt them right-side up.

I copied the image on freezer paper. Next I'll outline the butterfly from the wrong side of the freezer paper so that it will be facing the flower. I may have to transfer that image to another piece of freezer paper so that I can iron it onto the fabric. If that doesn't work, I can always pin it down.

I'll let you know how that works out!
Working with the upside down butterfly
Since I never did press the publish button, I can update this project. I ended up FMQ the butterfly from the wrong side of the image - I just pinned it down. It worked really well.

The FMQ from the back is essentially finished. Here it the front.

The front of the wholecloth quilt
Here's the back. Someone mentioned that I actually had 2 quilts - one from the back and one from the front. I am tempted to show the quilt from the printed fabric side, but with the butterflies moved over, it doesn't look as good anymore.
The back of the piece - all FMQ
Here's a close-up of the butterfly. It's not easy to see, but it will be nice once more colour has been added.
Close-up of the quilted butterfly
What I learned
  • I've had a great time FMQ this by essentially tracing the fabric. I find it very easy to do, but then when I thought about it, I've been tracing pictures since I was ten or so. I used to make my own monthly calendars by tracing from my favourite colouring books (that I rarely coloured) and then adding the grid for the dates over the images - which were often Peanuts characters :-)
  • I mentioned that the butterflies traced onto freezer paper worked really well. What I didn't mention is that I didn't place one of the butterflies as carefully as I should have, so that it's overlapping a leaf. I'll have to work on that from the front when I add more colour. 
  • I'm happy to say that I learned from my mistake - the second butterfly is very well placed! Now the first one can be considered a creative challenge as I try to fix it 😊
  • This has been a great experiment, but I have to admit that although I love my second wholecloth piece, I'm not sure how great it will come out. I really feel that it needs more to focus on. I may end up doing a lot of stitching on the birds and the butterfly so that there will be something to draw the eyes. That may mean that I won't do much stitching on the flowers or leaves. That is how I intend to proceed once I start working from the front.
  • I'm not sure if I will have time to do more FMQ on this piece before the end of the month, or to even work on the other two wholecloth quilts. I have come a long way since I am really not stressing about it, except that I just realised that I have to post my Learning QAL - November Sum-up. So I will add it to the post. Oops!!!
Related Links
Linking Parties: I will be linking this to many linking parties. Find out what others are doing by clicking on these links. Free Motion Mavericks, MOP Monday, Off the Wall Friday, Finished or Not Friday, Can I Get a Whoop Whoop?, Monday Making, Design Wall Monday, Linky Tuesday, Let's Bee SocialMidweek Makers #100, Needle & Thread Thursday,