Showing posts with label learning sum up. Show all posts

Wednesday, December 27, 2017

Final Learning QAL Sum Up

I haven't had a very productive month as far as quilting goes. December started out well, quilting wise, but I didn't end up making much progress. On the other hand, I've had a great Christmas and started getting used to relaxing and minimizing my obligations. All is well 😊

I've enjoyed putting on the Learning Quilt-A-Long but as I mentioned, there were very few link-ups so it's not really worth continuing. This is, therefore, my last Learning QAL Sum Up. I will, however, continue my learning journey but with less pressure!

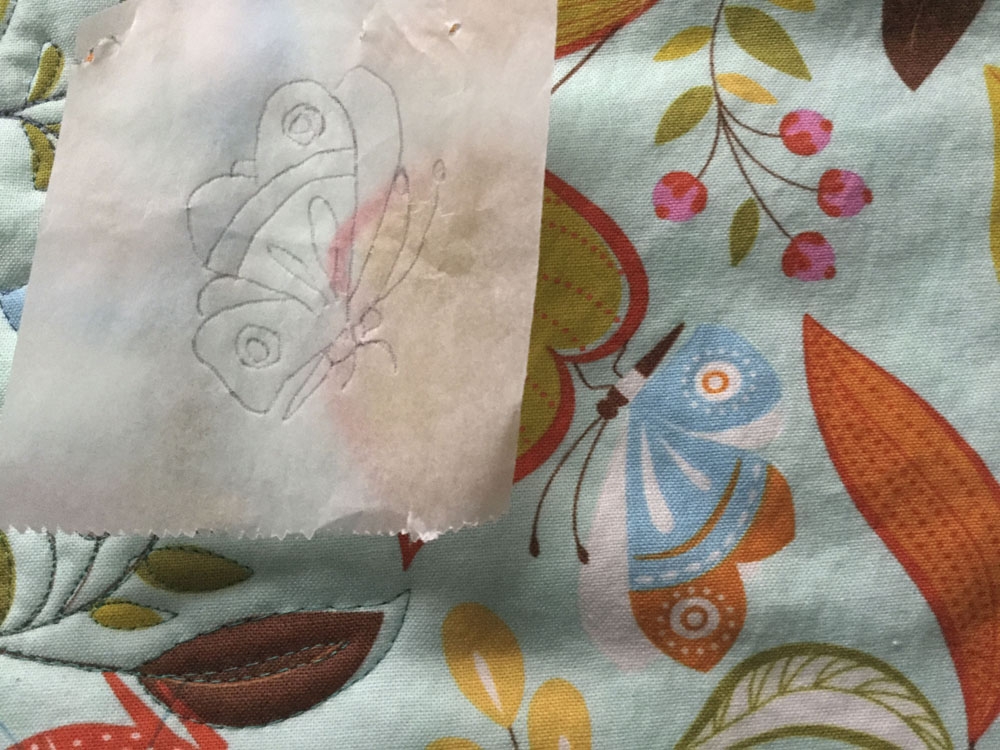
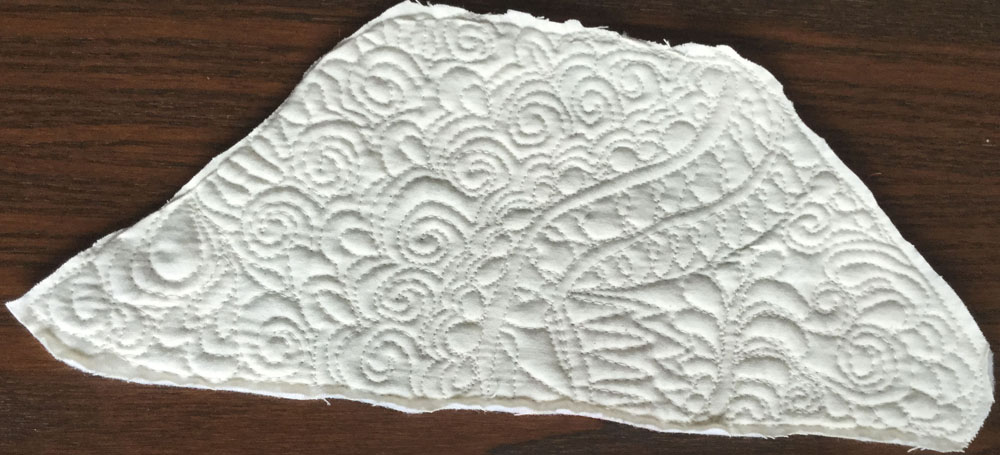
For my December learning goal, I wanted to continue adding colour to my wholecloth quilt.

December Learning Sum Up

I only spent a few hours working on it, but it is slowly coming along. It's taking longer than I thought, mostly because I'm trying to think of different things to do within the pattern. Below you will see what I mean.  I've done some lines within the flower in the middle (sort of a cross hatching) and I've done some echoing within the leaf, in two different colours.
Trying new FMQ techniques within the pattern
Here is the overall piece. It doesn't look like much progress but it was a few hours of FMQ.

FMQ Progress on the wholecloth quilt

A few more leaves now have colour

December One Monthly Goal (OMG) Finish

For my One Monthly Goal for December (OMG), I was hoping to start playing and creating an art quilt based on Jacobean embroidery of gardens. Instead of working on a garden, I found myself using some of the same techniques using Christmas fabrics from the bag of scraps that I brought up for the Christmas EPP.

I just built a background with strips and then started adding appliqué. I used the Crafty Appliqué technique for most of the appliqué. These worked out better than the large cardinal appliqué that was done without using that technique!

The beginning of a fun Christmas art quilt
I will be adding the embroidery and embellishment, once I've done the free motion quilting (FMQ). It is a great trial piece for my future art quilt based on Jacobean embroidery of gardens...that will come eventually.

Getting ready to travel

I'm going away for almost three weeks. I really, really dislike packing, especially when it comes to packing my hand-work. What to bring, how much, etc. It's always a pain because I want to get it right! I have to bring something with me other than books!

This embroidery is definitely coming with me. I've got another one started and will probably bring at least one solid fat quarter in case I decide to start others. I have visions of sketching what I see and embroidering it. Who knows, it could happen!

Packing a few embroidery pieces
For my last big trip, which was to China, I had packed some orange peels and appliquéd them onto blocks.
Orange peels project for my China trip

Appliquéd orange peel blocks


Appliquéing on the Yangtze River


This time, the trip is mostly to Spain. We start off in Barcelona.

I'm thrilled that I'll get to see the Sagrada Familia Cathedral again. It's an amazing building and its stained glass windows were the inspiration for my Art with Fabric in the fall of 2016.
Sagrada Familia stained-glass windows
Sagrada Familia Cathedral


Art with Fabric - stained-glass windows


What I learned

  • I'm happy that I put on the Learning QAL. It was a good idea and pushed me to learn so much more that I would have without it.
  • I also learned that it's a lot of work - not just writing the posts, but actually doing something!
  • I'm very grateful for those who put on QAL, Blog Hops and Linking Parties. I know how much work it is, but it's also rewarding and a great way to meet other quilters.

Related Links

Linking Parties: I will be linking up to the December One Monthly Goal Finish Link-up. I will also link up to as many linking parties as I can before I leave :-) Check out what everyone else has done! Linky TuesdayLet's Bee Social, Oh Scrap!Midweek Makers, Finished or Not Friday, Can I Get a Whoop Whoop?


Sunday, November 26, 2017

Wholecloth Quilt 2 and Goal Sum Up

In the November Learning QAL, I very optimistically said that I would try out the 4 types of batting on wholecloth quilts.

So far, I made the beginnings of a wholecloth quilt with the silk batting. The quilting is mostly done, although I do want to try quilting some kind of grid pattern in the border. The project won't be finished for a while because I will be painting within the FMQ. (See the Wholecloth link in Related Links below for more details.)


First Wholecloth quilt - the back
First Wholecloth quilt - the front


This will be the front of the quilt
I started the second wholecloth quilt Thursday night. Since it's essentially just following the pattern of the fabric, it's not that difficult. The hard part is making the decision of which thread to use where!

I am using # 100 Kimono silk thread on this wholecloth quilt as well. So far I've used teal and blue on the plants and a maroon on the bird. The colours don't show that much, but once I've quilted the outline, I hope to add more colour from the front (instead of the back). That would be much easier :-)

You may be able to see two upside down birds that I've x-ed out, on the fabric. I don't care about the direction of the plants but didn't want the upside down birds. I x-ed them out in the hopes that I won't quilt them by mistake. The marks will come out when I iron the piece.

The pattern that I am following, which will be the back


I used the cotton-wool batting for this project because I would love to have the extra loft. In my last batting experiment, I found that once the quilts were washed, there was little difference in the loft of each. Since I don't expect to wash this one, I'm hoping that the cotton-wool batting will give me the best result.

Here's a closeup of the FMQ. You can see the bird in red and some of the plants.
Closeup of the FMQ so far
This is roughly the same section as the top, but in reverse. It's so weird looking at all of this colour and not seeing it on the quilted side :-) I'm really hoping that I'll be able to add more colour once I've outlined the pattern. Then I'll be able to follow the FMQ and see exactly what I'm doing.

Closeup of the pattern that I'm quilting. Isn't it amazing?
The fabric also includes 2 butterflies. I could leave them upside down but I'd rather not. I think I've figured out how to reverse the image so that I can quilt them right-side up.

I copied the image on freezer paper. Next I'll outline the butterfly from the wrong side of the freezer paper so that it will be facing the flower. I may have to transfer that image to another piece of freezer paper so that I can iron it onto the fabric. If that doesn't work, I can always pin it down.

I'll let you know how that works out!
Working with the upside down butterfly
Since I never did press the publish button, I can update this project. I ended up FMQ the butterfly from the wrong side of the image - I just pinned it down. It worked really well.

The FMQ from the back is essentially finished. Here it the front.

The front of the wholecloth quilt
Here's the back. Someone mentioned that I actually had 2 quilts - one from the back and one from the front. I am tempted to show the quilt from the printed fabric side, but with the butterflies moved over, it doesn't look as good anymore.
The back of the piece - all FMQ
Here's a close-up of the butterfly. It's not easy to see, but it will be nice once more colour has been added.
Close-up of the quilted butterfly
What I learned
  • I've had a great time FMQ this by essentially tracing the fabric. I find it very easy to do, but then when I thought about it, I've been tracing pictures since I was ten or so. I used to make my own monthly calendars by tracing from my favourite colouring books (that I rarely coloured) and then adding the grid for the dates over the images - which were often Peanuts characters :-)
  • I mentioned that the butterflies traced onto freezer paper worked really well. What I didn't mention is that I didn't place one of the butterflies as carefully as I should have, so that it's overlapping a leaf. I'll have to work on that from the front when I add more colour. 
  • I'm happy to say that I learned from my mistake - the second butterfly is very well placed! Now the first one can be considered a creative challenge as I try to fix it 😊
  • This has been a great experiment, but I have to admit that although I love my second wholecloth piece, I'm not sure how great it will come out. I really feel that it needs more to focus on. I may end up doing a lot of stitching on the birds and the butterfly so that there will be something to draw the eyes. That may mean that I won't do much stitching on the flowers or leaves. That is how I intend to proceed once I start working from the front.
  • I'm not sure if I will have time to do more FMQ on this piece before the end of the month, or to even work on the other two wholecloth quilts. I have come a long way since I am really not stressing about it, except that I just realised that I have to post my Learning QAL - November Sum-up. So I will add it to the post. Oops!!!
Related Links
Linking Parties: I will be linking this to many linking parties. Find out what others are doing by clicking on these links. Free Motion Mavericks, MOP Monday, Off the Wall Friday, Finished or Not Friday, Can I Get a Whoop Whoop?, Monday Making, Design Wall Monday, Linky Tuesday, Let's Bee SocialMidweek Makers #100, Needle & Thread Thursday,


Monday, September 25, 2017

Learning QAL - September Sum Up

It's that time again. In the next few days we'll find out what participants learned this month as part of the Learning Quilt-A-Long.
My thought for choosing my September goal was to minimize my stress level this month by aiming for something fairly easy to accomplish since I have a quilting deadline in early October. I thought that I would explore and practice a few FMQ sites and try some new things. In hindsight, I was pretty ambitious!

Wild Quilting on Craftsy
I ended up spending almost all of my time exploring the Wild Quilting course with Christina Cameli from Craftsy. That ended up being a very good thing because it gave me the chance to watch the video several times, take notes, practice and then enter what I learned in my FMQ journal.

FMQ journal - Wild Quilting page


I started a journal when I got interested in learning how to write as part of doing art work. I practiced on any piece of scrap paper I could get my hands on, but I wanted to keep a journal of the different styles of writing that I had mastered (sort of). 

I knew that this journal would also be perfect for keeping a record of the FMQ that I was learning.

Focusing on just the Wild Quilting course gave me a chance to do all of that. I now have two and a half pages of notes on Wild Quilting, that I can refer to whenever I like.

In my Lots of projects! post in mid-September, I showed you this little practice piece.
I had also started working on what Christina calls Layered Combinations. These are different designs that are made mostly in a row with lots of echoing and then worked into another row of FMQ designs.
Layered combinations 
When the layered combinations are done, then there are partial combinations and finally it all comes together, mostly around what Christina calls Showboats.
A few Showboats with dense FMQ 
Here is my finished practice piece using Christina Cameli's Wild Quilting. 

Finished practice piece based on Wild Quilting course
FMQ Project 

As a final project, I created a little black and white wall hanging for my niece. I used improvisational piecing and many black and white scraps. 

I started quilting on it with white thread. The bobbin thread was originally a white Bottom Line but when I ran out, I used a taupe one. Not a good idea because I could see the difference. Finally I ended up using the same white thread in the bobbin as in the top.
Improv top with lots of\
negative space to FMQ

Quilt top marked and partially quilted
I've gotten a little further than the quilting in this picture below but it's not going to be ready for today's post (which is almost tomorrow's post!)

You can see in the image that I used a blue FriXion pen to mark some of my showboats. Quilting with white thread on white-on-white fabric is nearly impossible without the marking.

This wall hanging project is my OMG for September. I hope to squeeze in a quick post between now and October 1st.

Don't forget to join us for October's Learning QAL. The Goal Setting post will be up on October 1st. See you then :-)

What I learned
  • I started off quilting my practice piece very densely. I then figured out that this was not really sustainable. I love practicing my FMQ but I also don't want my finished pieces to be as hard as a board! That's when the quilting designs in the Layered Combinations got bigger.
  • Quilting densely is important when you want the un-quilted spaces to stand out. I knew this but for effective FMQ I can't be reminded too often!
  • I quilted the practice piece using a King Tut variegated thread. It looks pretty cool, even if you can't really see it in the photo.
  • When FMQ with white thread on white fabric, it's important to use white thread in the bobbin. The thickness of the thread is secondary to the colour!!! 
  • My white fabric is actually a white on white with a flower design on it. It's the most difficult thing that I've ever quilted since I can't see what I'm quilting because of the white thread. This is one lesson I will remember!
Related Links
Linking parties: I will be linking this post to a whole bunch of link-ups. Find out what others are doing and check them out! Monday MakingDesign Wall MondayMoving it Forward, Linky Tuesday


Thursday, August 24, 2017

Learning QAL - August Sum Up

Welcome to the first 
Learning Quilt-A-Long Sum Up post and link-up.


My learning goal for August was to dye my own fabric! This was big! I was nervous! The actual dyeing was almost anti-climactic :-) Isn't it typical to see new things as complicated and difficult?

Learning to dye fabric

I approached it as I mentioned in my goal setting post.
  • I started by reading a couple of books and blogs, and watching some YouTube videos. I have listed my favourites resources in the Related Links section below.
  • I bought some supplies since the measuring cup, funnel, measuring spoons and whisk shouldn't be used for cooking any more. 
  • I already had my kit and some fabrics but bought a little bit more :-) and raided my stash for a few fat quarters.
  • I made notes - lost the notes and re-wrote more notes!
  • I washed all of the fabric last week, even the Prepared For Dyeing (PFD). After reading all kinds of advice, I just used my usual unscented laundry soap.
Fabric pile ready to dye
  • I put away all of the laundry in the laundry room so that nothing could get accidentally dyed.
  • I mixed the soda ash with the warm water (about one cup for a little more than a gallon), unfolded the fabric and placed it all in the mix.
  • I set everything up on the top of the washer and dryer, with rags under everything.
  • As suggested, I misted the rags so that the dye powders would stick to them rather than float in the air. That was a very valuable tip. You can see from the picture below that the rag underneath the jars is quite colourful from dye powder that stuck to the wet rag.
  • You can also see that my two cups measurement was pretty uneven.
Black, fuchsia, yellow and turquoise prepared dyes 

My supplies and prepared dyes on the washer and dryer
It was now time to take everything outside. 
  • I placed my old picnic table in the sun and then covered it with plastic. 
  • From the original yellow, turquoise and fuchsia dye mixes, I made purple with the turquoise and fuchsia; and green with the yellow and turquoise. I realised half way through the day that I had forgotten to make orange dye.
  • I placed some of each dye in the plastic squirt bottles for easier application.
Dyes ready to use

Table set up in the sun
Then the real work began!
  • I took fabric out of the soda ash water, wrung it and then placed it on the plastic covered table.
  • I found that the hardest part of dyeing fabric was to decide what colours to use. The only piece that I used just one colour on was a fat quarter that I dyed purple, since I had lots left near the end of the day.
  • I tried to dye the fabric with colours that might be used for landscape art quilts. Of course, if I don't like all of the colours on one piece, I can always cut it up.
  • I did a few pieces the way Sharon Collins makes them, by applying different colours of dye on half of the fabric and then folding the other half over it to get a mirror effect. 
I have no idea what I was thinking!
The picture was taken before I covered it with plastic and spread it out.
Let's hope for the best :-)

The fabrics are white on white.
I heard that you can get nice effects by dyeing them.
As I look at the pictures I took of the fabric with dye on it, I'm not sure what to expect. I may have gone a little too crazy with the colours. Oh well, this is what learning is about!

I wish that I could show you the results in this post, but the fabric is still outside. I placed the table where it will get maximum sunlight. I will be removing the fabrics tomorrow and then washing it.

Fabric dyed and waiting to dry.
What I learned
  • Dyeing fabric is a lot of work, but I'm sure that it gets easier with practice!
  • I'm really glad that I misted my work space with water since I got dye powder on the rags. I should have known since I always get flour and sugar all over everything when I bake!
  • I should have cut my plastic pieces before starting to dye - and I should have used heavier plastic. I did use medium weight but I think that heavy weight would probably not have wrinkled as much when placed on top of the fabric. I'm not sure what effect this will have on the dyed fabric. I guess we'll see soon enough!
  • I'm happy to say that I wore my plastic gloves most of the day. I did take them off to arrange the cheese cloth on the table, and then only used one gloved hand to apply the dye. Since most of it was fuchsia, the pink doesn't look too bad on my fingers - and most of it washed out after a shower and doing some dishes.
  • Next time I will probably dye a smaller batch of fabric. I was tired about half way through dyeing my fabrics. 
  • Next time I also want to think more about the colours and the effects that I want to achieve on the fabric since I won't be so worried about the process.
  • I still have some dye mix ready to use. From everything that I've read, it seems to keep from 1 to 5 weeks.
Related Links
Linking parties: I will be linking this post to many link-ups. Follow the fun and see what everyone is working on. Finished or Not FridayOff the Wall FridayCan I Get A Whoop Whoop?Oh Scrap!Monday Making, Main Crush Monday, Design Wall Monday, Linky Tuesday, Midweek Makers, Let's Bee Social,


Thursday, July 20, 2017

Announcing the Learning QAL

Please join me in the Learning Quilt-A-Long (QAL).

Join the Learning Quilt-A-Long
In this QAL, you get to choose what you want to learn - 'cause it's all about you ;-)

Think of all of the learning that you do while you create quilts and art! What about that new pattern or the first landscape quilt you made? Are you taking a class or participating in a quilt-a-long? This is where you'll link up when you want to share what you'll be learning with the rest of us!
Learning Needle Felting!

Learning with the Growing Up QAL


Twice a month we'll get together - at the beginning of the month we'll share our learning goal for the month in the Learning Goal Setting link-up. Then at the end of the month, it'll be time to share what we learned in the Learning Sum Up link-up.  

I've created a Learning Quilt-A-Long page on my blog. That's where the button will take you. It has all of the details, including the links to all of the link-ups (eventually past and present!). 

Learning all about "value"

Learning to blog (first post)
My own learning goal before the launch of the Learning QAL on August 1st, 2017 is to use MailChimp to send email reminders of the link-ups to anyone who wants them. I've seen other bloggers use it and I love getting that email reminder. As soon as I've figured it out, I'll post the link on my post as well as the Learning QAL page.

Prizes

Each month there will be a prize for those who have linked up to both the Goal Setting and the Sum Up link-ups. I'm going to try to find prizes that are related to learning - a new technique, e-book or something fun about learning. The prize for the month will be announced at the Learning Goal Setting Link-up and the winner will be announced on the next month's Learning Goal Setting Link-up.


Learning Quilt-A-Long (QAL) Button

Feel free to grab the button located at the top of the sidebar. You can also find it on the Learning Quilt-A-Long (QAL) page. (See Related Links below)


What I learned
  • I've really enjoyed hosting the Celebrate - Fêtons 150 link-ups. It's given me an opportunity to: 
    • Reach out to more quilters and bloggers, 
    • Find out about all kinds of events and projects created specifically for Canada 150.
    • Make a few of these Canada 150 projects myself.
    • Learn all about link-ups.
  • I've also learned that I enjoy hosting link-ups but wouldn't want to host one every week. I know my limitations.
  • I get bored very easily! I'm hoping that this link-up will give me the opportunity to try new things - that way I can keep my interest and motivation going!
  • As I mentioned in the Learning Quilt-A-Long page, in the last 5 years that I've been blogging, I realised that learning isn't only about practice - it's also about taking a few minutes to reflect on what I learned.
Related Links


I hope that you'll help me celebrate learning by joining the Learning Quilt-A-Long (QAL). See you back here on August 1st!