
Welcome! Have you ever felt like your quilting life is out of control? Since finishing Version 2.0 I have been working on more and more projects. Some are classes, others are my usual TextileArtist.org workshops and then there are those squirrel projects from who knows where. 😃
2023 Stitch Camp
This year's Stitch Camp at TextileArtist.org was a revised version of the Gwen Hadley workshop from June 2021. Since I hadn't done the original workshop, I thought that I would give this version a go. TextileArtist.org does an amazing job with their workshop and Gwen Hadley is very popular. I just hadn't participated because I had tons of other projects on the go and it involved paint. I am getting more comfortable mark making with paint but it's not my favourite thing to do. I do like how it came out.
 |
| First cloth is heavily marked |
The first cloth is heavily marked, half in one colour and the other half in the second colour. We added little bits of the "other" colour in each half. I used many tools for mark making, including the bottom of a plastic insert from an assorted box of crackers.
 |
| Second cloth has more background showing |
We used the same colours for the second cloth but applied the paint marks sparingly. I used many of the same tools but added a plastic fork as well as the end of a swimming noodle. For both pieces I used Pebeo Setacolor - a shimmer opaque turquoise and a glitter tourmaline (purple/fuchsia). I figured that they would play nice together 😊
I attached my favourite meditation block with natural elements to make the card. I stitched the corners of the block into the paper to attach it. I really like how it turned out. This is a great way to use meditation blocks.
The next step is to cut these two cloths up and join then back together with stitches, appliqué, etc. The suggested project is to stitch together a long narrow band such as a snippet roll. For this project, I would rather make an art piece that I can attach to a canvas frame.
 |
| Starting to put some stitches in to blend the pieces |
I've put everything together (i.e. fabric, yarn, thread, etc.) to work on the project. This is the best way that I've found to keep ongoing projects. Every once in a while, if I find something that could be used for the project, I just add it to the bag.
 |
| My project so far. |
Rocks, Pebbles & Stones, Oh My!
The Rocks, Pebbles & Stones, Oh My! workshop was taught by Ana Buzzalino, through the Craft Napa 2023 Uncorked at home (virtual). When I saw the images for the course, with those rocks attached to her art quilt, I was hooked.
Ana is a great teacher and her work is wonderful. We learned 3 techniques for making and attaching rocks to our work. The first is to use the background fabric to make the rock, sort of like trapunto. For me this was the easiest technique to use.
 |
| My project so far |
I found an amazing piece of painted fabric in my stash. In the picture above I've covered the top sections with different blue fabric since I want it to be more of a water and beach scene.
Here are some of the photos of my trapunto-like process of making rocks and pebbles. For this technique, it was easiest to work with the padding and background fabric within an embroidery hoop, underneath the top fabric.
 |
| Adding the batting over the back |
 |
| Stitching the first rock |
Keeping the fabric as tight as possible and having as little gathering fabric as possible was difficult. To hide these pleats, I'll be adding beads after the rocks are finished. This covers up the pleats, looks like sand and gives a wonderful effect.
 |
| Pinning the fabric to stitch a second pebble |
 |
| Three rocks or pebbles imbedded within the piece |
We learned two other methods of making rocks or pebbles. The first is to create a flat stone using a cardboard template while the other used more batting and stiff interfacing. These can then be attached by appliqué to the piece. Again the most difficult part is getting rid of pleats because rocks don't generally have them 😁
 |
| A collection of stones on a partly FMQ background |
Card featuring a Meditation block
A couple of weeks ago I needed to send a card. Since I have lots of blank cards and envelopes in my stash, I though that it might be the time to see what I could make.
 |
| Hand-made card using a Meditation block |
I attached my favourite meditation block with natural elements to make the card. I stitched the corners of the block into the paper to attach it. I really like how it turned out. This is a great way to use meditation blocks.
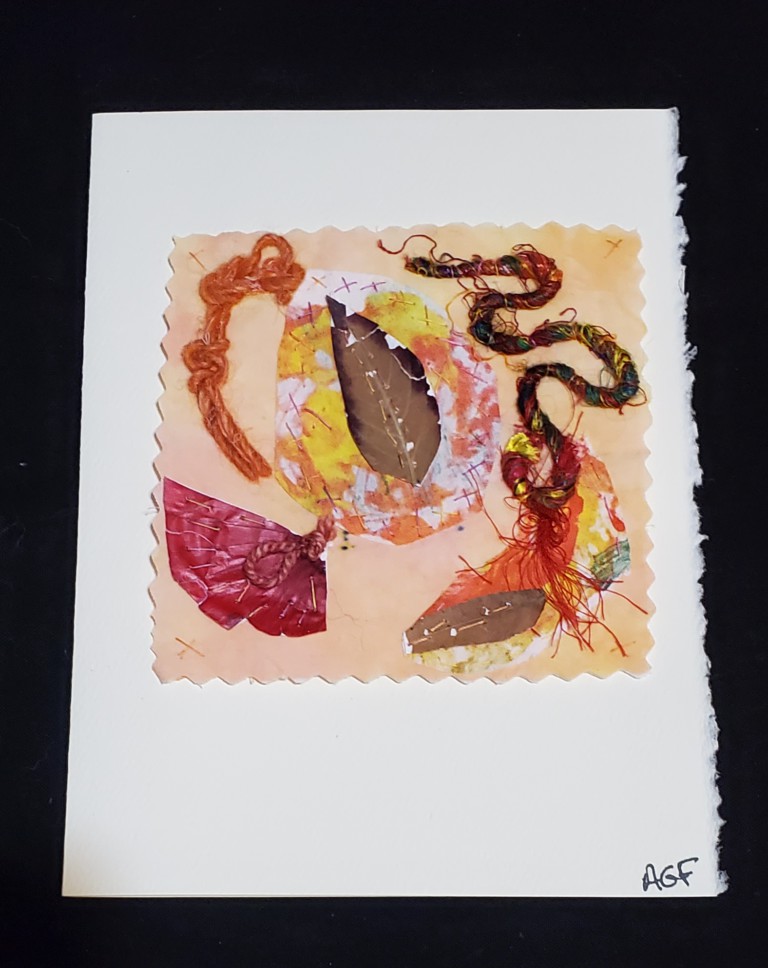 |
| Card with natural elements |
What I learned
Stitch Camp
- I enjoyed the mark-making process in Gwen Hadley's workshop.
- There was also no pressure to make it look great since it would be cut up.
- When cutting the fabric, I was nervous because the fabric's weave is quite open. I think that the paint kept it from fraying too much. Besides, I'm sure that I'll be adding some frayed bits for effect!😊
- A week was not enough for me to get this workshop done but then I always take it further, and of course having all of these projects on the go isn't helping.
- I've arranged all of the materials in a lovely bag that I can grab at any time. This one is coming with me on holidays. I just need to ensure that I have some good contrasting thread and material so that things don't all blend into a puddle!
- The first thing that I learned is that I need to read course descriptions better before signing up! When I saw the images of Ana Buzzalino's art pieces, I had no idea that the stones were made of fabric - they are that good! So, I though that I was going to learn to attach stones to art quilts, not make the stones! 😁
- I'm not sorry that I took the course. I did learn new techniques and the teacher was terrific, but it's going to require a lot of practice before my stones look like the real thing.
- I'm not sure what I want to do as a finished piece. I will be adding shells and driftwood with embroidery, like I did in the Embroidered Seascape workshop (see link below). That would be very cool, but I'm not quite ready to tackle that yet. One day inspiration will crash into my consciousness!
Card featuring Meditation blocks
- I'll be making more of these and playing with that concept!
- I'm not sure how the card survived the postal service - I hope that the recipient didn't end up with a bunch of crumbled bits at the bottom of the envelope. I'll have to work on that if they are going to be mailed!
Related links
- Gwen Hadley, website
- Snippet Exchange, June 06, 2021
- Ana Buzzalino, website
- Embroidering a seascape, August 22, 2022
- Mindful stitching with natural elements, December 04, 2022
Linking parties
I'll be linking up to many fun linking parties. You may want to visit a few. Sew & Tell, Patchwork & Quilts, Put your foot down, Needle & Thread Thursday, Off The Wall Friday, Finished (or Not) Friday, Can I Get A Whoop Whoop?, Peacock Party, Slow Sunday Stitching,
Project details
|
Card with Meditation block - Natural Elements
Meditation block made based on Claire de Waard's workshop
Card size: 5" x 6⅞"
Material: Meditation block made with fabric, sari yarn, painted fabric, thread, yarn and leaves and onion skins glued to paper; card is ivory with deckle on acid free paper
Techniques: embroidery and stitching
I haven't done my Stitch Camp project yet, but it's on my list. You've made good progress! Adding stones is an interesting technique, too.
ReplyDeleteHi Wendy, good luck on your Stitch Camp project too! Slow stitching takes a lot of time! Hopefully I'll be able to add stones to a future project. Thanks for dropping by and commenting!
DeleteYou always astonish me, Andree, with all that you do and all that "learning". Each project is so different and looks like you have a whole lot of fun with experimenting. Those rocks are really cool.
ReplyDeleteThanks so much Kim. I must say that they are easier to attach to a quilt than the real things! Take care.
DeleteSuper fun class projects, Andree! Wishing your gorgeous card safe travels through the postal system.
ReplyDeleteThanks so much Joyful :-)
Delete