Showing posts with label wool. Show all posts

Monday, May 11, 2020

Adding rug hooking to my artist's tool box

It's been a while since I felt like reaching out. Although I needed some quiet time, I did continue to stitch and learn. That is my go-to in times of stress. Here is a bit of what I've been up to. 😊

Rug Hooking


I met a lovely lady, Robin Whitford of Hooking Outside the Lines, who teaches rug hooking. I must admit that it suited me better to take a virtual class rather than going to the store as it is usually taught. For an introduction course to rug hooking, it wasn't really necessary to be next to the teacher. The technique is really not very complicated. Like anything else, practice makes it easier. That's not to say that it can't get complicated, but for an introduction - it was perfect.

rug hooking - Echoed Heart
A rug hooked Echoed Heart 
After a two-hour class, I had made a square and rectangle with wool. Those were my practice pieces.
orange rectangle rug hooking
Making a practice rectangle
and then pulling it out

One of the things that I like best about rug hooking is that I can just pull on the wool to take it all out. If you don't like it, it's relatively easy to just start over. Of course that also depends on the type of yarn and the backing that you use. Burlap and the wool I used were very forgiving so that it's possible to just start over with the same wool, in the same place on the burlap.

After the class, I wanted to keep practicing because the hardest part it getting the wool hooked on the other side of the hoop. Once your fingers figure this out, the rest is fairly simple. So I started making a shape in the blue yarn. It sort of looked like a heart, so I continued with that shape. Then I got bored and added the red yarn around it (an echo in quilting terms 😊).
heart rug hooking in hoop
Echoing the heart in red

rug hooked blue heart shape
Making a heart shape with blue wool


Since I want to learn rug hooking to use in my textile art, I knew that I would want to make smaller pieces. I removed the burlap from the hoop and then zigzag stitched around the heart. I also zigzagged around the piece of burlap so that I could continue to use it without it un-raveling. 

I was very happy with this first piece and incorporated it into one of the art quilts that I'm working on. I used a square of red velour, cut out the shape of the heart from the centre and then reverse appliquéd the heart onto my piece. It was easy to attach because the wool of the heart extends over the edge. 
rug hooking inserted into reverse appliqué square
Reverse appliquéd the heart to my art piece
The next day, I decided to make a small landscape - nothing like diving right in!

It's wonderful that I can use most of the lovely novelty yarn that I've been accumulating in the last few years. It's great to see how a yarn translates to rug hooking. Some keep their shapes while others end up splitting or getting quite shaggy (like the top of the tree).  

Small rug hooked landscape

close up of rug hooked landscape
Close up of rug hooked landscape
partially done rug hooked landscape
In progress picture -
it needed help.
It was fairly simple to make the foreground in green and I added some purple in shapes that could have been flowers.

My son helped me by suggesting a longer trunk for the tree. It also helped when I added blue yarn for the sky on both sides of the tree. You can see the improvement from the progress image, which mostly looked like a big clump of fuzzy green. I used three different yarns for the sky.

I added some beads to the flowers, hoping to make them look more like flowers.

What I learned
  • Rug hooking is very cool. Not too difficult to learn the basics but has so much potential.
  • My teacher, Robin Whitford, is very experimental and doesn't follow the rules - my kind of artist!
  • I really loved how the different fibres and yarns looked after they have been hooked on. 
  • The bark was particularly interesting because I used pieces of twine that one of my favourite restaurants uses to tie the paper that wraps their sandwiches. If the twine has never been used, it comes out in distinct curls but once it's been used and pulled out, it became all fluffy.
  • I used the hoop to learn, practice and make the first heart shape. After that, I just did the rug hooking without the hoop. That's also how I do a lot of my embroidery unless it's a really precise piece.
  • I'm not sure how I will be using rug hooking in my art, but it's great to think of the potential. I do want to experiment with other types of backing. I have some cotton and linen pieces that I would like to experiment on. Actually, wouldn't it be cool to hand-dye the backing material and then add rug hooking to it, leaving some of the spaces empty? Oh the possibilities 😊
Related links
Linking parties
I will be linking this post up to Free Motion Mavericks which is hosted by Muv right now. I'll be hosting on Thursday so remember to come by. Let's see what's going on and join in the fun! Monday Making, Design Wall Monday, What I Made MondayColour & Inspiration Tuesday Midweek Makers, Needle & Thread Thursday, Put Your Foot Down, Off the Wall Friday, Finished or Not Finished Friday, Friday Foto Fun, Can I Get A Whoop Whoop?, Peacock PartyOh Scrap!, Slow Sunday Stitching,


Tuesday, June 05, 2018

June Beginnings

My life is overflowing with quilting, embroider, EPP and other fibre art projects. I love it, especially since there are no real deadlines. Here are some of the things I've been working on this week.

Connected by a Thread Art Quilt

The Out of the Box FibreArtist group has a challenge so that we can eventually create a body of art for an exhibition. It's really weird working on a piece for eventually. It's also really nice since I get to explore without a deadline.
Trying out some stitches on felt

The theme is Connected by a Thread and the size is 11" x 14". I had many ideas for this project, each one more complex than the last. I finally put a stop to all of that and decided to create an abstract piece (something I very rarely do) with my hand-dyed fabrics from last summer. I'll be incorporating a whole bunch of techniques that I'm presently learning 😊 It's going to be organic and improvisational (i.e. winging it!)

I'm only going to show you elements of it since it's got a long way to go. Eventually the task will be to make sure that it's cohesive.

The first image is a layered circle. I started with a circle of hand-dyed fabric cut with pinking shears. I layered the circle and embroidering it following some of Sue Spargo's techniques from her Craftsy class, Embroidery Texture & Dimension by Hand.

The layer on top of the fabric is green pre-felted wool, attached with a whip stitch. This layer is surrounded by Pekinese stitches in 2 shades of green embroidery floss. The next layer, a pink-beige pre-felted wool, is crowned with couched purple sheep curls. I haven't figured out what will go with the next purple felted circle.
Needle felted edge

I have a 3-D edge that needed to be finished. Over the zigzag stitch I attached little strips of cheesecloth on both sides of the edge. Over this I needle felted some lovely wool roving.

In this area, I cut some of the dyed fabric into strips and wove it together into a block. I didn't want to add the whole block so I backed it with fusible web, cut it into this shape and then stitched it to the background. Eventually I will be stitching around it.
Woven strips of hand-dyed fabric
I also practiced some of the stitches I learned on this piece of felt. There are fly stitches, tête de boeuf, closed fly stitches, more Pekinese stitches and attempts at a few crested chains.
Some practice stitching from Sue Spargo's class
Kingfisher Stitch-Along

The stitch along has started. I thought I had a few EPP flowers already made but my hexies had two rows while the pattern calls for only one row of hexies around the middle hexie. I'm not complaining since in the end it will be that much easier and faster to make.

These are potential flowers from my pile of already made hexies. The next step is to go into the stash and get different fabric, since these are the ones that I've been working with for the last year. Time for some new stuff! As you can guess, I haven't decided what to do about the middle hexie. I would like it to be roughly the same fabric or colour to unify the quilt.
Potential EPP flowers
I really like the look of low volume fabrics as a background to these colourful flowers. I'm not sure that I have much of that in my stash. I may have to check out some of my favourite shops! Oh shucks 😊
More colours for potential EPP flowers
This project will be my One Monthly Goal (OMG) for June. We are supposed to make 8 flowers per week. I'm not sure that's very realistic for me, so I'm aiming for 16 flowers by the end of June.

What I learned
  • I'm not really sure where I'm going with this art piece but ultimately what I would like is to make a cohesive piece that includes all kinds of different techniques that I'm learning.
  • I started with some improv piecing, didn't like parts of it so I just took the rotary cutter to it!
  • I have a few ideas but what I'm trying to figure out is when to quilt it. Since I want to add some found objects and do some beading, the quilting should probably be done before this.
  • I am loving the creative process and really trying to let myself be ok with not knowing how it's going to turn out. I'm just doing a minimum of planning as I go. I've been known to do this but it doesn't always work out. This time, it will!
  • I've only been on Instagram for a few months. I haven't really been hooked until I started looking at hexies through #kingfisherstitchalong. I have no idea why, but I love looking at the different combinations of fabric on participants' hexies. It makes my heart sing.😊
  • I'm glad that the EPP project involves lots of colour because my art quilt isn't as colourful as I would like.
Related links
Linking parties
I'll be linking this post to OMG Goal Setting for June as well as many others. Let's find out what everyone is up to! Main Crush MondayMonday MakingDesign Wall TuesdayMoving it Forward MondayMidweek Maker, Linky Tuesday, Tuesday Colour Linky PartyNeedle & Thread ThursdayLet's Bee SocialMidweek Makers, Off the Wall Friday,


Wednesday, October 25, 2017

Learning QAL - October Sum Up

Welcome to Learning QAL's October Sum Up.
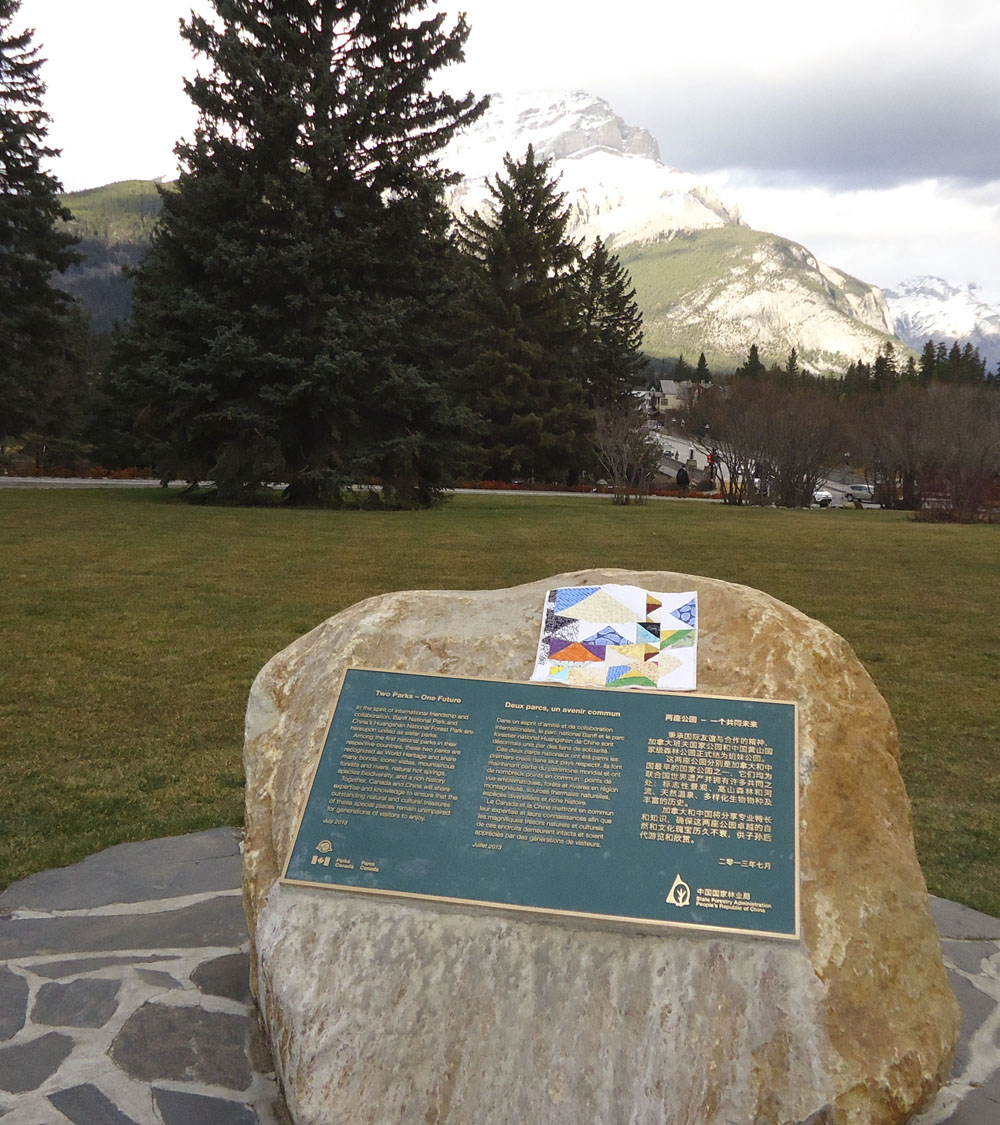
One of the views from Banff
Life is good here! I'm writing this post from the beautiful town of Banff, within the Banff National Park in Alberta.

As you can imagine, last weekend was a frenzy of activity at my sewing machine, getting my samples ready for this post and getting ready to leaving for Banff. 

Quilt blocks lounging in the grass in Banff!
Quilt Tops

First things first - to test the batting, I had to create some quilt tops. I wanted this to be as painless as possible - so I chose to make some scrappy improvisational pieces. These are, for me, the easiest things to piece since matching points and such is not my strength. 

I looked through "Quilt Improv" by Lucie Summers for some ideas on new improv blocks to make. 

It was really fun putting together a half-square triangle block. Since I had many half-square triangles left over from other projects, this was the perfect way to use them. I must admit that it's my favourite of the blocks. I also tried a variation of her X block.

I already had a log cabin block that I just added strips to, as well as a block that Lucie calls pieced squares. These are the improv blocks that I usually make.

X Block with
silk-poly batting
Here they are, sandwiched and pinned, before quilting.

Half-square Triangle block with
cotton-wool batting


Pieced Squares block with
bamboo-cotton batting

Log Cabin block with
cotton batting


Batting

Here are the four different batting I used.
  • Tender Touch bamboo-cotton (50%-50%) with scrim
  • Warm 100 Cotton  with 100% cotton scrim
  • Hobbs Tuscany Collection cotton-wool (80%-20%) batting with resin bonded
  • Hobbs Tuscany Collection silk and fine polyester (90%-10%) with resin bonded
Taking these different batting out of their bag, I was surprised by the stiffness and stickiness of both Hobbs products, although in the end, this didn't affect the quilting.

Something else that I noticed when I made my quilt sandwiches, is that the silk batting didn't stick to the fabric at all, even after being ironed. Again, I don't think that this affected the quilting, but it was unusual.

The bamboo batting was the softest and most supple while the all-cotton also felt great and was a little thicker than the bamboo-cotton.

Quilt blocks lounging in the gazebo
The Quilting Process

For consistency, I used the same backing fabric for all of the pieces, a Kona solid in pink. I put a new Superior Topstitch 90\14 needle into the machine. I also used Superior Threads, King Tut thread (40) for both the bobbin and the top. The bobbin was a grey thread while the top was a light variegated. I ended up running out of both of these on my last block! 

I started by quilting-in-the-ditch each block. The cotton and bamboo-cotton batting were great. The cotton-wool batting adds loft (puffiness) and did feel a little thicker. It was also great to quilt. I was surprised with the silk batting. It is the thinnest, was a little stiff and it almost felt as if there was no batting.

Free Motion Quilting (FMQ)

After doing some in-the-ditch quilting, I then went back to complete the FMQ of each block. I started with the cotton-wool batting. Wow! It was really great to quilt and I definitely saw the added loft while quilting. I did have to be more careful about puckers, just because of the added loft. 

FMQ on the cotton-wool batting (block size 16" x 16"½)
After quilting the cotton-wool batting, the silk batting felt really thin. I did have to adjust the tension on my machine since it was so different from the cotton-wool. It did quilt well.

FMQ on the silk batting  (block size 14" x 14"½)
I didn't really see or feel much difference when quilting the cotton and bamboo-cotton pieces. They were both great - but this is what I'm used to quilting. 

FMQ on the cotton batting  (block size 16" x 16")

FMQ on the bamboo-cotton batting  (block size 15" x 15"½)
I didn't get to finish the FMQ on the bamboo-cotton piece. I ran out of both bobbin and top threads. It is about 80% quilted.
Back of the X block
(silk batting)
Back of the Half-Square Triangle block
(cotton-wool batting)

Back of the Log Cabin block
(cotton batting)
Back of the Pieced Squares block
(bamboo-cotton batting)
The experiment is not over...

Overall, I was really impressed with the cotton-wool, bamboo-cotton and cotton batting. I was a little disappointed with the silk batting, just because it was a little stiffer and so thin. But the experiment is not over!

I still have to finish quilting the bamboo-cotton piece (after I buy more thread), and then bind each of them so they can be washed. That could make a difference in the end result.

I will also do some more experimenting with these batting - so if you're interested, follow my learning adventure next month. I'll be posting the details of Batting - Part 2 in my goal setting for the November Learning QAL on November 1st. I also hope that you'll be learning along with me!

Quilt block enjoying the view
What I learned
  • I was working hard to not be biased in regards to the silk batting because I was sooo looking forward to using it. It was difficult to not be disappointed.
  • In defense to the silk batting, it is known to be very lightweight but warm. I will reserve judgement (on all of them) once they have been washed.
  • In reality, the experiment can only be over once a whole quilt has been made and used to really get a feel for their properties as quilts. This experiment may last a long time :-)
  • I was impressed by the cotton-wool batting. Only 20% wool made a big difference in the loft. I'm also glad that there is only a little bit of wool since I do react to wool - even the softest makes me itchy. I had no problem working with this batting.
If you've had success, or not, with a particular batting, feel free to share with readers and me in the comments section!

Related Links
Linking Parties: I will be linking up to these great parties. Please check them out! Let's Bee SocialLinky TuesdayMidweek Makers, Design Wall Monday, Main Crush Monday, Quilter's Monday, Can I Get A Whoop Whoop?, Oh Scrap! Finished or Not Friday, MOP Monday, Free Motion Mavericks, Off the Wall Friday,

Great news! My half-square triangle block was featured on Free Motion Mavericks. Check it out!
Update: I linked to Sarah Goer's fun linky, Show Me Something Improv.