
Hi! I hope that this weekend finds you well. I have a slow stitching project to share with you today.
Mindful Stitching with Natural Elements
I'm still doing the TextileArtist.org Stitch Club workshops, and this one was great to incorporate into the mindful stitching that I've been doing for the last few years. The workshop was "Using natural materials in embroidery" with Claire de Waard. Here are the two meditation blocks that I created based on the workshop.
 |
| Using natural elements in my meditation block |
 |
| Using leaves and onion skin to make a meditation block |
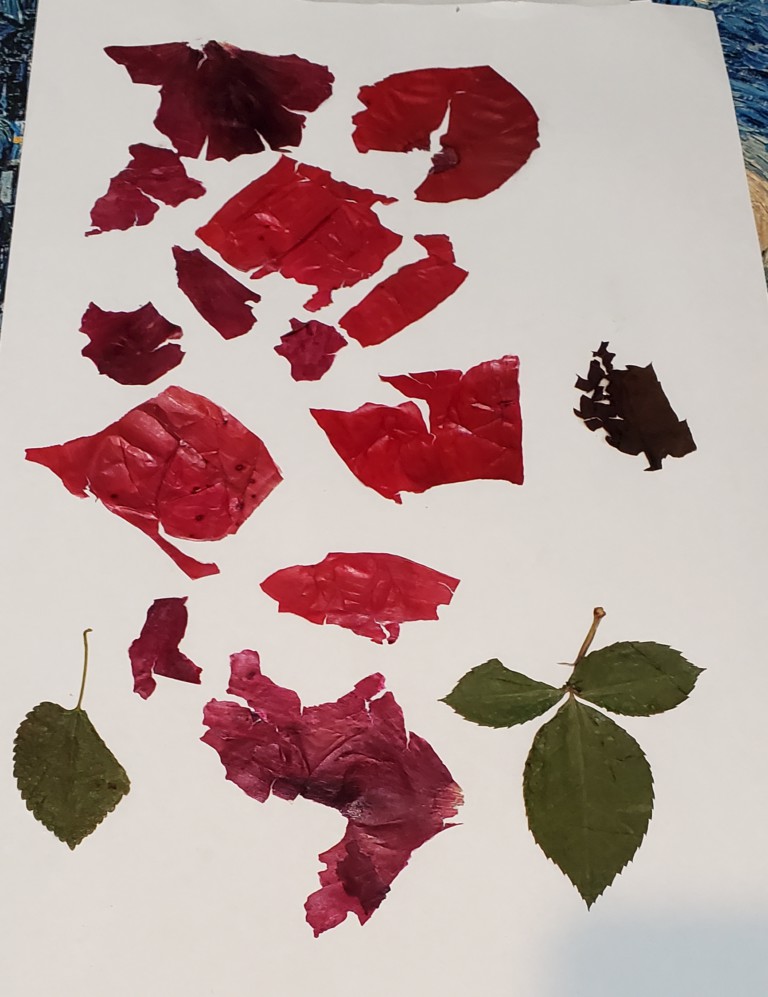
In the workshop, we learned to preserve natural elements such as leaves, onion skins and flower petals to incorporate into embroidery pieces.
I had a great time foraging for the natural elements in my back yard. This was before all of the leaves and flower petals fell to the ground. I love the image below, however they weren't all used since some things didn't dry as well as others.
 |
| Foraged in the back yard |
The first step after gathering was to dry everything. I placed them on sheets of printing or freezer paper and then covered them with weights. I learned quite a few things at this point that I'm including in the "What I learned" section below.
 |
| Onion skins and rose leaves dry well |
 |
| From tiny lotus leaves to larger burning bush leaves |
 |
| The flower petals change colours depending on the type |
 |
| Tiny flowers that dried to a pink-brown |
Once they were dry, the next step was to glue them to paper so that they keep their shape and don't become too brittle to stitch through.
This is a little harder than you might think because if the material is too dry, it becomes very brittle. In that case, you can soak the material in water for a few minutes, then dry it and glue it to the paper.
 |
| Onion skin in the water |
 |
| Onion skin dried and clued onto paper |
Sometimes it was hit and miss, but since I had lots of natural material, I could afford to loose a few. After I incorporated the leaves and petals into my meditation blocks, I realised that they are still very fragile. Talking with artist friends, I found out that you can also add gel medium or Mod Podge over the leaves, with or without the paper underneath.
I added a layer of Mod Podge on some of the leaves to see if it would help. It did make them less brittle. You can see the "natural material" stitched in the middle of this unfinished block. They are petals from a white rose. They are more pliable but the paper underneath it pops up every time you bring the needle up. I think that it might be more effective to just use the Mod Podge without the paper behind it.
 |
| Stitching through rose petals covered with one layer of Mod Podge |
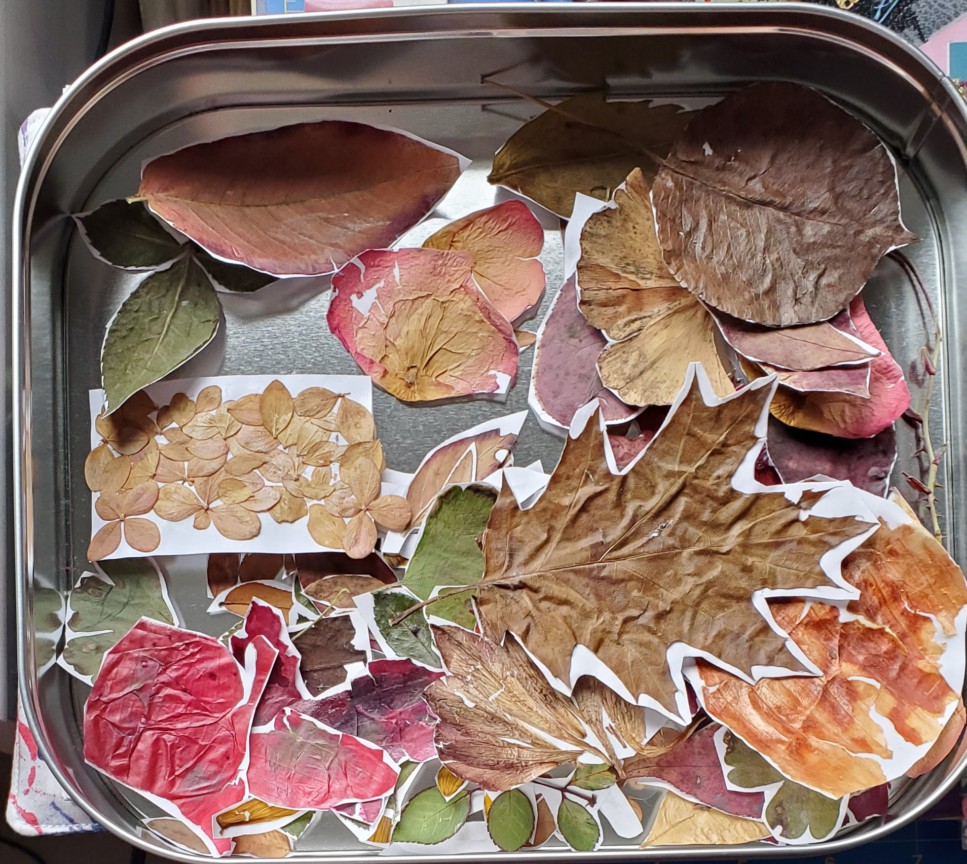
I am keeping the Mod Podge covered natural material in a new Coptic Journal that I made this week. I'll be writing a post about this later.
 |
| Envelopes in my Coptic Journal to keep my flower petals |
 |
| Keeping a leaf and onion skins that have a layer of Mod Podge |
This is the tin where I keep my glued "natural material".
Another way of keeping smaller flower petals is to glue them under plastic to create sequins. In this case, I bought a sheet of sticky plastic. I cut two circles of the clear plastic and then sandwiched the flower between the two sticky sides. You can see below the little clear flowers that it creates. I kept some round while I cut between the petals on others. In the top picture of this post, I incorporated one of these flowers in my block.
 |
| Lots of natural material to play with |
Another way of keeping smaller flower petals is to glue them under plastic to create sequins. In this case, I bought a sheet of sticky plastic. I cut two circles of the clear plastic and then sandwiched the flower between the two sticky sides. You can see below the little clear flowers that it creates. I kept some round while I cut between the petals on others. In the top picture of this post, I incorporated one of these flowers in my block.
 |
| Making little clear flower sequins |
What I learned
- Placing the leaves and other material on the sheet to dry is a great idea but it works best if the sheets are not piled one on top of the other. It turns out that the material can mold if there is too much humidity. It's best to place one sheet down, cover it and then place a weight (a heavy book) on top and keep layering this way.
- It might also have worked better if I hadn't left the sheets there for a few days. That would have aired the natural elements better.
- I got a bouquet of flowers for my retirement/birthday and the petals of the pink roses really dried beautifully although they didn't keep their shapes.
- Some of the natural material didn't dry well. You have to experiment to see what works.
- The next natural material that I get, I'll try to just use a few coats (on top and underneath) of Mod Podge over them. I think that this shows promise.
- The clear flower sequins didn't always stay together. The next time, I will add a drop of glue over and under the flower.
- I made the first sequin while the flower petals were still pink. Unfortunately, a few minutes later it had turned more brown-pink.
- I'm working on adding layers to my art, including the meditation blocks. It's so much fun and can be very effective! 😊
Related links
- Claire de Waard
- Claire de Waard: Playing with tradition, article on TextileArtist.org
Linking parties
I'll be linking up to many linking parties. Let's see what's going on out there! Slow Sunday Stitching, Patchwork & Quilts, 15 Minutes to Stitch 2022, Off The Wall Friday, Design Wall Monday, Sew & Tell, Midweek Makers, Put your foot down, Peacock Party, Can I Get A Whoop Whoop?,


