Wednesday, November 22, 2023

T-shirt Quilt FMQ on Free Motion Mavericks

Hi and welcome to week 457 of Free Motion Mavericks. I'm still travelling so it will be a short post. Before I left, I finished  FMQ (free motion quilting) a few of the t-shirt blocks on the quilt. 

A Few More Blocks


I finished these three blocks. 

FMQ both the sashing and the t-shirts

FMQ feathers in the sashing and loops on the sweatshirt

I FMQ the sashing on the next t-shirts. I'll have to change my thread and quilt the t-shirts next. For these two t-shirts, I quilted stars in the sashing. I'll be FMQ something simple in the orange t-shirt and probably outlining the people and the logo on the Star Académie t-shirt.

Stars in the sashing

I'll be outlining the logo as well as the group of people

This next block includes parts of two different t-shirts from Garneau High School, I started with the bottom sashing and FMQ some athletic images that were easy for me to do - a badminton racket and birdie, a soccer ball, hockey stick etc. I was wondering how I would fill in all of the sashing with sports designs when I questioned that assumption. I decided that the other borders would have much simpler FMQ, a mixture of swirls and echoes. Next to the "G", I copied it and then FMQ over the tracing paper on both sides.
FMQ so far

The whole t-shirt block


What I learned
  • FMQ the sashing based on the colour is as good a way of choosing what to quilt next as any. 
  • I'll be quilting inside the t-shirts next or eventually. That will also depend on my mood, design ideas and thread colour.
  • I quilted loops on the sweatshirt but only FMQ around the pouch/pocket. Won't that make a great hiding place 😁
Related links
Linking parties

Free Motion Mavericks


I may have messed up the linking party last week. I hope you'll be able to link up this week.😊

You are invited to the Inlinkz link party!

Click here to enter

Friday, November 17, 2023

Updates on Free Motion Mavericks

Welcome to week 456 of Free Motion Mavericks. I've had to do some travelling and haven't done much in my studio, or even in the car. Good news though, the snow is gone and the temperature is a little higher. I hope you're having a good autumn 🍂  

FMQ on the t-shirt quilt


I FMQ (free motion quilted) the block that contained the smaller crests. It was quick and easy with flowing, wavy serpentine lines. I used a dark gray top thread. In the soccer crest, I added a row of larger pebbles. I also echoed the track & field crest (it was on a cap).

A series of wavy serpentine lines

Next to the above block is a back sweatshirt. I decided to use the same top gray thread and FMQ some feathers. The sweatshirt is from Laws in Motion - a gymnastic organisation. In my mind, feathers have lots of motion with those lovely curved edges. I've done about half of the border and hope to finish it today. I'm thinking of using just large curves and hoops for the inside of the sweatshirt.

Feathers in the sweatshirt border


Booklet samples


I was supposed to lead a playdate for the Out of the Box (OOTB) Fibre Artists group on Monday but it had to be cancelled because I had to be out of town. It will be rescheduled for the winter. Here are the booklet or journal samples that I made for the class.

These are the 5 sample journals that I made. I wanted to try using different kinds and sizes of cardboard. Three of the booklets are made from legal size folders. You may recognize the washi tape journal at the left. The next one is essentially the same but wasn't decorated while the flat red one is the largest journal that I could make with the legal size folders.

Samples of booklets or journals made with cardboard covers

I had a really lovely box that I got when I bought cupcakes. I used the box to create this little cuty. 

A Cupcake Lounge box booklet

This next one was made from the sides of a tissue box. I absolutely love it! I put a Scotty button at the end of the thread that keeps the journal closed.

A small booklet made from a tissue box

These are the first three journals that I made using this technique. If you're curious and want to learn more, check out the link to the post in Relating Links below. I've updated the links.

First three booklets or journals using this technique

Abstract Free Motion Embroidered Landscape


In case you missed it, my last post was also FMQ related. If this peaks your interest, check out Related links below.

Black and White image

FM embroidery


What I learned
  • The t-shirt quilt is coming along well, but I'm really monitoring my energy level so that I stop before I get too tired. That's a very difficult lesson for me to learn but it's important because.... 
  • Too tired = mistakes, and I don't want to go there!
  • Many of the t-shirt blocks will have simple FMQ designs, otherwise it will never get done. Besides, you need regular designs for the special ones to shine 😊
  • I'm sorry that I wasn't able to lead our playdate but it's just postponed. I love this particular bookmaking technique because it's easy but very versatile. I know that I'll be making more of these fun booklets to give as gifts.
  • I've been collecting lovely boxes just for that purpose!
  • I did learn something when I made that tiny tissue box booklet. I used heavy wax coated thread for it, but I must have cut the thread too close to the knot because the booklet eventually fell apart. I'll be repairing this one and using perle cotton instead and will keep the knot threads longer!
  • If you're curious and want to learn more about these booklets or journals, check out the link below. 
Related links
Linking parties
I'll be linking up to many fun linking parties. You may want to check them out! Design Wall Monday, Sew & Share, Finished (Or Not) Friday, Can I Get A Whoop Whoop?, Beauties Pageant, Peacock Party, Patchwork & Quilts
I linked the FM Embroidered Landscape to Sandra's DrEAMi post.

Free Motion Maverick


I'm sorry that this post is late. It's also possible that the next couple of weeks' posts won't be done or not on time. It will depend on how I feel and my travelling. Please bear with me.

Donnalee made a very cool fall runner. I love her choice of fabric and colours! 

A very original fall runner by Donnalee

Last week Gail taught a Christmas tree skirt class and made one for herself! Here is one of her previous Christmas tree skirt. They are all so pretty!

Gail's Christmas tree skirt

Sandra of mmm quilts has another pattern published in Make Modern magazine. Rosebud garland is a very lovely pattern and the picture in the magazine is gorgeous! Congratulations Sandra!

Rosebud garland in
Make Modern magazine
Sandra's Rosebud garland runner and placemats


Sorry that I messed up the party. Hope to see you next week!

Saturday, November 11, 2023

Abstract Free Motion Embroidered Landscape

Hi! I just finished a workshop by artist Dionne Swift on creating abstract embroidered landscapes with a perspective that lets the viewer enter the piece. I know that doing more than one sketch and piece is great for learning, but I'm usually impatient to get on with the next thing! 😁Here's the beginning of a learning adventure.

Perspective and a sketch


The assignment was to find an image with a perspective, sketch it and then use free motion quilting (FMQ) to stitch or embroider it. Here's my first finished piece. 

Perspective - free motion embroidered

I started by choosing a photo that invites the viewer in. It's from last year's fall trip to Agawa Canyon.

Agawa Canyon in Northern Ontario

The next step was to convert it to black and white. It's still a great picture for this exercise. Lots of contrast and perspective.

Black and white picture in the Agawa Canyon

I then made the sketch. Can you tell that I'm not used to working with a pencil? My hands were covered in black!

Sketch of the black and white photo

I'm afraid that my sketch got lost in translation when I started embroidering. About half-way through the stitching, I realised that I had lost the perspective that I was looking for. So, back to some sketching!

My sketch made this look far in the distance without
adding the perspective I was looking for

This time I drew a sketch right on the fabric. I forgot to take a photo, but you can see the green FriXion pen marks as I'm stitching. I also kept the photo that I was using close by on my phone. The sketch is different from the original one. Sometimes I was more accurate and sometimes I just made it up as I went along. 😊

Following the sketch on the fabric 

I stitched most of the piece with black cotton thread - nothing fancy, just my go-to piecing black thread. Three bobbins of black thread were used in this piece!

About half way through, I decided that I didn't want to stitch the lighter sections in black. You're supposed to use black but not as densely stitched to show lighter areas. Instead I found a spruce tree green that looks like a dark gray next to black. The only gray thread I have are too light and would have created too much contrast.

Perspective - free motion stitched

Here are the two stitched pieces. 

It really was worth making a second piece to get it right

What I learned
  • I'm glad that I didn't do my usual thing, which is to finish what I started and just call it done!
  • I really wanted to get the perspective right and drawing the sketch on the fabric helped me do that.
  • What I didn't know at the time is that in the Further Development video, Dionne suggested that we use colour in our sketches and our embroidery. I ended up using a spruce green in the lighter areas instead of just stitching less densely. 
  • I'm really happy with my piece and I would like to make at least one more version with some colour. 
  • This one will be a little smaller, maybe an 8" hoop instead of a 10". 
  • It's also possible to add paint - wouldn't it be cool if the water was blue, maybe with some water colour paint? I would want to do this before stitching it, in case the paint part didn't turn out.
  • Dionne stitches her piece on a tightly woven, but not felted, wool. That would eliminate the puckers at the edges that I got from using a piece of cotton. I'll see if I can find something like this.
Related links
Linking parties
I'll be linking up to many fun linking parties. Why not check them out? Put your foot downSew & TellCan I Get a Whoop Whoop?Peacock PartyPatchwork & Quilts, TGIFF, Beauties Pageant

Thursday, November 09, 2023

FMQ the T-shirt Quilt on Free Motion Mavericks

Welcome to week 455 of Free Motion Mavericks. November has brought us snow in Ottawa. It probably won't stay but it is pretty. I guess that it's time to put away the patio furniture! I hope that you're enjoying whatever fall is bringing you.😊 

FMQ the first three blocks


Here is a quick look at the blocks. Nothing fancy but fun to quilt!

The first block with snowflakes on the t-shirt

Second block quilted with the Ablaze design

Third block quilted with meandering loops, notes and musical symbols

I'll start at the beginning, after having made the flimsy. I had been procrastinating because the next part was sandwiching the quilt...and you know how I love that (heavy irony here, if you don't know me!) To get motivated, I did a search about FMQ (free motion quilting) a t-shirt quilt. This is what I found out: 
  • Since none of the t-shirts have heavy plastic logos, I would be able to stitch inside the t-shirts.
  • T-shirt quilts can be quilted as densely or as lightly as you want - it depends on preference and the batting.
  • T-shirt quilts tend to be very heavy and hot because of the weight of the t-shirts, batting and backing. I can attest to that - my nephew's quilt weighed a ton (but he's a big strapping man)!
  • The t-shirt quilt doesn't have to include batting. That was a mmm... moment. Since my niece is rather tall and slim with a small frame, did she really want a quilt that would be, for her, like a weighted blanket?
  • So I asked her. Did she want a hot and heavy quilt, or a light and cooler one? 
  • Cool and light it is! Yeah!!!! 
This meant that I didn't have to add batting to the quilt. Since the quilt was on the banister at the top of the stairs, I put the backing face down on the banister and then added the quilt. Sometimes I am brilliant 😎 It helped that I had lots of time to think about it while procrastinating.😁😂

This weekend I sandwiched the quilt over our dining room table. Without the batting, it was the quickest quilt sandwich that I've ever made. Yeah!

Stitch-in-the-ditch


Choosing thread to quilt this queen size quilt is important. From experience, I know that my machine prefers light, synthetic thread over cotton or even polyester. I do have a few cones of Superior Threads' Bottom Line, so that's where I started.

Since my stash of Bottom Line cones is rather small, I looked for other thread that could work. I found 5 colours of Glide thread and 4 colours of Madeira thread. I guess that there's no need to go shopping!😌

Glide, Madeira and Superior Threads' Bottom line cones

I used the tan coloured Bottom Line thread to stitch-in-the-ditch. From the back, it's perfect...but not so great when I miss the ditch in the front! No worries, it won't show once everything is quilted. 😊

Texture at the back, but very little extra colour

Block one


I chose the lovely skiing t-shirt as my first one to FMQ because it was sort of in the middle of the quilt and I have a lovely blue cone of Bottom Line. Since I kept the tan coloured thread in the bottom, this was a great way to see if my tension was good enough to use different colours on the top and bobbin...and it was!

The skiing t-shirt with the light blue sashing

Since my favourite FMQ design is the meandering flower, I stitched this on the side sashing. At the top and bottom, I used another favourite, what I call the "l" and "j" design. Designs that use our writing motor muscles are often the easiest to do since we learned to write a long time ago! 😊

Inside the t-shirt, I added meandering snow flakes and a few lines for the skiing. I used the light blue thread - it almost looks white against the red background. What a fun first block!

A colourful snowy first block!

Block two


After the first block, I did a lot of research using my own FMQ books to find some appropriate designs. The Ablaze design is from Christina Cameli's Step-by-step Free-Motion Quilting. I was looking for something that would connotate speed - so why not a line of fire? I used the little extra row at the top right of the block to FMQ the Ablaze design for the first time.

First image of the Ablaze design

If you click on the first image to make it larger, you might notice what I did when I was cropping the images. I had forgotten to FMQ most of the space between the two crests. Oops!

Finishing up the Ablaze design

The first quilted block of crests


Block three


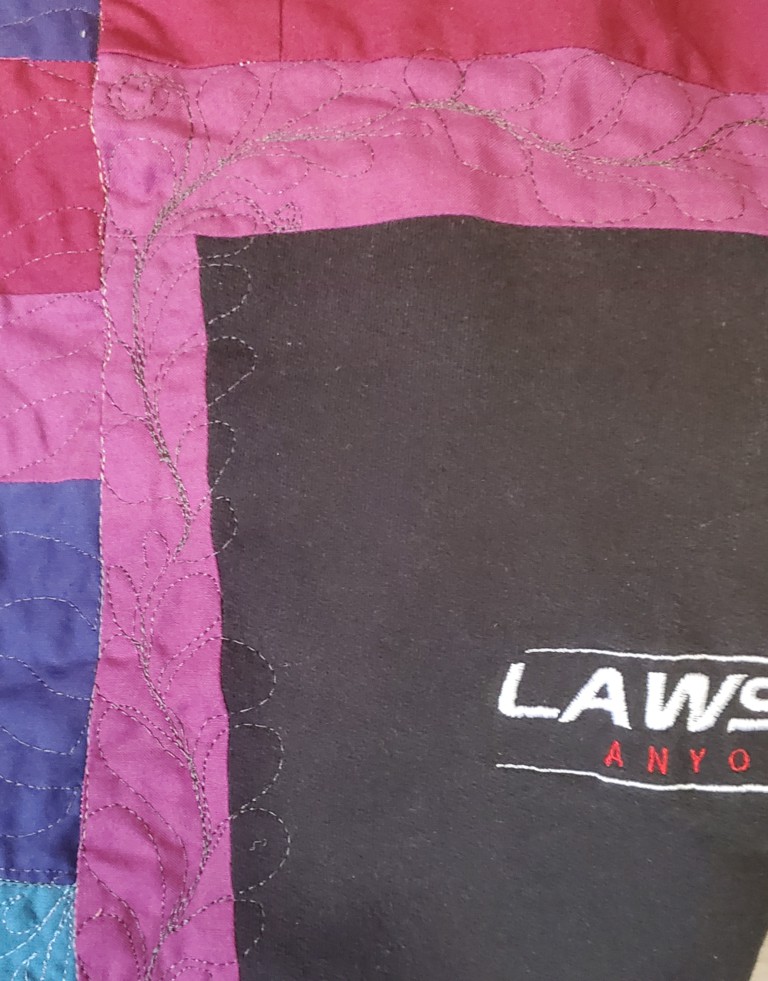
I decided to quilt the front and back of the Lukas Graham t-shirt next. From the Terrific T-shirt Quilts book, I had found a meandering loops and notes FMQ design. I added a few other musical symbols and quilted all of these in the navy sashing of both t-shirt pieces. In the inside of the t-shirts, I used a white thread to outline the name and then go around the t-shirt and the frames. For the front of the t-shirt I also stitched around the girl's t-shirt.  

The front of the t-shirt with stitching inside the t-shirt and sashing

The 2 parts of the Lucas Graham t-shirt and
the first crest block

What I learned
  • It's different doing FMQ without the batting in the quilt. It's not bad, just different. 
  • I could have done some easier quilting but what's the fun in that? It is good to know however that I can do minimal quilting in the t-shirts if I have to.
  • I didn't do much FMQ for the back of the Lucas Graham t-shirt. I don't really like how it lies. The next time that I'm using white thread, I'll add a few lines of stitching between the locations to help it lie flat.
  • My tension was perfect when the bobbin and top thread were both Bottom line. It was a little more finicky when the top thread was a dark Madeira. I haven't used the dark Glide thread but I'm sure that it won't be any fussier. 😊
  • I'm still having trouble when I FMQ from right to left for more than a few inches. It just seems to be something that my machine doesn't like! At least I was able to turn the quilt around and stitch from bottom to top instead. I just have to remember this.
  • Sometimes my studio is very hot, especially on a sunny afternoon - so I now wear my shorts to quilt. That really helps and I get to keep wearing shorts!
Related links
Linking parties
I'll be linking up to many fun linking parties. Why not check them out after linking up below? Monday Design Wall, Sew & Tell, Midweek Makers, Put your foot down, Finished (or Not) FridayCan I Get a Whoop Whoop?, Peacock Party, Patchwork & Quilts, Oh Scrap!, 15 Minutes to Stitch 2023

Free Motion Mavericks

Last week The Joyful Quilter linked up with her ABC (Table) SCRAPS Challenge for November. Look at those light neutral colours and curves! She also managed to include the "Q" and "T" in the mini. Can you spot them? It took me a while.😁

The Joyful Quilter's light neutral mini

It's now your turn.

You are invited to the Inlinkz link party!

Click here to enter

Wednesday, November 01, 2023

Progress on Swirling Leaves 3 for Free Motion Mavericks

Hi and welcome to week 454 of Free Motion Mavericks. I hope you had a safe All Hallows' Eve! It was uneventful here except for the snow on the ground in the morning. Of course it was all melted by the afternoon! I guess we know what's coming! ⛄ 

Swirling Leaves 3


I am making a third edition of Swirling Leaves for Danielle, my daughter's friend who got married on the weekend. 

Final (?) leaf placement

After making the first two, I wanted to see what would happen if I used a lighter background. I was a little nervous about it, until I attached the leaves. Since colour value is relative, I'm not sure that not having dark neutrals in the background made a difference since the mid-tones are dark next to the light neutrals! Here is the background, before adding the colourful leaves.

Swirling Leaves 3 background

This is what the two previous Swirling Leaves wall hangings look like.

Swirling Leaves 2

Swirling Leaves 1

As you can see, this third one is quite different - which was the point. I have to keep learning and let's face it, colour values is a huge topic and makes such a difference in any piece.

Making the leaves


I took out my many maple leaf templates and found some amazing colours in my container of hand-dyed scraps gifted to me by Elaine Quehl. What a treasure! 😊

Hand-dyed fabric scraps for the leaves

I was planning on using about the same amount of leaves that I used on Swirling Leaves 1. After cutting the leaves out and placing them on the background, I made a couple more, for a total of 8.  

Making the leaves was also an experiment. It doesn't look like I used iron-on adhesives on my first two quilts' appliqué. I've become more confident since using it more lately. Most of the leaf templates were on freezer paper, so I ironed that onto the fabric. Then, I added a backing of iron-on adhesive.  That was the simplest method. No extra drawing, and I only had to cut through all of the layers.

Ironing on the freezer paper template and
then the iron-on adhesive to the back.

I did draw the leaf onto the iron-on adhesive but only when my template was not on freezer paper.

My first batch of leaves

To choose the placement of the leaves, I just pinned them to the background. It took me a while (and 8 photos) before I was satisfied with it. Here are a few images to show you my thought process. 

In this image, the top pale leaf and the bottom orange leaf (both circled) are blending into the background.

Leaf placement - not quite right

This was getting a little better but the pale leaf is still blending in, and there are too many red leaves on the left side of the piece. The bottom red leaf was put over the brown fabric that stands out a little too much. It's still not quite right.

A better placement

The red leaves are still mostly on the left side but bringing the bottom red leaf up a bit has made a difference and the focus is drawn from the top red to the bottom red leaf. The very dark leaf has moved closer to the centre while the bottom red leaf is over that annoying gold block. Because the bottom leaf is also partially over a very pale block, it stands out more and stops fighting with the gold block.

Final (?) leaf placement

Of course this could change as I iron the leaves down, but they would likely be minor changes.

What I learned
  • Since I've been doing improv piecing fairly regularly for the last two years (with the monthly Table Scraps Challenge), I've become much quicker at putting these together. 
  • It still surprises me that value is always so present in creating. My improv fabrics are not as dark as the previous two quilts, but since I also used lighter fabrics, the mid-tones do appear darker.
  • I'm very happy with how my leaves stand out on this lighter background. Is it better? I'm not sure, but it is different and good 😊
  • Finding the fabric for the borders went so quickly, especially compared to Swirling Leaves 2. I went directly into my Civil War reproduction fabrics basket and the inner border cried out to me! Danielle is a lover of country music and this had the right vibe. After that, only 2 fabrics were auditioned for the outer border. Yeah! I love painless decisions.
  • After making the background, I re-read all of my posts on making both Swirling Leaves 1 and 2. There are a lot of learning there. I do wish that I had read them before, because I would have made the outer border strips larger to be able to use them instead of binding. However, I do have many strips cut for the binding, so it shouldn't be any trouble.
  • I'm also going to apply another of my lessons learned - I'm not going to attach the appliqué leaves today because I'm getting tired and the post is fine with just the pinned leaves on 😁. I also have to post this today to make it in time for The Joyful Quilter's ABC (Table) SCRAPS Challenge. The October colours were light neutrals. It will eventually be Quilted (letter Q).
Related links
Linking parties

Wonderful news! Swirling Leaves 3 was featured on Midweek Makers. Thanks Susan 😊
I'm joining the Tips and Tutorials on the 22nd linking party. 

Free Motion Mavericks


Last week Donnalee made three more table toppers for her guild's upcoming quilt show in May. Here's to fabric being used! 

Three more patriotic table toppers by Donnalee

Gail participated in the Sew It – Show It: Monster Mash Blog Hop with her pumpkin front door hanging. It got lots of swirls and twirls!

An improv pieced pumpkin by Gail

It's now your turn!

You are invited to the Inlinkz link party!

Click here to enter