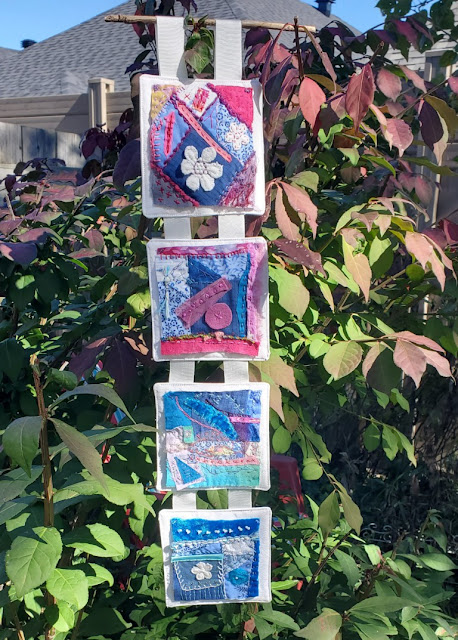
Hi, you may remember that I taught a Meditation Stitching course this summer. It was a great experience, and I'll be repeating it (in French!) at the end of November.
Getting Ready
I know that I have a lot of time to get ready, and that this is probably another great way of procrastinating, but I've prepared this lovely piece to show at the course.
 |
| Joyful |
There isn't anything very about doing mindful stitching. It's all about taking the time to be creative, to set a few parameters around what you want to do, and then enjoying the meditative process of stitching. I believe that doing this process regularly can help to keep you grounded, bring relaxation and encourage creativity.
As an exercise, I used my wonky block sample to see if I could create four different blocks from each quarter of the cut-up block.
 |
| I cut this sample block into 4 to make meditation blocks |
 |
| Adding fabrics and colour |
 |
| Using stitches to add texture (and more colour!) |
At some point I trim the block, although I do like having things sticking out when I can. 😊 Here are close ups of the blocks.
 |
| First block |
You can see that all of the bases started with the wonky star but evolved pass that! I love using different thread, yarn, and fabrics like hand-dyed cheese cloth, organza, felt, linen and velour. The flowers were cut from one of my favourite top.
 |
| Second block |
While reading a "new-to-me" Creative Embroidery book by Dilys Blackburn, I found a wonderful example of a drop hanging that is used to display embroidery pieces. The link to the book is in Related links below.
 |
| Opening pinned before stitching |
I repined that opening so that the square would be more square. Then I top stitched around the whole square, as close to the edge as possible. After the four blocks were finished, I attached some wide white ribbon.
 |
| Back of the hanging |
I then went on a photo shoot in the back yard.
 |
| Twix and Taffy (my brother's dogs) exploring the area. |
 |
| A close up with the tree and sun as backdrop |
 |
| The picture that I took at night because I was so impatient 😊 |
What I learned
- I do find it difficult to know when to stop embellishing these beauties. Often it's when I've had enough 😊
- I've been reading about blogging and decided that I need to up my game by taking better photos. It's not always easy because I usually finish a piece in the evening and then have to wait for the next day to take good pictures.
- I got so caught up with making the hanging that I only took one process picture. If I make another, it might be a good subject for a tutorial!
Related links
- Embroideries in hoops, September 16, 2022
- Blue Wonky Star Mat, September 10, 2022
- Creative Embroidery by Dilys Blackburn
Linking parties
I'm linking up this post to many fun linking parties. Why not see what's going on in the quilty universe? Put your foot down, Slow Sunday Stitching, Monday Making, Oh Scrap!, Peacock Party, TGIFF, Beauties Pageant, Off The Wall Friday, Patchwork & Quilts,


Fun crazy quilt blocks. Such a creative way to display them!
ReplyDeleteThanks Andi. It was fun making them so I'm glad that I can display them without having to make 20!
DeleteYour blocks look great. That sounds like a good way to relax and create something beautiful at the same time :)
ReplyDeleteThanks Janine, it really is a great way to relax. I'm looking forward to playing with this technique and taking it elsewhere :-)
DeleteBeautiful! Love the beading additions :)
ReplyDeleteThanks Kathy. Beads add so much to pretty much anything, especially if it doesn't get washed!
DeleteSuperbe, et parfait pour la prochaine classe ! J'aime bien la diversité de matières et de textures.
ReplyDeleteMerci beaucoup Frédérique. J'ai vraiment hâte d'en faire d'autres :-)
Delete