Showing posts with label quilted gifts. Show all posts

Thursday, October 19, 2023

FMQ Journal Covers at Free Motion Mavericks

Welcome to week 452 of Free Motion Mavericks. I have finally done some Free Motion Quilting (FMQ), but not on my niece's quilt yet. These were fun squirrels that I pursued for the upcoming Fall Fling marketplace with Out Of The Box (OOTB) Fibre Artists.

Making Journal Covers


The Fall Fling is like our Spring Fibre Fling except that everything on exhibit is for sale. I've been slowly getting ready for this event and am finally ready. Here are my first two finished journal covers.

Blue and Green Journal Covers

The fabric for these first two covers is made by Gunnel Hag, a Canadian textile artist. Every once in a while, I go to her Etsy shop and treat myself to a couple of pieces of fabric. They are always colourful and fun. 

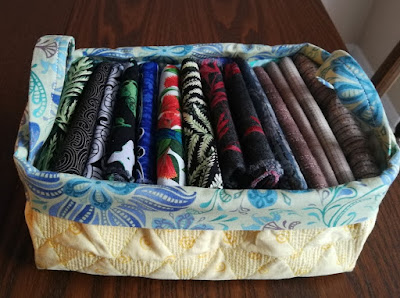
I also bought very thick journals to go in the journal covers. They are as close to a hand-made look as it gets and have lovely scalloped page edges. I also love the fabric that I used for the lining. If they don't sell, I will be very happy to keep them, although I have so many journals already 😁

The inside of the blue journal with one of my favourite fabrics

The inside fabric of this journal is a green ombre with purple, pink and blue dots. I used the dark green part for the lining.

The fun ombre fabric lining with purple, pink and blue dots.

Here are photos that show the FMQ on the journal covers.

The blue fabric was very difficult to FMQ and I should have listened to my intuition when it told me that I shouldn't follow the lines of the diamonds. It's a good thing that I started on one end so that when it didn't work out, I moved over and quilted in a spiral. It also helped that I used dark blue thread, so it doesn't show up much.

FMQ the diamond patterns in a spiral shape

Front of the journal cover

Back of the journal cover

I did, more or less, follow the shapes in this crazy ribbon shaped fabric. I started with a turquoise/brown variegated thread that looked quite good. About halfway through, I stitched around the brighter yellow/green with a bright lime green thread. I then finished up with the original variegated thread. 

The FMQ on the green journal cover

The front FMQ of the journal cover

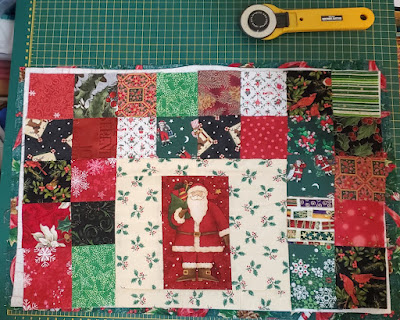
FMQ the pink journal covers


For the next two journal covers, I chose one of my own hand-dyed pink fabric. 

Two pink journal covers

For the first journal cover, I FMQ it with just the top fabric and batting. I've done this before without an issue, but this time, there was a huge drag. I even checked to make sure that I had lowered the feed dogs. Yup, they were down, so for the second cover, I added a backing fabric. That really helped.

FMQ pink fabric with a meandering flower

FMQ with the batting at the back

For something different on the second journal, I did some vertical FMQ. In the image, you can see my practice page. I went through my FMQ journal to find some designs that would be easy to do vertically.

Vertical FMQ designs with practice sheet

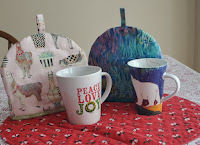
Here are my two FMQ journal covers.

First pink journal cover with Meandering Flowers

Second pink journal cover with vertical designs

When I did my second pink journal cover, I remembered to stitch my label before I put the whole thing together. I was so proud of myself, until I realised that I had sewn it inside the journal cover! It's a good thing that I was able to fold and sew it back out. 😓Aren't the lining fabrics gorgeous?

I was able to stitch the label again so that it peaks out!

Poster for Fall Fling 2023 Marketplace

I have a total of 11 pieces for sale in Fall Fling. Most of them you've seen before, but I will show more of them on Instagram. I'll check to see if I've blogged about each of them. If not, I'll include them soon in a post.

What I learned
  • Making a quilted journal cover is always a little tricky because most journals are not the same size. It's not complicated, but since I am accuracy challenged, I really have to be extra careful.
  • My first journal cover, the blue one, was a little tight because of the thickness of the journal. I thought that I had added extra space for that, but not quite enough. It looks fine, but the green one fits the journal much better.
  • For the pink fabric, I knew that the fabric would be tight, but it did work out. At least this journal is thin, so no extra fabric needed for that!
  • For the FMQ, as I mentioned earlier, I knew that I shouldn't try following the diamonds, but I just couldn't help it. After a few inches, I knew that I needed a plan B - so a spiral it was. It's always a great go-to when you want movement in your design. I balanced the wonky diamonds by adding a few on the other side of the fabric. I was lucky that I had more than enough fabric, so only an inch or so shows up on the journal cover.
  • I'm also lucky that I used a navy thread that blended in well.
  • I feel like I should explain my bizarre thread choice for the green journal cover. I ended up using a turquoise/brown variegated thread because the top of the fabric has some subtle turquoise where the green and blue paint has blended. After making the first journal cover with the blending thread, I wanted a little bit of pop. Adding the bright lime green thread in areas was a good idea.
  • I was so proud of myself for finally remembering to add my label before I sewed the journal cover together. I could have pulled it out, but since the label is quite long, I was able to fold it and stitch it down so that it shows.
  • I love my choices of lining fabric. I believe that it adds a lot to the look of the journal cover.
  • I was also surprised that FMQ without a backing cause so much drag. Adding a piece of fabric as a backing for the second pink journal cover did the trick!
Related links
Linking parties

Free Motion Mavericks


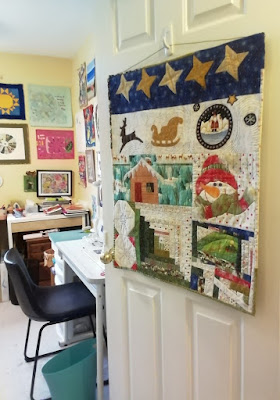
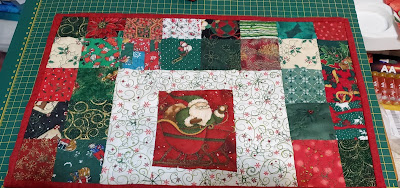
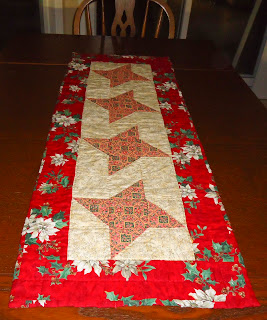
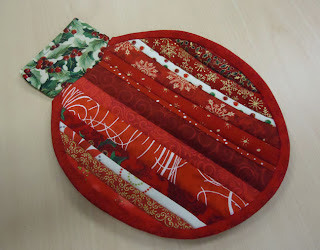
Last week Donnalee's oldest daughter came for a visit and some quilting lessons and practice. How wonderful that mother and daughter have the same passion! Here are a couple of her finished projects.

Table topper and runner by Donnalee's daughter

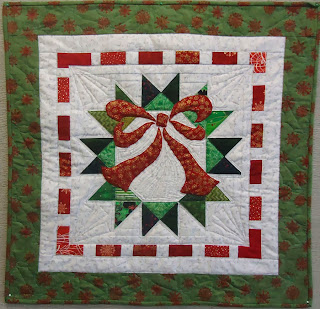
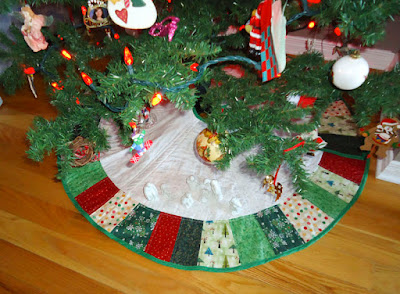
Gail has been busy pattern testing this lovely quilt for her friend. If you go to the original post, there is a link to the pattern.

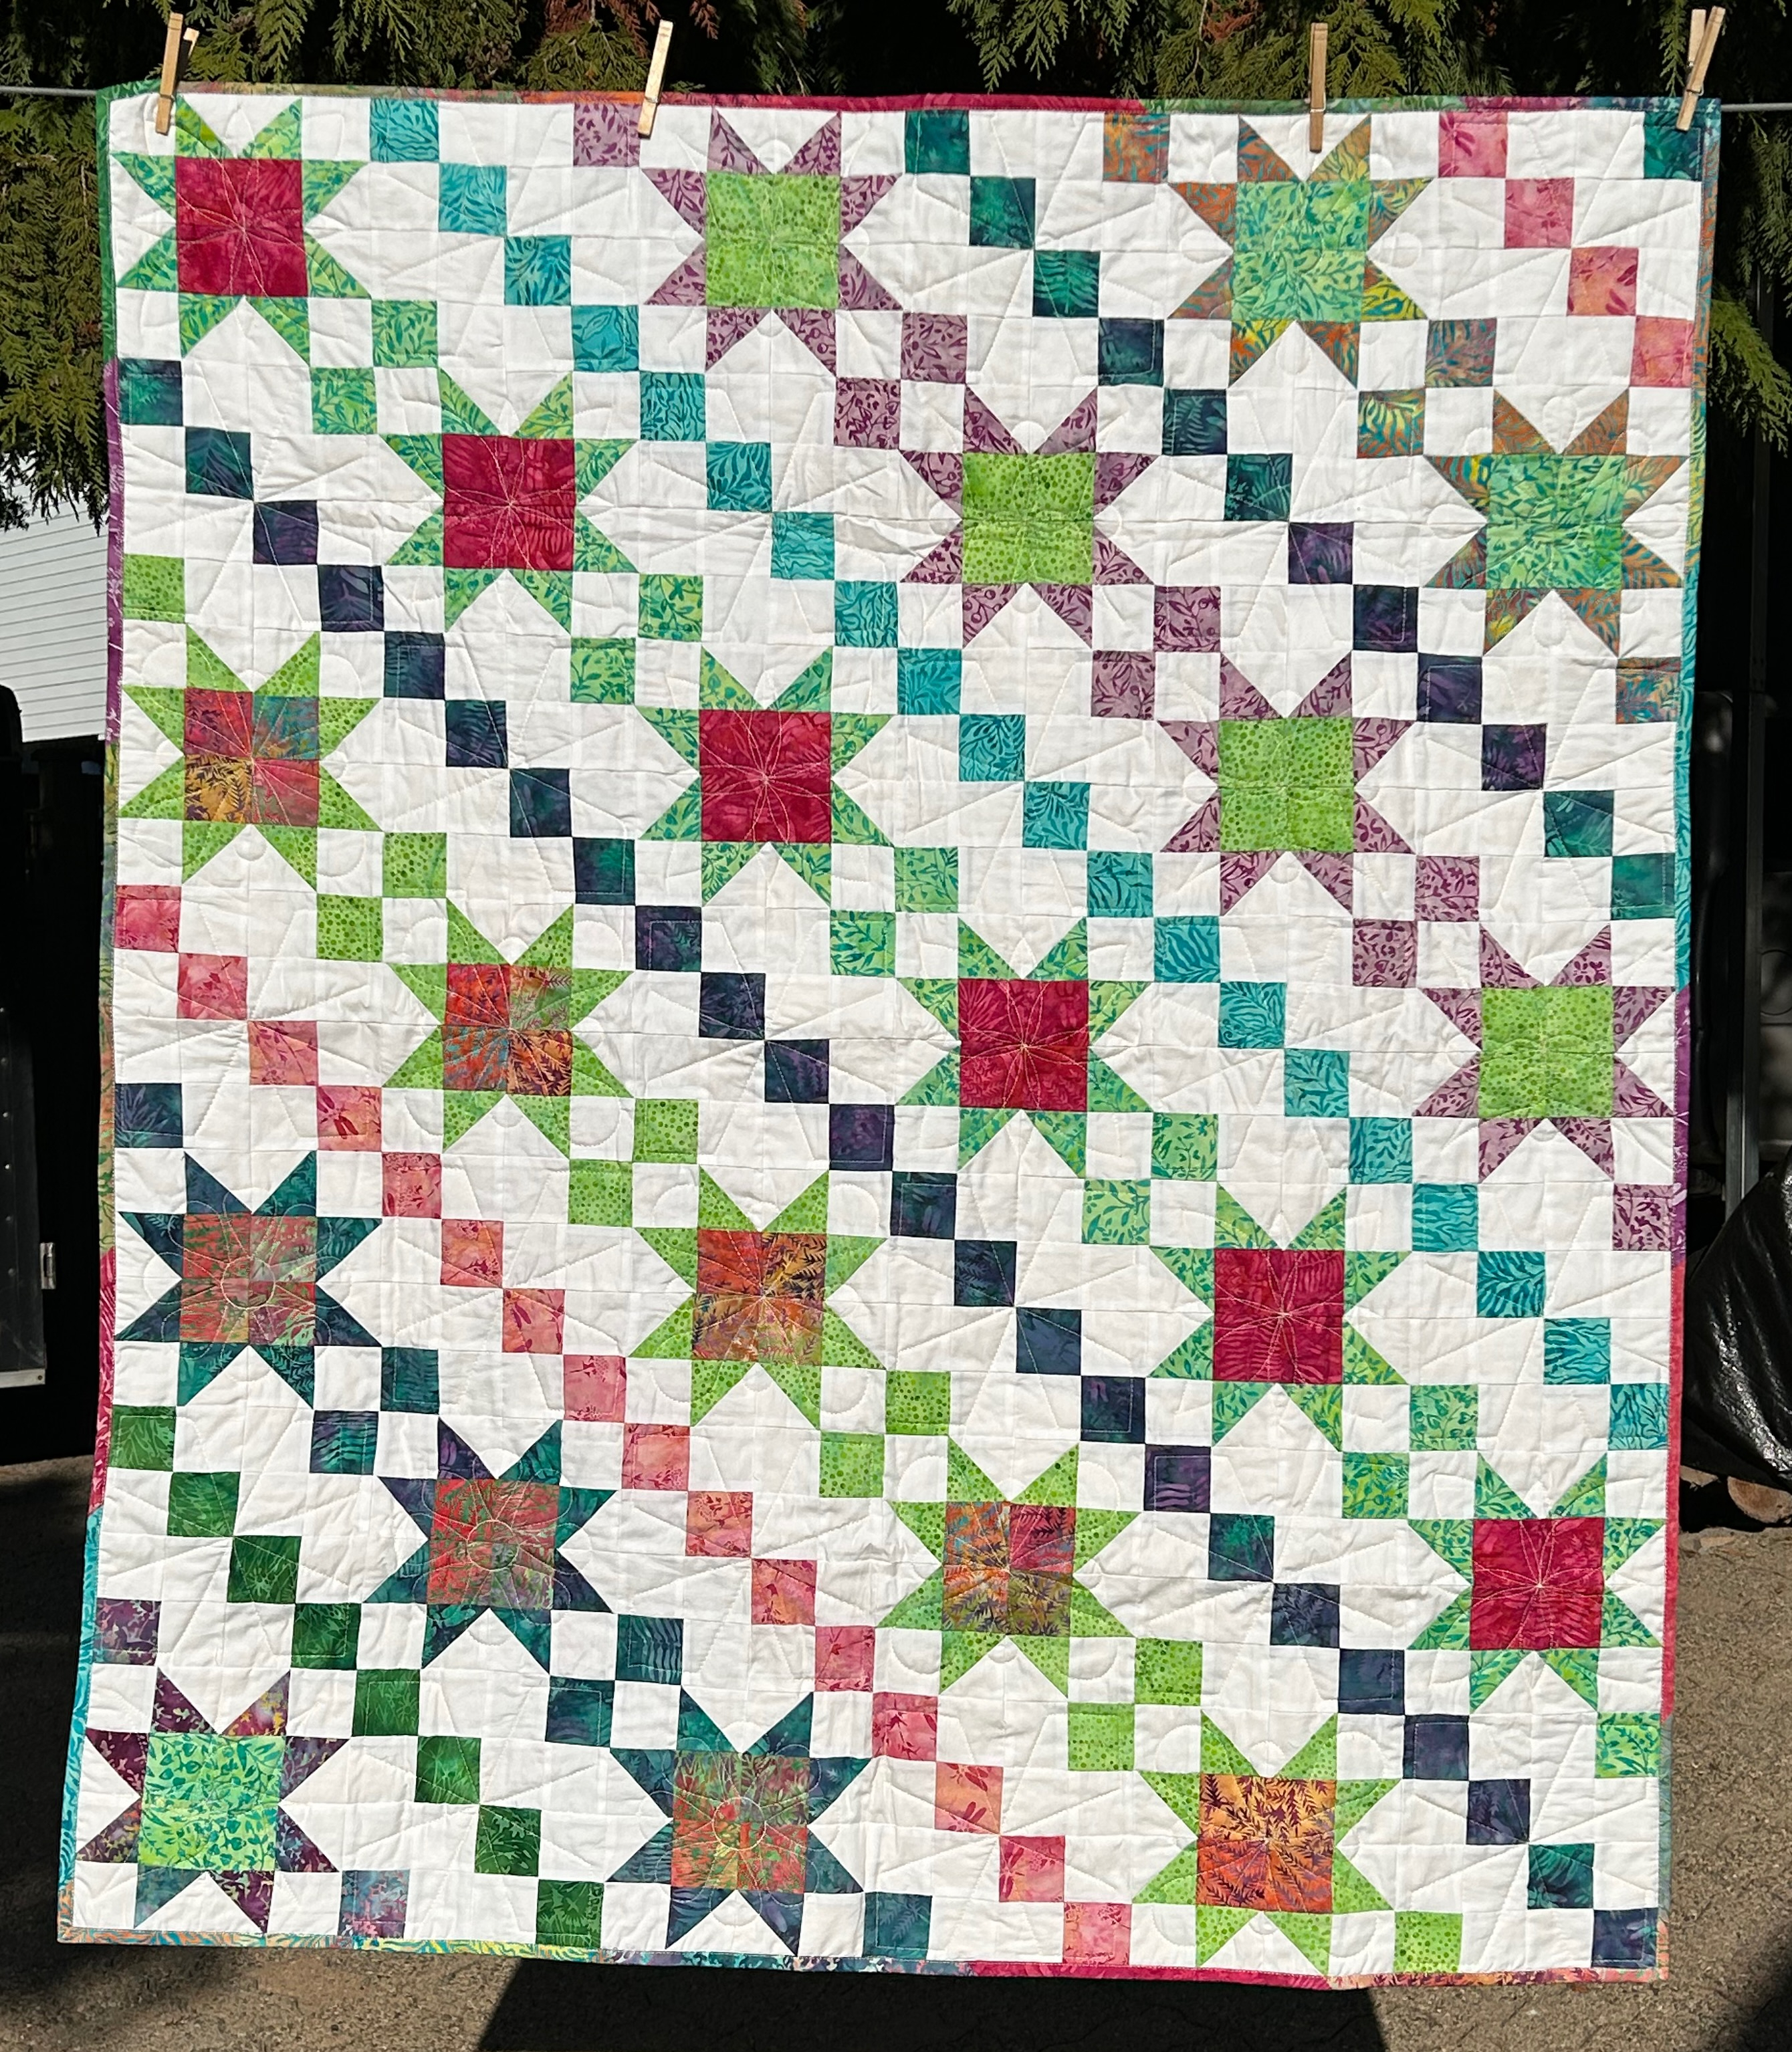
Starry Path made by Gail

It's now your turn!

You are invited to the Inlinkz link party!

Click here to enter

Monday, December 20, 2021

Surviving the Holidays

I hope that you're not too stressed with the holiday preparations. I've been taking some of my advice this year...because not much is ready here 😁 

10 strategies for surviving the holidays 

Do you want to know the secret to surviving the holidays? These are my suggestions. I’m not an expert – except that I have managed to survive 58 of them so far…

BTW I can’t be held responsible if others in your family don’t approve of these great innovative ideas!

Survive and maybe even enjoy the holidays!

1. HIBERNATE! 

This is by far my favourite idea! Hide out in your quilting studio and don’t come out till the holidays are over – or better yet, when spring is in the air, your bulbs are peaking through the snow and the birds are back! 

If you just can’t swing this, negotiate at least one day (or a few hours over a few days) to yourself, in your quilting studio during the holidays. Hopefully that will be enough to energize you for a while.

Hibernate in your studio...for the holidays
or for the entire winter  😊

2. Gift giving - Online shopping

I know....we should be finished by now...but not a chance! 

We’ve all become experts on doing online shopping. It doesn’t mean that we don’t love our local quilt shop, it just means that we have expanded our horizons! The perfect time for online shopping is when all is quiet in the house! If you can’t get to the store across the city during the day, shop online and have it delivered…and if you spent lots and lots of money, they’ll deliver it for free!

Pamper yourself, or others, online
You can even buy locally online


3.  Gift giving - Quilted gifts

I can hear you wondering how this is going to help you survive the holidays since this is possibly one of your major holiday stressors. My innovative idea – give the hardest to-shop-for person a quilty IOU. In a Christmas card or on a large gift tag, write down what their quilted gift will be (keep it general, small and realistic – they may actually expect you to deliver on this!) Then you can shop the Boxing Day sales from the comfort of your home, buy some yummy fabrics for you and to make the gift!

This year, I am following this idea, sort of....I managed to make 2 Christmas placemats but only one of them got quilted before my son and his girlfriend left for the holidays....so I wrapped the one that was done, and will quilt the other one and send my son a picture of it so that he can share it with her 😊 on Christmas day. I can have it FMQ before Christmas, but not before they left this morning!

The one left to quilt! 😀

The finished one 😊

Here are some great gift ideas that could easily be delivered later....after Christmas!

Make a set of microwave bowl holders


Quilted baskets are a great gift and don't
need to be Christmas themed

4. Gift giving – Support local crafters, artists and companies

An alternative is to support local quilters. artists or specialty food companies, either online, in stores or through crafts shows. I know of several quilters who have Etsy shops with incredibly well made and reasonably priced quilted gifts and textile art. Don’t procrastinate though cause you’re going to run out of time!

Buy from local quilters on Etsy!
Cheesecakery Bakery - locally made cheesecakes
in a jar 😋 Yum!


5.  Decorating

Take out all of your Christmas quilts, runners and wall hangings and call the house decorated! If you really must have a tree, get two or three of your grandchildren, nieces and nephews, or neighbour's kids to help decorate the tree. Have them decorate your tree, then feed them holiday sweets and send them home before the sugar rush sets in!

Take out the Christmas quilts!
Take out your home-made holiday decorations


If the tree really needs to go up, get bribe the grand kids to do it!


6a.  Cooking – get invited

Get yourself invited for Christmas dinner somewhere, pick up an amazing desert at your favourite local bakery and a bottle of wine. If you can’t pull this one off, consider cooking less. There are great places that make excellent food that you could buy for parts of your meal.

Buy some locally made food to give or for parts of your meal

6b. Cooking - Try out your festive meal ahead of time

Make sure that the meal that you’re planning for Christmas dinner only includes recipes that you’ve tried before. This year, we practiced our dinner twice on company – so the third time will be a breeze! 

If you’re having people over, when they ask you what they can bring, instead of saying “Oh, don’t worry about it”, seriously consider letting them contribute. If they are really good at making something, give them the pleasure of making and sharing it with everyone.

7.  Sleep in

Even if you can't sleep in every day, give yourself permission to sleep in at least on one or two days.  If you're the type of person who wakes up at 6 am every day, consider getting up to make a coffee and then going back to bed with a great book. Give yourself permission to rest :-)

This Christmas we are dog-sitting my brother's two small dogs. They wake up early but once they've done their business and gotten their treat, they don't mind taking a nap 😊

Twix and Taffy going back to sleep!

8. Pamper yourself

What is the one thing that you haven't done in ages that you used to love to do, before kids, work and responsibilities? It could be singing your heart out, dancing, going out with friends for a cup of coffee or tea or maybe even giving yourself a manicure (or better still getting someone else to give you one!) Take the time this holiday season to do something that makes you happy or makes you laugh. You deserve it!

Take it easy and enjoy the holidays!

9. Reach out

The holiday season can be very difficult for people who are grieving or who are lonely. If you can, take some time out of your holiday to call or visit someone who could really use a friend.

Visit those who are lonely or grieving

10. Gratitude

No matter how busy or stressed this holiday season gets, remember that you are blessed with all kinds of wonderful people around you. You are also blessed with this amazing art that makes your soul sing! Be grateful for all that you have.

Gratitude makes everything better :-)


Do you have any other ideas for surviving the holidays? Please share them with us! 🎄🎅🎉

I wish you all a Christmas / Holiday season filled with love, joy, fun and peace.

Thanks so much for sharing this quilting journey with me. It means a lot to me 😊

Love, Andrée

Related links

Linking parties
I'll be linking up to many fun linking parties. Let's see how other people are coping with the holidays😊 Mosaic Monday, Monday Making, Design Wall Monday, 15 Minutes to Stitching 2021, Patchwork & Quilts, Oh Scrap!, TGIFF with Anja, Peacock Party, Off The Wall Friday, Tips and Tutorials

Thursday, December 09, 2021

Holiday Gifts at Free Motion Mavericks

Welcome to Week 360 of Free Motion Mavericks. I feel like I've been avoiding it long enough - like a groundhog who pops out of his den and finds that snow is on the ground and Christmas and the holidays are almost here! Yikes...unlike the groundhog, there's no going back to sleep now! 😃

Christmas Mug Rugs

Here they are! 

Cheerful Mug Rugs

I made these in a wonky improv log cabin style. It's my go-to when I'm not sure what to do.

Peek-a-boo penguin mug rugs


Candy person and cardinal mug rug

What I learned

  • My favourite improv piecing is a wonky log cabin. Anything goes as long as it's sort of a log cabin.
  • I only used the pieces in my scrap box of holiday fabrics.
  • I used my walking foot to stitch-in-the-ditch. I'm getting better and from far they look fine 😊
  • My next quick project is to make two placemats. I need to look into my Christmas fabric stash (only 2 smallish boxes) to find the right fabrics, and then a really simple pattern. I think that the recipient would rather have something more traditional than my crazy improv piecing.
  • If I have time, I can always improv piece the back to make them reversible....we'll see how much time I have.
Related links
Visit these posts to see some of my holiday creations throughout the years.
Linking parties

Project details


Christmas Mug Rugs
6½ " x 8" 
Materials: Scraps of Christmas commercial fabrics
Techniques: improv wonky log cabin, quilted in-the-ditch


Free Motion Mavericks

I hope that you're dropping by to link up something quilty, FMQ or just some great holiday stitching.

Denise made this gorgeous Hexie project as part of the Island Batik EPP Challenge. Of course it's Loki who gets all of the attention, but there is a pretty table runner there...really! 😊

Loki gorgeousness under some wonderful hexies!

It's now your turn!


You are invited to the Inlinkz link party!

Click here to enter

Sunday, May 31, 2020

A big hexie squirrel

About a month ago I made a squirrel - that is a little (or sometimes big) project that just insists on getting done, right NOW. I knew that this would be my May DrEAMi (Drop Everything And Make it), a link up that's always a lot of fun, and hosted by Sandra at mmm! quilts.

The Big Hexie Experiment


Big Hexie Experiment
I bought the Better Homes & Gardens "Handwork happiness" magazine a while back (see Related links). I was intrigued by the way that the little table mat "Hex Marks the Spot" was finished.

Last year my lovely neighbour made me some large 2" hexie templates. Then, in the fall, I was gifted some very bright scraps by a quilting friend.  With all of these supplies, I thought that I would try the finishing technique of this project.  
Handwork happiness magazine

2" hexies


Since I was gifted both the templates and the fabric, I gave this one to my lovely neighbour. She loves orange so it was perfect for her.


I've made small hexie projects in the past, and the hardest part is the finishing of the pieced. In this project, the seam allowance of the hexies on the edge of the piece are ironed to the outside. The batting, which is the same size and shape as the top (with its edges ironed out), is place on the bottom. You then put the hexie top face up and then place your backing on top of your top, facing right side down. At this point, you very carefully sew ¼" along the edge, leaving an opening a couple of inches wide. You flip the fabric inside out and then stitch the little opening. This technique is sometimes called the pillowcase technique for finishing a quilt. In Related links, I have linked to a YouTube video to explains the technique.

My lovely neighbour sent me these pictures after I had forgotten to take some of the finished cosy.
Being useful as a wine cosy :-)

Finished hexie cosy


The back of the cosy


What I learned
  • The technique worked very well. 
  • I did have a bit of a problem pulling the edges of the hexies to the outside since I must have sewn parts of it down when I sewed the hexies together. Next time, I'll try to be more careful with my starting or finishing stitches.
  • I also had to trim the edges to ¼" since my edges under the hexies are not very consistent.
  • As I wrote this post, I realised that I hadn't taken a picture of the finished hexie cosy. Oh well....but as usual, my neighbour came through. 😊
Related links
Linking parties
I'm linking up to Sandra's DrEAMi! link up as well other fun linky parties, Slow Sunday Stitching, Oh Scrap!, Can I Get A Whoop Whoop?, Finished or Not Friday, Put Your Foot Down, Colour & Inspiration Tuesday, Monday Making,


Have a great week and stay safe, healthy and sane😊

Sunday, February 09, 2020

I heart Project Quilting

This week on Project Quilting, Challenge 11-3 was "Put a 💖 on it!"

Scrappy Heart Journal Cover

For those who read my blog, you will have noticed that I'm on a free motion quilted (FMQ) journal cover kick! My last post was about " A production of quilted journal covers". Since I'm on a roll, I thought that I would try out a few things on my latest journal cover.

What do you get when you:
  • Make scrappy fabric
  • Free motion quilt it to an inch of it's life
  • Using variegated thread
To make a FMQ journal cover?
You get this....
A FMQ Scrappy Heart Journal Cover!
It figures that this very scrappy FMQ journal cover is my best one yet, construction wise - just not design wise. I did learn a lot from this one!
The back of the scrappy journal cover
Scrappy quilt cover with elastic


I even used some scrappy pieces to make the inside of the cover. I love it!

Scrappy even on the inside!
What I learned
  • In hindsight, I should have done ONE of the three things (scrappy, or densely FMQ, or used variegated thread). Using all three was just too much since they all add a lot visually to the piece. 
  • FMQ on scrappy fabric calls for either one overall design or a FMQ design that is simple and follows the fabric.
  • Variegated thread adds a lot to a piece. It really wasn't needed here - it's too much!
Related links
Linking parties
I will be linking up, with a couple of hours to spare, to Project Quilting, Put a Heart on It - Challenge 11-3. Let's go see what quilters have put a heart on! Can I Get A Whoop Whoop?, Oh Scrap!, Monday Making, Design Wall Monday, Midweek Makers, Can I Get A Whoop Whoop?, Finished or Not Finished Friday,  TGIFF, Beauties Pageant, Peacock Party,