Showing posts with label curves. Show all posts

Saturday, June 30, 2018

June is finished?

June is almost done and with the end of the month comes those deadlines that I may, or may not, have ignored so far 😊

Kingfisher Stitch-Along and One Monthly Goal (OMG)

My goal for June was to finish 16 hexie flowers. That's a lot less that what we need to follow the Stitch-Along but to be honest, I didn't think that I could even do 16. Thanks to Miaismine's very positive comment, I figured out that from the date she left me the comment, that if I did roughly one hexie a day, that I could easily complete all 16. So that's what I did. I even took some hexies to work and basted them on my lunch break!
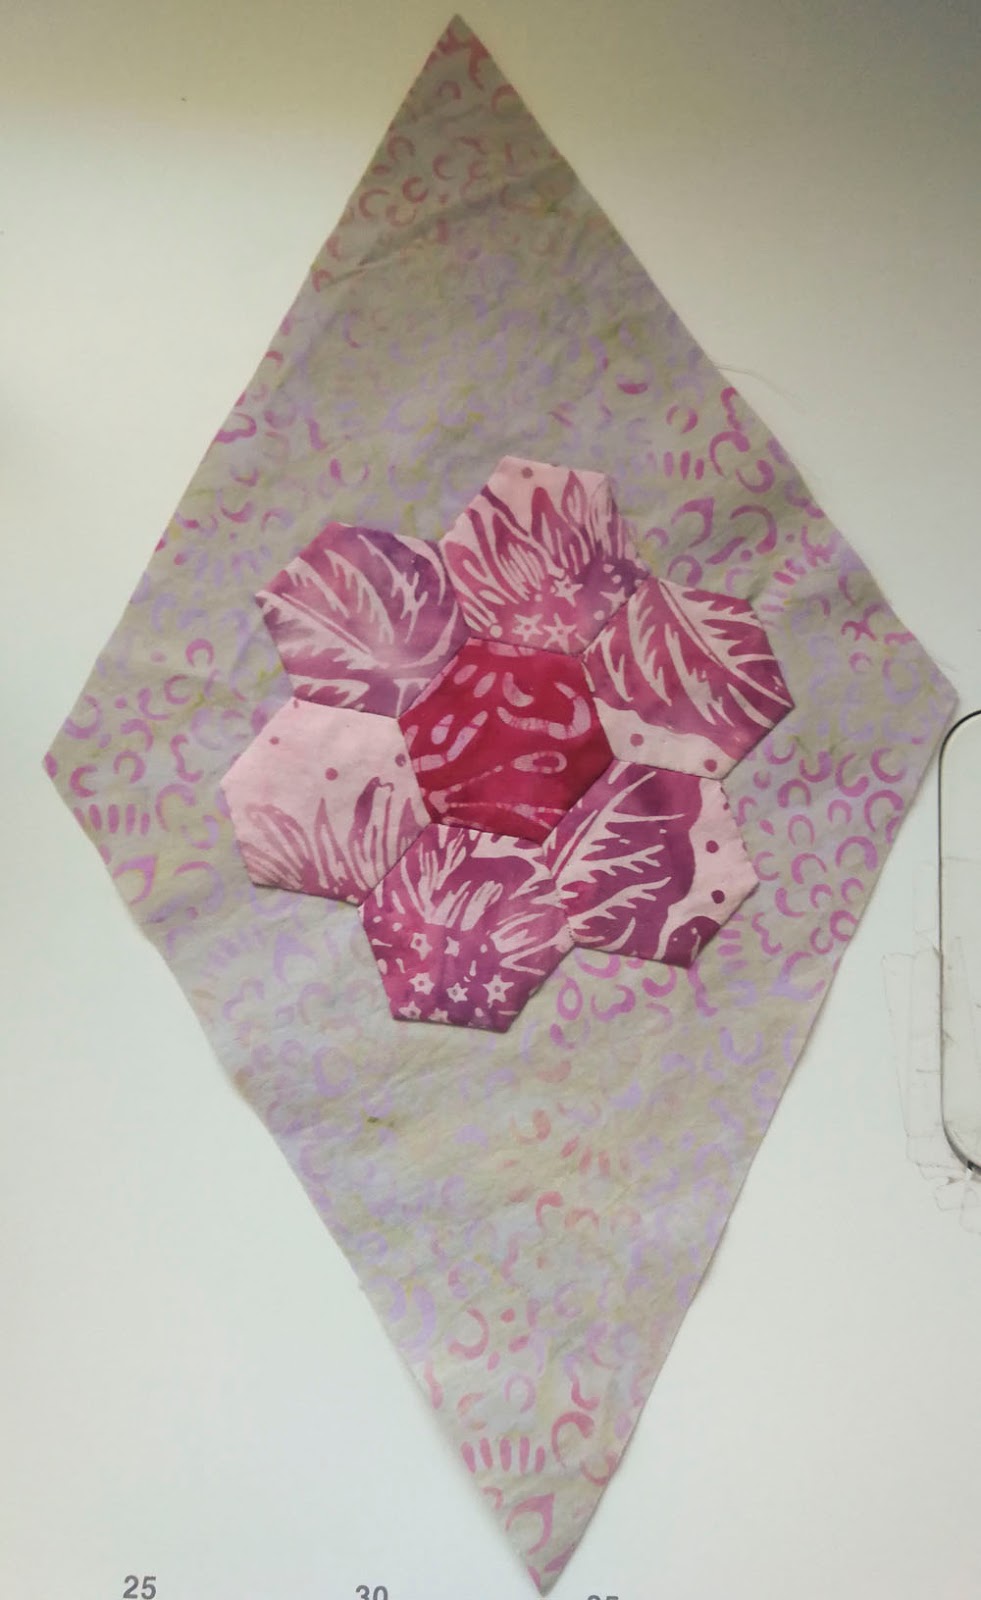
First hexie flower hand-appliquéd
on the diamond

My neighbour's beautiful
clematis with my hexie flower


I also finished hand-appliquéing my first hexie to my background. I really like how it looks. This project is going to be a LOT of work. Oh well, it will get done eventually.


Pretty red hexie flower
The first 16 hexie flowers completed!
Star hexie flower


Starry Bright Night QAL

Month 6 of the Starry Bright Night QAL is all about curves - not my favourite thing, which is one of the reasons that I've procrastinated, although any excuse will do to procrastinate :-)

Block 5 - not a star. Could it be
a nebula?
I chose to make Block 2 which includes off-set curves within curves. To give it a starry look, I used an orange fabric for the centre, then bright yellow and a lighter yellow to symbolize a fiery star. Of course my son then told me that stars are only one colour because that's how they categorize them. Oh well, the artist in me doesn't care 😊, except that I messed it up, which I do care about, but at time, not enough to make another one! If you haven't figured it out, you'll have to read what I learned below.

Batik Lap Quilt

Batik Lap Quilt - feather meander

I finally got my silk thread from my supplier :-)

317 (Orenji)
345 (Kyoto)


I was doing well quilting Angela Walters' Feather Meander until I ran out of thread. So Wendy go me two spools of Kimono silk thread from Superior Threads. One spool of 345 (Kyoto) and one of 317 (Orenji). Looks like I'll be back at it. Yeah! This is my To-Do Tuesday project for the week!


What I learned
  • Although I've completed my 16 hexie flowers, I'm not going to be making the next 16 my July OMG. As much as I love making them, I would rather take my time and not have to rush. I am happiest without deadlines!
  • I also enjoyed hand-appliquéing the hexie flower onto the diamond fabric. It is a rather slow stitching Sunday type of task and is going to take a while. It will be a gorgeous quilt though.
  • I was also reminded, while I was appliquéing my hexie flower to my diamond, that I should have ironed (and possibly starched) it, before starting. 
  • I've added a few pictures of my hexie flowers to my post since it was nice enough outside to take pictures.
  • My curved starry bright night block is a bit of a mess. I learned that if you are going to cut  multiple pieces of a pattern at the same time, that all of the fabric needs to be either right-side up, or all right-side down...not folded accordion-style. I really should have known better but it's been a very long time since I've sewn with patterns. I've also been sewing a lot with batiks and solids which don't have a right and wrong side (which is one of the things I love about them!) 
  • I must admit though that sewing these curves was a lot easier than I expected. Alida suggested that we not bother pinning the pieces since they were wonky anyway. Wow, that was really wonderful and easy to do! If I end up making a new block, I'll post it here as an addendum.
Related posts
Linking parties

Wednesday, November 29, 2017

Lots of curves

Block 11 - New York Beauty style
Growing up QAL


Block 11 featured both foundation paper piecing and curves. It was a New York beauty style block

I love foundation paper piecing and can tolerate putting curves together, but having to put 5 of them together was long.

I have to admit that the last two were easier, but I also didn't care as much by then! It's a miracle that they came out ok :-)

For the colour choice, since I had quite a bit of the light purple, it got the honour of being the background colour. The other pieces were added, mostly based on the size of scraps I had. I did deviate from Alida's two blocks by using the Block 1 pattern piece for the bottom curve, while the rest is from the Block 2 pattern.

I had originally thought of making both blocks but after the curves of this one, I was done!!!

Block 11 - foundation paper pieced and lots of curves
To-do Tuesday
Sergeant 150!

I have to make a label before Friday for my Sergeant Sesquicentennial wall quilt (and here I was hoping that I would never have to write that 150 word again!)

Each year I donate a small quilt to our Workplace Charity Campaign. This year, the Sergeant is it!When I was getting him ready to take to work, I realized that it didn't have a label.

I'll be making a 3" foundation paper pieced block that is a variation of the maple leaf. I can either make the leaf in a light colour so that I can print within it and have a colourful border, or I can make the leaf in one of the Canada 150 fabrics and just add a piece to the block to print on. I guess it will depend on what fabric I find first!

I just want to mention that I get many of my 3" foundation paper piecing patterns through the Quilting on the Square newsletter. (See Related Links)

Update: I just finished the quilt label and quilt sleeve. It's all ready for the auction - and that's a project crossed off my To-do Tuesday list!


What I learned
  • One or two curves is fine - 4 is excessive!
  • My curves did get better by the fourth one, even if by then I didn't care much about accuracy.
  • I've had a great time making Alida's blocks in her QAL. It hasn't always been easy to get it done within the month, but I'm quite happy that I managed it.
  • I haven't decided how I'm going to sash and finish the quilt yet. There is no hurry since I still haven't found my first three blocks yet!
Related Links
Linking Parties: I'm linking up to the last link-up of Alida's Growing up QAL. Come see all of the amazing blocks! I will also be linking up to To-do Tuesday. It's nice having a little goal for my week :-) I am also linking up to these great linking parties. Check them out! Linky Tuesday,  Let's Bee Social, Midweek Makers #100Needle & Thread ThursdayFinished or Not Friday, Can I Get a Whoop Whoop?, MOP Monday

Friday, April 24, 2015

Learning Through a Table Runner

The Common Thread Quilt Guild in Orleans, Ontario organised a Print Windows table runner workshop last November with teacher / designer Valerie Miller. Her designs are quite modern and incorporate some lovely details – gentle curves, piping, mini squares, etc.  When I saw a sample of her runner, I decided to take her course to learn the techniques involved in making these.

Here is the link to her Print Windows table runner pattern.

Details of Print Windows Table Runner
Valery came to our guild as a guest speaker, so that evening I chose my fabrics for the weekend workshop. I liked the fabrics, although I have made few projects with a black background.

The workshop was enjoyable and I did learn a few tips and tricks. For instance, the fabrics that make up the mini windows within the grey strip were strip pieced. Since I don’t usually have great success with these, I did get a couple of tips to help me.
Print Windows Table Runner

  1. Sew the strips together from alternate directions. This helps the fabric stay flat.
  2. Use a smaller stitch so that they won’t fall apart after you cut them.
Sewing gentle curves isn't difficult. You just have to take your time. The trick is to use pins and then to clip the seam allowance once you've sewn the curve. I just find that this gives the piece a nice flat finish once it’s pressed. I've included a link to a Connecting Threads tutorial, in case you’d like to learn to sew curved pieces.

Finally, when cutting and inserting the grey strip into the runner, you just have to be careful to adjust the curved piece that it’s going through so that the curve will continue evenly on both sides of the strip.

What I learned:
  • The sewing tips I've written while making this runner are above. 
  • My life lesson was more difficult. As much as I enjoyed the workshop, it was during the time that my “best friend” Bandit died. The quilting helped me get through those rough days but as lovely as it is, it will forever be associated with those difficult times. I guess that’s how life and perception works (and the black background doesn't help.)
This post is listed on Link-a-Finish Friday. See what other quilters have been up to!