Showing posts with label CTQG. Show all posts

Wednesday, September 10, 2025

FMQ a Baby Quilt and Cell Phone/Device Holder

Hello and welcome. By the time you read this, I will be ready 😕 and hopefully making my way across the Pond for an amazing trip! Our first destination is London💂 and then Southampton to embark on the ship. Before I leave, I'll share my latest finish. 

FMQ a Baby Quilt for the Guild


You've seen the two scrappy BB/cuddle quilts that I made this summer. I took them, as well as the quilt shown below to the Common Thread Quilt Guild (CTQG) meeting this week. They are donated through our Community Projects.

I picked up the flimsy, batting, backing and binding last year at a guild meeting. I quilted most of it months ago and just needed to finish FMQ the borders. This time I didn't bind the quilt before quilting the border since the borders are 6" wide. That's quite wide and I didn't want to take a chance that it wouldn't work out.

Finished baby quilt for Community Projects

Back of the baby quilt

I FMQ the centre blocks with straight lines converging to the middle of the triangles but extending out to the next rows/columns. With that geometric quilting, I wanted to add organic shapes to the borders. I FMQ vines of heart shaped leaves. Even though I was using an orange thread, it was still sometimes difficult to see within the colourful fabric pattern. I'm always amazed how a colour that I think should pop out, will disappear. The only reason I wanted it to pop out was so that I could see it clearly when I FMQ it. 😕

Here is the pretty backyard photo. My garden is mostly weeds but at least they're mostly alive now that we've finally gotten some rain.

Backyard glamour shot 😎

Scrappy Cuddle Quilts

Because we all love photos of quilts, here are the two scrappy cuddle quilts that I handed in this week at the guild meeting. You can read more about them in previous posts (see Related Links).

Purple Scrappy Cuddle Quilt

Teal Scrappy Cuddle Quilt

Cell Phone/Device Holder

Last Spring, my childhood friend, Sylvie, made me a cell phone or device holder. JJ (my adult child) and I have been moving it around the house and using it. JJ asked me to make more so that we could keep them handy....so I finally did. They will be very useful and I have made one to take with me and another as a gift for my niece.

Original holder made by my friend Sylvie

More cell phone/device holders

The holders only require a 9" x 12" fabric piece., a cup and a half of rice and some fluffy batting. I used batik fabrics since they are pretty and already out to use for the Bloomers blocks, Of course, the neutral batik one is for my niece - I love the leaves pattern on it. The one supporting my old cell phone is an amazing fabric that looks like cathedral windows. I've been wanting to use that fabric for years - so now I have and I'm keeping it 😍 JJ got the two other two and we'll keep my friend's one downstairs to share.

I did learn a couple of things 😊while making these. The first thing is that once the holders are filled with rice and fluff, you want to place the pins facing the top so that they can easily slide out of the way when sewing that last seam. This became very evident when I tried to remove the pins that were pointing up and difficult to remove before stitching.😉 

Ensure that the pins can be easily slid out of the way!

I also added a quilting clip at the beginning of the seam. It just keeps the fabric together while you fiddle around with it but is easily removed just before you start to sew.

What I learned
  • I enjoyed FMQ the baby quilt that I didn't have to piece.😁
  • At the guild meeting in June, I picked up another quilt top to be finished. It's wonderful - the committee puts the quilt top, batting, backing, binding and a label together. It goes so much faster to finish without having to figure things out...since there's always a chance of getting it wrong!
  • I'm really glad to give back to the community, now that I have a little more time. Since my favourite part is the FMQ, it's a great way to get more practice without spending so much time piecing.
  • Making the phone/device holders went really well and it was as easy as promised!
  • I didn't have any fibre fill, so the first holder I made, after adding the rice, was filled with scraps of batting. I just had to try - but I removed it and then refilled it once I had bought the correct fill. 
Related links
Linking parties
I'll be linking up to many fun linking parties. Consider checking some out, after you've linked up below. 15 Minutes to Stitch 2025, Finished or Not Friday, Beauties Pageant, Off The Wall Friday, Put your foot down, Patchwork & Quilts, Sew & Tell, TGIFF


Free Motion Mavericks


Welcome to week 548 of Free Motion Mavericks! It was a very productive week! Thanks for linking up. Here are the projects from last week that included FMQ, ruler work or walking foot quilting. 

Kat of Scrapbox Quilts finished two scrappy bargello quilts in the RSC colours. Each was simply FMQ. They are so lovely!

Kat's scrappy bargello quilt FMQ with slight waves

Kat's scrappy bargello quilt FMQ with straight lines

Sally from Crafts, Cavies and Cooking is in the process of FMQ a lovely, large quilt. In her plan of attack, she stitched all of the stars first. Now she's working on the crosses. What lovely FMQ!

Sally is now FMQ the crosses!

Sally was FMQ the stars

Deb, the Scrappy Quilter is rolling along and finishing more quilts! This latest one involved curves :-) The FMQ is lovely as it echoes the curves of those gorgeous blocks. 

Deb's lovely curved blocks quilt

Details of Deb's FMQ as she echoes the curves

Gwyned Trefethen is busily FMQ her very large 2024 RSC quilt. Here is her latest accomplishment.

Gwyned FMQ her 2024 RSC quilt

Melva of Melva Loves Scraps had another finish this week! Here is her Rainbow Korner Kabin quilt. She FMQ it with a Baptist Fan design.

Melva's Rainbow Korner Kabin quilt

Close-up of Melva's Rainbow Korner Kabin quilt

It's now your turn 😍

You are invited to the Inlinkz link party!

Click here to enter

Thursday, February 22, 2024

Having Fun with Panels on Free Motion Mavericks

Hi and welcome 😊. This is week 570 of the Free Motion Mavericks linking party. I've been busy learning how to create a wall hanging with a couple of companion panels. Let's see how it's going!

Fun with Panels with Cyndi McChesney


Last week, the Common Thread Quilt Guilt (CTQG), had Cyndi McChesney as the virtual guest speaker. A few days later, there was the first of a two-part workshop on Zoom with Cyndi to teach us how to make wonderful quilts with our panels.

Here is the companion panels that I purchased for my husband a few years ago. "Healing Waters" was created by Anishinaabe/Ojibwe artist Mark Anthony Jacobson for Northcott Studios. There was an entire collection, but I just purchased these two amazing panels.

Large panels

Small companion panel


Cyndi McChesney is the author of the book, Fun with Panels. She has another book, Playful Panel Quilts, coming out in the spring. Our course was supposed to be Montages with Panels, which is what her newest book is about, but the panels that the participants had were better suited for her first method. If you're interested, check out Related links below.

When I showed my husband the panels, he absolutely loved them - but I had no idea how to begin putting everything together into a large wall hanging.

The first thing that we did in class was to talk about our panels. We were then put into groups to brainstorm what kind of traditional blocks we could use with out panels. Here were some of the questions we considered:
  • Does the panels have a theme that could translate into some traditional blocks? For example, flying geese would be great for a panel with birds. 
  • Are there visual elements in the panel that could be used for appliqué or be found in traditional blocks?
  • Are there visual elements that could be used for background or complimentary fabric, etc.?
  • Can some of the blocks be cut up and used?
As we brainstormed each of our panels, someone mentioned elongated blocks and improve. That's when I knew that I had found my answer.

Measuring, graphing and cutting 


I knew that I would be cutting up the panels to make the wall hanging. I measured each image and noted where there was extra fabric for the seam allowances and where it would be very tight to get a full image with enough of a seam allowance. 

I cut the individual images based on those measurements. For example, with the image below, I knew that I wanted to keep as much of the image intact as possible, but that the images directly above and below had extra fabric that I could cut into for a larger seam allowance.

Taking extra fabric above and below
the panel for the seam allowances

You may have noticed the masking tape at the top of this panel. I gave each image a number so that they could be easily identified when I created the graph. 

Graph of possible setting

This is my plan so far. I attended our second class this morning and got some positive feedback on my plan to date. You can see my proposed design and some improv strips between the panels.

Panels with improv strips at the top

This is what the improv strips look like between the panels.

Wonky improv strips that will be the background

More improv strips made of Kona solids

I'll be working on this project for a while. At least the improv strips can be sewn up and adjusted as required.

What I learned
  • It's been a very busy week. I didn't intend to take this class but after hearing Cyndi McChesney speak at our guild, I knew that this is what I needed to get the panel wall hanging done.
  • Cyndi is an excellent teacher and had some really great advice. I bought a Kindle version of her book - it really is wonderful and comprehensive. I'm looking forward to seeing her latest book. Her panel collages are very special.
  • I am so glad that we did some brainstorming in groups at the beginning of the class. I'm not sure that I would have thought of improv strips.
  • Between the large panels, I've decided that the improv strips will be at least 2". I think that this will be proportionate to the size of the panels.
  • The wonky improv strips are fun to make. I started off making regular improv piecing but I didn't like the joined strips showing since there is already so much going on. I will probably have to join some strips together at the top since that's the only way to avoid "y seams" but I'll be matching them as much as possible so they won't be too visible.
  • This quilt was on my list for 2024 so I'm glad that it's finally started.
  • I started a cold this week- so I've been pretty out of it the last few days. I sure won't be sewing any of this together until I can think again.
Related links
Linking parties
I'll be linking to many fun linking parties this week. Why not check one out after you've linked up below? Design Wall Monday, Sew & Tell, Midweek Makers, Put your foot down, Needle & Thread Thursday, Off The Wall Friday, Patchwork & Quilts, Oh Scrap!, 15 Minutes to Stitch 2024, 

Free Motion Mavericks


We had lots of quilting and blogging going on in the last week. Thanks to everyone who linked up 😊

Melva gave new life to a vintage linen runner by attaching it to a lovely batik and then quilting it. What a great way to showcase and keep using it. 

Giving a second life to a vintage linen runner

Donnalee finished an Attic Windows block quilt for her guild's charity group. She quilted it with a serpentine stitch and variegated orange thread. 

A lovely colourful quilt for someone to love!


It's now your turn!

You are invited to the Inlinkz link party!

Click here to enter

Sunday, February 13, 2022

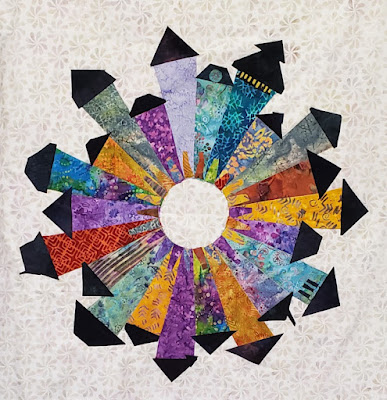
Dresden neighborhood quilt class and project

I may have been relatively quiet on the social media front, but this time it's because I've been busy quilting 😊 I love being able to say that! Here's the latest class that I've taken.

Dresden Neighborhood Quilt Class

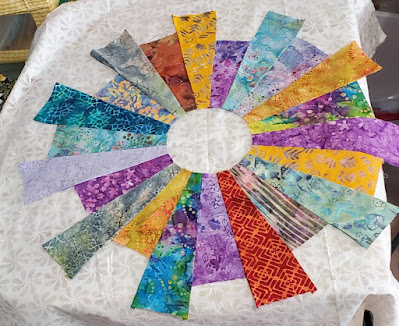
I've loved the Dresden Neighborhood Quilt since the first time that I saw it...but I also saw the word "Dresden" in there and figure that since I would rather not do needle-turn appliqué again, that this wasn't for me. However, after seeing a class offered through my local guild, I thought that it would be easier if I was sharing the pain with a virtual class. I was so thrilled when I learned that all of it was sewn by machine! 😊

My Dresden Neighborhood quilt so far

Since I wasn't sure what fabrics to use, I googled "Dresden Neighborhood quilt" and looked at tons of pictures of these finished quilts. All of them are great, but I was drawn to a couple of them that I uploaded onto my phone to study them. The ones that I liked had strong colours with a light background. 

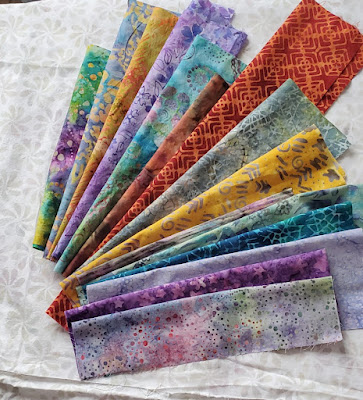
Since, of course, I wanted something funky, I used bright batiks that have a small range of colours on them. I used the very orange-on-orange and the gray-on-yellow batiks as my starting point. From there I added other colourful batiks. Many have purple and colours that are complimentary to orange and yellow.

Fabric choices

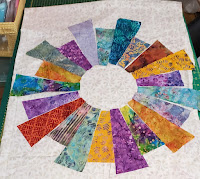
During the class, I cut out my house fabrics with a template. I'm not sure what happened but the template was not the size it should have been so I ended up needing 21 houses instead of the 20 from the pattern. When I sewed them together (I was so nervous!), I thought that I would have to do some major fudging to make it work, but finally I just added one more house (that's 22) to create a perfect circle....no fudging required 😊

Houses cut to different heights -
still 21 of them
Houses before cutting
 and sewing


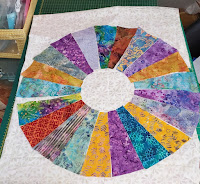
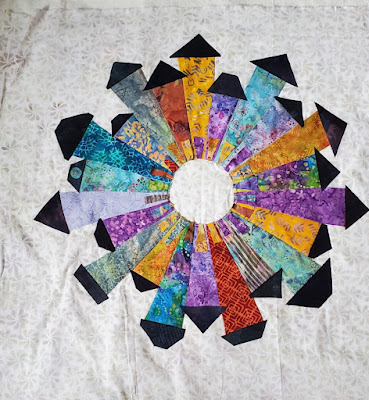
After sewing them together and adding one more house, it was ready to be tacked onto the background.

22 houses sewn together

At this point, the class members had a discussion with our teacher, Michelle Banton of Little Pups Designs about whether to sew the pieces on or to quilt them on, that is to add the batting and backing right away before doing more than tacking the houses to the background. I opted to add the batting right away, so I sandwiched it and started quilting as I sewed things on. 

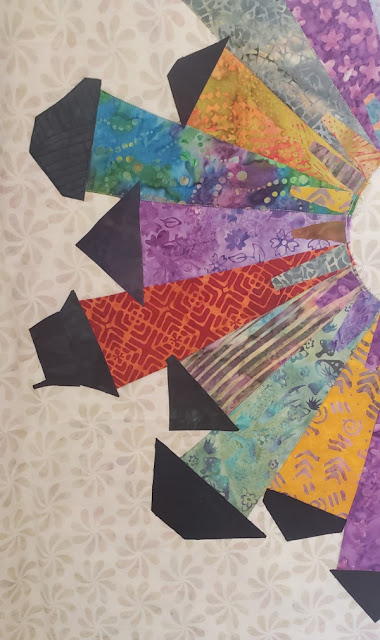
After making the houses, the fiddly but fun part starts - finding the perfect combination of fabrics for the rooves, doors, windows and whatever else is to be added 😊 I used some scraps of very dark hand-dyed fabrics that a friend gave me to make all of the rooves. The doors are all made of the same fabrics as the houses.

Adding roofs and doors to the 22 houses

I made some slightly more elaborate rooves and started adding things such as awnings and windows. 

More elaborate rooves with other fun features

FMQ around the houses and some of the rooves

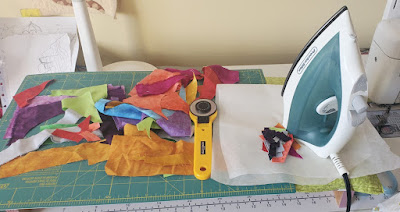
I've added adhesive bonding web to more hand-dyed fabrics to add the windows, etc. I haven't had the iron out for ages before the last two projects. With my mini ironing platform and small cutting mat, I can iron and cut small pieces anywhere in the studio.

Adding adhesive bonding web to the fabric scraps

What I learned

  • If I left the FMQ to the end, I know that I have too many other projects right now and would only finish it in a few months.
  • My other Dresden needle-turn
    appliqué project
    Another incentive to get this mostly done is that our teacher holds a quick show and tell two or three weeks after the class so that we can share our progress. Since it's on Zoom, I will be receiving all of the participant's pictures of their project and arranging them in PowerPoint. It really is the best and easiest way to see them virtually. 
  • I've made this project larger than I usually do so that I can hang it up in our entrance. I can't wait to see it up there all finished!
  • FYI, the quilt here is my first (and last?) Dresden needle-turn appliqué project.
  • It just occurred to me that there must be a way to make the Dresden shape using a technique like English Paper Piecing. I think that it would make it easier to stitch down....I'll have to check that out! 

Related links

Linking parties

I will be linking up to many fun linking parties this week. Why not check them out? Patchwork & Appliqué, Oh Scrap!, Put your foot down, Off the Wall Friday, Peacock Party, Design Wall Monday, Monday Making, Free Motion Mavericks with Muv, Midweek Makers, 


Thursday, June 22, 2017

Countdown to Canada - Fêtons 150!


Quilt of Belonging coming to Ottawa
Countdown! In 9 days Canada will be 150!

As you can imagine, there are many events already under way and many more planned.

Quilt of Belonging

On June 23 the Quilt of Belonging will be displayed at the Ottawa City Hall until July 5. This should be on your list of things to see if you're in Ottawa during these dates. There are also visits planned to other Canadian cities, but if you can't make it, their website is well worth a look. See below in the Related Links.

The quilt of Belonging is a collective work of art that was created to celebrate the diversity of Canada's people. Everyone that I know who has seen it was very impressed. I've made plans with a girlfriend to visit it on Monday. Yeah!

Quilt Canada 2017


Last Friday I took the train to Toronto to attend Quilt Canada 2017. Wow! The quilts were incredible. It was so awesome to see these works of art. The highlight was the National Juried Show. This year they offered tours of the winning quilts. The tour I attended was lead by one of the judges of the show. What a great way to learn about the judging process and find out what they look for.

I'm not posting any pictures of the National Juried Show because I didn't take any (I can't believe it either!) The organizers created a booklet of all of the quilts in the show and I bought two copies :-) I just found the link to the winners of the National Juried Show, so it's below in the Related Links.

Sesquicentennial Quilts of Valour Challenge

Another quilt exhibition at Quilt Canada 2017 was the Sesquicentennial Quilts of Valour Challenge.

Quilt #3 of the Quilts of Valour Challenge
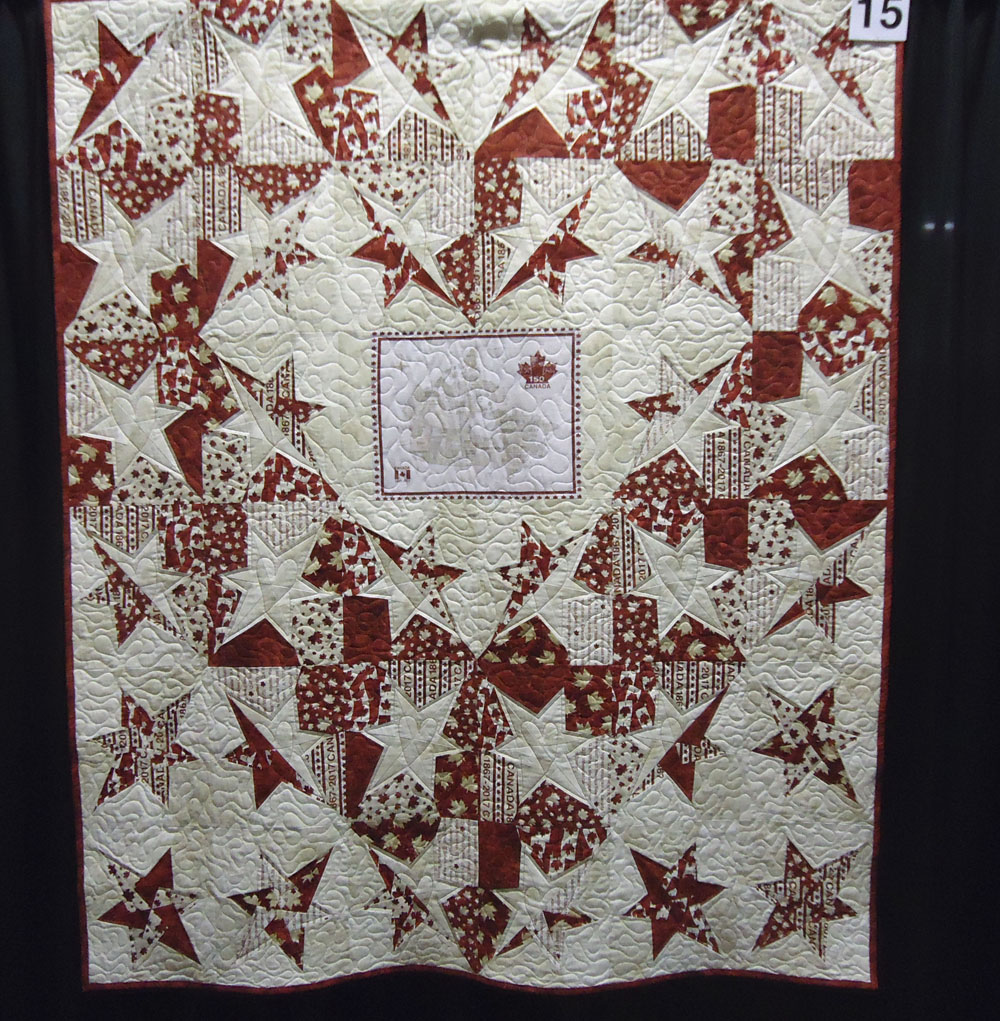
Quilts were created using Northcott’s Canadian Sesquicentennial collection and then donated to the Quilts of Valour. The top 15 quilts were exhibited and everyone attending the show was asked to vote on their favourite. I've been checking the Northcott website but haven't seen the results of the voting yet. I will add the link to Related Links as soon as I find it.

Here are some of the quilts.


I heard many people talking about quilt number 15!

Quilt #15 of the Quilts of Valour Challenge

Check out the details of Quilt #12 below.

Quilt #12 of the Quilts of Valour Challenge
Quilt #12 details - "For your service & dedication"

Quilt #12 details - "Canada Thanks You"

Quilt #10 of the Quilts of Valour Challenge

Quilt #8 of the Quilts of Valour Challenge

Quilt #7 of the Quilts of Valour Challenge

Quilt #6 of the Quilts of Valour Challenge

Canada's Biggest Quilt Bee
Slab blocks I made in March
Do you remember these? They were scrappy slab blocks made for quilts going to Ronald McDonald House. Many of the quilts were pieced and quilted by volunteers during Canada's Biggest Quilt Bee, held during Quilt Canada 2017.

Here are some pictures of the different work stations at Canada's Biggest Quilt Bee. I got a lovely guided tour. It was near the end of the day, so it was rather quiet at the Quilt Bee. Volunteers had worked hard all day and were taking a well deserved break. I'm sure it started all up again the next day!

There were stations spread out efficiently through out 3 rooms. The blocks and quilt tops were received at one end and progressed through the many stages. There were 6 or 8 people sewing slab blocks together to make quilt tops. The quilt tops were then pilled up to be sandwiched while the batting and backing were cut.

Quilt tops to be sandwiched
After being sandwiched, the quilts were piled, ready to be quilted in the other room. 
Ready for quilting
Volunteers at several long-arm and domestic machines free motion quilted them. I spoke to one volunteer who was FMQ a quilt on a domestic machine that she had never used. It was a challenge!

Free motion quilted on a long-arm
After being quilted, they were piled on another table for binding and the label.

Quilts ready for binding and labels

Big Quilt Bee labels
Once completed, the quilts were placed on another table for folding. These were placed in bags or boxed for shipping.

Finished quilts ready to go

Quilts ready for shipping
As I was leaving Canada's Biggest Quilt Bee, I noticed this on the door. The original goal was to donate 1,000 finished quilts to Ronald McDonald Houses across the country. Based on how many quilts my own guild donated (Common Thread Quilt Guild sent over 100 blocks and 50 finished quilts), I'm not at all surprised that they exceeded their goal. Quilters are incredibly generous people!
The final count was 2614 quilts!
Status as of Friday late afternoon
I also have a few images of the Youth Challenge, the Guild Rosette Invitational as well as quilts made for the Centennial in 1967. Come back on July 1st for these.
Practicing the stem stitch


While I was travelling on the train, I practiced my stem stitch. Before I left, on a fat quarter, I drew some free motion quilting designs that I typically use and proceeded to embroider them using a stem stitch. I practiced for about 6 hours during that trip and my stem stitch is getting better.

My secret is not just practice! I purchased the Craftsy course, "Design It, Stitch It: Hand Embroidery" with Jessica Marquez. She is an excellent teacher - and her secret to stem stitching is well worth the price of the course :-)


Finally, here is Block 6 of the Growing Up QAL. It's a "Famous Jane" style block. I had never seen this before. It was interesting and had a bit of the improv feel when adding the final 4 pieces.

Block 6 of the Growing Up QAL
What I learned
  • This was the first complete national juried show that I've attended. It really changed my perspective on juried shows. Because I had only seen pictures of the winning quilts, I didn't think that I could ever submit a quilt. However, at the show, there were many quilts in every category that were great, but much more achievable to make as a quilter or artist.
  • Great news! Quilt Canada 2019 will be hosted in Ottawa!!!!! I have two years to try to add some accuracy to my quilting so that I can submit them and hopefully get accepted. Now that's a BAHG (Big Audacious Hairy Goal!)
Related Links
Posts on the slab blocks and Canada's Biggest Quilt Bee


Linking parties: I will be linking this post to the link-ups at Celebrate - Fêtons 150 in June and the Growing Up QAL as well as many other excellent linking parties. Please check them out! Let's Bee Social, Midweek Makers, Needle & Thread Thursday, Linky Tuesday, Off the Wall Friday, Finished or Not Friday, Monday Making, Main Crush Monday, Moving it Forward Monday,