Did I say that I would try to stop starting new projects? I'm sure that it's in writing somewhere but, oh well, I am having too much fun learning new techniques and playing with fabric! 😊
Fantastic Fusion Workshop
Through my local quilt guild, I registered for a couple of workshops. This first one peaked my interest - it's an improv quilting using fusible web. I've done both of these before but I liked the look of the teacher's sample and hoped that I would learn something....and I have!
We were encouraged by our teacher, Lisa Walton from Australia, to buy Wonder-Under Transfer Web (or something like it) because it can be ironed on many, many times, and we definitely needed that for this technique.
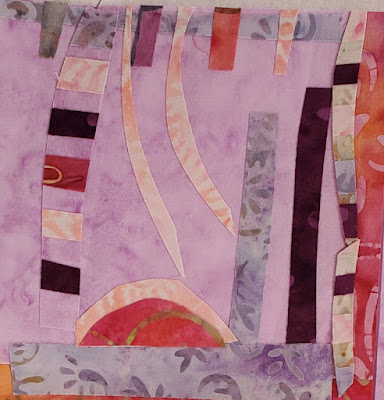
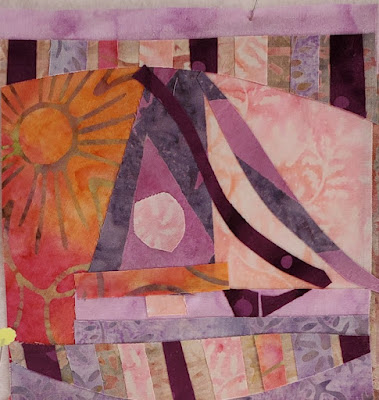
These were the first two blocks that I made during the first class.
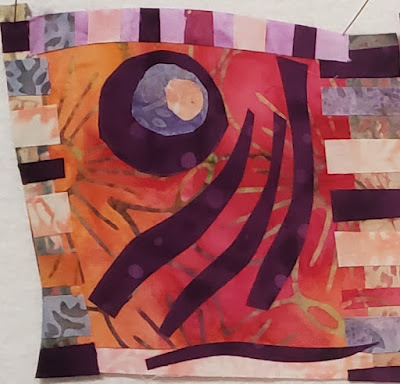 |
| Block 1 - still one of my favourites |
 |
| Block 2 |
I used an assortment of batiks that had different values, colours and patterns. These are important, otherwise the fabrics all sort of merge together. Since I knew that I wouldn't be making a large quilt, I only added fusing on the back of about 12" blocks of each fabric, knowing that I could fuse more if needed.
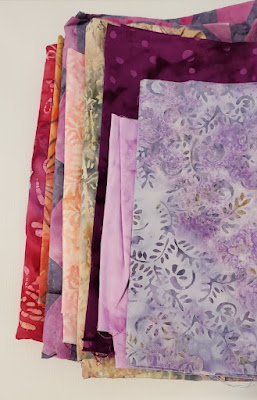 |
| Fabric pull of batiks |
I was enjoying the class but when Lisa got to cutting curves, I was thrilled. This is exactly what I wanted - line are fine but curves add flow. I add curves whenever I can, especially if there're no sewing involved! 😊
 |
| Block 3 |
 |
| Block 4 |
 |
| Block 5 |
These first 5 blocks are roughly 6" square. I tried to keep them simple, but that's very hard for me - I'm a "more is best" kind of gal!
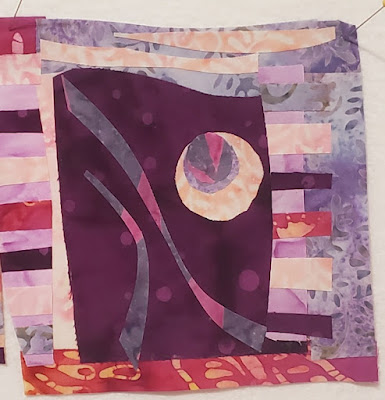
These next 3 blocks have slightly different shapes.
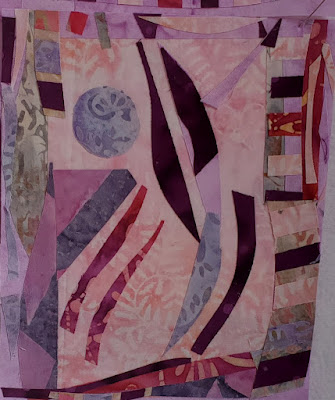 |
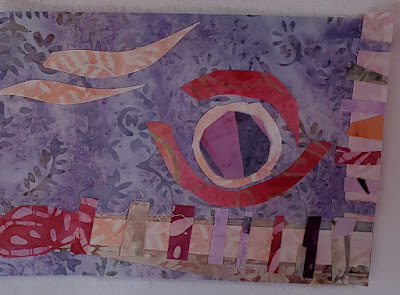
| Block 6 - Do you see a moon there? |
I simplified these next 2 blocks because I figured that I would add more if need be. Also, by the time I made these Saturday evening, I couldn't tell which side of the fabric the fusible web was one (it's difficult for the light fabric but obvious for the darker ones!)
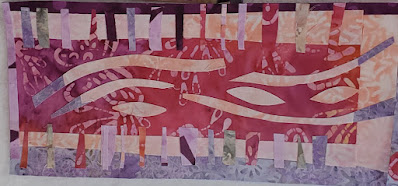 |
| Block 7 Just flowing |
 |
Block 8 - not really finished since this is the one that I will probably
have to change to make it fit with the others. |
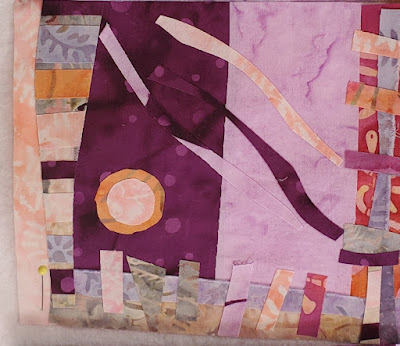
Possible layouts
I found this to be the most difficult part. I did take lots of pictures of layouts but each block could, in theory be laid out in 4 possible ways since there is no right-side up here!
My thought process:
- The first thing that I noticed was the very dark purple in three of the blocks. I think that they need to be balanced somehow.
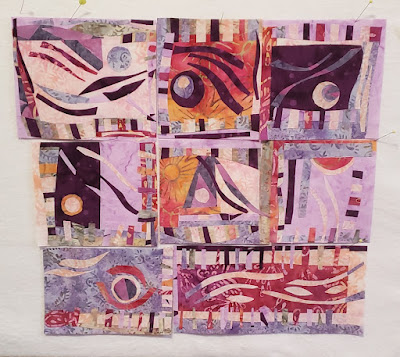 |
| First layout - balance the dark purples? |
- I think that this balanced the dark purple blocks.
 |
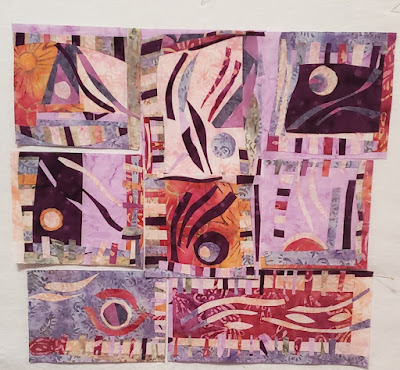
| Second layout - balance the odd shaped blocks |
- I think that most of the blocks are interchangeable except for the 3 that are different sizes.
 |
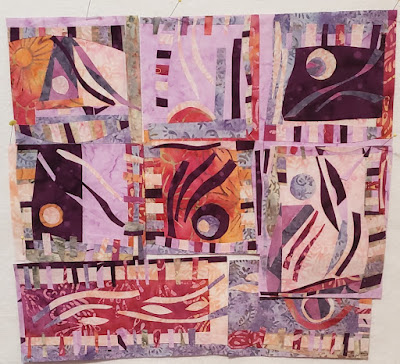
| Third layout - more balancing? |
- I believe that this may be the best balanced layout....but I'm still learning and I can't wait to get feedback from Lisa.
- The bottom right block may need to be redone, or at the very least cut up. I like the outside striped border but the rest could be redone - maybe into two, either attaching the left side to the block next to it (not bad but not great) and then fixing up borders for the other part.
 |
| Fourth layout....maybe? |
You'll just have to come back to see the finished project...by the end of February!
February's One Monthly Goal Finishing this quilt is my OMG for the month of February. I'm excited about this piece and don't want it to get lost in my WIP pile 😊 Thanks Patty for the great motivational party!
What I learned
- Tips for working with Fusible Web:
- I pressed the pieces of fusible-backed fabric onto a piece of Pellon Wonder-Under Transfer Web backing. This lets you pull the fabric off of the backing and keep adding more fabric. You can also use parchment paper.
- When I wasn't sure on what side the fusible web was attached, I pressed the fabric piece between 2 pieces of the backing. The fusible web is on the side that is attached to the backing (rather than on your iron). I did a lot of that too until I thought of this.
 |
The side with the fusible web
sticks to the backing paper. |
 |
Pressing the fabric between two sheets of
fusible web backing |
- Lisa is a great teacher - laid back, organised and very knowledgeable.
- She also teaches this course online. During her class, she showed us an introductory video that featured her quilts in this technique, as well as quilts by other students. It's always great for inspiration to see what can be done.
- She is a very generous teacher, and after our 3 hour class, she sent us a link to the first half of her online, on-demand class. It's really excellent and was a great reminder of what we had learned. As you can see, I highly recommend her classes!
- During our next 3-hour class, we will learn tips for putting the whole quilt together (without stitching!) and then quilting and finishing it. I think that I've done most of my blocks but I want to see what Lisa advises before I cut and make adjustments to finish it.
- I figured out that I need one of those circle templates - it was difficult using objects to make the circles on these!
Related links
I will be linking up to the
February OMG party as soon as it opens. I am also linking up to Kathleen McMusing's
Tips and Tutorials on the 22nd, as well as many other fun linking parties.
Monday Making,
Design Wall Monday,
Midweek Makers,
Put your foot down,
Needle & Thread Thursday,
Off The Wall Friday,
Free Motion Mavericks (it's Muv's turn - check it out!),
Finished or Not Finished Friday,
Patchwork & Quilts,
Oh Scrap!,
15 minutes to Stitch 2022,


That tip for using two pieces of the backing when it is hard to tell is brilliant. Thanks for linking up to the #TTot22!
ReplyDeleteHi Kathleen, I'm just glad that I had the energy to write up the post before the end of your party! Happy 3rd anniversary
DeleteI LOVE scrappy work like this. Great impromtu work that gives you that freedom feeling.
ReplyDeleteThanks Joy - I really love it too! Lots of freedom.
DeleteI love it, so creative. Glad you enjoyed your workshop.
ReplyDeleteThanks Denise. I'm surprised that I haven't been at it but am waiting for tomorrow's class to make changes. It's not easy waiting :-)
DeleteSounds like a fun class! you are so creative!
ReplyDeleteThanks so much Alycia. It's been amazing and my quilt top is now finished! Now to quilt it before the end of the month :-) Thanks for the great linking party.
DeleteGorgeous, Andree!!
ReplyDeletejolis blocs, et cette technique a l'air bien sympa. En tout cas tu en a fait des merveilles ! Merci pour les bonnes astuces ;)
ReplyDeleteTruly, it is always fascinating to read your posts every time. They are packed with fabulous creativity, and of course, reading about your thought processes is always interesting. ALL these blocks are tremendous! Love how you have placed them; they all dance beautifully together. As a more is more kinda girl, three cheers from me for your ethos. =) I kinda expect you, Andree, to start a new project...just because. Why, it makes for a happy life!
ReplyDeleteMy way of identifying the fusible side is to mark it with frixion pen slash across the back. My had dyes are very hard to tell which side has the fusible and this works great. I am partial to #3 composition. have fun
ReplyDeleteSuch a cool quilt! Lots of movement in each block, I wasn't sure they'd play together well, but it's going to be a stunning quilt.
ReplyDeleteSeriously, it will not matter the placement because this will be a beautiful finish regardless. Thank you so much for always linking up to Put your foot down. I think tomorrow is your linky party, I actually have 2 new finishes to share.
ReplyDeleteHello Andrée,
ReplyDeleteAbsolutely love your blocks! I can see why you keep trying new techniques. This time you have found a way of combining fascinating fabrics with flowing shapes. Amazing!
Love, Muv