Friday, December 20, 2013

Another Cute Mug Rug

I'm glad to say that the production of mug rugs has slowed to a crawl, but unfortunately, I still have a few more to make. Through a Quilting group on Linked In, I found this wonderful pattern for my last few mug rugs by Elizabeth Wyatt (www.ebethwyatt.com).

Mug rug and wall hanging in my office
Here's the link to the Stripy Christmas Ornament Hot Pad. As the name suggests, the original pattern is for a hot pad, but I adapted it for a mug rug by only using batting and skipping the insulated lining. This project uses a quilt-as-you-go technique so that really, the most difficult part is putting on the binding. I also had to adjust the top part of the ornament since I didn't include a hanging loop. Check out her tutorial on the link above. It's really great.

As well as planning, following instructions is not my forte (except at work, of course!) - so I ended up cutting the batting and backing fabric first and then sewing directly onto the batting as instructed. One advantage to doing this was that I was able to use shorter strips for the edges of the ornament. The disadvantage  was that the backing ended up a little smaller than the batting - so I suggest that you cut the backing a little bigger than the batting and then trim before putting on the binding.

Red Christmas Ornament Mug Rug
Christmas Ornament Mug Rug


This is a great little project that could probably be adapted to other shapes. In one of my previous mug rugs, I had put together a triangle that looked like a Christmas tree. This would be a great shape to use this technique with.
Stripped Christmas Tree


What I learned:
  • If possible, use bias tape or cut out your own. I didn't and the mug rug doesn't really lie flat. Not a huge deal since it is only a mug rug and you are supposed to put something on it which will make it lie flat!
  • If you cut the batting and backing first, you may want to cut the backing a little larger so that it doesn't get too small. You can always trim it before adding the binding.
Update - I made 2 more Christmas Ornament Mug Rugs, in green this time. I was able to find bias tape and it did help somewhat with the flatness. I did make one of them larger but then I forgot to trim it! Here are the results:

Hope you get some quality quilting time during the holidays.
Andrée

Wednesday, December 11, 2013

Christmas Mug Rug Production

It's almost that time again! This year, since I didn't have to create the guild newsletter and post it etc., I've had so much extra time to actually quilt. What a treat! I decided to make a little something for my friends and colleagues for the holiday season. Since mug rugs are all the rage this year, I thought I would give those a try.

I am very happy to say that I have a nice little stash of Christmas fabrics collected over the years. Just enough fabrics to have a decent variety. This year, at Quilty Pleasures, I bought two little bundles of 2 1/2 inch charm packs of Moda Christmas fabrics. With those squares mixed in with some of my own fabrics, I made quite a few small 9 patch blocks with borders. They made really nice mug rugs.
Mug rug using Moda squares
These are all little Moda squares

Three 9 patch mug rugs
The block in the middle mug rug was made years ago!
I also had quite a few blocks that I had made years ago, so they got incorporated into the mug rug production.

Three fabric mug rugs
After researching on the internet, I found that many mug rugs were made of three panels of fabric. Here are a few of those models.  I found it difficult to put all of these printed fabrics together, but I think most came out ok.

Appliquéd tree
Appliquéd tree
The tree on the mug rug above was made of strips of fabric and appliquéd. That was a lot of fun.

These were also great little projects to practice my free motion quilting. Some came out better than others, but that's what practicing is all about!

Lovely penguin fabric
I made this mug rug to highlight the penguin fabric. Aren't they cute!

I bought a couple of e-patterns for mug rugs. The mug and gingerbread man was one of them. My version doesn't really do it justice. The one with the different border looks better though.

mug rug
Mug and Gingerbread Man 
Glitzy mug rugs
Same mug rug with a different border
 I also created a few glitzy mug rugs. The two below will be in the mail today for Denmark, one for my brother and sister-in-law and the other for her mother. I hope they get there on time!

Bandit in the stash
Bandit nesting in my Christmas stash!

I spent many evenings making these. One night, Bandit decided to keep me company. He moved around some of the fabrics in the box and made himself at home.

What I learned:

  • Having a dozen or so small projects on the go is more than I can handle. At one point, I felt very scattered. I think that it's best if I make a few and finish them before moving on.
  • Sometimes it's important to review things that you think you know! I was having a very hard time at the beginning with the binding. I thought I wasn't stopping early enough at each corner (that 1/4 inch) but it turns out, after reviewing directions for making those corners that I wasn't folding the fabric properly. After that, my corners were much more respectable.
  • I found it hard to choose the different fabrics that would go together on a mug rug. After I made the Mug and Gingerbread Man above, I realised that having a different fabric for the binding can be a very good thing to emphasize the project.

Thursday, November 21, 2013

Quilting for Woman’s Best Friend

Challenge # 1: free motion quilting requires a lot of practice.  Challenge #2: I needed more blankets on the couch to keep the couches clean and to make Bandit, the dog who adopted us last winter, more comfortable. Solution: I made a doggy blanket for Bandit and practiced my free motion quilting. It was a win-win situation. No matter how good or bad the quilting, Bandit won’t complain. That’s one of the reasons he’s our BF!

Bandit on the pink blanket
There are several blankets already on the various chairs and couches around the house, but none had been made specifically for our Bandit. Here’s Bandit on one of my very pink quilt. It’s a good thing that he’s quite confidant in this masculinity!

While I was in Philadelphia, I bought a few doggie fat quarters. Unfortunately, the colour palette leaves a lot to be desired – brown, grey, beige and black. I know that dogs are colour blind, but I’m not!
The Gallery pattern adapted to lap size

Thank goodness one of the fabrics had a hint of a teal blue on the dogs’ collars. I also picked up an interesting promotional pattern on that trip. The pattern is The Gallery by Heidi Pridemore that was used to feature the Illustrations fabric collection by P&B Textiles.
Free motion bones

Free motion hearts / leaves


I wanted to make Bandit’s quilt lap-size so one evening I sat and adapted the pattern. That was trickier than I expected, particularly keeping track of those ¼ inch seams. I made a few minor calculation mistakes, like the top-right panel that’s a couple of inches too large.  Since I’m trying to keep my quilting in perspective (i.e. it’s a practice piece for the dog), I didn't redo the block.
Writing on the quilt

I had a great time free motion quilting it. I did quilt some bones but I didn't see myself quilting bones for 5 or 6 hours! I loved the heart/leaves that I came up with.

To keep practicing and for variety, I wrote out Bandit’s name and “Woof” a few times. I also quilted a design by Leah Day – Icicle Lights. I included them on the quilt since they look like snowflakes and Bandit loves to eat snow. He’s originally from Florida so his first winter here was an adaptation. Bandit loves to eat and it was a momentous occasion when he discovered that 1) he could eat snow chunks and that 2) they were everywhere! He’s now a huge fan of winter!


 Here's Bandit enjoying his quilt.


Lessons learned:

  • Adapt patterns when you’re mind is fresh – not after a full day’s work! It will probably lead to fewer miscalculations.
  • The amount of un-sewing on a quilt should depend on the context (like who gets it and what it’s for).
  • Even if a free motion stitch is easy, practice it on a scrap before using it on the quilt. That’s why there are no pictures of that lovely Icicle Lights pattern. It’s worth checking it out.

Tuesday, November 12, 2013

Grandmother’s Choice: Women’s Rights and Issues

I have a soft spot in my heart for political activism. I really admire people who work tirelessly to protest, write or blog for a cause that they believe in. I am generally too much of a cynic and a chicken to take to the streets but if there’s something that I can do to help through quilting, then that’s a different story. Being my mother’s daughter (she was a feminist to her core!) I find issues affecting women particularly moving. You may have seen my blogs concerning the “Walking with our sisters collective art project”.

Grandmother's Choice logo - Votes for Women
Here’s a very different project. Barbara Brackman is a quilt historian and author of many books and blogs. One of her projects, Grandmother’s Choice, started over a year ago. I’ve been following it almost since the beginning but I only started making the blocks about a week ago. Every week she published a block and included all kinds of amazing historical facts about one aspect of women’s rights. Most of the history is American but there are tidbits about England, Canada, Australia and New Zealand.


Block # 1 - Grandmother's Choice
Block #1 - Grandmother's Choice
The first block, Grandmother’s Choice, encourages us to look at our grandmothers or great-grandmothers’ lives to see how having the right to vote might have affected them. In the US, many states gave and took away women’s right to vote. It was only in 1920, when the right to vote became a part of the U.S. constitution, that women were guaranteed their right to vote.

In Canada, some women, were given the right to vote from 1917. It seems that it was in January 1, 1919 that the qualifications of both men and women to vote became the same (i.e. British subjects of a certain age). Even if, in theory women and men were both allowed to vote, this right was far from universal. It wasn't until 1950 that the Inuit were given the right to vote; and status Indians didn't get this right until 1960! (Canadian Encyclopedia)

Block #3 - Union Square: Red for Rebellion


Block number 3, Union Square: Red for Rebellion acquaint us with England’s National Union of Women’s Suffrage Societies, a group committed to attaining the vote for British women. They realised that marching in protest could be very effective. Their colours were originally white with red accents; red being the colour of rebellion.

Block # 5 - New Jersey: Suffrage Pioneer
Block # 5 - New Jersey: Suffrage Pioneer

My next block is the fifth in the series: New Jersey: Suffrage Pioneer.  As in Canada where provinces were allowed to give women the right to vote on the provincial level, in the U.S., an individual state could give women the right to vote if the issue hadn’t been addressed at the federal level. When the New Jersey constitution was adopted in 1776, voters were defined as propertied adult residents of the state. By the early 1800’s, it seemed that the percentage of women voters was “alarming” and the state changed its laws to allow only free, white men over the age of 21 to vote.

This block was created to remind us that at one time, the right to vote could be given as well as taken away.  In the 19th amendment of the US constitution, "The right of citizens of the United States to vote shall not be denied or abridged by the United States or by any State on account of sex."
Block # 7 - Alice's Star

My fourth block this week is the seventh in the series: Alice’s Flag. Alice Paul created a Ratification Banner where she would sew a star every time that one of the states ratified the 19th Amendment. To take effect, the amendment required that 36 of the 48 states vote in favour. This finally happened in 1920.

I’ll be creating more of the blocks in the Grandmother’s Choice project. I will also do some research about women’s rights and issues in Canada at that time.

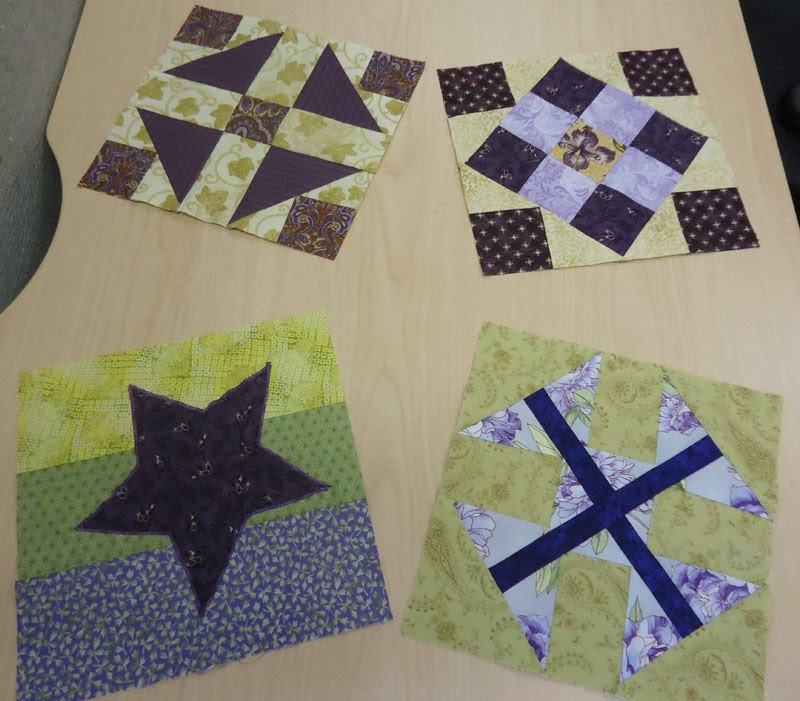
Here are my 4 blocks to date.
Blocks completed to date
What I learned:
  • The patterns for each block and the measurements of the pieces are included on the website but only the more difficult patterns have instructions. I realise that I know more about quilting than I thought.
  • I sure know more about the history of women’s issues.

In this post, all of the information about women voters was taken from the Grandmother’s Choice website unless specifically stated.

Monday, October 28, 2013

Patches the Pumpkin Patch Protector

It's completed! Patches the Pumpkin Patch Protector, whose pattern is by Jaynette Huff is done! I downloaded this pattern from Martingale - it was free and I couldn't resist....but I didn't expect to make it for a while. One day, I felt like starting something new and voila! The rest is history.

I blogged about Patches in my last post, but I'm so happy with the result that I had to share it (aka show off!).  My husband's comment was: "No offence, but he rather looks like a Calvin Klein scarecrow". No offence taken...I'll choose to take that as a compliment (it might be the white linen shirt!)

Patches the Pumpkin Patch Protector, pattern by Jaynette Huff


Here he is in all of his glory!  For now, he resides at work - it's frankly too large to put on the wall at home! That's what happens when you don't look at the measurements of a project before you start.

I want to thank Martingale for the free pattern and I need to give credit to Craftsy: First to Carol Doak for her Mastering Foundation Paper Piecing course and then to Leah Day for her Free Motion Quilting a Sampler.

I also hand appliquéd the birds - and I used the skills I learned in Kathy Wylie's class.


Free-Motion Process:

  • I marked the clouds so that I would get them right.
  • I used multi-coloured thread to stitch the wheat - both on the wheat fabric and on the horizon. I like the way it came out.
  • Quilting around the pumpkins makes them "pop".
  • You can't seem them in this picture, but the black border has pumpkins quilted on them. I made a template so that the pumpkins would all be the same size and also made a template of a pumpkin leaf since I had the horrible time trying to draw them!
Isn't it great to be putting all that learning into practice? Don't give up - it is all about practice!

Wednesday, October 16, 2013

Ambitious Paper-Piecing Project

I’m not sure why I started this project. I had many projects in mind that I was going to make. This one wasn't even near the top of the list but somehow it was at the right place at the right time (on the top of the pile when I got bored!)

It’s the perfect time to make this project since it’s a fall scarecrow with pumpkins. I also didn't realise how large it would end up being (it’s 24 by 36 inches). The project, Patches the Pumpkin Patch Protector by Jaynette Huff, was free on one of my favourite book publishing  internet sites – Martingale. You just have to sign up. They’ll ask you to get their newsletter, which is great if you want to find out about the books that are coming out and if you want to know more about their authors. It’s one of the few newsletters that I read fairly regularly.


Here’s a picture of the pattern as well as my unfinished version.  I just need to add the patches and finishing details and then quilt it. Doesn't that black border scream for some cool quilting?

I was going to make an elaborate backing using the four pumpkins in the corners of the original pattern….but then I got side tracked with needle-turn appliqué. I also found some great backing fabric when I was taking the course last week, so I may actually finish this project before winter comes!

I have no idea where Patches is going to reside, but he’s sure to spend a few days at work with me.

What I learned:

  • It might be a good idea to look at the size of the finished quilt before starting it (I keep saying that but I’m having problems learning that one!)
  • I had the perfect hand-dyed fabric for this quilt – but I didn't want to use it! After some serious self-talk, it’s in the quilt!
  • The pattern called for 1/3 of a yard of fabric for the field background. I only had a fat quarter – but that’s the fabric I wanted. Thank goodness, it turns out that you can do a lot of fudging with paper piecing!

Happy fall from Patches and Andrée!

Learning Needle Turn Appliqué from an Expert

I had the pleasure last week of taking a hand appliqué course with international award winning quilter, Kathy Wylie. Wow, this lady knows appliqué! She was the speaker at our guild meeting last Tuesday. She’s funny, smart, knowledgeable and really down to earth. Her work is meticulous and has won many prizes. Those are actually the kind of quilts that I see at quilt shows and in magazines and automatically think that I’ll never be able to do that. Both the appliqué and the quilting are really unbelievable. She has sure earned those prizes.

I registered for the course this summer, before even knowing what we would be appliquéing. It’s just as well, or I probably wouldn't have had the confidence to take the course. We learned to appliquéd a small section of her pattern, Flourish on the Vine. Our pattern is one of the horizontal stem pieces coming out of the centre. It’s placed at both ends of the runner.
Flourish on the Vine by Kathy Wylie
Applique project

I thought I was exhausted coming home after the workshop, but once I got some supper in me, I kept going and finished the section we were working on. I even transferred the rest of the pattern onto freezer paper. It’s now all ready to cut out and be appliquéd.


Butterfly
Applique inside the lines
Applique Inside the Lines
I've only done needle-turn appliqué a couple of times before. Based on the book, Appliqué Inside the Lines: 12 Quilt Projects to Embroider and Appliqué by Carol Armstrong, I embroidered and appliquéd two projects that are in my cubicle.

I put aside the Flourish on the Vine project to practice a little more. I’m working on the feather project from the book that I had started but never finished. I’m doing the project as fall coloured leaves. I know that quilters will recognize them as feathers but anyone else will see leaves!

Dresden Plate

What did I learn?

  • Like anything else, the more you practice the better you get.
  • Appliqué is addictive.
  • It’s best to appliqué in really good light. It makes all the difference!
  • It’s important to have a ¼ inch to do the needle-turn. Less is NOT a good thing!
  • Kathy taught us to mark the pattern onto the fabric before doing the appliqué. It really helps! 
  • It’s also important to mark the appliqué piece on the fabric before cutting it a ¼ inch larger. This helps you guide where you should be turning and appliquéing. 
  • We learned many other things, but I’m not going to reveal all of Kathy’s secrets here. Instead, I’ll encourage you to take one of her classes!