Showing posts with label Wonder-Under fusible web. Show all posts

Thursday, June 20, 2024

Outdoor art pieces coming along on Free Motion Mavericks

Hi and welcome to week 486 of Free Motion Mavericks. I'm staying away from the heat and humidity by being productive in my studio. The garden will have to fend for itself for the week 🌞 while I make more garden art for Fibre 15's upcoming show.

Raining Pink Petals


My first fence art piece is finished and looked rather nice in the backyard for its photo shoot. 😊

Raining Pink Petals fence art piece ✔

There wasn't much left to do to finish this piece except to add more petals on the sides. I looked through my fabric and found a perfect bunny and 4 butterflies to add to the piece. I used fusible web to attach them. I will be adding at least one or two invisible stitches in each of them before the installation. I'm creating a list below of all that's left to do to finalize these pieces for the installation.

Essence of Leaves


I've created another fence art piece using one of Connie's Textile Art fabric pieces that I bought last year. I mentioned her work in May when I bought more of her fabric at Fibre Fling 2024. I asked Connie how she had created this piece. She replied "I think I sun printed the lighter coloured ones and then used textile paint to stamp/print the darker coloured ones.  All done at the family cottage with leaves growing there.  I also used coarse salt on it."

Essence of Leaves

I attached the fabric to the outdoor woven fabric that I've used for all of my fence art pieces. I then FMQ the darker leaves and then the lighter ghost leaves. It still needs a little more stitching but I want to keep the emphasis on the leaves. I'm thinking of echoing the leaves in an orange thread that matches the background.

Our show's theme is "Impermanence". I named this piece Essence of Leaves since we can only capture the essence of the leaf in our art since they are impermanent.

Prayer Flags


I made the first of a series of Prayer Flags that will hang in the trees surrounding Arbor Gallery. A new workshop in the TextileArtist.org Stitch Club peaked my interest. I haven't had much time to participate in the last few months but this one came at the perfect time. The workshop to make a stitched and dyed sampler with Deb Cooper, is perfect for creating my Prayer Flags.

"Thanks" Prayer Flag dyed in tea

I made this first sampler using mostly white and off-white fabric. In the image below, I've placed the original fabric next to the dyed piece. I used a variety of thread - white #8 and #12 perle cotton, beige perle cotton, white linen cotton as well as white cotton sewing thread. I included a commercial fabric that had a white background with black lines. It's really interesting to see how the fabrics have taken, or not taken, the tea dye.

Dyed fabric with the original fabrics and thread

I embroidered the work "Thanks" on the t-shirt fabric on the right (two fabrics from the stick). I've added colour by threading through the back stitch. If you're wondering about the stick in the photo above... I learned a new technique - you stitch around a stick, remove the stick and voilà! It makes for very cool thread rings. In this case, I added some fluffy yarn (acrylic I suspect since it didn't take the dye) to create texture.

Prayer Flag - "Thanks"

Outdoor Hanging Sculpture - In The Sky


The hanging sculpture is looking good. I attached the Suns and Clouds to a branch. I painted Golden GAC-400, a textile stiffener, to the edges of the sun. What a difference it made. Hopefully it will be ok in the rain.

Applying some GAC-400 to stiffen the edges of the sun

Sunset with the fabric stiffener

As I put the sculpture together, I realised that my instincts were correct. My pretty cloud is too small. I will make another fluffy blue cloud to attach to the one already made.

Need to add to the fluffy blue cloud

After the cloud, all that remains is to make a bird(s) on the branch below. I thought of using one of my tamarack geese as a model, but they really do look like geese. Next to the geese, I found a beautiful soapstone bird. I'll use that as a model to make one or more birds out of wire and fabric.

Soapstone bird to use as a model

To Do List


The installation deadline is July 3rd (in 2 weeks) and I have lots of work left to do. I hope you don't mind if I keep a running tab of what needs to be done here. 😊
  • Raining Pink Petals
    • Stitch the bunny and butterflies in place
    • Prepare the dowel for hanging
    • Create a label
  • Essence of Leaves
    • Finish FMQ the background
    • Fix the hanging sleeve and prepare the dowel for hanging
    • Create a label
  • "Thanks" Prayer Flag
    • Prepare for hanging once the others are done
    • Create a label for the series
  • Create one more fence art piece called Squirrel! 
  • Create 3 or 4 more Prayer Flags
  • Outdoor hanging sculpture
    • Make another fluffy blue cloud
    • Make one or more birds
What I learned
  • I have so many pieces on the go that it was really good to spend the time figuring out what is left to do.
  • Most of the work is not too daunting. I have an idea and a title (Squirrel!) for the third fence art  - I just need to figure out how to do it (i.e. appliqué, FMQ, etc.) It will be something simple and fun.
  • The birds make me a little nervous but now that I've found my model, I'll find the YouTube video and get going!
  • I've had a lot of fun with stitching and dying with tea. I'm going to experiment with other types of tea to see what effects I can get. The stitching takes a while but it's relaxing and I can do that easily in the evenings.
  • I started a piece in Alaska that I was going to use as a prayer flag. For some reason, I kept hesitating. I finally figured out that our theme, "Impermanence" just didn't go with the very solid mountains of Alaska. I guess in the grand scheme of things everything is impermanent but I thought that it was stretching it. Besides, I couldn't make 3 or 4 more like it - it's just too time consuming. I'll share it with you, as soon as it's done.
  • As well, I'll be facilitating a journal making playdate for OOTB on Monday. I'm looking forward to it, but it is making things busy 😊
Related links
Linking parties


Free Motion Mavericks


It was a busy week! Thanks for linking up. Here are the projects from last week that included FMQ, ruler work or walking foot quilting. 

Kat of Scrap Box Quilts has finished her Dino quilt. She quilted it with lots of wavy lines - it will make a great toddler play quilt. 😃

Kat's great Dino play quilt

Frédérique finished another donation baby quilt. She used her very cute llama fabric and quilted it using a template to make the Pearl and Squares stitching in the sashing. Isn't it lovely? Lightly quilting and pretty 😍
Llamas Baby Quilt by Frédérique

It's now your turn!

You are invited to the Inlinkz link party!

Click here to enter

Sunday, January 14, 2024

Project Quilting 15.1 - Bird House Challenge 1

Hi and welcome! I did it! I've finished the first challenge of Project Quilting (PQ) season 15. I "discovered" PQ at the end of their 10th season, in March, 2019. Each year I've done as many of the challenges as I could. In fact, my first challenge was done within 16 hours! 😊

I've had a whole week to prepare for this one. A lot of time was spent thinking and procrastinating. My last blog post was the beginning of the project. This one is my final product.

Home to feed


Here is the finished piece 😊

Home to feed

The story continues from my last post (see Related links below.)

Thread and Solvy circle drying

While the circle was drying, I traced the close up of an image that I had taken of birds at the feeder. Here is what I got.

Tracing the bird

I then cut the fabric to the shapes of the tracing and used fusible web to put the bird together. 

Putting the bird together

The next day, when the circle of thread and Solvy water soluble stabilizer was dry, I cut it in half to make the nest. I found a great hazy background, brown strips of hand-dyed fabric for the branches and tried out the nest. I cut the middle of the circle so that it would have jagged edges and then hand-based it to the fabric, making sure that it opened

Once the bird was done, I did some free motion quilting (FMQ) on it. 

Bird and nest attached

My next step was to figure out where to place the leaves. I looked at several pictures of trees that I have taken and figured out a placement.

Ready to add leaves onto the quilt sandwich

I backed 4 different green hand-dyed fabric with fusible web and then cut and attached the leaves. Next it was time to FMQ.

Adding the leaves and FMQ them

Next comes the squaring up of the piece.

Piece ready to bind and then add a bit more FMQ

We went to visit family and I finished the binding as we talked. This is the picture that I took once it was done.

Binding on but not quite finished

Once I got home, it was time to figure out how to finish it. I knew that I needed FMQ in the background but I didn't know what to do with the nest. After trying a couple of different things, I ended up making two chicks with their beaks open, waiting for food. 

I used the same technique as the bird to make them. I did get creative by using markers to make the beaks and darken some of the FMQ that I had done on the chicks. 

Home to feed - made for the PQ 15.1  Bird House Challenge

On my visit, I saw this great poster. I thought that you might like it!


What I learned
  • I may have made my first challenge within 16 hours of the deadline, but this time I made it within 10 hours of the deadline! Sometimes life just gets busy. Oh well, it's done 😊
  • I really enjoyed this whole process, from the Solvy to the FMQ and last minute chicks.
  • If I'm rambling it's because it's very late and I need to sleep!😴
  • You may wonder why I bound the piece before it was actually finished. I have to admit that I do this quite often. Especially on a small piece, a little bit of extra FMQ is not going to affect the piece enough to make a difference. I like to see what it looks like and then add what needs to finish it.
  • I did make a few mistakes this evening but it all turned out well. If it wasn't for the deadline and company coming for brunch, I would have finished FMQ the piece later, after a good night sleep. Since that wasn't going to happen, I just kept going.
  • I'm so happy with my first finish of the year. I do want to make more bird themed art quilts, so I'm off to a good start. 
  • I'm so happy that I was able to find and use my photos of birds and trees. You never know when they will come in handy.
Related links
Linking parties
I'll be linking up to many fun parties. Thanks so much Trish and Kim for bringing us this amazing challenge! I'm linking up to Project Quilting 15.1 - Bird House Challenge 1 as well as many other super linking parties. Off The Wall Friday, Free Motion Mavericks, Put your foot down, Finished (or Not) Friday, Can I Get A Whoop Whoop?, Patchwork & Quilts, 15 Minutes to Stitch 2024, Oh Scrap!, 15 Minutes to Stitch 2024, Design Wall Monday, Midweek Makers, Sew & Tell, Needle & Thread Thursday

Guess what! I was featured on Put your foot down and Needle & Thread Thursday. Yeah! Thanks 😊
Update February 1, 2024: I have linked up to my Favourite Finish with Quilting JetGirl. 
Home to feed can be seen (and purchased) at Chez Lucien in the Ottawa market for the month of February.


Project details


Home to feed art quilt
Made for the Project Quilting 15.1 - Bird House Challenge 1
Size: 11½" x 9"
Materials: Solvy water soluble stabilizer, thread, commercial and hand-dyed fabric, markers, fusible web
Technique: free motion quilting, hand basting, 


Monday, July 24, 2023

A handmade album covered with Glimpses of Antarctica

I still haven't written my posts about our Antarctica trip, but I'm one step closer - I finished my stitched piece "Glimpses of Antarctica" and used it as the cover for an album to hold a few photos, postcards, etc.  

Glimpses of Antarctica


In February, I wrote a post about a few of my ongoing hand-stitching projects. The first was a mark-making and stitching project with Gwen Hadley through TextileArtist.org (see Related links below). I made marks on two pieces of white cotton - the first was heavily marked while the second was not.

I cut up the pieces and put them back together again with lots of stitching. Sometimes it was fun, other times a little tedious and even frustrating, but I must admit that I love the finished piece.

Finished Antarctica piece mounted
at the front of a handmade album

Here are a few process pictures.

Heavily marked cloth

Lightly marked cloth   

Both pieces cut up to be re-sewn together

Stitching on the ship


While I was on vacation, I stitched quite a bit and started adding shapes and images from Antarctica. There is a penguin, whales, birds, fish, and whales blowing water (see Related links). I quickly learned that good lighting was more important than ambiance when stitching on the ship. I also had a few interesting conversations with my fellow passengers. 

A glimpse of the water

Finding a well lit bar 😊

Finishing it at home


The frustrating part came at the end of May. I didn't know if it was finished and I also wasn't in love with it. A friend gave me the perfect ribbon to add to the bottom of the piece. I added an embroidered a scene from the rocks and glaciers of the South Shetland Islands. 

Almost finished

At the very top, a scene of glaciers and rock formations
from the South Shetland Islands

The stitched scene above is a compilation of a few photos, but this is the general image.

Glaciers and rock formations in the South Shetland Islands

Making the album


In the archives of the Handmade book club, I found the perfect book - the hard cover stab bound album. The pages of the album are not folded in half, so it's easier to make a larger book. Instead, the pages are folder about an inch at the top, so that the album won't bulge after you add things to the pages.

You can see the additional fabric sewn around the piece

The album cover is made of book board covered by a book cloth. I added strips of batik fabric around the Glimpses of Antarctica piece to make it large enough to cover the board and to go over the edges by about 1". I then covered the fabric with fusible web and then ironed a very large piece of copy paper to it. This is then glued onto the book board. I did the same thing for the back, except that it was a lovely piece of batik with penguins on it.

Additional fabric is sewn around the penguins to fit the book board

There is less fabric around the back cover. The end sheet
is craft paper with vintage postcards.

Wider fabric behind the front cover with a craft paper end sheet

Photo shoot and next steps


I went into the garden yesterday and took some lovely pictures.

A very sturdy album

Album among the flowers and chicken!

The back, from a better perspective

  • This is what I've done do far: 
    • I went through my souvenirs and have organised them by days and regions travelled.
    • All of my photos have been transferred from my phone to my computer.
  • This is what's next:
    • Pick a very few pictures from each day or region to print and add to the album.
    • Write my posts!
I had Poppy keeping me company in the back yard today 😊

Poppy basking in the sun

What I learned
  • I managed to put the front cover on backwards so that the album opens up from the wrong side. I could say that it reflects the other hemisphere....but who are we kidding - I'm just accuracy challenged.
  • I have no idea why the penguins are not facing the correct way on the back cover. I only noticed after it had been glued to the board. Again...see point above!
  • I mentioned that I didn't really like Glimpses of Antarctica. It was like I was seeing the trees and not the forest. Once I placed it on the cover of the album, I knew that it was good! It really does look like a map. I had lost sight of that.
  • I know that it's going to take a while to get my trip posts done, but I do hope that it's sooner rather than later. 

Related links

Linking parties

Project details

Handmade album covered with Glimpses of Antarctica (hard cover stab bound album)
Size: 13¾ x 11"
Album: book board, craft paper end sheets, thick craft paper signatures (pages)
Glimpses of Antarctica: fabric paint on cotton, embroidery, appliqué, embroidery floss, Mouliné étoile embroidery thread, perle cotton, silk thread, organza, yarn, ribbon


Wednesday, June 28, 2023

Final Rainbow Neighbourhood Quilt Top

Hi and welcome to week 437 of Free Motion Mavericks. Have you had a chance to do any free motion quilting (FMQ) this week? I played with fusible web, Bottom Line thread and zig-zag stitching, but no FMQ. I didn't quilt my Neighbourhood Houses, but I did add many (possibly too many) fun elements to the quilt. The rest of the effects will have to be done through FMQ.

Quilt Top Done ✔


Two weeks ago I thought that I was mostly done with the quilt top. I greatly underestimated the time that it took to add the finishing touches.

The Rainbow Neighbourhood quilt top is done 😊

First Row of Houses


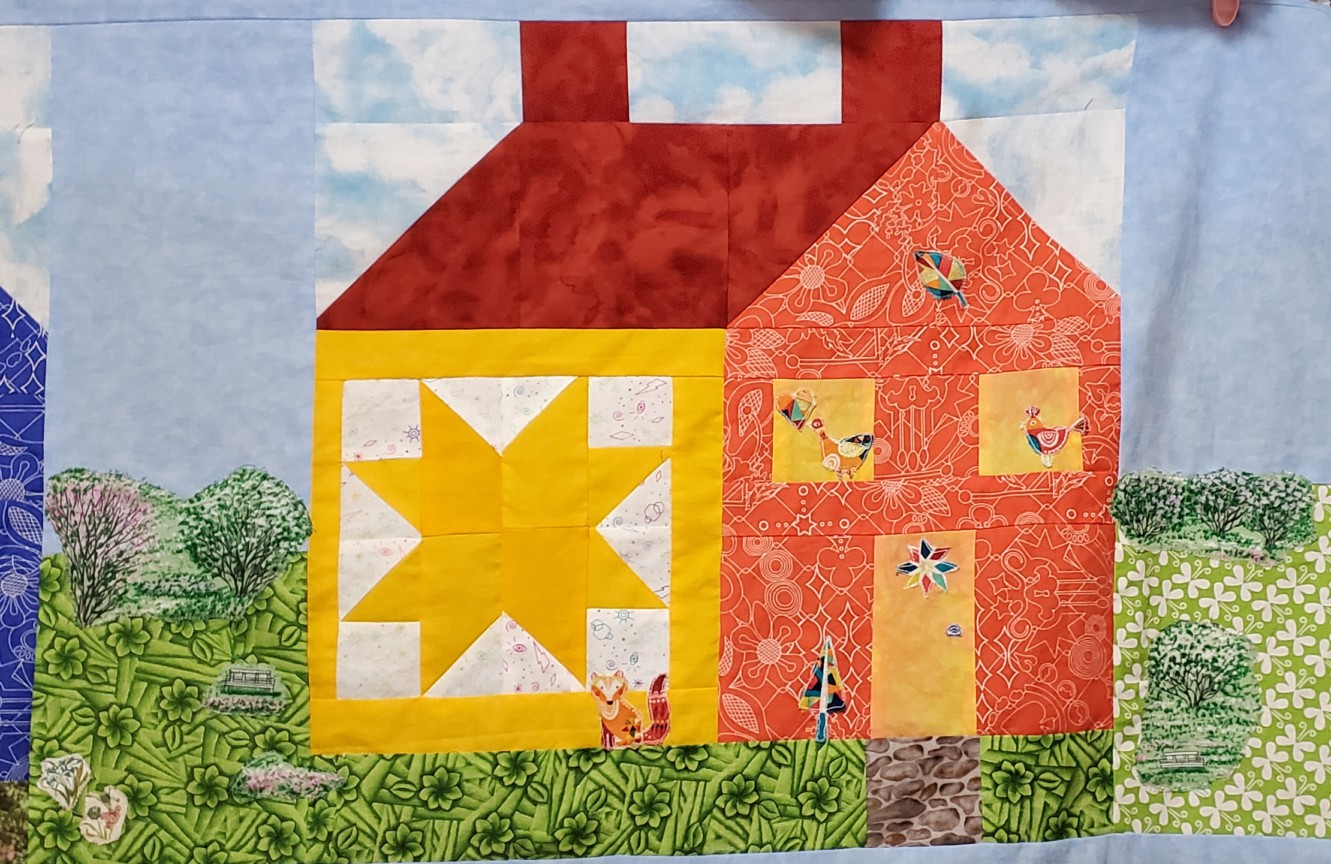
The first row of houses all have blue skies, different green yards, including fences, benches, trees and bushes from a wonderful piece of fabric that I've had forever. You can see the fabric at the bottom of this section.

Row 1 - first house

Row 1 - second house

Row 1 - third house

Here is the fabric that I used. This is the only part that doesn't have huge holes 😁

Fabric that I used for the fences,
benches, bushes and trees

Second Row of Houses


The second row of houses starts with a house and then parks and a lake. I was able to include a lot of fun elements to the lake - from a turtle, fish, a girl fishing, a frog prince and a duck😊 

Row 2 - first house

Row 2 - lake and park

Row 2 - friends' house 

There will probably be a few more elements added to my friends' house but I don't have the ones I want. I'm sure that I'll come up with or find something before I finish the quilt.

Third Row of Houses


This third row of houses are set in a night scene. I kept the elements simple, especially in the yards, with one tree and some cute critters.

Row 3 - first house

Row 3 - second house

Row 3 - third house

What I learned
  • Two weeks ago when I had finished assembling the quilt top, I didn't realise how much more work I still had to do to add elements to all of the windows, yards and then the lake and parks. 
  • I also didn't realise how fiddly it was, and how difficult it was on my eyes. I didn't seem to see well enough when appliquéing. Finally I switched to a clear and more open foot which helped a lot. 
  • As I was zig-zag stitching the various elements to the quilt, it was very obvious that this needed to be done before the quilting. It was just easier to work with a quilt top than a whole quilt with batting! 
  • It will be easy after that to just accent these with the FMQ. This will also add an extra layer of stitching so that they all stay in place!
  • I started zig-zag stitching with regular thread but quickly decided to use something less visible. I have three cones of Bottom Line thread - so I used a little bit of black and then white thread. Eventually I just finished everything with the tan thread. It worked for all of the fabrics.
  • As I was working on the quilt top, I was thinking about the eventual quilting of it. Since the Bottom Line thread worked so well, I've ordered a couple more spools of it - one taupe, which works for almost everything and a blue for the sky.  
  • I had originally thought of adding features to the quilt with the FMQ, but at this time, I think that I'll only do that for the park and lake section. The quilting will need to unite all of these sections together. 
  • As for FMQ the yards, I was considering adding shadow trees (or the outline of trees) with the quilting - all in the Bottom Line thread. This will add some lovely texture.
  • I've really had a great time participating in Sandra's QAL. The houses were easy to make and adding the extra elements made it lots of fun. 
  • I had fun, now have a quilt top for my friends and learned a lot! I couldn't ask for anything else 😊

Related links

Linking parties
I'll be linking up again to Sandra of mmm quilts' linking party for her Rainbow Neighbourhood QAL parade. Sew & Tell, Midweek Makers, 


Free Motion Mavericks


Have you had a chance to check out Kelly Young's latest book, Perfectly Pieced Quilt Backs? Many of our favourite quilting bloggers are posting their quilt backs inspired by her book. 

Gail showed us 4 of her quilt backing. Two of those quilts are FMQ with  “Wild” or “Graffiti” quilting. The FMQ is so beautiful from the back!

Gail's finish based on the "islands" backing

Gail used "Cross Purposes" as her inspiration for this backing

I hope that you have a great week. It's now your turn to link up!

You are invited to the Inlinkz link party!

Click here to enter