Thursday, February 24, 2022

Filling in a couple of strips on Free Motion Mavericks

Welcome to week 370 of Free Motion Mavericks. I managed to put in a few hours of Free Motion Quilting (FMQ) on my son's Version 2.0 quilt this week. 

Bird feathers and playing cards

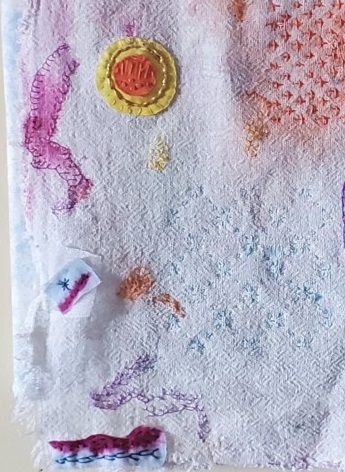
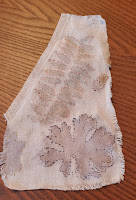
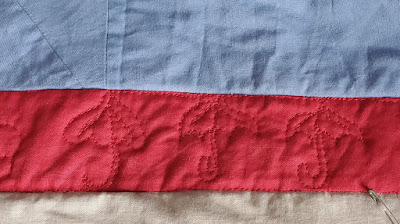
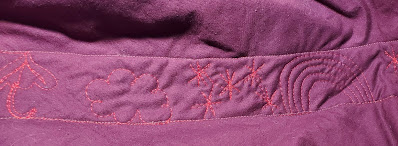
This week I choose to FMQ a couple of the easier strips on my son's quilt. This first one is a strip of bird feathers. They are a part of the quilt that symbolise his First Nation ancestry. It was difficult to FMQ plain bird feathers because as a quilter, feathers are always so much more elaborate.
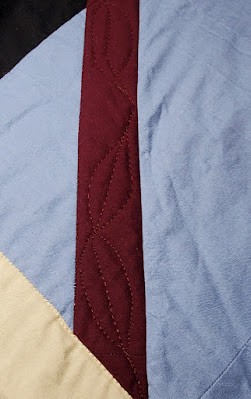
FMQ Bird feathers

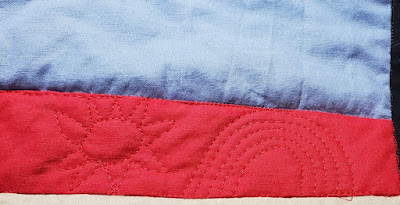
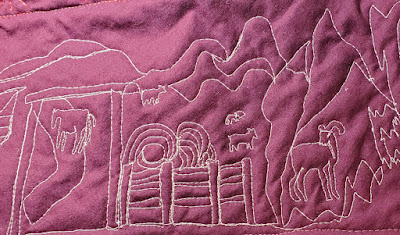
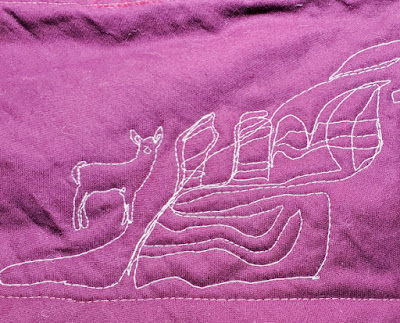
In theory the playing card strips were easier but in practice, let's just say that I had to take out the seam ripper for a couple of the spades! I know, it's really just an upside down heart - but my fingers and mind just were not playing well together! 😊 After the second time I ripped the same spade out, I decided to draw them using a Frixion pen. They do leave a tiny echo on the fabric, but barely noticeable and certainly better than badly FMQ spades!
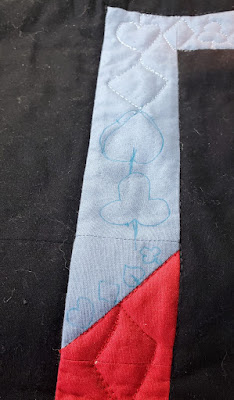
Drawing them in

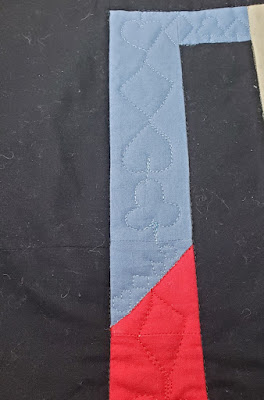
Final result - after using the seam ripper


I also finished the weather strip that I had begun on the last Free Motion Mavericks' post. 

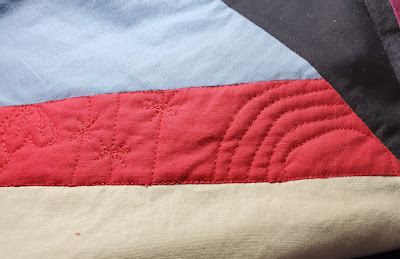
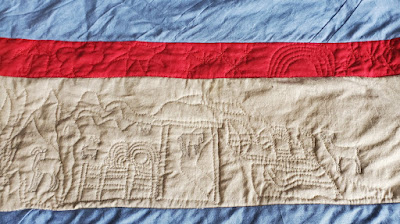
Finishing the weather strip from last time

What I learned
  • To get ready to FMQ bird feathers, I searched the internet and found a couple of very interesting posts by Lori Kennedy about quilted feathers - and not just the usual quilty feathers. I've included the links below - you may want to check them out. One day I will make these for myself!
  • I feel more confidant FMQ this large queen size quilt. I'm getting used to ensuring that there is no drag to keep me from quilting properly. I'm also getting better at slowing down (mostly!)
  • I realised that I need more light when I'm quilting it - so I moved my table light to a different angle so that I can better see beneath my sewing machine. That also made a difference.
  • I've been working on the different designs for the quilt and will be doing some research to figure out how to best FMQ my ideas.
Related links

Linking parties

I'll be linking up to many great parties this week! Remember to link up your posts below! Put your foot down, Needle & Thread Thursday, Patchwork & Quilts, Off the Wall Friday, Monday Making, Design Wall Monday, 15 minutes to sew 2022

Free Motion Mavericks

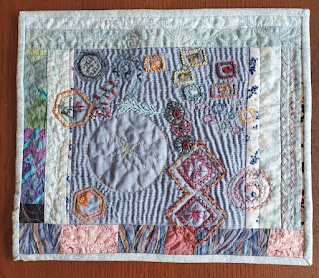
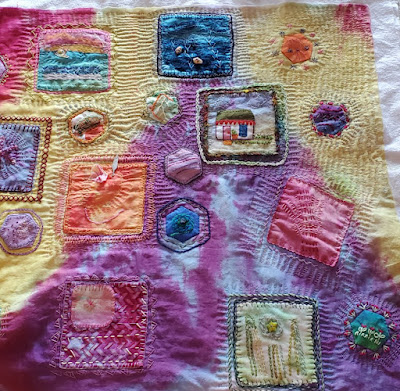
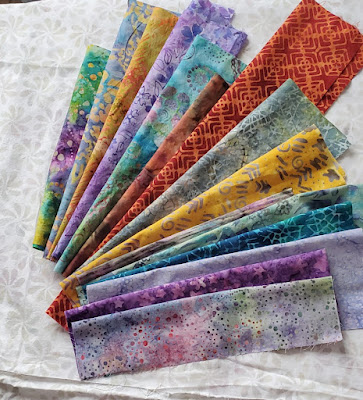
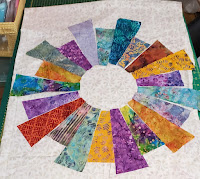
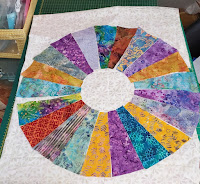
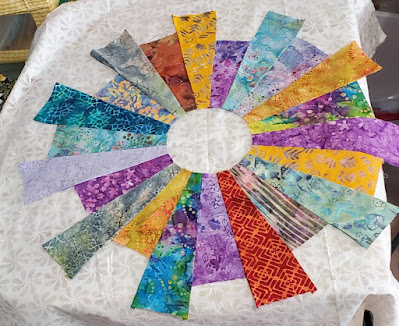
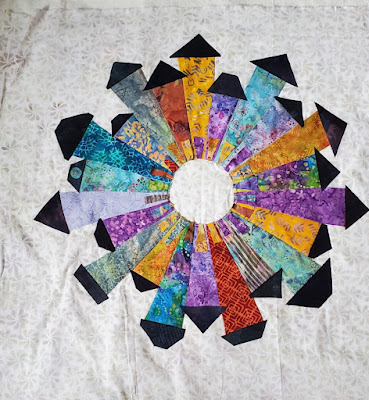
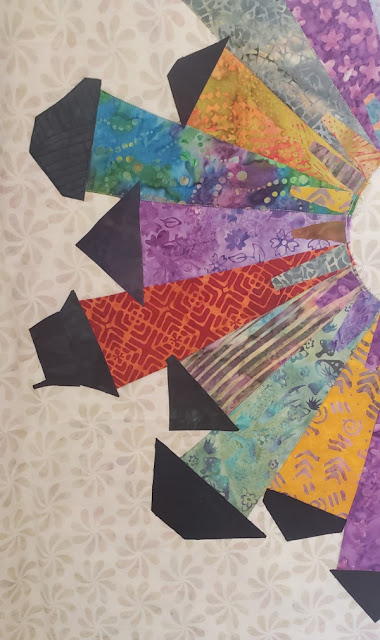
Thank you for linking up last time. Quilting Gail had a secret quilt that she was finally able to share with us. Her quilt was in the Island Batik catalogue and she was able to show us the quilt, now that the fabrics are available in stores. If you didn't see her quilt, make sure to check it out! 

Check out Quilting Gail's beautiful batik quilt!

It's now your turn!

You are invited to the Inlinkz link party!

Click here to enter

Saturday, February 19, 2022

Please let me play

I've been very busy quilting during the last few weeks. It's been such fun! However, I realised that with all of these busy projects, I'm missing the meditative calmness that slow stitching brings. So today I spent some time finishing up my "Please let me play" piece.

Adjusting the composition

In the Out of the Box Textile Artists Group, we've been learning about composition. I've read a lot about it, but it always feels more intuitive than just following rigid (or black and white) rules. I get the feeling that there's a lot of gray area in there to play with. Sometimes you know why a piece isn't working but at other times, it's not as clear.

That's why I turned to my artist friend, Elaine Quehl for help on this piece. Here is my  final piece.

"Please let me play" - embroidery on a clean-up rag

When I asked Elaine for help, the image below is what the piece looked like. The colour on this photo is not very  good, but you get the idea. I knew that I would add things at the bottom but wasn't sure if the composition was the best that it could be. Elaine agreed with adding pieces at the bottom and suggested that the bright fuchsia piece on the left was distracting. Although it was my favourite fabric, I had to agree with her.

Composition on the design wall, before getting advice

I then played with fabrics and came up with this. I replaced the bright pink piece with a lighter one, but after I had stitched it, I ended up removing it - it wasn't the colour so much as the extra piece.

Playing with possibilities

I added pieces at the bottom as a type of echo of the top strip but kept the colours lighter. You can also see that I played a lot with embroidery stitches on both the fabric pieces and the original rag. I have been following Mirjam Gielen of Mirjam Textiles on Instagram (see Related links below). She has a very organic way of stitching that I find fascinating, so I bought her Basic Stitches e-book and used a few of her stitching variations on this piece. To keep it subtle, I used regular sewing thread. 

Trying fun stitch variations

Keeping the added stitches subtle

As I was wondering how to hang this piece - it because obvious - on a clothe line! I covered a 14" x 14" canvas with very light sky fabric. I then attached a piece of clothe line with tacks at the sides of the canvas and used wooden clothes pins to hang the piece.  

Creating my own clothe line to hang the piece


"Please let me play" and Chevy - pride of place on the art wall

To find out how this piece came to be, check out my original post and see Venessa Marr's work in Related links below.

#100dayschallenge2021 on Instagram


Today "Please let me play" is my last post of the 100 days challenge on Instagram. I started the challenge on August 6, 2021.  I did the math and I'm very impressed! It took me 197 days to do the 100 day challenge - that's an average of a post every second day! Wow! 

I started the challenge with slow stitching. I created a piece, "Mixing it Up" that incorporated both free motion quilting and embroidery. I then worked on stitching some eco printed fabric and also finished my first concertina book "Best and Worst of Times".

Mixing it Up with FMQ and embroidery


Slow stitching on
 eco-printed fabric


Finished my Best and Worst of Times concertina book

Recently I also posted more traditional quilting projects since I was doing less slow stitching. You can see my projects by going through my blog or my Instagram. The one piece that I'm still working on is the Traveller's Blanket. I hope to finish it before the end of the #100dayschallenge2022. 

Slowly stitching the background of the Traveller's Blanket

I hope that you'll continue joining me on my stitching journey, either through my blog and/or Instagram. I really appreciate all of your encouragement. If I keep posting at the same rate as the last challenge, I should be finishing up just before my retirement in October 2022 😊😎

What I learned

  • I have really enjoyed stitching on a piece of cloth that symbolizes my artistic journey. The message is very apt because frankly all I want to do is Play!!! (as opposed to work)
  • There is so much to learn about composition and I hope that it gets easier with experience. Thanks so much Elaine for your advice!
  • I've also learned a lot on my #100dayschallenge2021. It gave me the incentive to play with slow stitching and finish/advance some of my UFOs or WIPs. 
  • I'm going to try to re-incorporate slow stitching into my daily routine. I feel like I need the calmness.

Mirjam Textiles

Related links

Linking parties

I'll be linking up to many fun linking parties. Let's see what's going on! Put your foot down, Finished or Not Finished Friday, Off The Wall Friday, TGIFF with Quilting Gail, Peacock Party, Beauties Pageant, Patchwork & Quilts, Slow Sunday Stitching, Oh Scrap!, 15 minutes to stitch 2022, Monday Making, Design Wall Monday

Project Details


Please let me play
14½" x 13" on a 14" x 14" canvas
Material: clean-up rag spotted with dye, hand-dyed fabric scraps, organza, embroidery floss, perle cotton (hand-dyed and commercial) and thread - attached to a fabric covered canvas with clothes line and wooden clothes pins
Techniques: embroidery, boro and sashiko


Sunday, February 13, 2022

Dresden neighborhood quilt class and project

I may have been relatively quiet on the social media front, but this time it's because I've been busy quilting 😊 I love being able to say that! Here's the latest class that I've taken.

Dresden Neighborhood Quilt Class

I've loved the Dresden Neighborhood Quilt since the first time that I saw it...but I also saw the word "Dresden" in there and figure that since I would rather not do needle-turn appliqué again, that this wasn't for me. However, after seeing a class offered through my local guild, I thought that it would be easier if I was sharing the pain with a virtual class. I was so thrilled when I learned that all of it was sewn by machine! 😊

My Dresden Neighborhood quilt so far

Since I wasn't sure what fabrics to use, I googled "Dresden Neighborhood quilt" and looked at tons of pictures of these finished quilts. All of them are great, but I was drawn to a couple of them that I uploaded onto my phone to study them. The ones that I liked had strong colours with a light background. 

Since, of course, I wanted something funky, I used bright batiks that have a small range of colours on them. I used the very orange-on-orange and the gray-on-yellow batiks as my starting point. From there I added other colourful batiks. Many have purple and colours that are complimentary to orange and yellow.

Fabric choices

During the class, I cut out my house fabrics with a template. I'm not sure what happened but the template was not the size it should have been so I ended up needing 21 houses instead of the 20 from the pattern. When I sewed them together (I was so nervous!), I thought that I would have to do some major fudging to make it work, but finally I just added one more house (that's 22) to create a perfect circle....no fudging required 😊

Houses cut to different heights -
still 21 of them
Houses before cutting
 and sewing


After sewing them together and adding one more house, it was ready to be tacked onto the background.

22 houses sewn together

At this point, the class members had a discussion with our teacher, Michelle Banton of Little Pups Designs about whether to sew the pieces on or to quilt them on, that is to add the batting and backing right away before doing more than tacking the houses to the background. I opted to add the batting right away, so I sandwiched it and started quilting as I sewed things on. 

After making the houses, the fiddly but fun part starts - finding the perfect combination of fabrics for the rooves, doors, windows and whatever else is to be added 😊 I used some scraps of very dark hand-dyed fabrics that a friend gave me to make all of the rooves. The doors are all made of the same fabrics as the houses.

Adding roofs and doors to the 22 houses

I made some slightly more elaborate rooves and started adding things such as awnings and windows. 

More elaborate rooves with other fun features

FMQ around the houses and some of the rooves

I've added adhesive bonding web to more hand-dyed fabrics to add the windows, etc. I haven't had the iron out for ages before the last two projects. With my mini ironing platform and small cutting mat, I can iron and cut small pieces anywhere in the studio.

Adding adhesive bonding web to the fabric scraps

What I learned

  • If I left the FMQ to the end, I know that I have too many other projects right now and would only finish it in a few months.
  • My other Dresden needle-turn
    appliqué project
    Another incentive to get this mostly done is that our teacher holds a quick show and tell two or three weeks after the class so that we can share our progress. Since it's on Zoom, I will be receiving all of the participant's pictures of their project and arranging them in PowerPoint. It really is the best and easiest way to see them virtually. 
  • I've made this project larger than I usually do so that I can hang it up in our entrance. I can't wait to see it up there all finished!
  • FYI, the quilt here is my first (and last?) Dresden needle-turn appliqué project.
  • It just occurred to me that there must be a way to make the Dresden shape using a technique like English Paper Piecing. I think that it would make it easier to stitch down....I'll have to check that out! 

Related links

Linking parties

I will be linking up to many fun linking parties this week. Why not check them out? Patchwork & Appliqué, Oh Scrap!, Put your foot down, Off the Wall Friday, Peacock Party, Design Wall Monday, Monday Making, Free Motion Mavericks with Muv, Midweek Makers


Thursday, February 10, 2022

Weather and nature on Free Motion Mavericks

Welcome to week 368 of Free Motion Mavericks. Since the weather is all over the place, I thought that I would tackle some weather images as well as keep heading east on Version 2.0.

FMQ all kinds of weather

In my son's first quilt, my mother had quilted one of the strips of red fabric with rainbows. This was one of the designs that celebrate nature.

As well as rainbows, I wanted to add different types of weather onto that strip. I've got sun, rainbows, snow flakes, clouds and umbrellas. 

Sun and a rainbow on the right side of the quilt


Three umbrellas for rain!


Umbrellas, clouds, snowflakes and a rainbow seen from the back of the quilt.

FMQ nature

As you may recall, the beige strip that runs across the quilt is depicting various aspects of Canada, from the West Coast towards the East. I'm now in the middle of the prairies. I transitioned from the mountains onto a ranch and then the Canadian Badlands (yes, we have them too!)

Leaving the mountains, I added a mountain goat. After that came the ranch, with a fence, bales of hay, cattle in the pastures and a horse on the path.

A ranch and the Badlands


Adding a ranch after the mountains.

If you wonder how I managed to FMQ cattle, a horse, a mountain goat and a deer, this is my secret. From images on my computer screen, I use tracing paper to trace out the animals in the size that I want them. I then FMQ over the tracing paper, following the image. 

FMQ the cattle over the traced image
Adding the deer by stitching over the tracing paper

After the ranch comes the Canadian Badlands located in both Southern Alberta and Saskatchewan. It doesn't really compare to the Badlands of South Dakota, but it's still very special. It's where Alberta's Dinosaur Provincial Park is located.
 
The Canadian Badlands and a deer

What I learned

  • As I get more experience, it's getting a little easier to quilt on such a large (queen size) quilt. I find that my movements are rather jerky, and that's from not having the quilt laid out correctly. There are lots of areas of potential drag!
  • I started doing the strip with the weather because otherwise it will take me years to get this done. I'm looking for other places on the quilt that would be relatively easy to FMQ. I keep referring to the PowerPoint that I made of the original quilting and adding notes on potential designs. After the weather, there will be sports, birds, playing cards, and a few other fairly easy designs to add.
  • I'm thrilled to say that I used the Glide thread on the red - it quilted amazingly! I'm so happy.

Related links

Linking parties

I'll be linking up to many fun linking parties. Why not check them out...after you've linked up here! Midweek Makers, Put your foot down, Needle & Thread Thursday, Off The Wall Friday, Finished or Not Finished Friday, Peacock Party, Patchwork & Quilts, 15 minutes to stitch 2022

Free Motion Mavericks

It was a real party last time - thanks to everyone who linked up, whether they were doing FMQ or not! We're happy to have you all here.

Denise at For the Love of Geese created this amazing quilt for a veteran for Quilts of Valor. Go visit if you didn't see it!

Denise's very patriotic quilt

It's now your turn!

You are invited to the Inlinkz link party!

Click here to enter