Showing posts with label UFO. Show all posts

Thursday, February 16, 2023

FMQ Wild Hexies and Making Flying Geese

Hi, welcome to week 420 of Free Motion Mavericks. I have a free motion quilting (FMQ) project to share as well as the flying geese for Round 4 of the SAHRR. I'm glad that you can join me today.

FMQ Wild Hexies, a Mystery UFO


I called this a mystery UFO in my July 2021 post because when I wrote the post, I had a partially made quilt on my design wall with extra fabric in a project box, but no pattern! Since I had been inspired to make the quilt by seeing a finished version on someone's blog, I asked if any of my readers could help me. Wendy of Pieceful Wendy found the post for me - Nancy of Grace and Peace Quilting had made the quilt. I couldn't find the pattern because it was in one of my digital quilting books! Thank you Wendy and Nancy 😊

Mystery UFO is finally getting FMQ

The pattern is called Strip Lash from Stripology 2 by GE Quilt Designs. You can read about my making adventures in my previous post (see Related links).

I stitched-in-the-ditch around the hexies and then each row of hexies. Then I started FMQ the top and bottom partial hexies with some of my favourites - elongated loops (I call them cursive l's), twist (j's and l's) and then some triangle dot-to-dot patterns.

FMQ the top and bottom triangles or partial hexies


FMQ elongated loops (cursive l's), twist (j's and l's) 
and triangle dot-to-dot patterns

This is not a great picture but you can see my Swirling Stars in the top row. The next row of hexies contain a sun, clouds, and snowflakes.

FMQ the partial hexies and the first 2 rows

You can see glimpses of the sun, clouds and snowflakes in the image below.

Glimpses of the sun, clouds and
snowflakes designs

Next came a row of trees.

FMQ a row of trees

Finally some houses.

A row of houses

If these look familiar it's because I FMQ them in the Places and Communities section of my son's Version 2.0 quilt. The designs are from Lori Kennedy's book, Free Motion Machine Quilting 1-2-3.

Round 4 of SAHRR


This week we got to add flying geese to our quilt. I wasn't sure what method to use, but I was inspired by Denise of The Quiltery - For the love of geese, to make some foundation paper pieced flying geese. I checked out one of her patterns and drafted my own pattern.

Round 4 - a top row of flying geese was added

Here is a close up of the 5 flying geese that I made using my own foundation paper piecing pattern. 

Close-up of flying geese and wonky stars

You may notice that my pattern below is for 6 flying geese. Let's just say that I made every mistake possible, which included cutting my pattern while trimming. I'm very lucky that it happened on the 5th goose! I took it as a sign that 5 was plenty 😊

My foundation paper piecing pattern

Extra flying geese blocks

After I finished the top row and attached it to the quilt, I decided to see how else I could make these blocks. I vaguely remember that they weren't that difficult to make. I found a post in Simply Handmade Everyday by Kristin Esser with a tutorial on making flying geese blocks 5 ways. Her 5 ways didn't include foundation paper piecing! 

I ended up using the Oversized Stitch and Flip method since I'm accuracy challenged! They worked out very well. I now have 5 extra flying geese on the design wall and have fabric to make a few more. I'm going to see what Round 6 brings before I add them to the quilt.


What I learned
  • For my FMQ, I should have spent more time practicing my Swirling Stars design. The fabric is so busy that looks fine.
  • I love Lori Kennedy's pictural designs and am looking forward to making cars, pencils, apples, etc.
  • I actually know who the baby quilt is going to, so I'm going to have to figure out how to quilt a teddy bear!
  • I considered using the No Waste method that makes 4 flying geese blocks at a time, but those blocks all have the same middle piece. I wanted them to be different, so that method was out.
  • For my SAHRR quilt, I ended up re-doing the bottom row. I had added fabric to make it fit, but I ended up not really liking what I had done. I was also surprised that the hourglasses in the bottom row really didn't show up. The fabric with the multi-coloured dots just faded away. I added two bright hourglass blocks and then re-did the corner blocks. I like it much better.
  • I'm not sure if I have enough fabric to make a much larger quilt. I would rather incorporate the extra flying geese blocks into the next row if it makes sense. I guess I'll figure that out on Monday!
Related links

Linking parties
I'll be linking up the SAHRR quilt at Anja Quilts. Let's go see how everyone is doing on their quilt! Put your foot down, Sew & Tell, Midweek Makers, Needle & Thread ThursdayFinished (or Not) FridayCan I Get A Whoop Whoop?Peacock Party, Patchwork & Quilts

Free Motion Mavericks


We've had some lovely FMQ last time! 
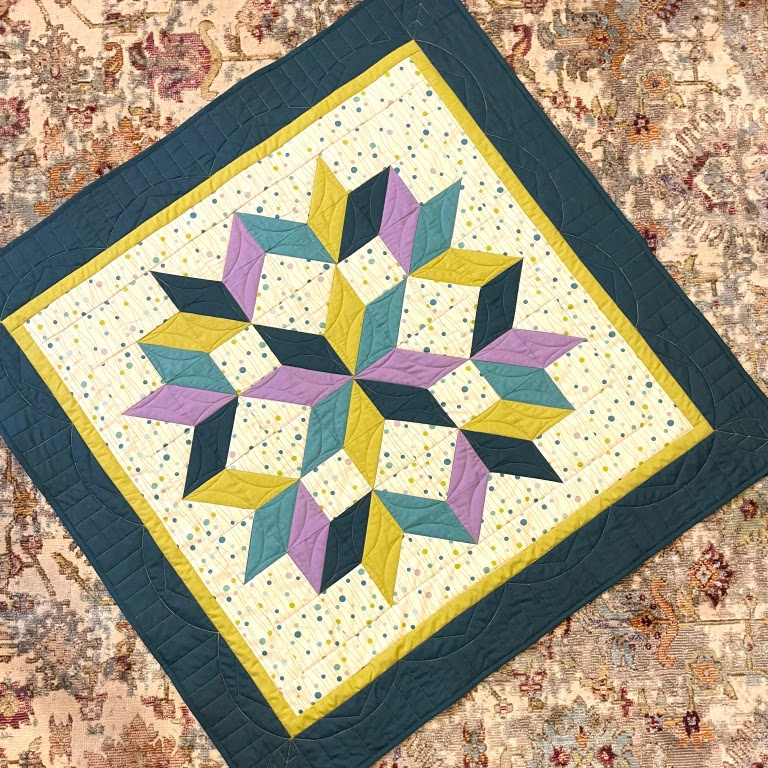
Chris from Chrisknitssews made this lovely Carpenter Star baby quilt. She quilted it with gentle curves and lines. What a lucky baby!
Carpenter Star baby quilt by Chris

Melva is carefully quilting a quilt for a client. It needed some work, but she's doing a great job (I peaked to a later post!)

Melva carefully quilting a quilt

Gail made a second fabulous Lone Star quilt in some beautiful Island Batik pre-cuts and dark green. She FMQ it with small arcs in the diamonds and fake feathers on the grey. 

Gail's fabulous Lone Star quilt

Frédérique of Quilting Patchwork Appliqué made a baby quilt for the neonatal care unit. She FMQ the centre diamond densely and then added light curves for a soft and smooth quilt.

baby quilt for the neonatal care unit by Frédérique

It's now your turn 😊

You are invited to the Inlinkz link party!

Click here to enter

Thursday, June 24, 2021

Thread, Tension & Free Motion Mavericks

Welcome to week 337 of Free Motion Mavericks. Here is a short update of what's going on with Version 2.0.

Thread & Tension 

Whether I've wanted to or not, I've learned a lot of things making my son's Version 2.0 quilt. At the beginning it was math - the hard way, and now it's quilting with black batting, choosing the thread and making sure that my thread tension is good. 

Back and front of stitching-in-the-ditch

Stitching-in-the-ditch


I was really hoping that I could use the same colour of thread for the back, but still have the front thread match the fabric. As you probably know, that's not always easy to do. I believe that this is the first time that I've worried so much about my thread colours and tension on a quilt. Since the quilt is made up of solid fabrics, the quilting will show, no matter what. It's just a matter of how much.

Struggling with the tension

Working on the back thread


In my last post about this quilt, I was wondering if I should use heavy or light thread. Well, I made it easy on myself...I am using mostly cotton, and essentially what I have on hand. I did pick up more dark bobbin thread but when I tried out the dark thread with the light top thread, there was no way that my tension was going to be perfect - so I've opted for a lighter more pinkish bobbin thread to go with the beige and red top threads.

Quilt sandwich ready to be quilted
So far, it's worked out fine. I started stitching-in-the-ditch of the red thread on top and the pinkish thread in the bobbin. That was the photos on top. My backing is made up of two different darker colours - maroon and burgundy. I sampled both of them on my quilt sandwich and it will be fine.

It's been a long time since I worked on a very large quilt. I do love free motion quilting (FMQ) but it is more of a challenge with a large quilt. The two long red strips have now been stitching-in-the-ditch. I'll get the other two small ones done and then start on the other colours. I will run out of the pinkish bobbin thread so back to the store I'll go. 


My FMQ set up for a large quilt

This is my set up for FMQ this quilt. I have a table on one side and a chair on the other to hold the weight of the quilt when necessary. I also moved a couple of my art pieces on the wall since they keep getting bumped around. Thanks for sharing the beginning of this FMQ journey.


What I learned
  • It's good to want to get the tension right but I'm now going to stop worrying about my thread. It will be fine as long as I don't go too fast...which will be difficult to do on such a large quilt!
  • I'm looking forward to finding designs in my books and online. I already have quilt sandwiches ready for practicing 😊
  • Thanks to the readers who left me some ideas on the thread and what to do about the cable design around the border. I will try to enlarge the pattern and maybe even see if I can add a little something to it - echoing?. There's lots of time for that since it's likely the last thing that I'll FMQ.
Related links
Linking parties
I'll be linking up to some great linking parties, so why not check them out. This will also be my One Monthly Goal (OMG) post since my goal for June was to sandwich the quilt. Well that's done!

Free Motion Mavericks


It's now time to celebrate all things quilty - from hand quilting to quilting with super duper computers! We've been following Frédérique as she works on her Drunkard Path quilt. What a little beauty! I love the minimal but effective FMQ that she has done. If you didn't catch her finish, check it out!

You'll want to check out the whole thing, but this
picture with details is lovely!

Now it's our turn!

You are invited to the Inlinkz link party!

Click here to enter

Thursday, June 10, 2021

Planning and Free Motion Mavericks

As you may have read, I finished the quilt top for Version 2.0 of my Mother's quilt to my Son as my May One Monthly Goal (OMG). For June, my OMG is to sandwich it. I trimmed all of the threads on the back of the quilt top, pieced the back, and it's now ready to be sandwiched!

Planning the Free Motion Quilting (FMQ)

My mother made the quilt in 2000, for my son's 9th birthday. All of the hand-quilting were motifs of things in my son's life, such as nature, school, books, sports, math, music, friends, mine heads (many of our ancestors were minors in Northern Ontario) as well as symbols of his heritage. The centre was the sun and the border was a chain. 

Here is one of the mine heads

Baseball ball, glove and bat


Mom wrote an account of each of the designs in a duo-tang that she gave to Stéphane. By-the-way, she named the quilt "La courte-pointe Stéphane".

I'll be using the original quilt as well as her notes to come up with quilting designs. Some will be the same while others will be my own, while still trying to illustrate Stéphane's interests.

Mom's template of a book, with numbers and notes used elsewhere on the quilt

The quilted book design

Tonight I coloured in the last copy of the pattern that I have of the quilt that Stéphane drew to scale. The quilt isn't exactly the same, especially the scale, but close enough! 

My map of how my mother quilted it.

I've prepared a couple of quilt sandwiches to try out some of the motifs after drawing them. I'll practice a bit on those and then create another sandwich with the quilt's fabrics and batting, to audition the threads that I'll use. The threads will match the quilt colours, but I'm not sure if I should go with a heavier or lighter thread. My instincts say heavier, but I'll see the effect when I practice. I had better figure it out soon because I may have to order thread, depending on what I choose.

I also have a template for the chain in the borders (which was probably my mother's) but since the borders are not the same width, that could be tricky. If anyone has any ideas on the thread weight and the border, I'd appreciate them 😊

What I learned

  • I had a really nice time tonight drawing the quilt, reading my mom's notes and then matching them to the quilt. It was like being there with her.
  • I can't wait to get started. I will probably check out some of the FMQ books that I have to find motifs to add to the quilt.
  • The hard part will be to not quilt it too densely. It has to be quilted more densely than my mother did because that's one of the reasons the quilt didn't last.
    Version 2.0

Related links

Linking parties

I hope that you'll be able to link up below to Free Motion Mavericks, even if you don't have any free motion quilting to show us 😊 I'll be linking up to many fun linking parties. Let's see what other's are up to! Design Wall Monday, Midweek Makers, Put your foot down, Needle & Thread Thursday, Can I Get A Whoop Whoop?, Finished or Not Finished Friday, Off the Wall Friday, Patchwork & Quilts

Free Motion Mavericks

Welcome to week 335 of Free Motion Mavericks.  We had a lovely turn out last time. Thanks for linking up and dropping by!

This week, I thought that I would mention Deb's quilt, Out to sea. Deb of A Scrappy Quilter is working hard on her free motion quilting skills and did a great job on her quilt! If you didn't catch it, check out her post - the back of the quilt really shows the quilting!

Out to sea! by Deb of A Scrappy Quilter
Now it's your turn!

You are invited to the Inlinkz link party!

Click here to enter

Thursday, May 27, 2021

May's OMG and Free Motion Mavericks

I didn't manage to sandwich the quilt, but when I read my One Monthly Goal (OMG) for May, it stated " My OMG for May is to finish piecing Version 2.0 of my Mother's Quilt to my Son". So thank you Patty for keeping us motivated! My OMG for May was achieved!

Piecing Version 2.0

There isn't much to tell except that when I came to prepare the back I found that I didn't have enough fabric 😒. This is why I tend to work with scrappy quilts - you can't really run out of fabric! This isn't a pretty picture but I just wanted to show everyone that it was pieced. Hubby was kind enough to hold up the quilt for me in the only space we can see it all.


Version 2.0 is pieced!

What I learned

  • What can I say....figuring out how much fabric I need shouldn't be beyond me but oh well.... Thank goodness that it's Kona Cotton so I was able to order another 4 meters. 
  • It took me a while to figure out how wide I wanted the borders to be. The quilt, without the borders, is slightly smaller than the original. I ended up adding 6" borders at the bottom and top, and 8" borders on the side. This will make the quilt roughly 80" x 95". 
  • I wanted the quilt to fit on a queen size bed if need be.
  • I've ordered the fabric from Sew Sisters in Toronto. It should be here today or tomorrow.

Related links

Linking parties

I'll be linking up to Patty of Elm Street Quilts' Finish link up for the May One Monthly Goal as well as other fun parties. Let's see what's going on...and remember to link up to Free Motion Mavericks below. 


Free Motion Mavericks

Welcome to week 333 of Free Motion Mavericks. I really don't like picking just one quilt to feature, so this time I've decided not to! 

I want to highlight Turid from Norway's finished black and white improv quilt, Punk. I had to laugh at the dinosaurs helper! You can see the whole quilt on her post.

Turid's quilted improv quilt and her dinosaur helper!

Here is Gail's quilt - that FMQ is pretty impressive. This quilt is her entry for the Island Batik Blog Hop. 

Gail's Island Batik Blog Hop quilt

Kathy of Kathy's Quilts was in the process of FMQ her Sister's Scrap Challenge quilt with wavy lines and loops. She was having lots of fun and trying to make her deadline!

Kathy quilting her challenge quilt

I hope that you will link up to this week's Free Motion Maverick's party.

You are invited to the Inlinkz link party!

Click here to enter

Wednesday, December 09, 2020

Happy 400th post and Free Motion Mavericks

This last month had many special events - the 300th linking party of Free Motion Mavericks, my first presentation about blogging and learning, and my 400th post at Quilting & Learning: What a Combo! I hope you don't mind if I use this Free Motion Mavericks post to reflect on my blogging journey.😊

Blogging and online learning presentation

Last month, I made a 15 minute presentation for the Out of the Box Textile Artists group. The theme was doing things online related to our textile fibre art. One presenter has been trying to exhibit and sell her work online to replace the exhibits that she was supposed to be in. She had mixed results. The other presenter has been making and selling on Etsy for a while. It was interesting to hear about her experience.

I was the last presenter and I had a slideshow about blogging and online learning. I really enjoyed the process of writing the presentation since it was a great time to reflect and see what I've done, and how my blog and my art has evolved over time.

I thought that I would share some of the things that struck me as I reflected on these last eight years. Here are some of the relevant slides. You should be able to click on the slides to see them larger.

Those last few reasons for blogging evolved over time

I then went on to explain what various blogging terms mean since many of the pieces that I've exhibited with this group have come from these types of events, and many participants are not familiar with them. I mentioned:
Quilt-Alongs help me create beautiful UFOs!
  • linking parties, 
  • quilt-alongs, 
  • finish-alongs and 
  • blog hops 
This is what I realised learned:
  • Although I enjoy quilt-alongs, they have resulted in more UFOs than finished pieces.
  • Grandmother's Choice block
    My success rate is not very good with the various finish-alongs, except for the One Monthly Goal (OMG). I'm sure that it's because we only choose one goal - and it doesn't have to be a finished quilt, just a completed step in the project.
  • My favourites are the blog hops, in all of their permutations. I try not to participate in too many of them. They usually have fairly broad themes so that I can make something that catches my fancy. I also love to see what other bloggers have made - there is usually so much diversity.
  • The biggest drawback to blog hops is everyone's great comments. I love to read them but I've yet to answer even a small percentage of them.

Becoming more involved

My blog took on a bigger presence on the web when I hosted two blogging events in 2017.


Celebrating - Fêtons 150
What I realised was that Celebrating - Fêtons 150 was the perfect event to host because it allowed me to do all kinds of fun research on the Internet and then post great patterns and events that were happening around Canada's 150th. I did make a few projects but it wasn't as intensive as the Learning Quilt-Along.   

I couldn't talk about being involved without mentioning Free Motion Mavericks! I'm glad that I am co-hosting with Muv because it brings me back to my first love, FMQ! It also ensures that I blog at least every fortnight - because sometimes it's hard to do more than that.


As I reviewed my blog, for the first time I had a look at my original visitation numbers for that first year. In that first post I wrote that I didn't know if anyone would be reading this. Well, it turns out that in 2012, I wrote 8 posts and had 18 views and one comment. Thank goodness for friends and family.😊

In 2013, I got tired of posting on Facebook (I'm not a fan), so I added a "Follow by email" from Google's feedburner to my blog.  I almost never check the numbers but when I did last month, I was intrigued by the results. The subscribers took a serious upward turn in 2017, the summer and fall that I hosted the two blogging events. It seems that even if very few quilters were participating in the Learning Quilt-Along, many were watching from the side lines. 

Stats from my "Follow by email" link

Learning Online

The second part of my presentation was about learning online. I've been learning online since I first started quilting - from reading fellow bloggers' posts and tutorials, to the odd YouTube presentation. I started buying Craftsy courses at that time and I own a ridiculous amount of them! 

This year, however, saw a huge growth in online learning opportunities. I love online courses since they are usually relatively inexpensive and I don't have to leave my studio (did I ever mention that I'm a home body?) Of course these are also responsible for a number of UFOs but as I start using some of the skills and ideas that I've developed in earlier workshops, I think that it's all worth it.  


Gratitude Journal
made last week


Well, my learning journey is far from finished as you may have seen in my last post! In a year and 11 months, I hope to go back to hosting at least one blog hop a year. I'm still learning so much from my fellow bloggers. Quilters are a very generous group and I'm very grateful to be part of this little corner of the virtual world. 

Thank you so much for your presence in my life. I am grateful to all of you for sharing my journey.


Linking parties

Free Motion Mavericks

Wow! What a great turn out last time. Thank you soooo much! I was hoping to start on the Pinwheels and Stars quilt but as I mentioned, it's not something that I can or want to fudge right before the post 😊. For everyone who left an encouraging comment, THANK YOU! As I was re-reading your blog links, leaving comments (finally) and thinking about the "out of this world" quilt centre (thanks Alycia), I prepared a clear plastic piece to draw on, over the quilt top and am getting a plan for starting. So thank you everyone!

There were such amazing and different quilts linked up last time and as always, impossible to choose what to highlight, so I'm going very close to home to show you Sandra's The Final Season quilt about the plight of trees, in Canada and everywhere.

The Final Season by Sandra at mmm quilts

It's now your turn - and I'm going to publish early to get the full enjoyment of my 400th post!


You are invited to the Inlinkz link party!

Click here to enter

Thursday, November 26, 2020

Finished stars and making plans on Free Motion Mavericks

Welcome to Free Motion Mavericks, week 308. The stars on the Pinwheels & Stars Baby Quilt are done. In this post I'm going to wrap up the free motion quilting (FMQ) of the stars and plan the next part of the quilt.

FMQ star designs

At the end of July, I proposed seven possible FMQ designs for the six stars on the quilt. By November, here is what I ended up with. If you missed any of the posts, the links are in Related links below.


Making plans for the negative space

I designed the quilt so that the centre could almost be a wholecloth quilt. I've made a couple of quilts like this and love that some of the sides have blocks but that the centre is all negative space. This time, I'm going to be brave about FMQ the centre. It's going to be in colourful thread that will NOT blend in! That is a very scary thing to do, but I do believe that if the centre part is well planned and practiced, that it should be fine! This is not a project to do the night before it's due 😮

Here is the quilt so far.

All of the pinwheel and star blocks have been FMQ

A better image taken during the day 

This is my initial idea for FMQ the centre.

A space theme to go with the stars

As you can see, I have a lot of work to do (especially if I want a rocket that looks like a rocket!). I'm sure that I will re-arrange these but at least I have an idea of what could be included. I would also love to include something that could represent the Milky Way, so I will be playing around with this a lot.

What I learned
  • It's been a lot of fun finding and practicing various FMQ designs. 
  • This is the scary part - but as I mentioned, planning and practice should help me do this well (not perfect, but good enough).
  • I will also have to deal with some of the puckering in the fabric in the middle of the quilt. I will undo the stitching at the end where there are no blocks, so that will help.
  • I love researching the various elements to figure out how to represent them - how to draw them, where to put them and what colours to use. This is where the various elements of creating art come in - such as focal point, mouvement, contrast, etc. 
  • I also have to learn to draw that spaceship! 😊
Related links
Linking parties
I will be linking this post to many linking parties. I hope that you'll check them out, but not before posting your FMQ projects below. Remember that you can also post projects other than FMQ!

Free Motion Mavericks

It was a quiet party last time but as always it was great to be seeing everyone's amazing and diverse free motion quilting. I don't know if you realise this, but the hardest part of hosting Free Motion Mavericks is deciding on which quilt to feature! So, here goes... if you haven't dropped in on the Joyful Quilter's lovely little wall hanging with lots of texture, then take a few minutes to drop by to see it.

Look at all the texture on that little quilt
by the Joyful Quilter

It's your turn now 😊

You are invited to the Inlinkz link party!

Click here to enter