Thursday, December 22, 2022

Version 2.0 - almost done!

Hi and welcome to week 412 of Free Motion Mavericks! Are you ready for the holidays? At least my tree is up! ๐Ÿ˜Š๐ŸŽ„๐ŸŽ… 

Filling some empty spots on Version 2.0

Last time I shared with you my birds, and my plans for the Sun. I'm so glad that my daughter suggested that I add clouds around the sun - it's within the theme and takes up space without being dense or too showy. Yeah! I also added a few stars and a rainbow.

The best image I could get was from the back

Here are a picture of the front.

FMQ a rainbow and clouds.


Mining is in the family

While I was at it, I finished the last tan stripe. On my mother's quilt, it was hand quilted mine heads. I added a few more details.....because I can ๐Ÿ˜€. Mining is a huge part of the economy of Northern Ontario and Kirkland Lake, where my mother and I grew up, was renown for its gold mines. My maternal grandparents moved there and my grandfather and most of my uncles were miners. 

Here are some of the images on the tan stripe. 

A prospector's pick, "Mining" and a mine head

Mine head and train carts that carried the ore

"All that glitters is not Gold",
another prospector's pick and gold bricks

The end of the stripe includes the words "Mile of Gold" since this is what Government Road in Kirkland Lake was called. It included very successful gold mines from one end of the town to the other. If you want to read more about it, see "Related links" below.

"Mile of Gold"

Finishing up various parts

I added some lovely bird feathers (as opposed to quilted feathers) in the First Nation area. 

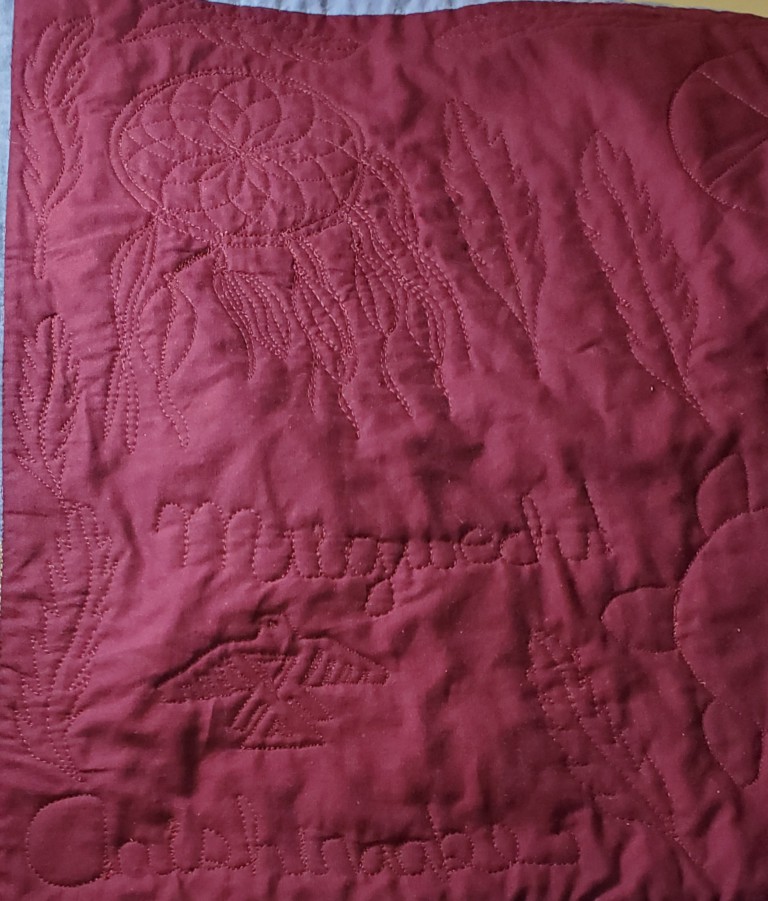
Finishing the First Nation area with bird feathers


The finished First Nations area

In the black stripe with music, I finished it off with a few extra notes ๐ŸŽถ

Adding notes to finish the Music stripe

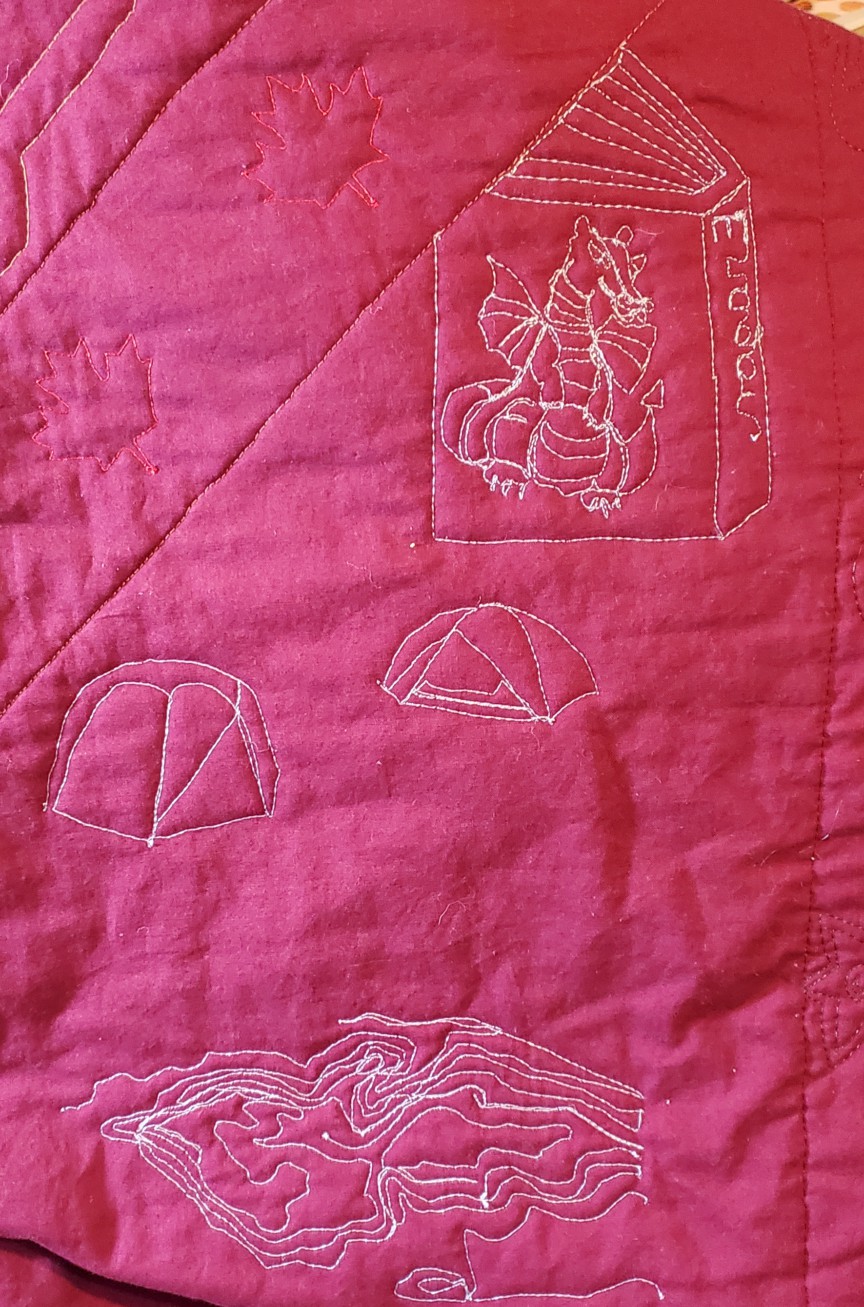
Finally, in the blue Travel Adventure section, I added a buffalo (we saw many at our campsite in the Theodore Roosevelt National Park), camping tents and a dragon ๐Ÿ‰. These images are all from the back of the quilt since the blue is difficult to photograph at night.

The addition of tents and the book "Eragon".

I had to include the dragon from the book "Eragon" in the Travel Adventures area since this was the first book that Stรฉphane read for pleasure (as opposed to being bribed to read). We are a family of avid readers and I was despairing that he would never take up reading. It just took the right book and a lot of driving time to get him hooked!

A buffalo - as seen on the back of the quilt

What's left

  • As you saw above, I just have to add a few finishing details to the Travel Adventures section.
  • In the tan middle stipe, I have to finish the Canada scenes. I left off with some scenes of the North after finishing the West. I'll finish up the North and then head East from Ontario to Newfoundland.
Northern scene in the Canada stripe - from the back
  • The original black border had a quilted cable. I have the stencil that my mother used but I've made the border wider, so I'll have to figure something out. It doesn't have to be the same, but it would be nice if it was close to it. However....it would be so much fun (and quicker) to quilt feathers. ๐Ÿ˜Š 

What I learned
  • Taking the time to mark and then baste around the Sun was probably overkill but it did give me the time to work through what I wanted to FMQ. I went over a few of those lines but it was good to know roughly up to where I needed to stitch.
  • I used to really dislike basting but as I've used it more, I find it easy to stitch and worth it. It could also be that I'm doing more hand-stitching, so it's now just part of the process.
  • I love how the Sun area came out. I'm glad because it really is the highlight of the quilt.
  • If you ever want to FMQ actual bird feathers, just do a search for "hand drawn bird feathers" and don't even mention free motion quilting. I found a few images that were perfect and it took very little time to get the feel for drawing and then FMQ them.
  • The quilt has been an ongoing project for about 4 years. It's also my December One Monthly Goal (OMG). It sure would be nice to finish it before December 31 (of this year!!!) ๐Ÿ˜Š

Related links


Linking parties

I'll be linking up to many fun parties. Why not check them out...after you've linked up below? Put your foot down, Patchwork & Quilts, Off The Wall Friday, Finished (or Not) Friday, Peacock Party, Tips and Tutorials on the 22nd

Free Motion Mavericks

Thanks so much for linking up! We had three FMQ quilts last time ๐Ÿ˜. 

Nancy of Grace and Peace Quilting put together blocks that she and her Japanese friends made in honour of Lucy Boston. It was great to read about Lucy Boston; her quilts and her life and see the lovely blocks that everyone made. Nancy FMQ them with a matchsticks design. You'll want to see this great runner!  

Nancy of Grace and Peace Quilting:
Patchwork of the Crosses runner with the pattern by Lucy Boston runner

DonnaLeeQ made a wonderful fire truck quilt for her older grandson who is going to study at the Fire Academy. What a great quilt for the beginning of his new career!

Fire truck quilt by DonnaLeeQ

Quilting Gail finished her Spicy Block of the Month Quilt. She got to quilt it in my favourite designs...Wild Quilting! Make sure to see the back of the quilt when you visit.

Spicy Block of the Month Quilt by Quilting Gail


It's your turn!

You are invited to the Inlinkz link party!

Click here to enter

Thursday, December 15, 2022

Adding details and planning for Version 2.0

Welcome to Free Motion Mavericks, week 411. I've only done a bit of Free Motion Quilting (FMQ) this week on my son's Version 2.0 quilt but, I have been doing lots of thinking! ๐Ÿ˜Š


Adding details to the birds sections

As I'm getting ready to finish the FMQ, I've been looking at each section that's already done, to see if the quilting is dense enough. I don't want it too dense, but empty spots lead to trouble, so I've been adding some fun little details to the bird sections.

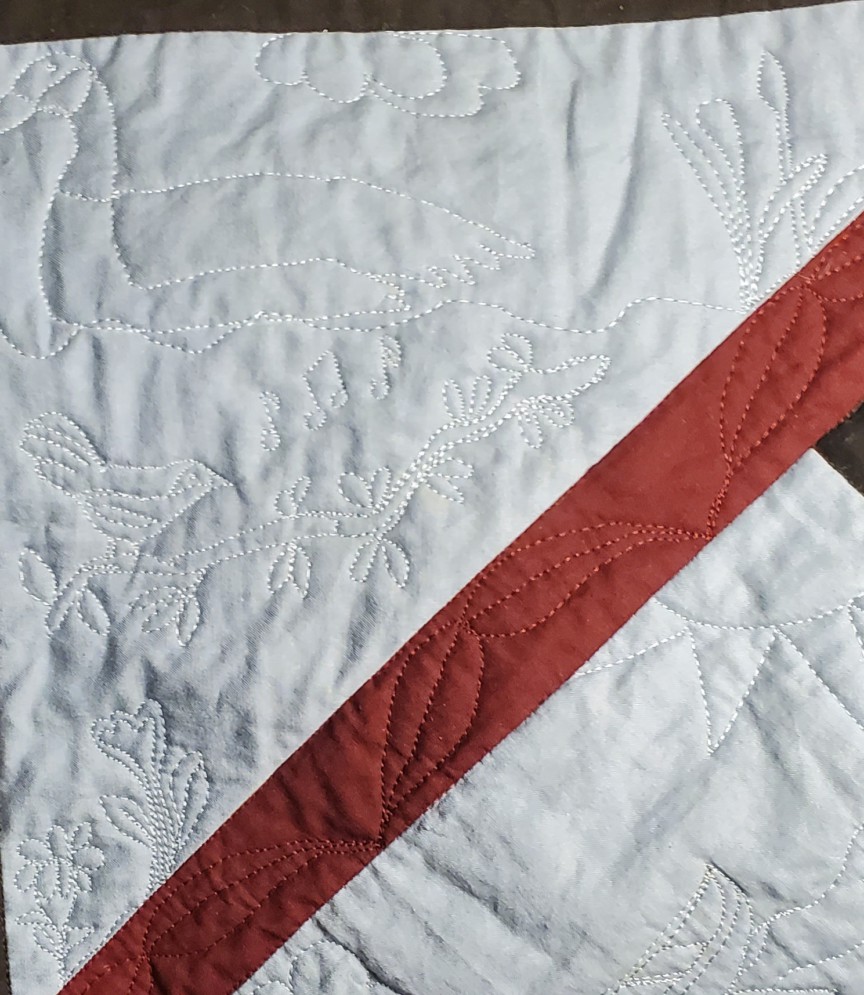
For the Canada Goose, I added some water, bull rushes and a cloud. Underneath that, I continued the branch that the bird is perched on and added some music notes. At the very bottom of that section are a couple of flowers.

Adding details around the birds to fill up the larger empty spaces

In front of the woodpecker, I connected the branch that he's on to a tree trunk and included a hole!

Adding a tree trunk with a hole

The next section has 3 birds. At the top and the bottom, I added some musical notes.

Birds and some musical notes

More bird tweets!

Planning the FMQ around the Sun

The Sun had been FMQ with flames and there are swirls in its centre. However the Sun does not take up the entire space in the blue section. On my template I drew a few things but I didn't really like them. 

To help me visualise the area that needs extra FMQ, I drew lines (mostly angled like the Sun) around the Sun and then basted the lines with white thread. In this picture, I used Paint to define the blue space and added a red line over the basting. This is roughly the area that I have to fill. 

The issue is that I really don't want to quilt anything that will detract from the Sun, but I do need to fill in some of that space. My daughter suggested adding clouds, which would take up space but not be densely quilted and therefore not complete with the Sun. If I use clouds, I could add them at the bottom and sides, and then add stars at the top.

Figuring out what to quilt in the space around the Sun

What I learned

  • Adding the extra details around the birds was fun. There was no preparation to do except to figure out what to add. I knew that it would include music notes. After that it was just about adding more details to the trees etc.
  • I'll be going through all of the quilt's sections to see what else needs to be added. Hopefully this will go fairly quickly. 
  • For the Sun, I know that echoing helps to make things stand out but I'm not sure if that's what this needs. I think that I would rather leave the Sun as it is and just add a few things in the extra space. 
  • On the paper template, I tried adding feathers or more swirls, but both were too much.
  • Right now I think that fluffy clouds and stars might do the trick. If you have any suggestions, I would love to hear them. 

Related links

Linking parties

I'll be linking up to many fun linking parties. Let's see what's going on out there! Design Wall Monday, Midweek Makers, Needle & Thread Thursday, Patchwork & Quilts, Finished (or not) Friday, Peacock Party, Off The Wall Friday


Free Motion Mavericks

Thank you for linking up last time. Here are two lovely free motion quilted (FMQ) finishes. Gail, of Quilting Gail, made a lovely baby quilt from her Lone Star left-over pieces. She FMQ loops and some swirling flowers. If you didn't see it, do check it out!

A lovely baby quilt with left-over pieces.


Sandra from mmm quilts made the Rainbow Neighbourhood Quilt and also launched the pattern for it this week! Each house has a different 6" star for its side wall and each star got some lovely custom quilting. The sashing is a ribbon candy design while the outside border is finished with a floppy feather. If you are falling in love with this quilt, you're in luck because you can now buy the pattern! Visit Sandra's post for more details.

Sandra's Rainbow Neighbourhood Quilt

It's now your turn!


You are invited to the Inlinkz link party!

Click here to enter

Sunday, December 11, 2022

Off the Grid Sampler

Hi! I hope that you are surviving December and all of its potential craziness ๐Ÿ˜Ž. I'm trying to stay Zen but it's not easy! Something that does help is embroidery and other slow stitching projects. Here is an ongoing project.

Creating my own Off the Grid Sampler

This sampler comes from a September class with Sue Stone from TextileArtist.org  It's taken me a while to get going but now I'm enjoying it a lot and looking forward to trying out stitches. 

Off the Grid Sampler...so far

I'm using two layers of fabric for the embroidery. The top is a Kona cotton and the bottom is a very light cotton that I've used for backing various slow-stitching projects. I've numbered the different shapes in the pattern so that I can keep track of what stitches I've used.

Pattern and numbering to keep track of stitches

Here are a few pictures at various stages. I won't be listing every combination here unless it's something particularly interesting. 

Sampler

The image below has some interesting trellis stitches with Tencel perle (section 6), double buttonhole stitch (section 5), and feather stitches in black as a filler (section 7). In sections 3 and 9, I was playing with the placement of running stitches. It's not quite what I want yet but I'm sure I'll figure it out!๐Ÿ˜Š

Closeup of some stitches

The French knots below are nice and fluffy because I'm using the Tencel Perle.

French Knots within a border (section 16).
I'm still working on the border part. 

My two furry helpers


I was dog sitting and asked my two helpers to sit next to the embroidery so that I could take their pictures. Twix, always wanting to please, sat for this photo while Taffy, the independent one, promptly lay down on it to sleep ๐Ÿ˜

Twix is always happy to pose for a picture.

Taffy taking a nap on the sampler

What I learned

  • I was hoping to make a lovely colour-coordinated sampler but I soon gave up and am using a variety of interesting threads without being too concerned with colour. It's going to be a scrappy sampler ๐Ÿ˜Š.
  • When I was at my brother's place, he saw my embroidery floss, left the room and then came back with a plastic bin. It contains my niece's friendship bracelet supplies which I've now inherited. (Thanks Anna!) There is some wonderful embroidery floss in there and a few interesting beads and buttons.
  • There was also a whole bunch of friendship bracelets that she made. I had a few of her bracelets and now with these new ones, I really want to make a "collaborative" piece. I will also include some of my daughter's bracelets. So many ideas ๐Ÿ˜‰ 
  • I'm enjoying trying out combinations of stitches on this sampler. The fun part is that if it doesn't really work the first time, I can use different threads to try again. 
  • My motto for this sampler is: It might not be pretty but it will be useful!
  • I was happy to try out some stitch combinations from memory. I wasn't of the name but checked them out in my trusty Creative Stitches for Contemporary Embroidery by Sharon Baggon.
  • The stitches I started in section 31 are buttonhole or blanket stiches but they are not going in the direction that I want them to. Unless it's really horrible, I'm not going to undo stitching, I'm just going to work around them.๐Ÿ˜Š(that's the Zen part!)

Related links

  • Creative Stitches for Contemporary Embroidery by Sharon Baggon
  • Sue Stone's website

Linking parties


Thursday, December 08, 2022

Sun flames, swirls and rail fence blocks

Hello and welcome to Week 410 of Free Motion Mavericks. I'm glad that you stopped by. I free motion quilted (FMQ) some flames and swirls to the sun in the middle of the Version 2.0 quilt.

Flames and Swirls


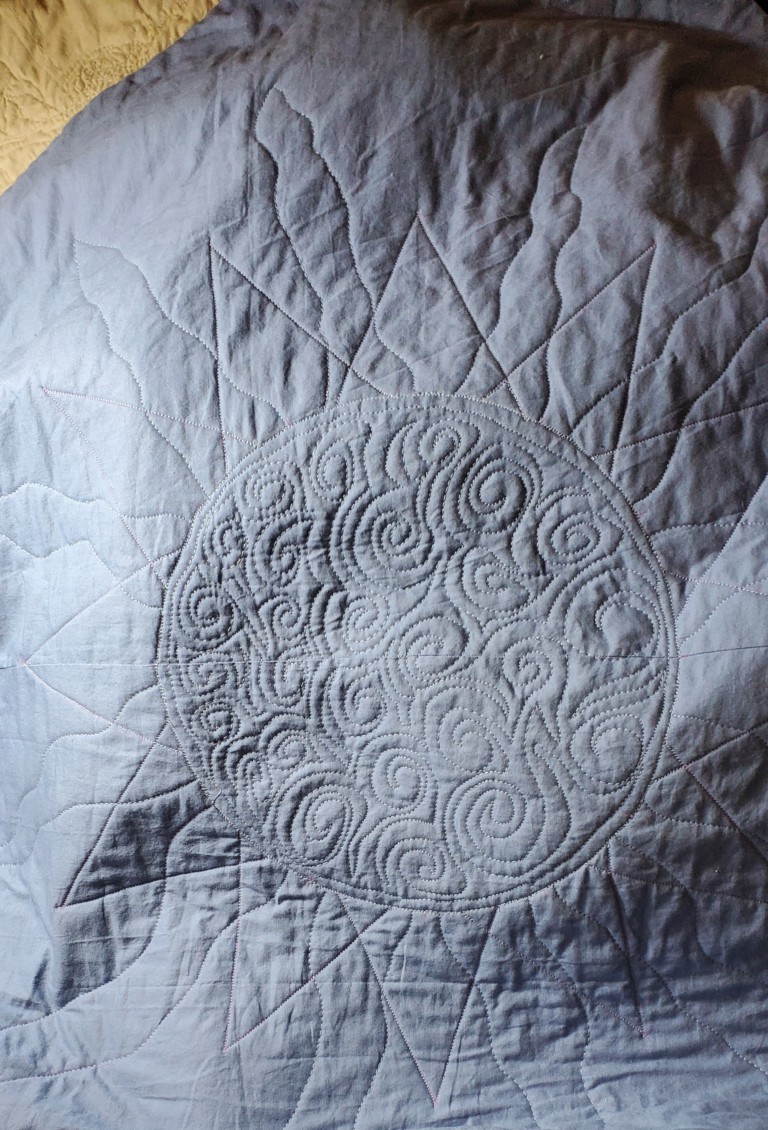
Last week I finished the Free Motion Mavericks post by showing you the Sun that I stitched with the walking foot in the middle blue section of the quilt. The section is not quite finished but I did add flames extending between the sun's points and then swirls in the middle of the sun.

This first picture isn't as pretty but does show the FMQ well. Between each point in the sun is a flame. I was very nervous about stitching in such a large area so I drew a few flames on the paper template that I had created. It only took a few to figure out that I wanted the flame to start outside of where the Sun's points intersected.

Sun with flames and swirls

After finishing the flames, I FMQ just inside the circle of the sun. It was much more wobbly than the original Sun stitched with the walking foot but I just wanted to highlight the circle. I then started stitching the swirls. That went fairly well since each swirl wasn't that large. The design also allowed me to stop often to get my barring. 

Another look at the Sun, the flames and the swirls

When I finished the FMQ, I started cleaning up the threads in the back. I discovered that when I had used the walking foot and had jumped to the next flame, the stitching was starting to come undone๐Ÿ˜ฒ. I thought that I had added a few stitches in place but obviously not enough. The easiest thing to do was to FMQ over the original circle and take a detour over the small triangles where the sun's points intersected. This helped to highlight the Sun's circle as well as stitch over those threads that would have undone.๐Ÿ˜Š

Making Rail Fence Blocks

This week I also made rail fence blocks for Cynthia's (Cynthia Brunz Designs) charity quilts . At the end of November, she asked if quilters could send her some dark blue and brown or tan rail fence blocks. You know how I'm accuracy challenged, so I thought that making blocks would be easier than making a whole quilt.  


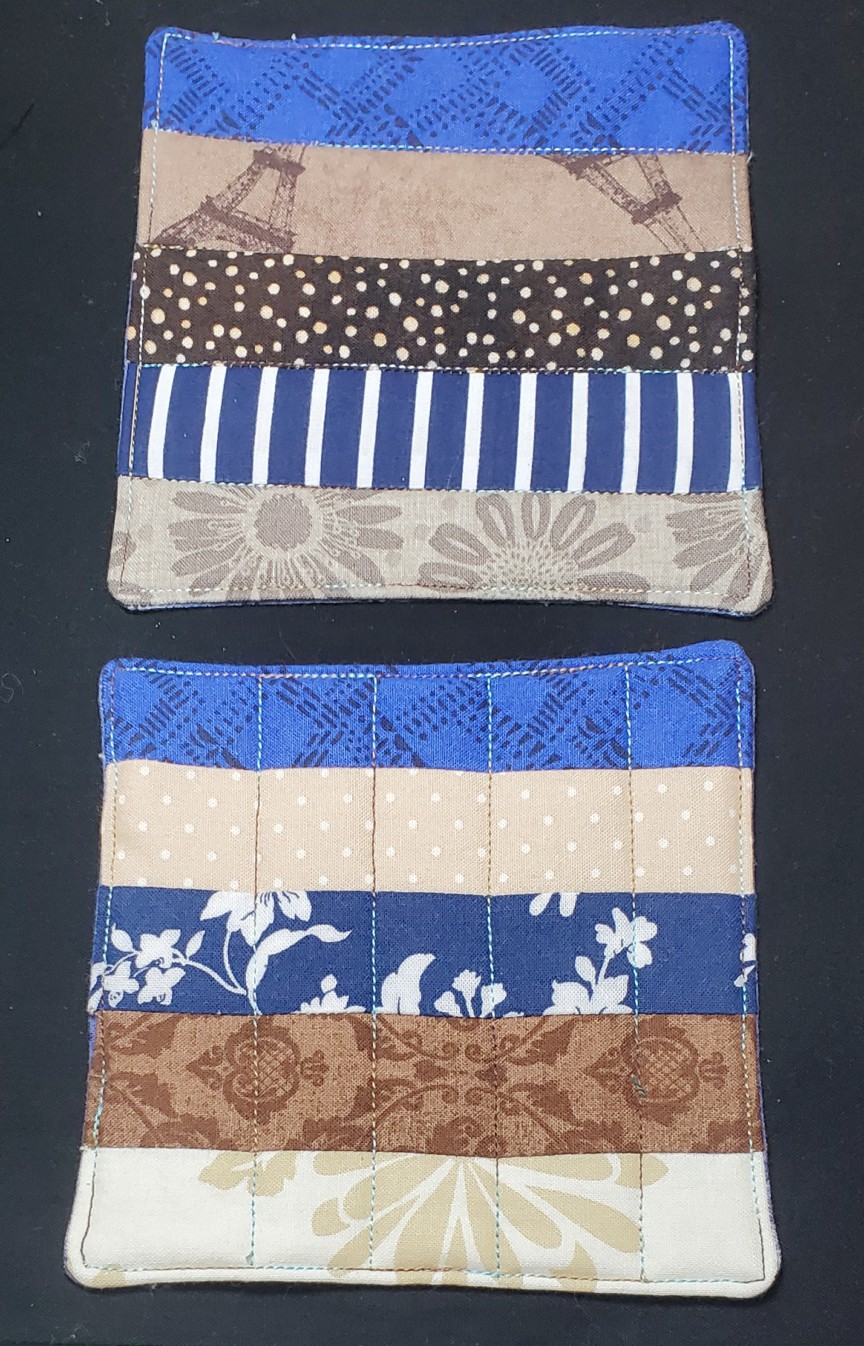
I might have been mistaken in my assumptions ๐Ÿ˜Š! Getting those rail fence blocks to finish at 5½" x 5½" took a lot of hard work but was probably a very good exercise for me. Of the 14 blocks that I made, 12 are good enough to send to Cynthia. Two were a whole ½" smaller, so I kept those and made two mug rugs. I did learn a lot and I'm including that below. 

First mug rug

Second mug rug

Two lovely mug rugs

I quilted them differently, with the walking foot, to see the effect. The top mug rug was stitched more or less in-the-ditch, while the mug rug below was stitched perpendicular to the piecing. It really gives a different effect. 

What I learned

  • Drawing the sun flames on the large paper template was a great idea. It helped me understand the scale of the flames and figure out where to start and finish them relative to the points.
  • I used a Frixion pen to draw the first flame on the quilt. After that I was confident that I could do it without the marking.
  • I was a bit upset when I saw that the thread at the beginning of the Sun's points were unravelling. I just ignored it while I finished up the swirls and then realised that FMQ over them would solve the problem. That is what I do when I come to the end of my bobbin thread. I just stitch over a part that is already stitched and then keep going - so that's essentially what I did. I checked the back of the quilt, and it's going to be fine ๐Ÿ˜Š.
  • As for the rail fence blocks, I was very careful in the sewing and pressing of the blocks, so the problem has to be in the initial cutting of the fabric. 
  • I did as Cynthia suggested and made the block length longer so that I could trim them, but my problem was with the width. After trimming a couple of blocks, that's when I realised that I had a potential problem. From then on, I was very accurate in my sewing. I'm really happy that only two blocks didn't make it.

Related links

Linking parties

I'll be linking up to many fun link ups. You may want to check them out...after you have linked your blog below :-) Needle & Thread Thursday, Finished or Not Finished Friday, Put your foot downPeacock Party, Can I Get A Whoop Whoop?, Oh Scrap!, Patchwork & Quilts, 15 Minutes to Stitch 2022.  

Free Motion Mavericks

We are starting to have a real party with FMQ and other posts. Remember, you don't have to do FMQ to link up! 

Karen made a lovely personalized ballerina quilt for her granddaughter Livia. She did some lovely FMQ flower swirls. It's really lovely.

Karen's lovely quilt for Livia, her granddaughter 

Melva finished her Pieces in the Garden Row Quilt by FMQ 5" clam shells. The quilt is based on the story of a "Bride's Quilt" and was her November OMG. Find out the significance of the various blocks by visiting her post. It's really lovely in front of the small chapel/shed. 

Melva's Pieces in the Garden Row Quilt

Rebecca is wowing us all with her mixture of digital quilting, FMQ and ruler work on her Jingle quilt. Here is the border that she is FMQ. Amazingly enough, it turns out that FMQ is faster than both the ruler work and the individual digital quilting!

The borders are FMQ on Rebecca's Jingle quilt

We also got to check out Raewyn's finished big Boxer floor cushion cover. The kids are going to love playing with this cushion! 

What a great big Boxer floor cushion cover!

It's now your turn ๐Ÿ˜Ž


You are invited to the Inlinkz link party!

Click here to enter

Sunday, December 04, 2022

Mindful stitching with natural elements

Hi! I hope that this weekend finds you well. I have a slow stitching project to share with you today. 

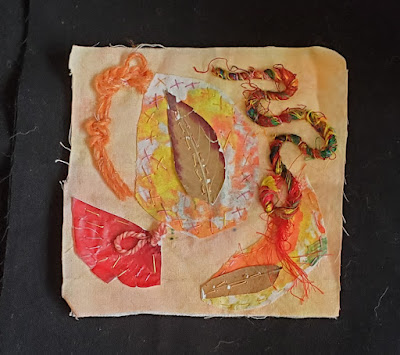
Mindful Stitching with Natural Elements 


I'm still doing the TextileArtist.org Stitch Club workshops, and this one was great to incorporate into the mindful stitching that I've been doing for the last few years. The workshop was "Using natural materials in embroidery" with Claire de Waard. Here are the two meditation blocks that I created based on the workshop. 
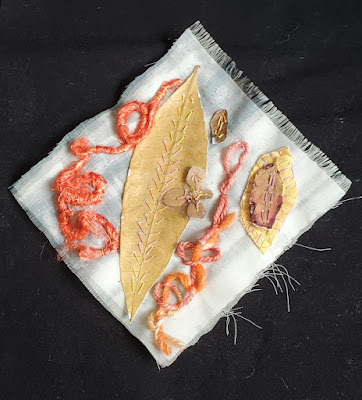
Using natural elements in my meditation block

Using leaves and onion skin to make a meditation block

In the workshop, we learned to preserve natural elements such as leaves, onion skins and flower petals to incorporate into embroidery pieces. 

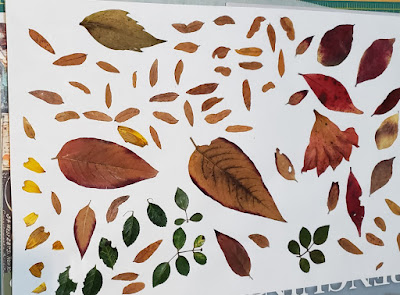
I had a great time foraging for the natural elements in my back yard. This was before all of the leaves and flower petals fell to the ground. I love the image below, however they weren't all used since some things didn't dry as well as others.
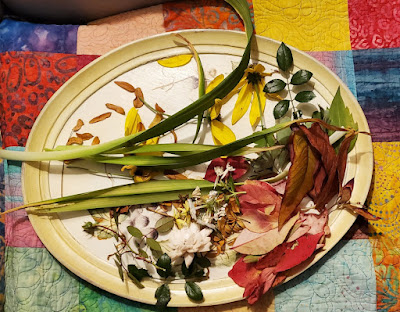
Foraged in the back yard


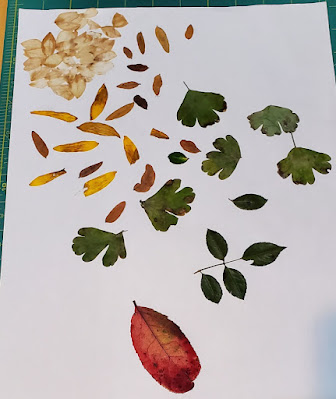
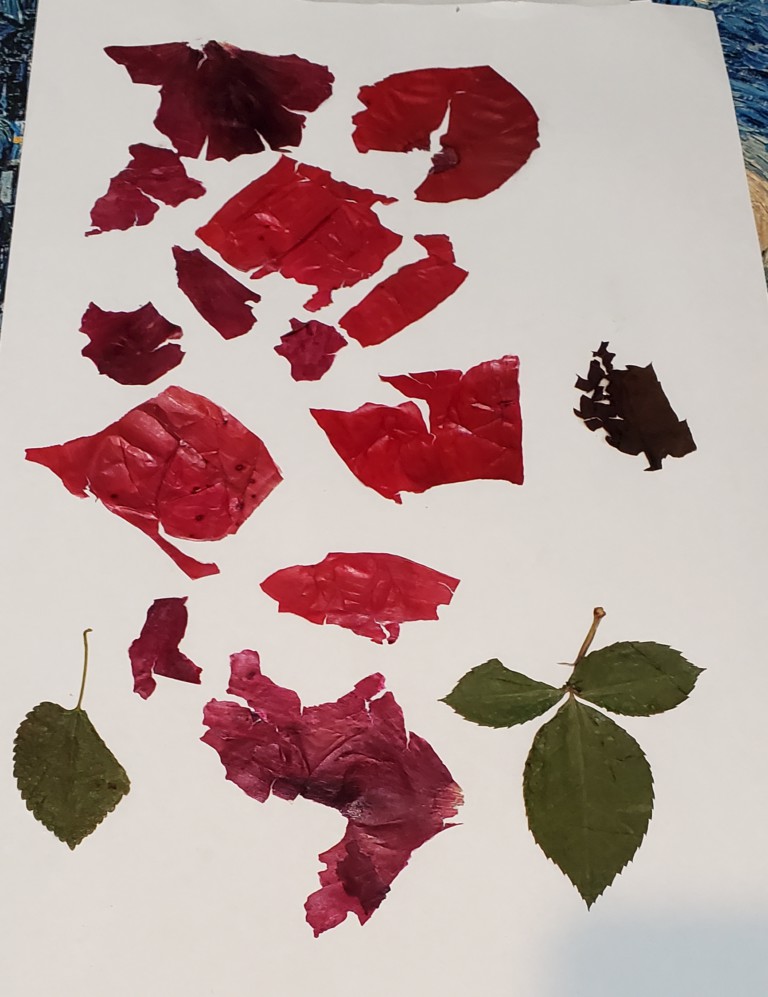
The first step after gathering was to dry everything. I placed them on sheets of printing or freezer paper and then covered them with weights. I learned quite a few things at this point that I'm including in the "What I learned" section below.
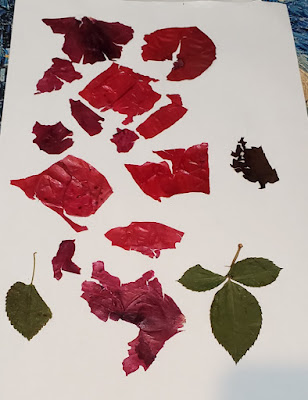
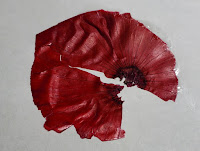
Onion skins and rose leaves dry well

From tiny lotus leaves to larger burning bush leaves

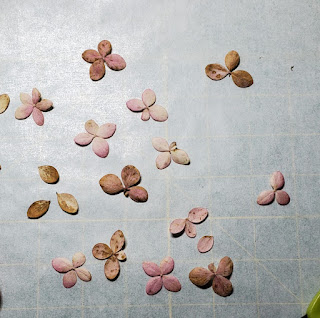
The flower petals change colours depending on the type

Tiny flowers that dried to a pink-brown

Once they were dry, the next step was to glue them to paper so that they keep their shape and don't become too brittle to stitch through.

This is a little harder than you might think because if the material is too dry, it becomes very brittle. In that case, you can soak the material in water for a few minutes, then dry it and glue it to the paper.


Onion skin in the water
Onion skin dried and clued onto paper


Sometimes it was hit and miss, but since I had lots of natural material, I could afford to loose a few. After I incorporated the leaves and petals into my meditation blocks, I realised that they are still very fragile. Talking with artist friends, I found out that you can also add gel medium or Mod Podge over the leaves, with or without the paper underneath.

I added a layer of Mod Podge on some of the leaves to see if it would help. It did make them less brittle. You can see the "natural material" stitched in the middle of this unfinished block. They are petals from a white rose. They are more pliable but the paper underneath it pops up every time you bring the needle up. I think that it might be more effective to just use the Mod Podge without the paper behind it.

Stitching through rose petals covered with one layer of Mod Podge

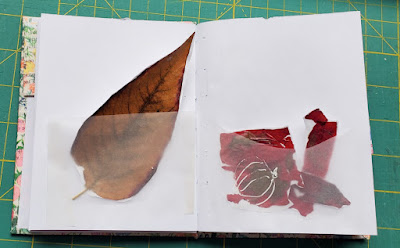
I am keeping the Mod Podge covered natural material in a new Coptic Journal that I made this week. I'll be writing a post about this later.
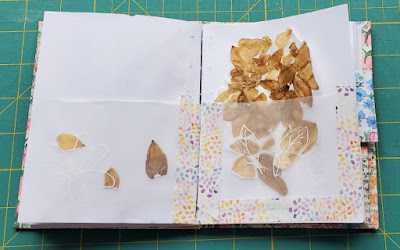
Envelopes in my Coptic Journal to keep my flower petals 

Keeping a leaf and onion skins that have a layer of Mod Podge

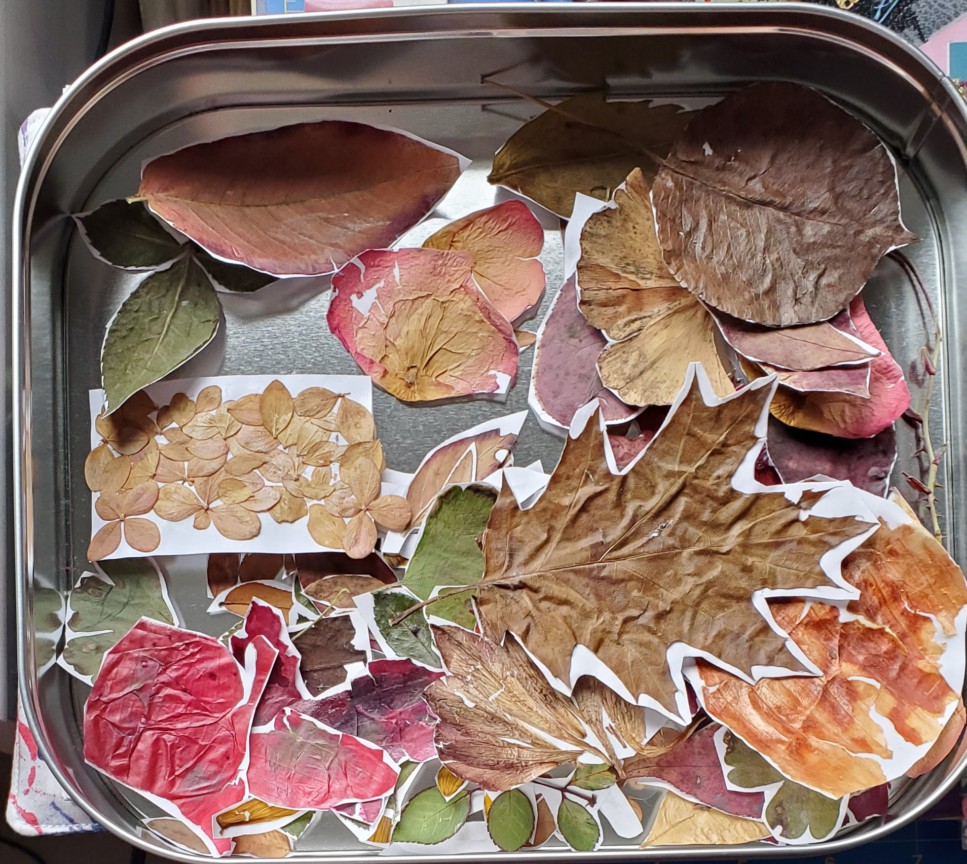
This is the tin where I keep my glued "natural material".
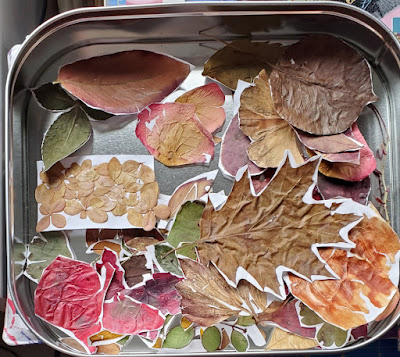

Lots of natural material to play with

Another way of keeping smaller flower petals is to glue them under plastic to create sequins. In this case, I bought a sheet of sticky plastic. I cut two circles of the clear plastic and then sandwiched the flower between the two sticky sides. You can see below the little clear flowers that it creates. I kept some round while I cut between the petals on others. In the top picture of this post, I incorporated one of these flowers in my block.
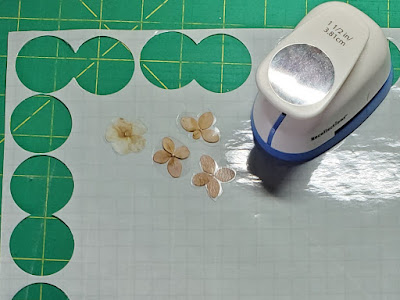
Making little clear flower sequins

What I learned
  • Placing the leaves and other material on the sheet to dry is a great idea but it works best if the sheets are not piled one on top of the other. It turns out that the material can mold if there is too much humidity. It's best to place one sheet down, cover it and then place a weight (a heavy book) on top and keep layering this way. 
  • It might also have worked better if I hadn't left the sheets there for a few days. That would have aired the natural elements better.
  • I got a bouquet of flowers for my retirement/birthday and the petals of the pink roses really dried beautifully although they didn't keep their shapes. 
  • Some of the natural material didn't dry well. You have to experiment to see what works.
  • The next natural material that I get, I'll try to just use a few coats (on top and underneath) of Mod Podge over them. I think that this shows promise.
  • The clear flower sequins didn't always stay together. The next time, I will add a drop of glue over and under the flower.
  • I made the first sequin while the flower petals were still pink. Unfortunately, a few minutes later it had turned more brown-pink.
  • I'm working on adding layers to my art, including the meditation blocks. It's so much fun and can be very effective! ๐Ÿ˜Š
Related links

Linking parties