Thursday, February 09, 2023

Hourglass blocks at Free Motion Mavericks

Welcome to week 419 of the Free Motion Mavericks linking party. I hope that you are all enjoying what ever February is bringing ๐Ÿ˜Š We are expecting freezing rain this afternoon, so it's a perfect day for staying indoors and stitching!

HST and Hourglass blocks


I was so focused on making half square triangles (HST) that I was surprised that they didn't end up looking like hourglass blocks! Wow - I really do need to do more traditional piecing!๐Ÿ˜ As always, Google to the rescue! I found Missouri Star's Hourglass Quilt Block video and was back in business (see Related links below).

Round 3 - Hourglass block

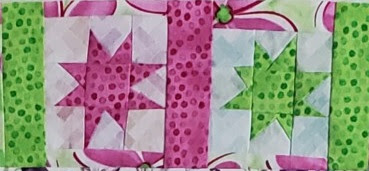
Since I needed to ensure that my centre block and first border didn't disappear after making the very colourful wonky star row in Round 2, I used more fabric from Round 1. It really does ground the quilt. At first, I only made one row of hourglass to make sure that I liked it. After I saw the results, I make more hourglass blocks and put the rest of the borders together.  

Round 3 - trying out the hourglass block on one side

I didn't take the time to think things through - so I did a lot of MacGyver(ing). Oh well, once it gets quilted (let me at it with some FMQ!), it will look just fine ๐Ÿ˜Š. 

What I learned
  • I've been very scattered lately. This is fine for mindful embroidery (which I've been doing tons of!) but not very good for piecing blocks.
  • My second batch of hourglass blocks are not quite the same size as my first batch because I trimmed my HSTs and was wondering why they didn't look like hourglass blocks! I even cut through one HST thinking that I could turn it into an hourglass ๐Ÿ˜’. Turns out that really not how you make an hourglass block!!!
  • Thank goodness for Missouri Star videos. Unfortunately she didn't address how to sew these blocks together! It was only as I was finishing up my last row that I figured out that if I had ironed each block in a different direction, that they would have nested up. I really fought with a few of those blocks to get them sewn up!
  • Next week is supposed to be a quiet one, so I hope to take more time figuring out Round 4 and get this quilt squared up too!
  • I just been reminded of something that I know but didn't think about when I was having a hard time fitting my hourglass blocks into the rows. In her Round 3 post, Quilting Gail suggested that if you're not sure if the blocks will fit, to add a blank block or two to make it fit. That's what I did in Round 2 - I wish I had remembered this option. I'm writing this down here so that I will remember it! Thanks Gail!
  • Update: Feb 13 This weekend I was in a more focused and patient mood so I un-did my bottom row and put it back together again with new hourglass blocks. I also fixed my MacGyvered end blocks - it looks much better now. I'm going to post a picture on Instagram but you'll read all about it in my next post.
Related links
Linking party

Free Motion Mavericks


Did you get a chance to do some FMQ this week? I didn't, but if you did, I hope that you'll consider linking up! Last week Melva made a Colorado wall hanging. I love how she attached prairie points to make the mountains and then echoed them and added more mountains in the back. Very cool!

Melva's Colorado wall hanging

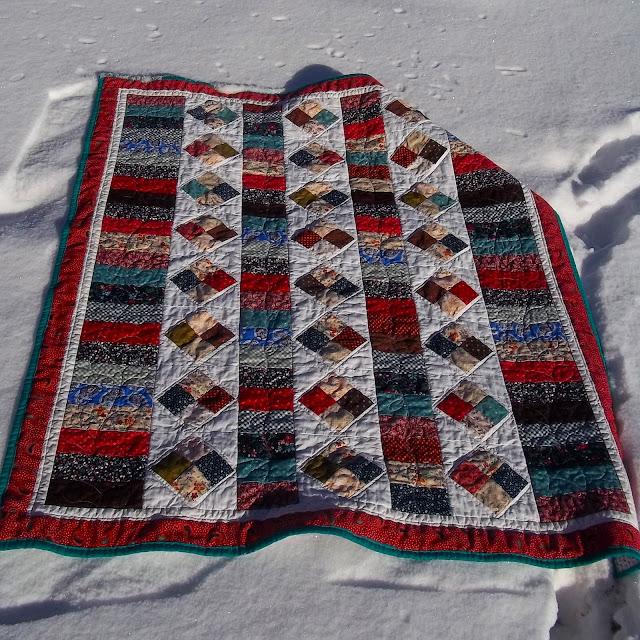
Sandra has been doing some great work for this year's Project Quilting. For the third challenge, she made a lovely baby quilt using the 54-40 or Fight block pattern. It was really interesting to read about what the block stood for and how the "54-40" line would have changed history had it gone ahead! As usual, Sandra did a wonderful job quilting it with flowers, leaves and loops! 
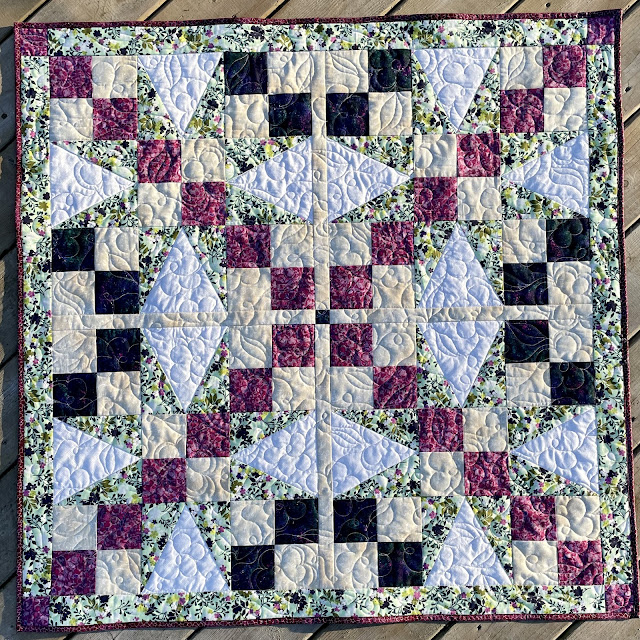
Sandra of mmm quilts and her Project Quilting 14.3 baby quilt

Gail made a lovely batik basket for her “One Gift a Month” 2023 Challenge. Those Island Batik fabric are just so yummy! 

Gail's lovely batik basket

It's now your turn to link up!

You are invited to the Inlinkz link party!

Click here to enter

Saturday, February 04, 2023

Wonky stars and a hand-made journal

Hi. I hope you are staying warm! Our cold spell is supposed to end by tomorrow - I don't remember being this cold in a very long time! ๐Ÿ˜ฎ This post is a little update on the Stay At Home Round Robin (SAHRR) and my latest home-made book.

Wonky Stars


The first thing I did when I learned that we had star blocks in our SAHRR quilt was to find my post on Wonky Stars. It gave me the link I needed and told me to be very careful because it was easy to get it wrong (which of course I managed to do!)

The baby quilt...so far

I love these wonky stars and the fabric that I used, but I'm a little concerned that it might over power the rest of the quilt. That's why I only made one border. I'll have to see what the next round brings us to figure it out.

Wonky stars with a lovely ombre background


Journal with a Butterfly Binding


It's been a while since I made a journal. I've missed it. Since I'm going to a birthday supper tonight, I thought that I would whip up a journal. It was a lot of fun ๐Ÿ˜Š


Journal with a butterfly binding

I love how a slit of the binding shows between pages. 

Journal with binding showing between sections


I created a pocket with the inside of the front and back covers. I didn't want to glue it down but I'm not sure that washi tape is the answer. I'll have to work on that!

Back panel cut into a pocket

When people make a journal, they usually take a picture of the binding to show what it's like. This is a version of a butterfly binding. You may notice an embroidered "Off the Grid" sampler in the background ๐Ÿ˜ It's finally done. I'll be writing a post about it soon!

Journal with butterfly binding showing
and a peek at the finished "Off the Grid" sampler


What I learned
  • I should have considered my very colourful fabric before I made the border. I thought that the centre block was colourful but it's very subdued compared to my top border. It's all very relative isn't it?
  • I may undo the border and use slightly less bright fabric around the wonky stars....I'll wait to see what the other rounds bring us.
  • I enjoyed making this journal. There is not enough time to do everything that I want. I know that I can prioritize things, but really, I want to make it ALL!!!!!
  • I really love how my "Off the Grid" sampler came out. For someone who didn't care what colours that I would use, they are all playing together well. I just noticed that it's upside down in the photo above. Oh well, more this piece in the eventual post!

Related links

Linking parties
I'll be linking to some fun linking parties, especially the SAHRR link up for this week! Patchwork & Quilts, Oh Scrap!, Design Wall Monday15 Minutes to Stitch 2023, Sew & Tell

Project details
 Hand-made journal with butterfly binding    
 6" x 8¼"
 Materials: scrap binding paper for cover, perle cotton thread, craft paper
 Technique: journal with butterfly binding


Thursday, February 02, 2023

A new art project with FMQ on Free Motion Mavericks

Hi! Welcome to another week of Free Motion Mavericks. Today I have some free motion quilting (FMQ) that will be enhanced with a lot of hand stitching. I'm still trying to figure out what to do exactly, but I have ideas ๐Ÿ˜Š

FMQ an image transferred to fabric


This is the first panel of a project that includes photo transfers on fabric. The transfer came out OK (more about that in the What I learned section below), and was clear enough to FMQ. I did use a pencil to outline some of the less prominent sections and then added the FMQ on top.

FMQ on a black and white image of fish in
their habitat, transferred on fabric

Here is the original photo in colour.

Original photo of fish in their habitat.

I transferred only one colour photo. Here is the result. I love the soft colours of this one. It's actually a little brighter in real life.

A beautiful yellow and blue fish that I
 chased around to get a good picture.

Here is the original photo.

The illusive little guy kept darting in and out of other slower fish.
It took many tries before I got a decent photo!

Image transfer


This project is the latest TextileArtist.org's Stitch Club workshop. Our teacher is the wonderful Cas Holmes who showed us how to make an image transfer onto fabric using acrylic gel medium or acrylic paint. Depending on your image, you can get some pretty cool results. The process is like using photo transfer medium but I think that the finish is not as rubbery. 

Here is another photo that I printed in black and white and used the gel medium on to transfer.

Another photo of fish in their habitat

It's quite difficult to see but I used a light box to trace out the images. I did a tiny bit of FMQ but decided that I will embroider this one instead. 


Last photo image that worked

I have two other photo transfers that really didn't work well. I think that my photos didn't have enough contrast. I will be using those two to practice embroidering so that I don't mess up the images that did transfer better.

Update February 5, 2023

Embroidering the different pieces


What I learned
  • If you are transferring black and white images onto fabric in this way, I believe that you require a lot of contrast in your photo.
  • I have been wanting to make an art quilt about fish for a long time. I have some great fish fabric but most of the fabric are rather large scale so that I would have to make a large quilt. I'm not ready for that, so this is a great way to practice and see what I can do on a smaller scale.
  • I have some beautiful stones, beads and shells that I'll be able to incorporate into this piece.
  • I do have an amazing batik background that will be perfect (I hope) for this piece. I guess we'll find out eventually how perfect it is ๐Ÿ˜Š
  • I'm glad that I have a couple of photo transfer to play with before I start stitching into the good ones. I'm a little nervous about this.
  • In case you're wondering, I took these photos at the Ripley's Aquarium of Canada in Toronto earlier this year. It's all great but there is a section that is truly beautiful. This is where I took most of the photos.
  • I'm still fascinated with photo transferring and have more techniques to try. I'm sure that you'll read about these eventually here ๐Ÿ˜‰

Related links

Linking parties
I'll be linking up to many fun linking parties. Why not check them out after you've linked up below? Sew & TellPut your foot down, Needle & Thread Thursday, Off The Wall Friday, Finished (or Not) Friday, Can I Get A Whoop Whoop?, Peacock PartyPatchwork & Quilts, Slow Sunday Stitching


Free Motion Mavericks

Welcome to week 418 of Free Motion Mavericks. I'm really glad that you've been dropping by and linking up! We have four FMQ projects to share from last week. 

Melva finished her Ladders and Steppingstones and used FMQ outlining feathers and vines and leaves. It's such a lovely comfy looking quilt. If you didn't see it last week, you'll want to check it out!

Ladders and Steppingstones by Melva

Quilting Gail participated in the Shades of Blue blog hop. She made 3 runners and then used these to teach 3 different techniques on how to bind them in a class. She used different stitches on her machine to secure the binding. What a great way to participate in a blog hop and create a teaching aid!


Quilting Gail's runners for the Shades of Blue blog hop


Sandra of mmm quilts participated in the Fast and Fun Blog Hop with Villa Rosa Designs. She adapted one of the patterns and made a stunning quilt called The Art of Riding Thermals. The quilt looks so intricate but it's all the same block going in different directions. Sandra used a double loop meander and some straight lines in the quilting - it's really amazing. 

The Art of Riding Thermals by Sandra of mmm quilts

Dawn of Quilting by Dawn, took a class and made a lovely improv quilt. After the class, she added a border and quilted it with straight lines. It's a very effective way to quilt it and I love that she turned the piece on its side so that it looks like flames! She called her piece, Flame your Passions


Flame your Passions by Dawn

Thanks so much for joining us! Now it's your turn.

You are invited to the Inlinkz link party!

Click here to enter

Sunday, January 29, 2023

Blue and Crazy for January's Table Scraps Challenge

It's a good thing that I was catching up on my blog reading or I would not have remembered the January Table Scraps Challenge! ๐Ÿ˜ฎ There's nothing more fun than whipping up a wee little scrappy project...and even learning something at the same time!

Blue Scraps for a Crazy Quilt Topper


This month the colour was dark and/or bright blue and the prompt comes from the letters C, R. or J. My prompt is therefore C for Crazy quilt. I started by sewing blue scraps together. Blue is always easy to do because I have a whole basket just with blue scraps! I tried to use triangular shapes because scrappy quilts are not just squares and rectangles.

Blue and Crazy table topper

Once the top was finished, I decided to quilt it using some of the stitches on my machine. It's a good quick alternative and I finally got to try out stitches other than straight and zigzag! One day I would love to make a real crazy quilt but not today! ๐Ÿ˜Š

Here are some of the stitches

Fancy Stitches on my machine

There are card symbols: diamonds, hearts,
clubs and spades

More interesting stitches

Harder to see but still impressive stitches

Newly added: Blue and Crazy is now in the kitchen
keeping the counter somewhat clean ๐Ÿ˜Š

What I learned
  • I just love sewing pieces of fabric together. Improv piecing with scraps makes my happy ๐Ÿ˜Š
  • I didn't worry about bright or dark - anything blue was added, with one scrappy fabric that included a few subtle colours for contrast.
  • I was reading the stitch diagram wrong on my machine. After a few tries I figured it out!
  • There are some really fun stitches that I will have to use again. It's not FMQ but it's still cool!๐Ÿ˜Ž 
  • I sewed on the binding using the lessons that I had learned in December (see link below). They worked out really well. 
  • I tried to use a fancy stitch to sew down the binding but it was too thick, even with the walking foot. Next time I'll try a simpler stitch.

Related links

Linking parties

Project details


Blue and Crazy Table Topper
Made for the Table Scraps Challenge 2023
10¼" x 10¾"
Material: blue cotton scraps
Technique: improv piecing and quilted using fancy machine stitches


Saturday, January 28, 2023

Stay At Home Round Robin

Hi! It turns out that resistance was futile ๐Ÿ˜ I've been watching the Stay at Home Round Robin (SAHRR) for a few years now and I finally have a little bit of time to play along. I didn't post my centre block the first week because I wasn't sure if I would actually get further than choosing a centre block....but I did!
 

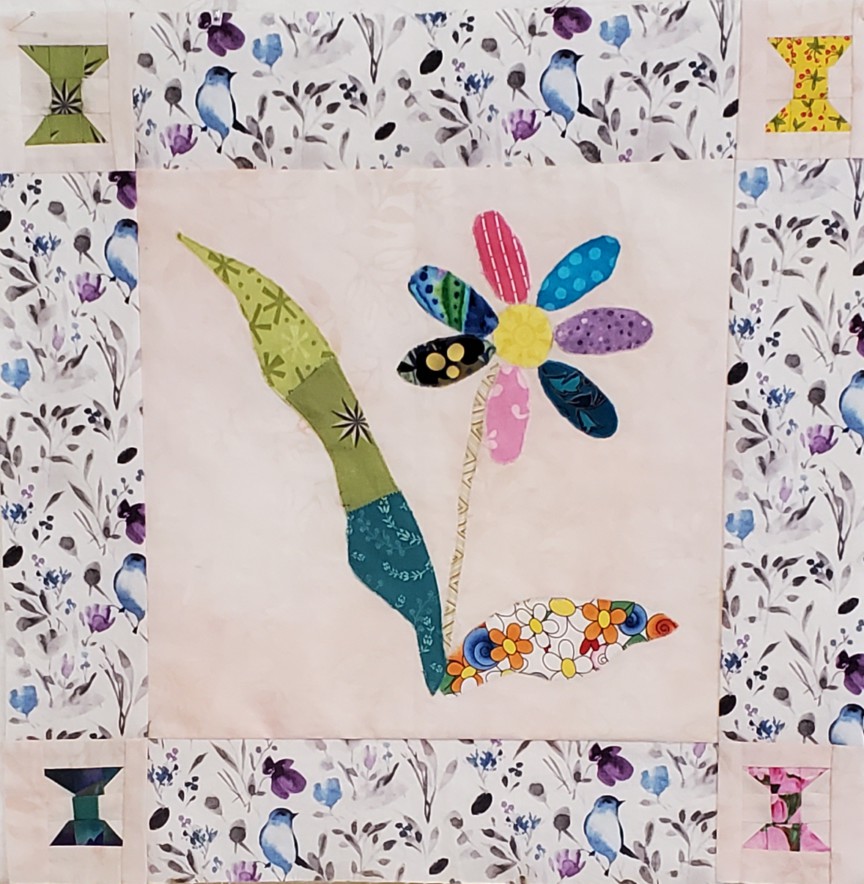
A cheerful centre block


I have no idea when I made this block but I love it. As soon as I found it, I knew what it would be my centre block for the SAHRR. It's all machine appliquรฉd. I'm happy to say that whenever I did this, I did a good job!๐Ÿ˜Š


Round One - Spool Block


I've never done a spool block. Like Roseanne said, if you can make half-square triangles (HST) then you've got it. I didn't want my border to be too wide and I really didn't want to make too many blocks, so I cut one inch strips from the extra background fabric of my centre block and had just enough for four spool blocks plus enough to make each block three inches to match the width of my borders. 

There is no doubt that these little spool blocks are not very accurate but in the middle of a quilt, it won't show too much. I was happy to find some of the same green fabric that's in my leaf. I know that I don't have many scraps left of the fabrics in the centre block but I hope to find a few more to add to the quilt.

Round One - adding the spool block

What I learned
  • I'm happy with the way that I figured out how to make the spool block. I just wish that they had been a little more accurate but by the fourth one, I didn't care! What can I say, making several blocks is just not my idea of fun.
  • Since there are five more rounds, I should be able to make a lovely baby quilt.
  • I'm really looking forward to seeing what everyone is making. I know that I will keep the blocks to a minimum but it will be a lot of fun!
Related links

Linking parties
I'll be linking up to many fun linking parties, including the SAHRR Round One link-up with Roseanne and Sue at Home Sewn by Us. Peacock Party, Can I Get a Whoop Whoop?, Finished (or not) Friday, Off The Wall Friday, Put your foot down, Patchwork & Quilts

This is definitely a DrEAMi!, even if it isn't finished yet :-)

Thursday, January 26, 2023

Going somewhere is Finished on Free Motion Mavericks

Welcome to week 417 of Free Motion Mavericks! I hope that you've had a chance to play since I last posted. When I began this piece, I had no idea that it would end up being free motion quilted (FMQ). I think that the FMQ added a lot to it. I'll let you judge this for yourself.

"Going somewhere..."


This piece began, as many of them do, with a workshop on TextileArtists.org. I haven't had time to do as many workshops as I would like, but this one grabbed my attention. It took me a while to start, but once I did, I couldn't leave it! ๐Ÿ˜Š

Going somewhere... original orientation

Going somewhere... is upside down better?

It all started with a fat quarter of Kona "School Bus" and some lovely hand-dyed orange-pink fabrics by Elaine Quehl. I also took out my stash of translucent fabric scraps. The workshop, Stitching in the Round, was created by April Sproule. She provided a template of a spiral, but of course, I had to make my own! ๐Ÿ˜ 

Following April Sproule's Further Development video, I created my own template of two connected spirals. To work, the spirals needed obvious negative and positive spaces. I coloured in the negative space and added a couple of extra starting and finishing points to create some interest and clear paths to follow. 

Creating my own spiral template

I transferred the template to my fabric and started playing. I asked April how she decided where to put the extra fabrics onto her background. She mentioned focal point and colour, but since I was just starting, I wasn't sure what I was doing, so I just added different sheer fabrics in 5 areas, mostly below and to the side, but with one stripe in the middle. Connecting some of that background fabric with the spiral creates unity, so that's what I did on the left side. I had lots of empty space under the smaller spiral, so just create an interesting block underneath it. 

Starting to put it together.


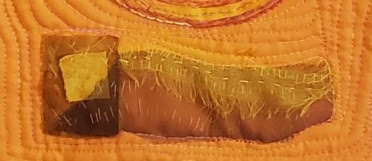
That interesting block is one of my favourites and I stitched it early on.

An interesting block

At the beginning, I spent most of my time on the left side spiral and background. There was a lot of hand stitching! 

Very slowly stitching things up

I used some beautiful scraps of hand-dyed fabrics as well as sheer fabrics. I also varied my thread, although I tried to use each element a few times in the piece so that it would add consistency. This is what my final stitched piece looked like. I knew that I would have to do something with it - either add a lot of hand stitching around everything, or do some FMQ.

Finished attaching the appliquรฉ

Free Motion Quilting (FMQ)


As  you can guess, FMQ won out! ๐Ÿ˜ŠIt was soooo much fun ๐Ÿ˜

FMQ finished - so how do I finish the actual piece?

You may have noticed in some of the pictures that at the top right corner and the bottom left corner, there were small chunks of fabric missing. My original intention was to trim the fabric, but of course I waited too long and wanted to keep the whole area. I covered these holes with matching fabric and all is good!

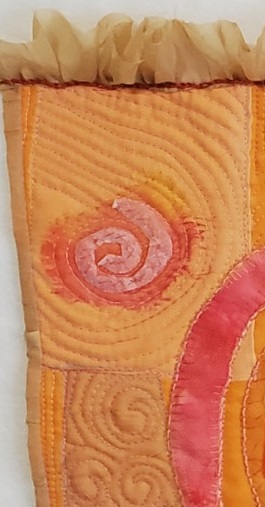
I didn't have any more Kona "School bus" fabric for the binding so I came up with (it turned out) a great idea! I used strips of one of the sheer fabrics (it's curtain fabric) to add interest at the top of the piece. Why not ruffles at the top? I based this down and then machine stitched it so that it would stay upright. I worked in sections to make sure that I liked it before continuing.

Making ruffles for the top

Adding ruffles was a lot of work and probably would have been too much all around the piece, so I used 1½" strips and attached these like regular binding. I am really happy with the result.๐Ÿ˜Š I thought that I was finished, but this morning I decided that it needed just a little more stitching. I added a chain stitch in a #12 perle cotton over the machine stitching of the ruffles. I also coiled up the bottom of that hanging sari yarn. 

Going somewhere.... when I thought that it was finished

Here are some of the details.

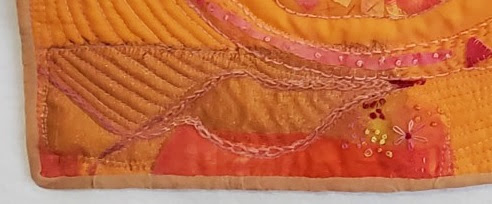
Embroidery and FMQ over very shiny sheer
with silk and hand-dyed cotton

Fancy tissue paper swirl
over silk


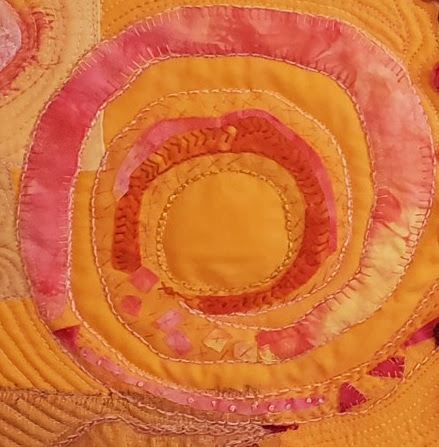
Spiral with embroidered hand-dyed
fabric pieces and snippets


Sari yarn coil, appliquรฉd triangles and circles
 with embroidery

Interesting block of sheer fabric (overlapped to makes it darker),
silk and hand-dyed cotton square with simple embroidery


What I learned
  • There was a lot of learning in the last couple of weeks as I worked on this piece.
  • The bottom, shiny sheer fabric had a very loose weave so I was glad to FMQ around and into it to add stability. My overcast appliquรฉ stitch was shredding away.
  • I worked with some beautiful printed tissue paper that came in a lovely box of chocolates. I added the spiral on the left and used it in some of the triangles. It stitched up really well. I do want to experiment more with stitching on paper.
  • The circles of fabric on the smaller spiral were stitched down with blanket stitch circles. They came out very well.
  • It's not always easy to figure out when to stitch fabric down before you embroider it, or just to let the embroidery stitch it down. There was only one piece, near the centre of the small spiral that I could have stitched down before I edged it with chain stitches. The chain stitch didn't catch everything, but once it was embroidered, it was easy to stitch a few sections down with thread. This didn't show, so I'm not sure that stitching it down before the embroidery was necessary. 
  • I loved using sheer fabric for the binding. I will do this again!
  • April suggested that we use silk organza (not washed) as a stabilizer behind the piece. I usually use a very lightweight cotton but since I had some silk organza I tried it. It was really lovely to stitch on and did give it a nice stability to the piece. I'm not sure that it's better than my lightweight cotton but it's a great option.
  • I curled up the other end of the sari yarn because without it, it looked too much like sperm (not the effect that I was going for) ๐Ÿ˜ฒ
  • In the end I'm happy with the sheer fabric that I added to the background. It's hard when you don't really have a plan, but I thought that the focal point would be the spirals.
  • Did I change the focal point when I added the coiled sari yarn, or the darker interesting block? I may have, but I hope that since everything is connected, either physically or though colour and fabric, that it's ok. 
  • I did want lots of movement, which I think I was successful in doing.
  • When I showed my daughter the finished piece, she suggested that I turn it around. I like it but it does change the focus. Do you have a preference? Let me know๐Ÿ˜Š
Related links
Linking parties

Project details


Going somewhere....
Made based on a workshop with April Sproule
17¼" x 12½"
Materials: Kona cotton, sheer fabrics, sari yarn, hand-dyed fabrics, tissue paper, perle cotton and embroidery floss
Techniques: embroidery, FMQ, ruffles 
April Sproule


Free Motion Mavericks


Gail from Quilting Gail finished her lovely "Quilt More Worry Less" hanging. If you didn't see it, you may want to check it out! She has also picked a centre block for her SAHRR quilt (Stitch at home round robin). You can see it here.  

"Quilt More Worry Less" hanging by Quilting Gail

It's now your turn ๐Ÿ˜Š

You are invited to the Inlinkz link party!

Click here to enter