Showing posts with label design wall. Show all posts

Thursday, January 23, 2025

SAHRR and Snow Happens on Free Motion Mavericks

Allô and welcome 😊. It's a lovely snowy day which started with a guided tour of the Woven Histories exhibition at the National Art Gallery of Canada and some quality time with sweet Poppy! I saw the exhibition when it first opened - it's really amazing, but it's even better when someone is telling you a story about some of the artists and pieces.

First round of blocks for SAHRR


Monday was the first day of instructions for making the blocks for our quilt. We got to choose a block that started with the first letter of our name. I chose the Art Square Block that I found online. There were instructions but just the very old fashion way of making blocks, i.e. attach one triangle to another. You do know that I'm accuracy challenged, so this was very challenging. After making four Art Square Blocks, I took the time to find alternate ways of making it, such as the stitch and flip, or making 4 flying geese at a time. 

Four Art Square Blocks for the Christmas panel

You may notice that I changed the order of my blue and gray fabrics in the flying geese block part. I originally wanted the gray to be in the centre but I didn't cut my fabric properly for the first block, so blue in the centre it was. Since I only cut my fabric one block at a time, I decided to try both ways. I like them both, but I do prefer the gray surrounding the block's centre.

I've had to take almost everything off my design board - I don't make many large projects. Since the panel is quite long, I'll probably only do one border but with different blocks. We'll see. I do love these blocks in the corners.

Christmas panel with the four Art Square blocks

I've looked at other blocks starting with "A" for my cowboy panel, although now that I know how I could make these blocks more easily, I may stay with this block. I've washed, trimmed and ironed the panel, so I'm ready to go. I'm slowly picking fabric to go with the panel. I love the muted colours and am looking for some denim colours, browns and the cactus green. I may even have some plaids that would go well 😊.

Next, making blocks for the Cowboy panel

"Snow Happens" wall hanging

I finished the border around "Snow Happens". It's not as bad as it could have been. 😁 My points are still mostly there but the diamonds got cut off on the side borders. That was because I didn't follow the instructions - I just don't cut things at ⅛". Since I'm not very accurate anyway, that ⅛" will not make much difference (OK it would but this is my excuse!) Anyway, some of those diamonds got cut but it still looks pretty darn cute!

"Snow Happens" wall hanging

I had some lovely blue Christmas fabric but wasn't sure about using them since they have a little bit of other colours, like the little snowman with a red scarf! I don't think that these little pops of colour distract from the blue.

What I learned
  • I know that my piecing skills are not great. Before I started the Art Square blocks, I should have researched how to make it using more modern tricks. I didn't realise that I was making a flying geese within the block and that I could easily make 4 at once! 
  • Using these faster methods don't guarantee more accuracy but at least it's a bit easier!
  • I go so long without making quilting blocks that I forget how frustrating they can be.
  • For the other blocks in the SAHRR, I'll try to find easy alternatives if I have to.
  • I did go through my many magazines and books of blocks and found a few alternatives, as well as a few tricks, so I hope that I'll be OK for the next ones.
  • As I mentioned already, rounding up the measurements to not use ⅛" wasn't brilliant, but I suspect that my blocks would not have fit anyway. I think that the best way to make sure that such a border works is to make the pieced border first and then work from there to add inner borders that will be large enough to fit them. It's a little late, but if there is a next time, I've written it here!
  • I'm actually looking forward to making the blocks for my cowboy panel. So we'll see how that goes! 
  • Update: I just figured out that my lovely Art Square blocks are the same as version 2 of Kathleen's King Crown block...and I thought they looked too complicated to make!😂
Related Links
Linking parties
I'll be linking up to many fun linking parties, including the first round of the SAHRR with Kathleen McMusing. You may want to check out other participants' first round. Monday Musings, Design Wall Monday, Sew & Tell, Put your foot down, Needle & Thread Thursday, Off The Wall Friday, Finished (Or Not) Friday, TGIFFBeauties PageantPatchwork & Quilts,

Free Motion Mavericks


Welcome to week 516 of Free Motion Mavericks! Thanks for linking up. Here are the projects from last week that included FMQ, ruler work or walking foot quilting. 

Kat of Scrapbox Quilts has made a beautiful quilt (22" x 29") for this cute bear. This is for the Bear Hugs mission. Kat used the blanket to practice her FMQ swirl designs from Angela Walters' swirl challenge. 

A pink Bear Hugs mini quilt by Kat

Quilting Gail's first finish (that she can show us) for 2025 is this lovely Christmas Tree made by watching "Helen Godden’s Christmas Countdown" with her sister on Zoom. What a great way to spend time together while quilting! It was also a great way of playing with FMQ.

Christmas Tree hanging by Quilting Gail

 It's now your turn!
 

You are invited to the Inlinkz link party!

Click here to enter

Sunday, January 30, 2022

New technique and new project

Did I say that I would try to stop starting new projects? I'm sure that it's in writing somewhere but, oh well, I am having too much fun learning new techniques and playing with fabric! 😊

Fantastic Fusion Workshop

Through my local quilt guild, I registered for a couple of workshops. This first one peaked my interest - it's an improv quilting using fusible web. I've done both of these before but I liked the look of the teacher's sample and hoped that I would learn something....and I have!

We were encouraged by our teacher, Lisa Walton from Australia, to buy Wonder-Under Transfer Web (or something like it) because it can be ironed on many, many times, and we definitely needed that for this technique.

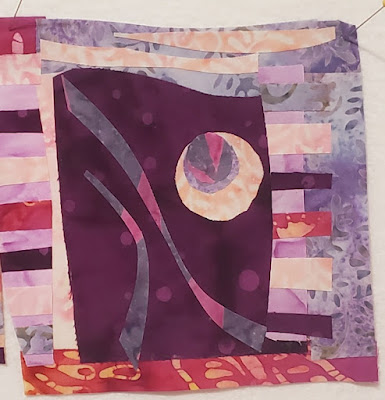
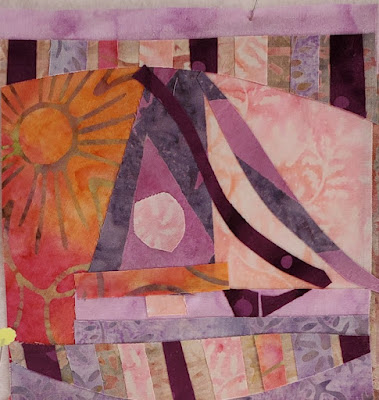
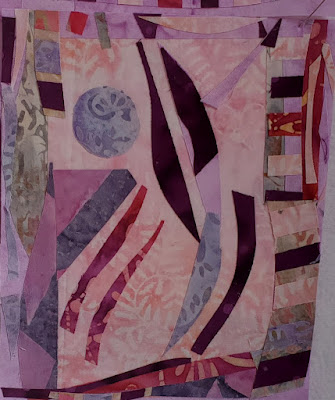
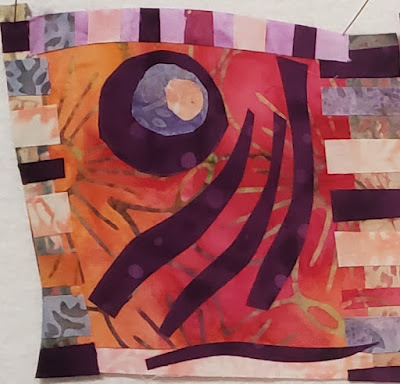
These were the first two blocks that I made during the first class. 

Block 1 - still one of my favourites

Block 2

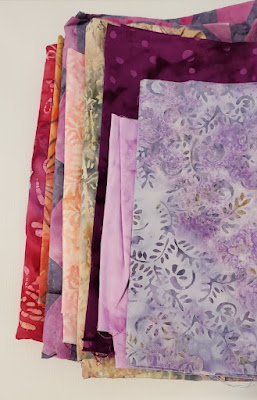
I used an assortment of batiks that had different values, colours and patterns. These are important, otherwise the fabrics all sort of merge together. Since I knew that I wouldn't be making a large quilt, I only added fusing on the back of about 12" blocks of each fabric, knowing that I could fuse more if needed.

Fabric pull of batiks

I was enjoying the class but when Lisa got to cutting curves, I was thrilled. This is exactly what I wanted - line are fine but curves add flow. I add curves whenever I can, especially if there're no sewing involved! 😊

Block 3

Block 4

Block 5

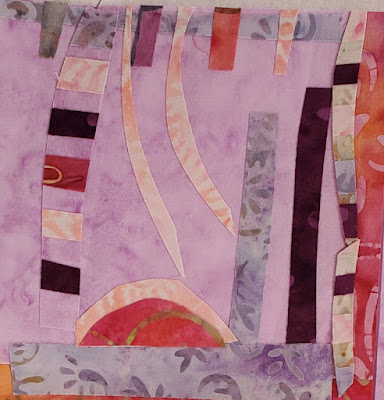
These first 5 blocks are roughly 6" square. I tried to keep them simple, but that's very hard for me - I'm a "more is best" kind of gal!

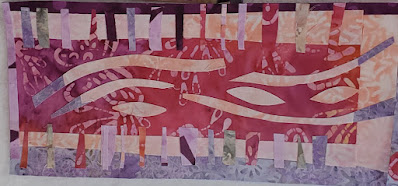
These next 3 blocks have slightly different shapes.

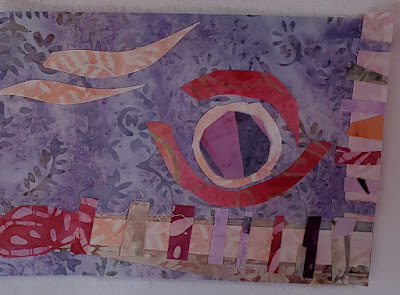
Block 6 - Do you see a moon there?

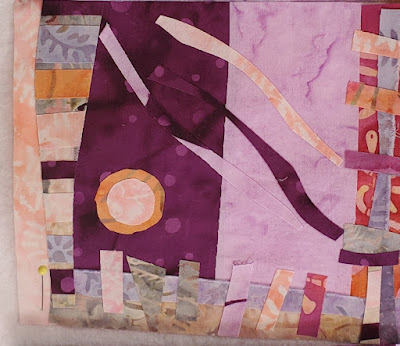
I simplified these next 2 blocks because I figured that I would add more if need be. Also, by the time I made these Saturday evening, I couldn't tell which side of the fabric the fusible web was one (it's difficult for the light fabric but obvious for the darker ones!)

Block 7 Just flowing

Block 8 - not really finished since this is the one that I will probably
 have to change to make it fit with the others.


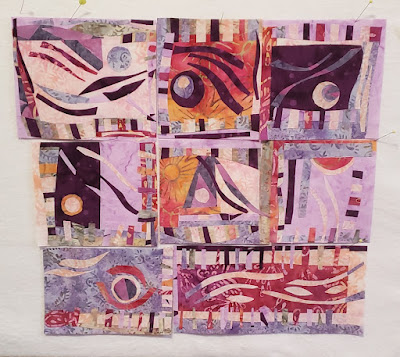
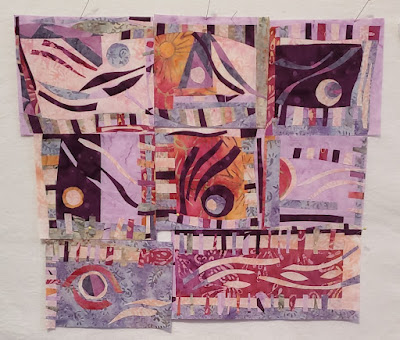
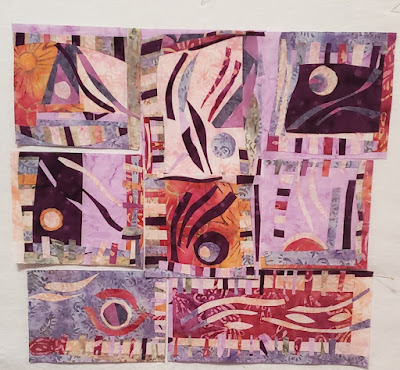
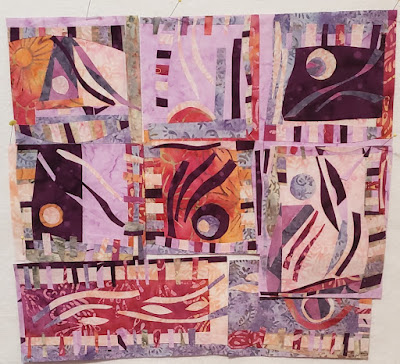
Possible layouts

I found this to be the most difficult part. I did take lots of pictures of layouts but each block could, in theory be laid out in 4 possible ways since there is no right-side up here!

My thought process:

  • The first thing that I noticed was the very dark purple in three of the blocks. I think that they need to be balanced somehow.

First layout - balance the dark purples?
  • I think that this balanced the dark purple blocks.
Second layout - balance the odd shaped blocks
  • I think that most of the blocks are interchangeable except for the 3 that are different sizes. 
Third layout - more balancing?
  • I believe that this may be the best balanced layout....but I'm still learning and I can't wait to get feedback from Lisa.
  • The bottom right block may need to be redone, or at the very least cut up. I like the outside striped border but the rest could be redone - maybe into two, either attaching the left side to the block next to it (not bad but not great) and then fixing up borders for the other part.
Fourth layout....maybe?

You'll just have to come back to see the finished project...by the end of February!

February's One Monthly Goal 

Finishing this quilt is my OMG for the month of February. I'm excited about this piece and don't want it to get lost in my WIP pile 😊 Thanks Patty for the great motivational  party!

What I learned

  • Tips for working with Fusible Web:
    • I pressed the pieces of fusible-backed fabric onto a piece of Pellon Wonder-Under Transfer Web backing. This lets you pull the fabric off of the backing and keep adding more fabric. You can also use parchment paper.
    • When I wasn't sure on what side the fusible web was attached, I pressed the fabric piece between 2 pieces of the backing. The fusible web is on the side that is attached to the backing (rather than on your iron). I did a lot of that too until I thought of this.
The side with the fusible web 
sticks to the backing paper.

Pressing the fabric between two sheets of 
fusible web backing


  • Lisa is a great teacher - laid back, organised and very knowledgeable. 
  • She also teaches this course online. During her class, she showed us an introductory video that featured her quilts in this technique, as well as quilts by other students. It's always great for inspiration to see what can be done.
  • She is a very generous teacher, and after our 3 hour class, she sent us a link to the first half of her online, on-demand class. It's really excellent and was a great reminder of what we had learned. As you can see, I highly recommend her classes!
  • During our next 3-hour class, we will learn tips for putting the whole quilt together (without stitching!) and then quilting and finishing it. I think that I've done most of my blocks but I want to see what Lisa advises before I cut and make adjustments to finish it. 
  • I figured out that I need one of those circle templates - it was difficult using objects to make the circles on these!
Related links
Linking parties
I will be linking up to the February OMG party as soon as it opens. I am also linking up to Kathleen McMusing's Tips and Tutorials on the 22nd, as well as many other fun linking parties. Monday Making, Design Wall Monday, Midweek Makers, Put your foot down, Needle & Thread Thursday, Off The Wall Friday, Free Motion Mavericks (it's Muv's turn - check it out!), Finished or Not Finished Friday, Patchwork & Quilts, Oh Scrap!, 15 minutes to Stitch 2022


Saturday, July 24, 2021

Mystery UFO

This quilt has now been on my design wall for several months. I felt like doing something different, so I thought that I would work on it. I had the fabric strips and extra pieces in a project box but no pattern...where did this project come from?  

Mystery UFO (UnFinished Object) solved

First clue: I checked to see when I had first taken pictures of the quilt on my design wall. I found this picture in December on my Studio Tour post, and on my phone it first appeared in mid-November. It would seem that I didn't write a post about it.

Here it is on my design wall during my studio tour.

It first appeared in Mid-November


Second Clue: The pattern wasn't in my project box, so it might come from an e-book.

It took me a while to go through my e-books but sure enough, the pattern is in Stripology 2 by GE Quilt Designs. I know that I saw the quilt in a blog post and loved it, but of course I can't find it now....so if it was in your blog, please let me know. I even wrote to the blogger because I was nervous about the piecing, but she reassured me, and it wasn't too difficult.😊  

* Update: Wendy of Pieceful Wendy found the post for me - it was Nancy of Grace and Peace Quilting. She made her quilt 36" x 36" because the pattern for the quilt is pretty small (24" x 29"). I'm not up to making it bigger with more hexies, but that's what borders are for 😊. I thought that I had finished the quilt on Sunday (July 25) but this week I'll audition some fabrics for the borders. It's going to get done! Thanks Wendy and Nancy! 


Progress and stitching up the columns

I say that it wasn't too difficult, but this is from someone who is accuracy challenged and pretty intimidated by piecing. My very favourite block is the 9-patch! I'm not really a fan of piecing but when I make a quilt that isn't improv pieced, it's almost always scrappy so that I don't have to cut all of the fabric at once. 

Before I found the pattern, I thought that I would just have a go at stitching the rows together. After stitching a few, I realized that I was probably not doing this right because I had not idea how I was going to attach the second row to the first - they are all hexies! That's why the seam ripper made an appearance. It turns out that the pieces are stitched one column at a time.

My seam ripper was very useful!

It was also handy when I sewed my first two half hexies together in that column. I'm really not good at thinking in 3 dimensions, so I ended up having to pin them together to figure out where to stitch. After that, it went quite well.

Pinning the pieces to get the correct angle

You can see the weird piecing at the top of each column. The pattern calls for cutting the extra pieces into quite smaller pieces to finish up the top. I really don't like dealing with small pieces, so I'm going to stitch these partial pieces to the top of the strip and then trim them when the top is all pieced. This should give me some added security since I'm really good at having these types of pieces be too small. 😊 

Adding extra long top pieces that will be trimmed off

Since my last design wall picture, I've cut and pieced the rest of the strips so that the quilt top will be 6 hexies by 8 hexies. It's supposed to be a 24" x 29" crib quilt.

What I learned

  • It might be a good idea to write the name of the e-book in my project box. 
  • I remembered why I don't really like piecing but it wasn't that bad. I've attached 5 of the 8 hexies in each column and all of the pieces are on my design wall.
  • I've been really restless and not feeling like FMQ or hand stitching, so this is a nice change.
  • It'll be nice to have something else on my design wall!
Related links

Linking parties

I'll be linking up to many fun linking parties. Why not check out what everyone is up to?  Let's Make Baby Quilts, Put Your Foot Down, Finished or Not Finished Friday, Patchwork & Quilts, Oh Scrap!, 15 minutes to stitch 2021, Design Wall Monday, Monday Making

This will also be my Squirrel and I'll be posting it to Sandra's DrEAMi! next Saturday, 


Monday, December 21, 2020

A Studio Tour

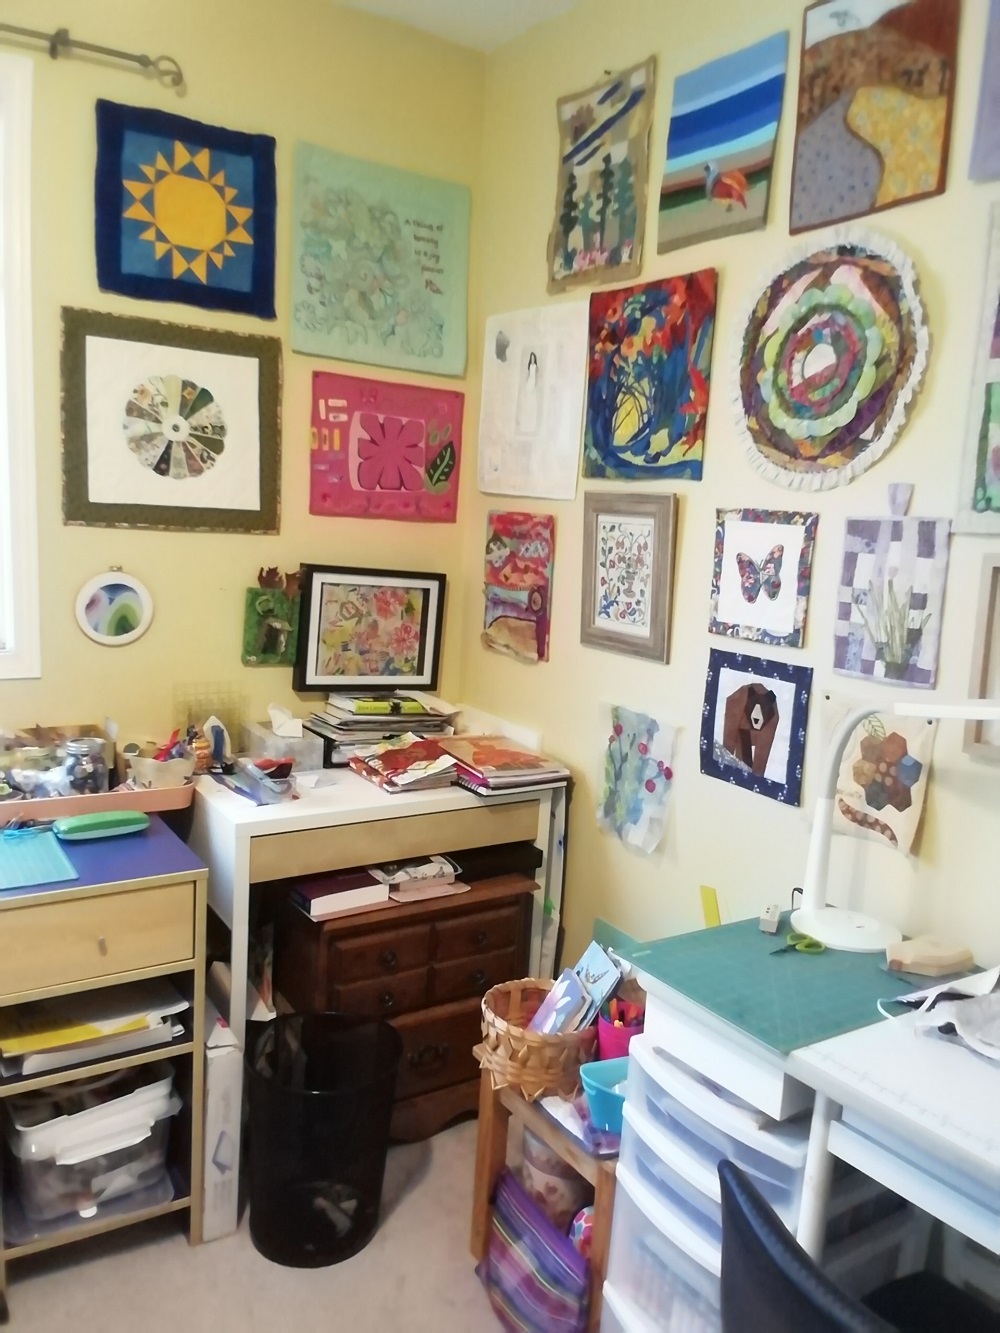
I've been working on my art, sewing and working space for almost a year - the first few months in my dreams and since June, on the real thing. I hope that you'll join me on the grand tour!😊

Celebrating my art studio

In June, my son moved into his own apartment. I have to admit that it was pretty tough to see him leave - but, the art studio that I had been dreaming about has now become reality. Since my son is doing wonderfully well and comes home every couple of weeks, I don't feel that guilty about taking his room. The only guilt that is left is the quilt that I owe him! Hopefully the hardest part of that project will be done by the end of December, as part of my One Monthly Goal (OMG).

Welcome!

My seasonal door hanging quilts are much
safer from the weather inside the house :-)

Being the smallest bedroom in the house, it's not a large area. The previous owners had painted it bright yellow, and it hasn't changed. I was afraid that the yellow might not play well with my creations, but I shouldn't have worried!

Sewing space

As you come in, I have my sewing space which is about the same layout as it was in my bedroom. My trusty Jag is surrounded by all that I need to sew. When I need more support for sewing a very large piece, like my king-size bed quilt, I can easily bring my extra table and chair to help.

My sewing centre with my trusty Jag

Support for quilting large projects


I have a lot of things in my studio. It would be nice if it was large and airy but I've made it cozy, which is really my preference. If it was large, it would just be filled with more stuff 😀


Cutting and ironing area

One of my favourite piece of furniture in my space is this IKEA change table that I bought years ago. It served as a music centre when CDs and stereos were a thing. It has now made the transition to a cutting and ironing table, while still functioning as a small library. 

For most of the cutting that I do, it's more than adequate. If I need to cut something big, I can always go to my kitchen table. I also converted a small hand-made shelf into an ironing space. I created a quilted mat this is slightly larger than the shelf and attached it with elastic. I love that it is the right height for cutting and ironing. When I don't need the ironing shelf, I just place it behind the unit. It's also great for cutting because I can get to three sides of the table (well sometimes Chevy has to move). 

Cutting and ironing space
Portable table and design wall


The cutting table with the
ironing shelf against the wall


Fabric Storage Space

I though before I moved into the studio that I would have enough space in the closet - boy was I wrong! It's amazing how many things I had squirreled around the house 😊

I've had a great time finding baskets for my fabric. My latest purchases are my favourite - they are children's baskets for toys, again from Ikea. I bought the ones on the top-right shelf this spring and they contain most of my cotton scraps. Now Ikea have even better ones that are perfect for fat quarters. They are the three yellow stacked baskets on the second shelf of the unit on the left. I still have some fabric left in the bottom of my husband's closet (that's where most of it was hiding!). I should be able to bring them in soon.

Two units of Ikea shelving for my fabric

Sitting & Stitching Corner

I hadn't planed for a sitting area in my studio but sitting on my computer chair for more than a couple of hours is not comfortable. This fall, we got a beautiful new chair for our bedroom as part of our plans to create a reading area. I had this older chair that has great sentimental value (another Ikea purchase over 30 years ago). I tucked it in the corner, in front of my closet. It's a little in the way but I love sitting there for my zoom calls and for some slow stitching.


Sitting area for slow stitching

Art & Computer Space

This is probably where I spend most of my time - at my desk. My laptop and my embroidery supplies are all easily accessible from there. I have placed many things on large serving trays that I can easily move around, depending on what I'm working on. I had originally placed my sewing machine in front of the window but it turns out that I spend a lot more time at my desk, so I moved them around. 

In the corner I have an older desk that I use for my current projects. Since I use it as a table, I have placed my mother's nightstand underneath it. There really is no wasted space in this room!

Corner table and nightstand
My desk - where I write this post, plan
my projects, watch tutorials, etc.


What I learned

  • I did a lot of research in the months before moving into this space (when my son started seriously thinking about moving out). He drew me a chart on graph paper of the space. I have to admit that none of it turned out as I planned. 
  • Although the closet had been fitted with a wonderful storage system, it was way too small to fit all of my supplies and my fabric. Once I started filling the space it quickly became obvious that a trip to Ikea for shelving would be needed. 
  • To make a long story short, almost everything in the room was moved around a few times before it got to this point. I can now say with confidence that at this time, it's the best use of the space for me. I love it!
Related links
Linking parties

I will be linking up to many fun linking parties. If you get a chance, go check them out! Patchwork & Quilts, Design Wall Monday, Monday MakingTo-Do TuesdayColour & Inspiration Tuesday, Peacock Party, Off The Wall Friday


Sunday, September 08, 2019

Introducing my Exit Strategy

In the spirit of anticipation, celebration and learning, I am starting a new project.

EXIT STRATEGY

In less than 3 years and 2 months, I will be 60! People are generally not eager to grow older, but I believe that the perks of age and wisdom more than make up for the laugh lines and grey hair (which I've had for over 15 years anyway!)

60 will begin the next phase of my life - Fibre Artist!

So, how am I going to get ready for the fibre artist phase of my life without living in the future? Well, pretty much the same way that I've approached most things.
  • Learn
  • Have a flexible plan
  • Keep expectations low and gratitude high
I hope that you'll join me on my journey. Let me tell you about my very flexible plan.

Amy's Creative Side
It started with the blocks that I made while participating in the One Week Improv Challenge with Amy Ellis of Amy's Creative Side. The challenge was by subscribed email and through Instagram at  #improvwithamy.

As with most challenges, I followed at my own speed. I did manage to make the first five days of seven days (see the post in Related links). At some point after the challenge, I made a few more blocks. 
Block 1 - joining strips
Block 3 - playing with triangles
Of course, the next decision is....what to do with those blocks?

The first time I thought about Exit Strategy
A few months later, in late spring, I felt especially tired and needed something besides rest to help me stay positive. What's better than a new plan, a new project to help my spirit soar with anticipation, celebration and learning? 

The name, Exit Strategy, came very quickly but the rest took me a while to figure out. It's so easy to get caught up with grandiose plans but more than anything, I want this to be realistic and doable.

These are the notebooks that I keep with me to jot down ideas. The idea for Exit Strategy was slowly percolating.
3 notebooks that I keep around

The next step of this plan came about when I bought a gently used version of the book, Exploring Textile Arts in June at Quilt Canada. The book was published in 2002 by the Editors of Creative Publishing. There is a more recent version, but this one is fine for my purposes.


I've been very inspired by some of the techniques in the book. That's when the rest of the flexible plan started falling into place.

 The flexible plan
  • Try out new techniques
  • Use the improv blocks as background
  • Blog and reflect on what I've learned
  • Repeat
  • Time frame: very flexible....3 years and 2 months 😊
Using 8 inch blocks as background makes these projects less intimidating. It's about learning, playing, taking chances and trying new things. I'm hoping that I'll be able to put some of the blocks together as they are completed....or not. That's also part of the very flexible plan.

You may have seen the first block that I posted about, without specifically saying what Exit Strategy was. If you didn't see it, the post is below in Related links.

A Felting Miss-Adventure,
part of the Exit Strategy project
I've been hard at work practicing my embroidery stitches and learning new techniques. Here is a sneak preview of my design wall. I will be posting about these techniques in the next few weeks.

A sneak peek at my design wall - things are progressing

I created a page for Exit Strategy, and as I progress, I'll add links to the related posts. I hope that you'll follow me in my journey.

What I learned
  • I've been thinking about this for a very long time, ever since I discovered what I wanted to be when I grow up 😊
  • I used to say that I wanted to be a full time artist when I retired, but then I thought about it....I'm going to be retired. This should be fun, not just another job! So now I'm keeping the full time out of the description. I'm hoping to play full time but as far as art making goes, I'll do what I want, when I want, and then, if I feel like it, I'll find opportunities to show my work and accept the deadlines that go with them.
Related links
Linking parties
I'll be linking up to many great linky parties. Let's go see what's happening in blog land! I'm linking up with Muv at Free Motion Mavericks, Slow Sunday Stitching, Oh Scrap!, Off The Wall Friday, Monday Making, Design Wall Monday, Moving It Forward, What I Made MondayMidweek MakersTuesday Colour Linky Party, Peacock Party, Can I Get A Whoop Whoop?, Put Your Foot Down,


Monday, April 16, 2018

FMQ, design wall and a quilt-along

Batik Quilt

As I mentioned in my last post, I liked the Feather Meander pattern so much that I used it in my third batik quilt. I've really had a blast quilting it, until I ran out of thread :-(

Here it is, about half quilted.

The quilted half of my batik quilt 3
I used the Feather Meander that I learned from Angela Walter's FMQ Challenge Quilt Along. I wanted to use an all-over quilt design on this quilt, since I had never done this before. This is a perfect FMQ design that you can make as large or as small as you need it to be.
FMQ Feather Meander
At the top left of this picture, you can see two blocks that haven't been quilted yet. The quilting does tone down the colours but they are still vibrant. I used Kimono silk thread from Superior Threads - a mid blue for the top, and an orange for the back.

Making a design wall

I've always wanted a design wall. I bought a little one years ago but it's too small to be useful.

Last year, I read something on the web about using Craft Board to make a design wall. I had heard of using other material, but craft board from the dollar store was right up my alley.

It took me a few months, but I finally went to my favourite discount fabric store in Cornwall - Ron's Fabric. It's only about an hour away but I don't even cross town to shop, so going to another town doesn't happen often.

He has some great fabric and also great prices on flannel - which I've used before. So I finally bought a couple of yards of white flannel to make two design boards.

Front of my new design board made of
craft board and flannel
I heard that you're supposed to put a layer of batting under the flannel, but I'm not convinced. I don't need to pin anything down. Hopefully it'll work for what I need it for, otherwise, it's very easy to pull apart and fix. I just ironed the flannel and then taped it tightly to the back side of the craft board.

The back of the design wall -
another use for duck tape!
To make sure that it worked, I placed the 5 panels that I've quilted in Angela Walter's FMQ Challenge Quilt Along on the design wall. They have been there for about 24 hours and don't seem to want to fall!
FMQ panels on the design wall.

Comfort Quilt Quilt-Along

Amy Ellis of Amy's Creative Side is hosting a quilt-along to celebrate her new book, Modern Heritage Quilts: New Classics for Every Generation. We are making her Comfort Quilt and Amy has provided the calculations for making this quilt in 6 different sizes.

I bought all of that flannel at Ron's to make this quilt. I'm hoping to make at least 4 cuddle quilts to donate to the neonatal unit through the Common Thread Quilt Guild. I made a couple a few years ago, but am way behind since I've been wanting to make at least one per year. 

If I get bored of making the same quilt, I can always make a couple of quilts from the other patterns in her book. I've drafted 6 patterns for 20" x 20" quilts based on Amy's book. We'll see how far I get😊

If you get a chance, sign up to join the Quilt-Along. It starts next week.

What I learned
  • The feather meander design is very forgiving. It took me a few tries on paper to get the hang of it. I find it harder to make it larger than small, but after FMQ a few dozen, I'm getting the hang of it.
  • I say that I'm getting the hang of it, but when I ran out of thread, I was actually quilting on the inside of the curve instead of the outside. Just for something different. 
  • I've never quilted a whole quilt with only one design because I tend to get bored. I've done fairly well on this piece and it's fun to fill in the spaces between the meandering feathers.
  • This quilting design has really helped me make feathers from any position. For traditional feathers, I have to quilt them with the stem down. I might now be able to experiment with other positions. That's always a good thing, especially when quilting large projects.
  • Thanks Angela for the opportunity to learn the Feather Meander.

Related Links

Linking Party