Showing posts with label Boro. Show all posts

Saturday, February 19, 2022

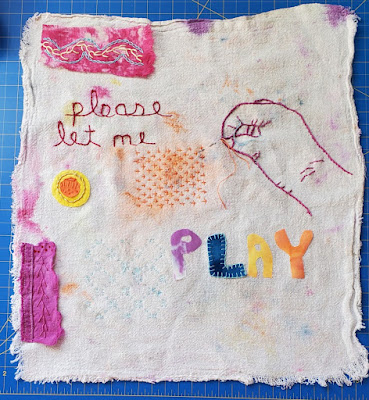
Please let me play

I've been very busy quilting during the last few weeks. It's been such fun! However, I realised that with all of these busy projects, I'm missing the meditative calmness that slow stitching brings. So today I spent some time finishing up my "Please let me play" piece.

Adjusting the composition

In the Out of the Box Textile Artists Group, we've been learning about composition. I've read a lot about it, but it always feels more intuitive than just following rigid (or black and white) rules. I get the feeling that there's a lot of gray area in there to play with. Sometimes you know why a piece isn't working but at other times, it's not as clear.

That's why I turned to my artist friend, Elaine Quehl for help on this piece. Here is my  final piece.
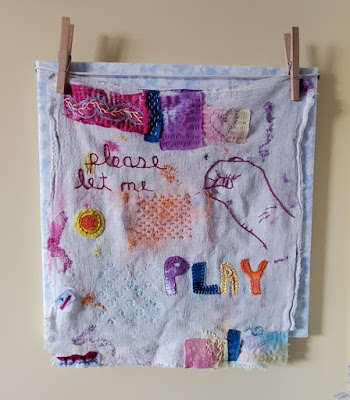
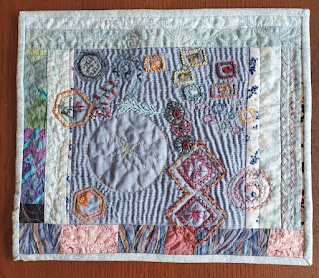
"Please let me play" - embroidery on a clean-up rag

When I asked Elaine for help, the image below is what the piece looked like. The colour on this photo is not very  good, but you get the idea. I knew that I would add things at the bottom but wasn't sure if the composition was the best that it could be. Elaine agreed with adding pieces at the bottom and suggested that the bright fuchsia piece on the left was distracting. Although it was my favourite fabric, I had to agree with her.
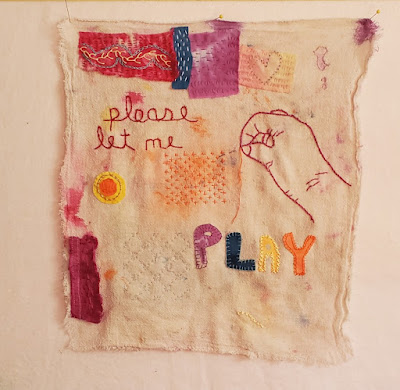
Composition on the design wall, before getting advice

I then played with fabrics and came up with this. I replaced the bright pink piece with a lighter one, but after I had stitched it, I ended up removing it - it wasn't the colour so much as the extra piece.
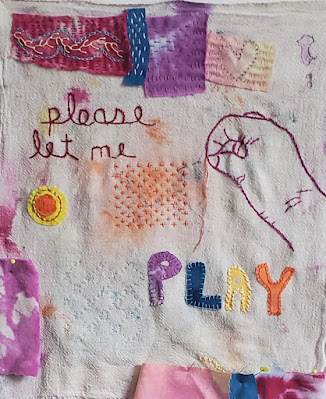
Playing with possibilities

I added pieces at the bottom as a type of echo of the top strip but kept the colours lighter. You can also see that I played a lot with embroidery stitches on both the fabric pieces and the original rag. I have been following Mirjam Gielen of Mirjam Textiles on Instagram (see Related links below). She has a very organic way of stitching that I find fascinating, so I bought her Basic Stitches e-book and used a few of her stitching variations on this piece. To keep it subtle, I used regular sewing thread. 
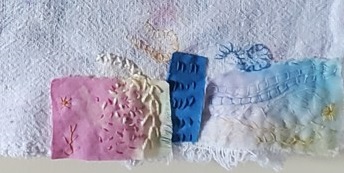
Trying fun stitch variations

Keeping the added stitches subtle

As I was wondering how to hang this piece - it because obvious - on a clothe line! I covered a 14" x 14" canvas with very light sky fabric. I then attached a piece of clothe line with tacks at the sides of the canvas and used wooden clothes pins to hang the piece.  
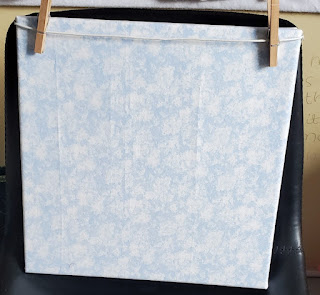
Creating my own clothe line to hang the piece


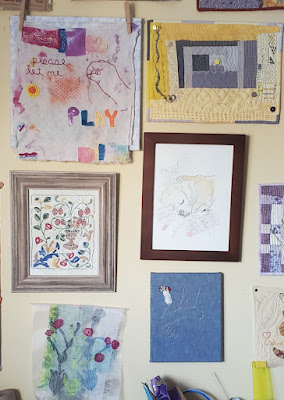
"Please let me play" and Chevy - pride of place on the art wall

To find out how this piece came to be, check out my original post and see Venessa Marr's work in Related links below.

#100dayschallenge2021 on Instagram


Today "Please let me play" is my last post of the 100 days challenge on Instagram. I started the challenge on August 6, 2021.  I did the math and I'm very impressed! It took me 197 days to do the 100 day challenge - that's an average of a post every second day! Wow! 

I started the challenge with slow stitching. I created a piece, "Mixing it Up" that incorporated both free motion quilting and embroidery. I then worked on stitching some eco printed fabric and also finished my first concertina book "Best and Worst of Times".
Mixing it Up with FMQ and embroidery


Slow stitching on
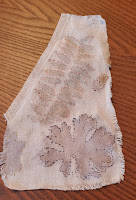
 eco-printed fabric


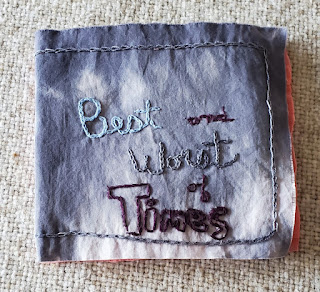
Finished my Best and Worst of Times concertina book

Recently I also posted more traditional quilting projects since I was doing less slow stitching. You can see my projects by going through my blog or my Instagram. The one piece that I'm still working on is the Traveller's Blanket. I hope to finish it before the end of the #100dayschallenge2022. 

Slowly stitching the background of the Traveller's Blanket

I hope that you'll continue joining me on my stitching journey, either through my blog and/or Instagram. I really appreciate all of your encouragement. If I keep posting at the same rate as the last challenge, I should be finishing up just before my retirement in October 2022 😊😎

What I learned

  • I have really enjoyed stitching on a piece of cloth that symbolizes my artistic journey. The message is very apt because frankly all I want to do is Play!!! (as opposed to work)
  • There is so much to learn about composition and I hope that it gets easier with experience. Thanks so much Elaine for your advice!
  • I've also learned a lot on my #100dayschallenge2021. It gave me the incentive to play with slow stitching and finish/advance some of my UFOs or WIPs. 
  • I'm going to try to re-incorporate slow stitching into my daily routine. I feel like I need the calmness.
Mirjam Textiles

Related links

Linking parties

I'll be linking up to many fun linking parties. Let's see what's going on! Put your foot down, Finished or Not Finished Friday, Off The Wall Friday, TGIFF with Quilting Gail, Peacock Party, Beauties Pageant, Patchwork & Quilts, Slow Sunday Stitching, Oh Scrap!, 15 minutes to stitch 2022, Monday Making, Design Wall Monday

Project Details


Please let me play
14½" x 13" on a 14" x 14" canvas
Material: clean-up rag spotted with dye, hand-dyed fabric scraps, organza, embroidery floss, perle cotton (hand-dyed and commercial) and thread - attached to a fabric covered canvas with clothes line and wooden clothes pins
Techniques: embroidery, boro and sashiko


Sunday, January 09, 2022

Wishes for 2022

After the holidays, it was good to start 2022 calmly and quietly. I did a little bit of free motion quilting (FMQ) which I will show you at the end of this post. Today I want to share with you a very fun project - another squirrel!

Stitching on a clean-up cloth

The first workshop of the year at TextileArtists.org was presented by Vanessa Marr. It's called Domestic Story Cloths. Vanessa stitches stories of women and domestic work on dusters. I was intrigued by the workshop and took a couple of days to think about the possibilities. 

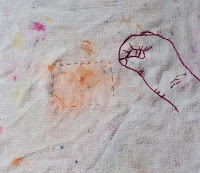
please let me play - a work in progress

I knew that I didn't want to stitch on a duster since I really, really dislike housework. Finally in the laundry room where I also do my dyeing, I found a cloth that was perfect. It was a rag that had been used to clean but it was so much more! It had splashes of dye and also needed mending. It was perfect! 😊

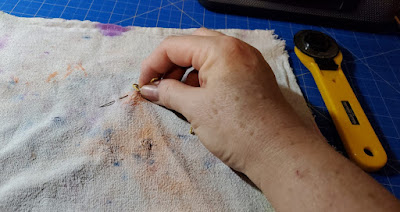
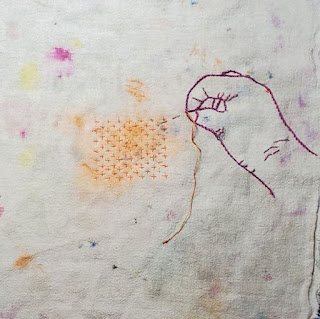
I started by taking a picture of my hand holding a needle. I put the image on my laptop screen and then drew it out on tracing paper. Finally I used my light box to transfer the image onto the cloth. 

Picture of my hand stitching used in the piece

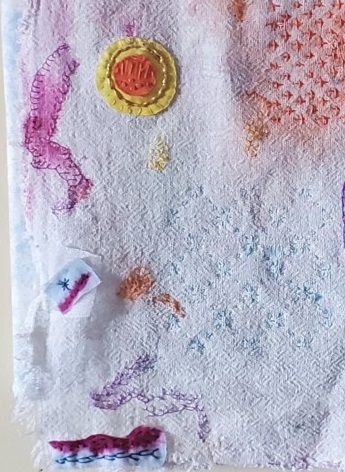
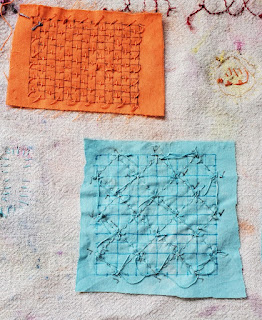
I used a wonderful shade of fuchsia perle cotton to embroider the hand with a stem stitch. At this point I wasn't sure what else would be on there except for some boro and sashiko. I learned two kinds of sashiko - the hitomezashi and the moyouzashi and used one of each on this piece.

Ready to add the sashiko

Using a hitomezashi stitch - Offset crosses


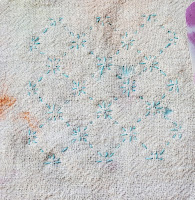
Here is the second sashiko, which actually is a moyouzashi stitch. It's a diamond variation. The blue blends into the fabric but it's very pretty. You can see the back of the piece from which I stitched.

The back where you see the stitching grids

This is a moyouzashi stitch -
diamond variation


Adding lovely colour
Of course I had to add a few other fun stitches and techniques on here 😊. 

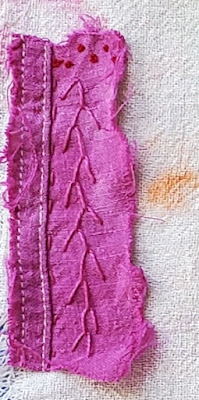
The first thing I did was add a pretty piece of hand-dyed linen and stitched on it.

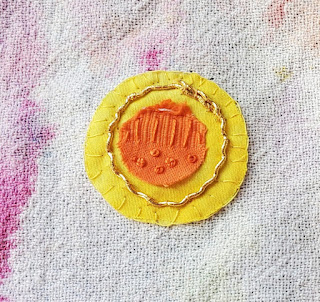
In the image below, I cut out two circles and embroidered the inside one. To show that a rag can be precious too, I added a circle of gold thread that I had purchased for Hannah Newton's goldwork workshop. 


Adding gold thread


Adding words to tell the story

It took me a while to figure out what I wanted to say on the cloth...and then it hit me.... a plea to just let me play, which is really what I've been wanting to do since I was a kid. As you know, there is a count down....it's now at less than 10 months!😎

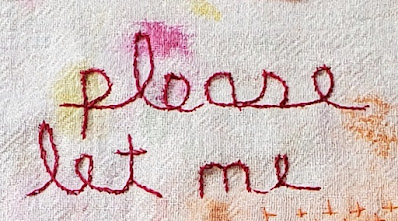
I practiced writing the words a few times and then very carefully used a frixion pen to write it on the cloth. I used my favourite hand-dyed thread to stitch it.

Adding the words

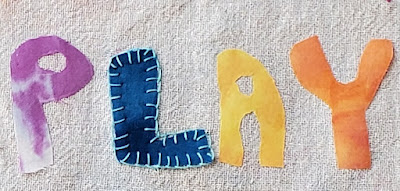
To emphasize the word, I drew the letters, cut out the templates, added Heat and Bond to the back of the fabric, cut them out and then ironed the letters on. I've only gotten the "L" stitched so far.


Stitching the word - not quite finished.

I'm really looking forward to finishing this piece. Since I'm still doing the #100dayschallenge on Instagram, I figure that I can get it finished by the end of the month.

Update on Glimpses of Joy

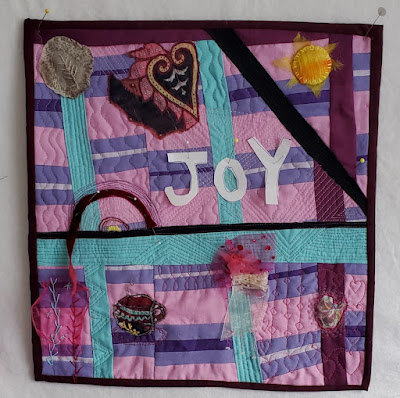
Since my machine is back, I did a little bit of FMQ on my Glimpses of Joy piece. I love the extra FMQ that I did. As you can see, I'll be adding the word JOY (not sure with what fabric yet). I also finally know what to do with the rest of the piece. Again, because of my posting on #100daychallenge on Instagram, I hope to have this one done within the next few weeks.

Glimpses of Joy - almost there!

What I learned

  • As you may have figured out in my post, my wishes for 2022 are calm, joy and play!
  • It was different stitching right onto the fabric of the rag. It's sort of flimsy yet it bounces back. 
  • I was looking for the link to the post on the goldwork workshop that I did with Hannah Newton but it seems that I never wrote it, so I'll try to add that soon.
  • I'm sure that I'll be adding more stitches on the "please let me play" piece, so I'll post it when it's done. I'm thinking of attaching it to a canvas frame - we'll see how that goes.
  • I'm really liking the Glimpses of Joy piece. Funny how I like it, then don't (usually because I don't know what to add to it) and then I like it again once I have a vision. It's a good thing that there is no deadline for any of these.
  • I'm still posting on Instagram - if you're curious you can see the images on the left side of my blog.

Related links

Linking parties

I'll be linking up to many fun linking parties. Let's see what's going on out there in quilting land 😊 I'm linking up with Muv on Free Motion Mavericks. There are still a couple of days left to link up your posts! Patchwork & Appliqué, Slow Sunday Stitching, Oh Scrap! Design Wall Monday, Monday Making, Midweek MakerPut your foot down, Off the Wall FridayPeacock Party, Oh Scrap!


Sunday, December 06, 2020

Sashiko stitching and visible mending

I had another great learning weekend! At the top of my quilting bucket list is a trip to the International Quilt Festival in Houston. Yes, one day I will go there...in person. However, this year I was able to attend a few virtual workshops offered through the festival. 

Sashiko stitching 

I took 3 courses and today I want to tell you about Sashiko Essentials - A Modern Adaptation of Ancient Handwork. The master class was taught by Shannon & Jason Mullett-Bowlsby of Shibaguyz Designz.

Sashiko printed designs - two of five are now done

I've been interested in Sashiko stitching for a while and a few years ago I bought a sampler that was printed onto the fabric since I haven't been able to figure out how to copy a pattern on the dark fabric without a stencil. While I watched the recording of the class, I stitched the second square of the table runner. I believe it's the Asanoha pattern or hemp/ flax leaf.  I researched it and the first pattern that I stitched was the Higaki or Cypress fence pattern. These are moyouzashi patterns. 

Offset Crosses pattern

After watching the master class for the first time, I went back and created a grid using a cupboard lining type of vinyl that I use for free-motion quilting to grip my fabric. They used a plastic canvas grid that is use for crafts but I wasn't able to find any. The important thing is that it's an even grid for stitching Hitomezashi grid patterns. You may be able to see my pink lines on the image above. These were made with a Frixion pen and will disappear when ironed. 

Creating Offset Crosses pattern after the course

Boro or visible mending

During the class, they showed us a few projects using visible mending or Boro, the Japanese art of mending.

This was timely because my favourite jeans are falling apart and I want to keep wearing them!!!! I first added embroidered patches to them while I was in Venice, picking up my daughter. Here they are in all their glory.

My favourite jeans' 
patches were made in Venice

Close-up of the new lovely patches

Considering how they were made and that I wear them a lot, I'm quite lucky that they lasted a year before un-raveling. Those were lovely stitches but the embroidery floss eventually started breaking.

I could live with the patches falling apart but then I just plain used up the jeans and had a couple of big rips on my butt! I wore them until they were too revealing and then added some fun plead flannel patches. Again, these didn't last very long. So, after seeing Shannon's mended pants and listening to how she mended them, I got right on it and reinforced my patches the Boro way 😊

Reinforced patches still show the
original embroidery designs

You can still see some of the original embroidery, but it has been reinforced with the running stitch that is used in Sashiko.
Both patches got a face lift! 

The big difference is that there is now a piece of fabric inside the jeans so that they patches are now quilted. How cool is that? 😊

There was some major stitching to fix the rips. You can see the patches from outside and inside the jeans. I didn't removed the original embroidery since for me, they show the evolution of the patches. I know that they are not cultural resources that are being preserved but I believe that the evolution of a piece, even a pair of jeans, needs to be respected. BTW, these flannel patches may be colourful but they are not very visible.

The layer on the inside of the jeans
Stitched patches on the
outside of the jeans


Boro & Sashiko 
While I was doing some research for this post, I found out that Shibaguyz Designz offers a course, Sashiko 101, that is very similar to what I took. The course is offered through Creative Spark, C&T Publishing's online course platform. The links are below in Related links. 

I've also bought Shannon & Jason Mullett-Bowlsby's newest book, Boro & Sashiko. That's where I got the terms for the different types of Sashiko patterns and stitching. They talked about them but I had no idea how to spell them correctly!

What I learned

  • I really enjoyed Shannon and Jason's course and I highly recommend it. It covers some history as well practical tips on how to mark the grids, work the needle and make the stitches.
  • To keep the top and bottom of the patch attached before stitching, they recommend using a glue stick. It worked very well 😊
  • I'm just sorry that I can only view the course for another week. Since I have the book, I should be fine.
  • I love the way that Shannon and Jason mix up the types of Sashiko patterns in the projects in their book. 
  • There's nothing like another tool to put into that artist's toolbox! I'm thinking that Sashiko could easily be added to my Traveller's Blanket, either as a meditation block or in the stitching around the blocks. 

Related links

Linking parties

I'll be linking up to Slow Sunday Stitching as well as many other fun linking parties. Let's see what's going on! Oh Scrap!, Patchwork & Quilts, Can I Get A Whoop Whoop?, Off The Wall Friday, Peacock Party, 15 Minutes to Stitch 2020, Monday Making, To-Do Tuesday, Put Your Foot Down

I will be hosting Free Motion Maverick's linking party on Thursday. Please come back to link up and check it out!