Making Accordion Books
I found another course/challenge to follow. I know....yet another one but I've been having so much fun 😍 Did you know that paper is a fibre? As a fibre artist, this is all part of learning to make and play....ok I'm really trying to justify my taking yet another course, but I've had a wonderful time making these accordion books.
 |
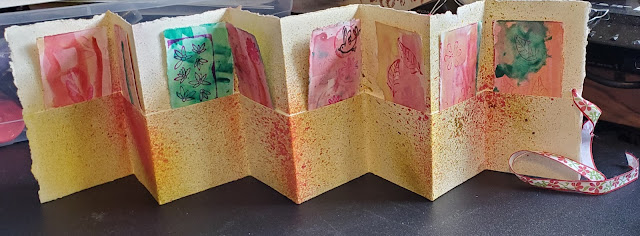
| Day 1 - Accordion book with 8 pockets |
The 5-Day Accordion Books Challenge is organised by Vintage Page Designs through The Handmade Book Club (you will find the links in Related links below).
I had to go to my local art supplier to find the correct paper. I was a little nervous because I generally work with printing paper - so it was a new experience for me. The organisers gave us enough information that I was able to find the 2 sheets of 22" x 30" paper of the correct weight. I did buy 3 sheets of the paper and I'm glad since I have ideas on how to use these books...but more on that later 😊
Day 1 Accordion book with 8 pockets
Day 1 had us cutting all of the paper so that we would be ready for all of the challenges. I love working with this paper. It's a good weight but not too stiff. It's really perfect for these projects. We cut each sheet in four so we ended up with 8 strips of about 7½" x 22".
For our first book, we also cut up some paper for tags to put into the pockets.
For each day we have a series of short videos to watch. They are really well made and I found them very simple to watch and follow. The organisers also have a Facebook group for the challenge as well as Zoom calls twice a day to answer questions.
 |
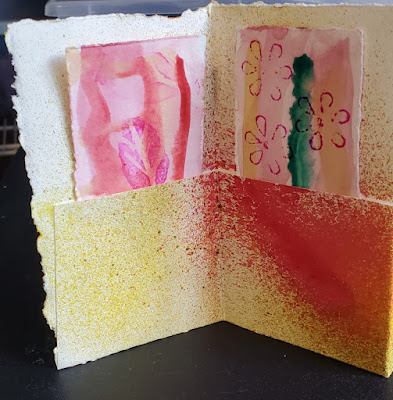
| Tags or bookmarks in the pockets |
Each day also includes a video from a guest artist who demonstrates techniques for decorating the accordion book. The guest artist for Day 1 was a collage artist, Kat Kirby. I will put all of the week's guest artists' links in Related links.
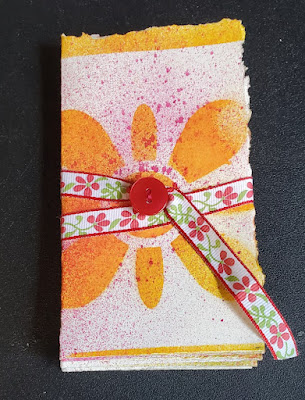
I don't remember the last time that I played with water colour paint. I picked up a set a while back but never used it. I also found some spray ink in my box of "paint supplies" that I never use. That's what I used for the front and back of the accordion book.
 |
| Book with pockets filled with tags |
 |
| Back of the accordion book with 8 pockets |
My husband was quite impressed with this accordion book. Since he's always running out of bookmarks, I'll make him one and included a couple of bookmarks with it. He said that he'll fill up the other pockets with the bookmarks he has.
Day 2 Accordion book with 4 panels and flap
I made this accordion book but haven't had time to embellish it. It has 4 pages, a flap and a closure.
 |
| Day 2, a 4 panel accordion book with flap |
 |
| Here's how to close the flap |
 |
| Accordion book ready to be embellished and used |
Day 3 Layered Accordion Book
I made this accordion book but adjusted it to have more pages instead of an inside layer. The inside layer was like a band inside the book. It's pretty but I really want to be able to use these books.
 |
| Stitched fabric on the front of the book |
I just had to add fabric to one of the books. I cut the fabric and then sewed it onto the paper using the walking foot that was still on my machine. I did increase the length of the thread so that it wouldn't just puncture the paper.
 |
| Instead of keeping the layer in, I cut the middle to make extra pages |
The book also had a belly band to keep it closed. I stitched fabric to the outside of the band.
 |
| Accordion book with belly band |
 |
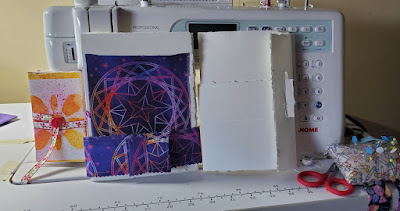
| Three accordion books posing in front of the Jag! |
What I learned
- I can see how people who don't want to paint, could have fun using water colours. I just might try more of this one day.
- I found that water colours are a lot like painting on fabric in that it doesn't really matter what you paint, you can always add stencils and stamps (or FMQ to fabric) to make it look good....and that's exactly what I did!
- I love making these accordion books and I love it when they can actually be useful (to me or others!)
- I had to re-attach the button on the accordion book with 8 pockets. Paper is not as strong as fabric so I ended up placing a piece of scrap fabric on both sides of the paper and then stitching the button through these scraps. It should be pretty secure now.
- I have a few ideas for using these books. I was thinking that I could use two of them to illustrate or explain Stéphane's Version 2.0 quilt as well as Jeannine's Paddington quilt. I'm sure that I could play and make a variation of these with some pockets to hold things as well as space to draw or write. It would make a great souvenir of the making of their quilts. My mother made a book for the original Stéphane quilt and it's been really useful to the making of Version 2.0.
- The Handmade Book Club - Vintage Page Designs
- Guest Artists:
- Kat Kirby, Collage artist
- Andrea Chebeleu, Mixed-Media art
- Joanne Sharp, Writing artist
- (I did some writing work that I will eventually get back to. Learning to Write, Again, April 17, 2016)
- Roben-Marie Smith, Mixed-Media art
- Kristin Reese Williams, Mixed-Media art
- Izink Dye Spray by Seth Apter
Free Motion Mavericks
 |
| Sweet Summer Strawberries by Quilting by Dawn |


